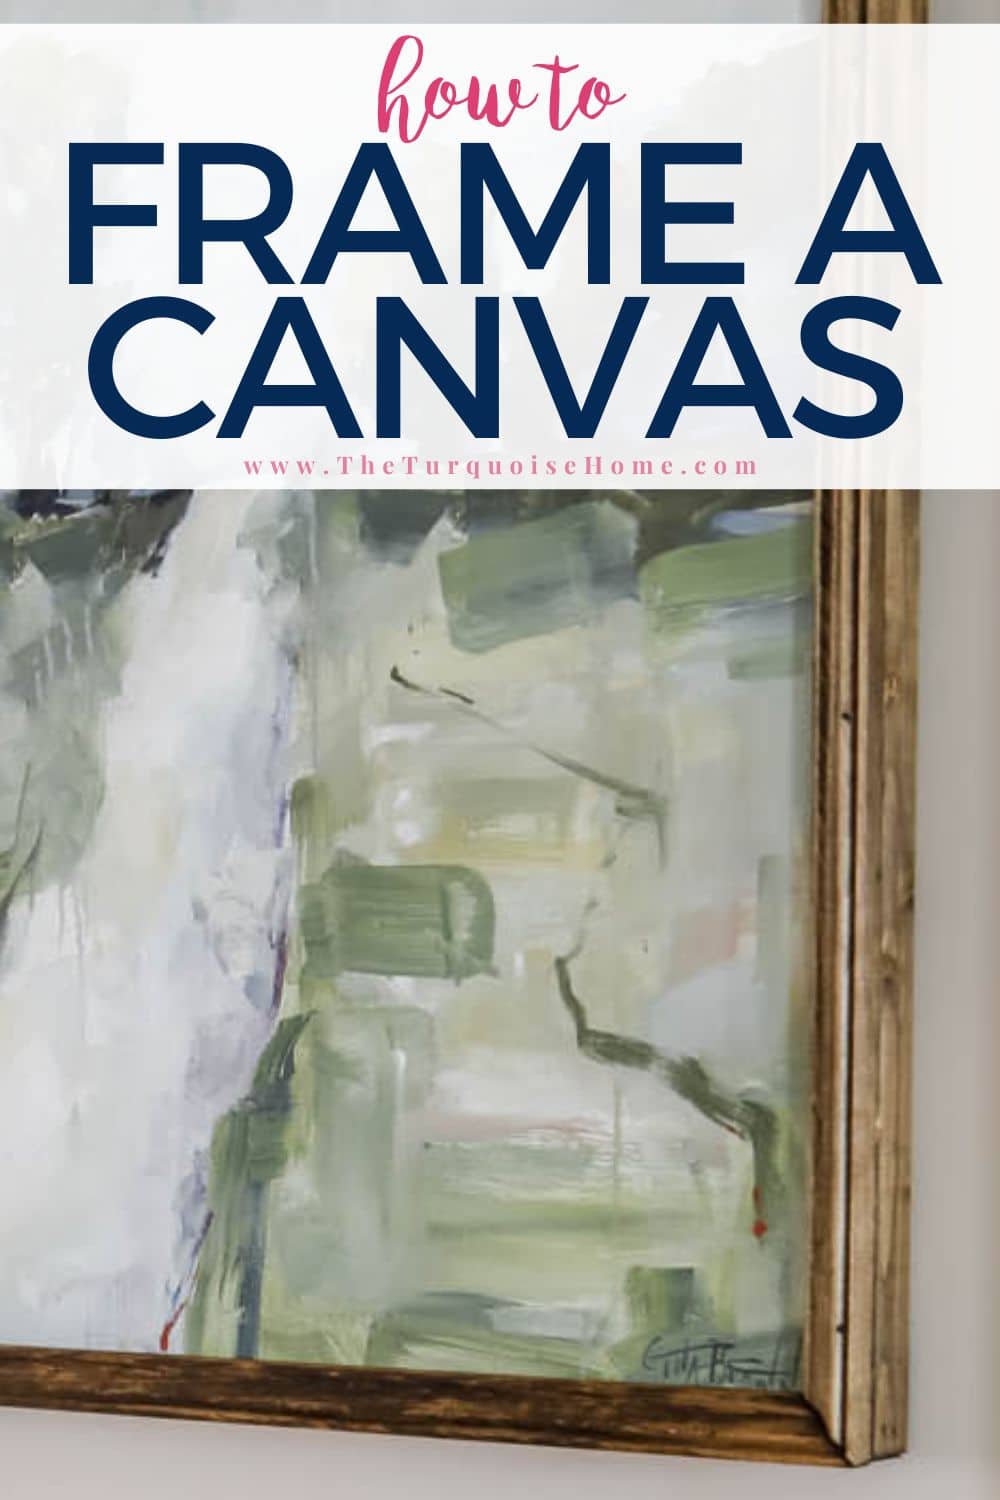
How to Frame a Canvas (for Cheap!)

This easy DIY tutorial will teach you how to frame a canvas for cheap, making any unframed piece of art look polished and finished! Using basic household tools, this is an easy DIY project for any beginner.
If you’ve ever bought unframed art or made a beautiful painting with an unframed canvas and it feels like something’s missing, then I’m here to show you how to make it look finished! You probably already have the tools in your toolbox and can finish this project in a weekend (or less)!
This post contains affiliate links for your convenience. See my full disclosure policy here.
My First Canvas Framing Experience
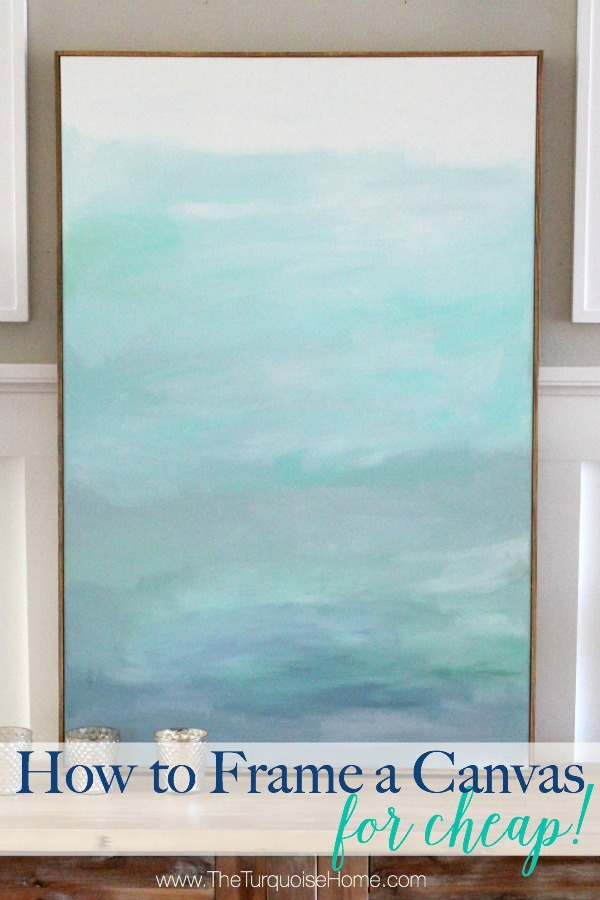
My love of DIY framing started many years ago when I created a piece of abstract canvas art on stretched canvas for less than $22! Then I framed it out using stained pieces of lattice that I repurposed from another project. It was so easy!
And since this canvas was a DIY project in the first place, there was no need to go champagne on my beer-budget art when it came to framing it.
When I first finished the art piece, I considered leaving it unframed. But in time I realized that it just looked unfinished.
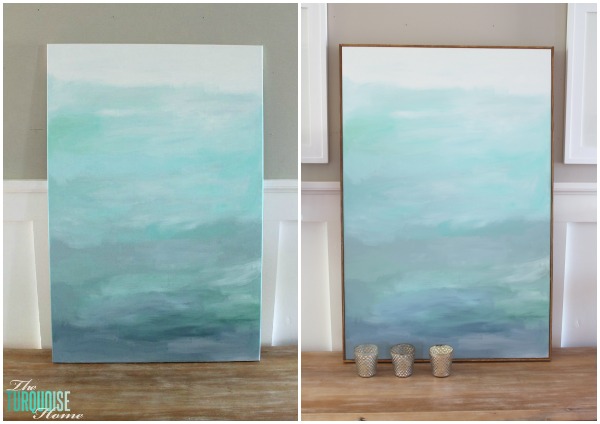
See how much better it looks in the second picture with a defined border?
For that project, I took some previously stained lattice boards, cut them to size and glued them on the frame of the canvas. It was so cheap and easy and would be a great way to frame a canvas for the cheapest cost.

But since then I’ve learned to make nicer, bulkier frames that look even better.
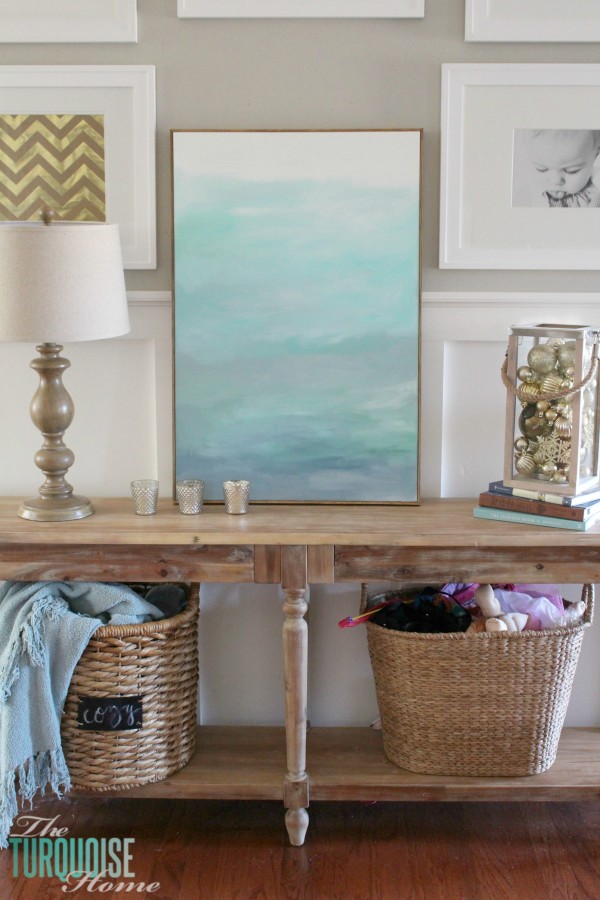
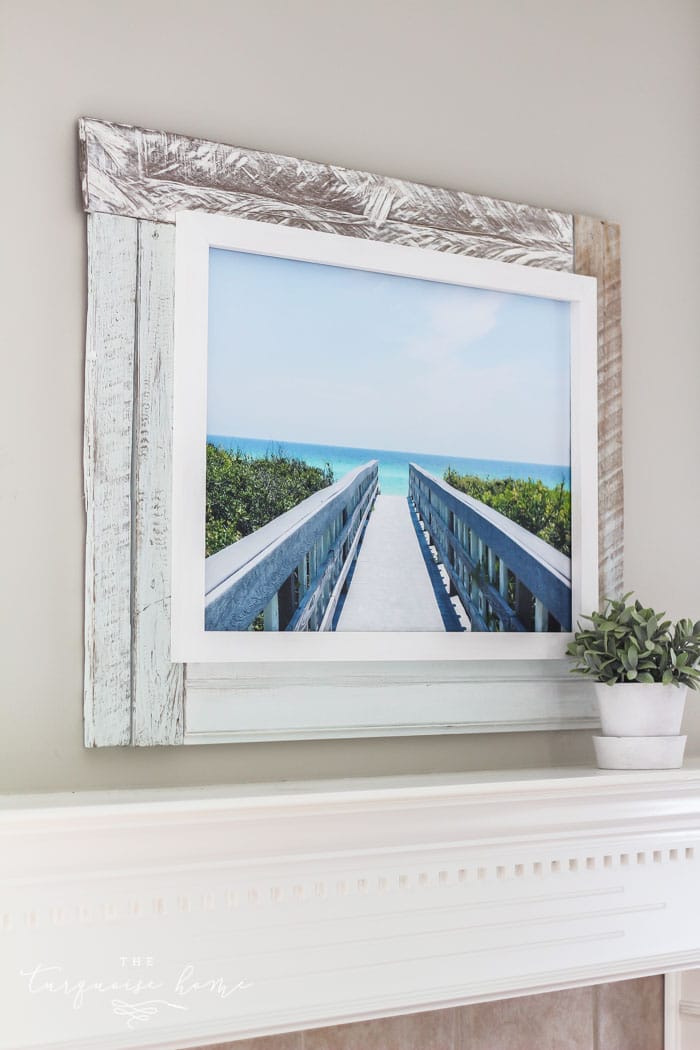
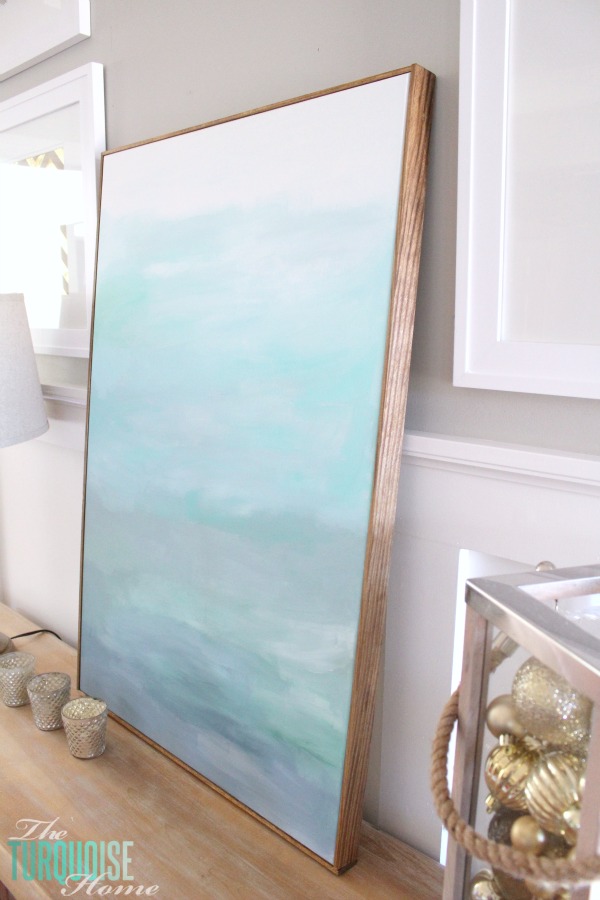
Since that first project, I’ve framed numerous other pieces of art, like my beach-inspired DIY art framed with large and chunky pieces of reclaimed wood.
And most recently I framed out my Frame TV since I wasn’t interested in spending $100’s more on the frame after paying nearly $1,000 for the TV! It just seems silly since I already had the tools and the know-how to frame a canvas, surely I could frame a TV. And I did!
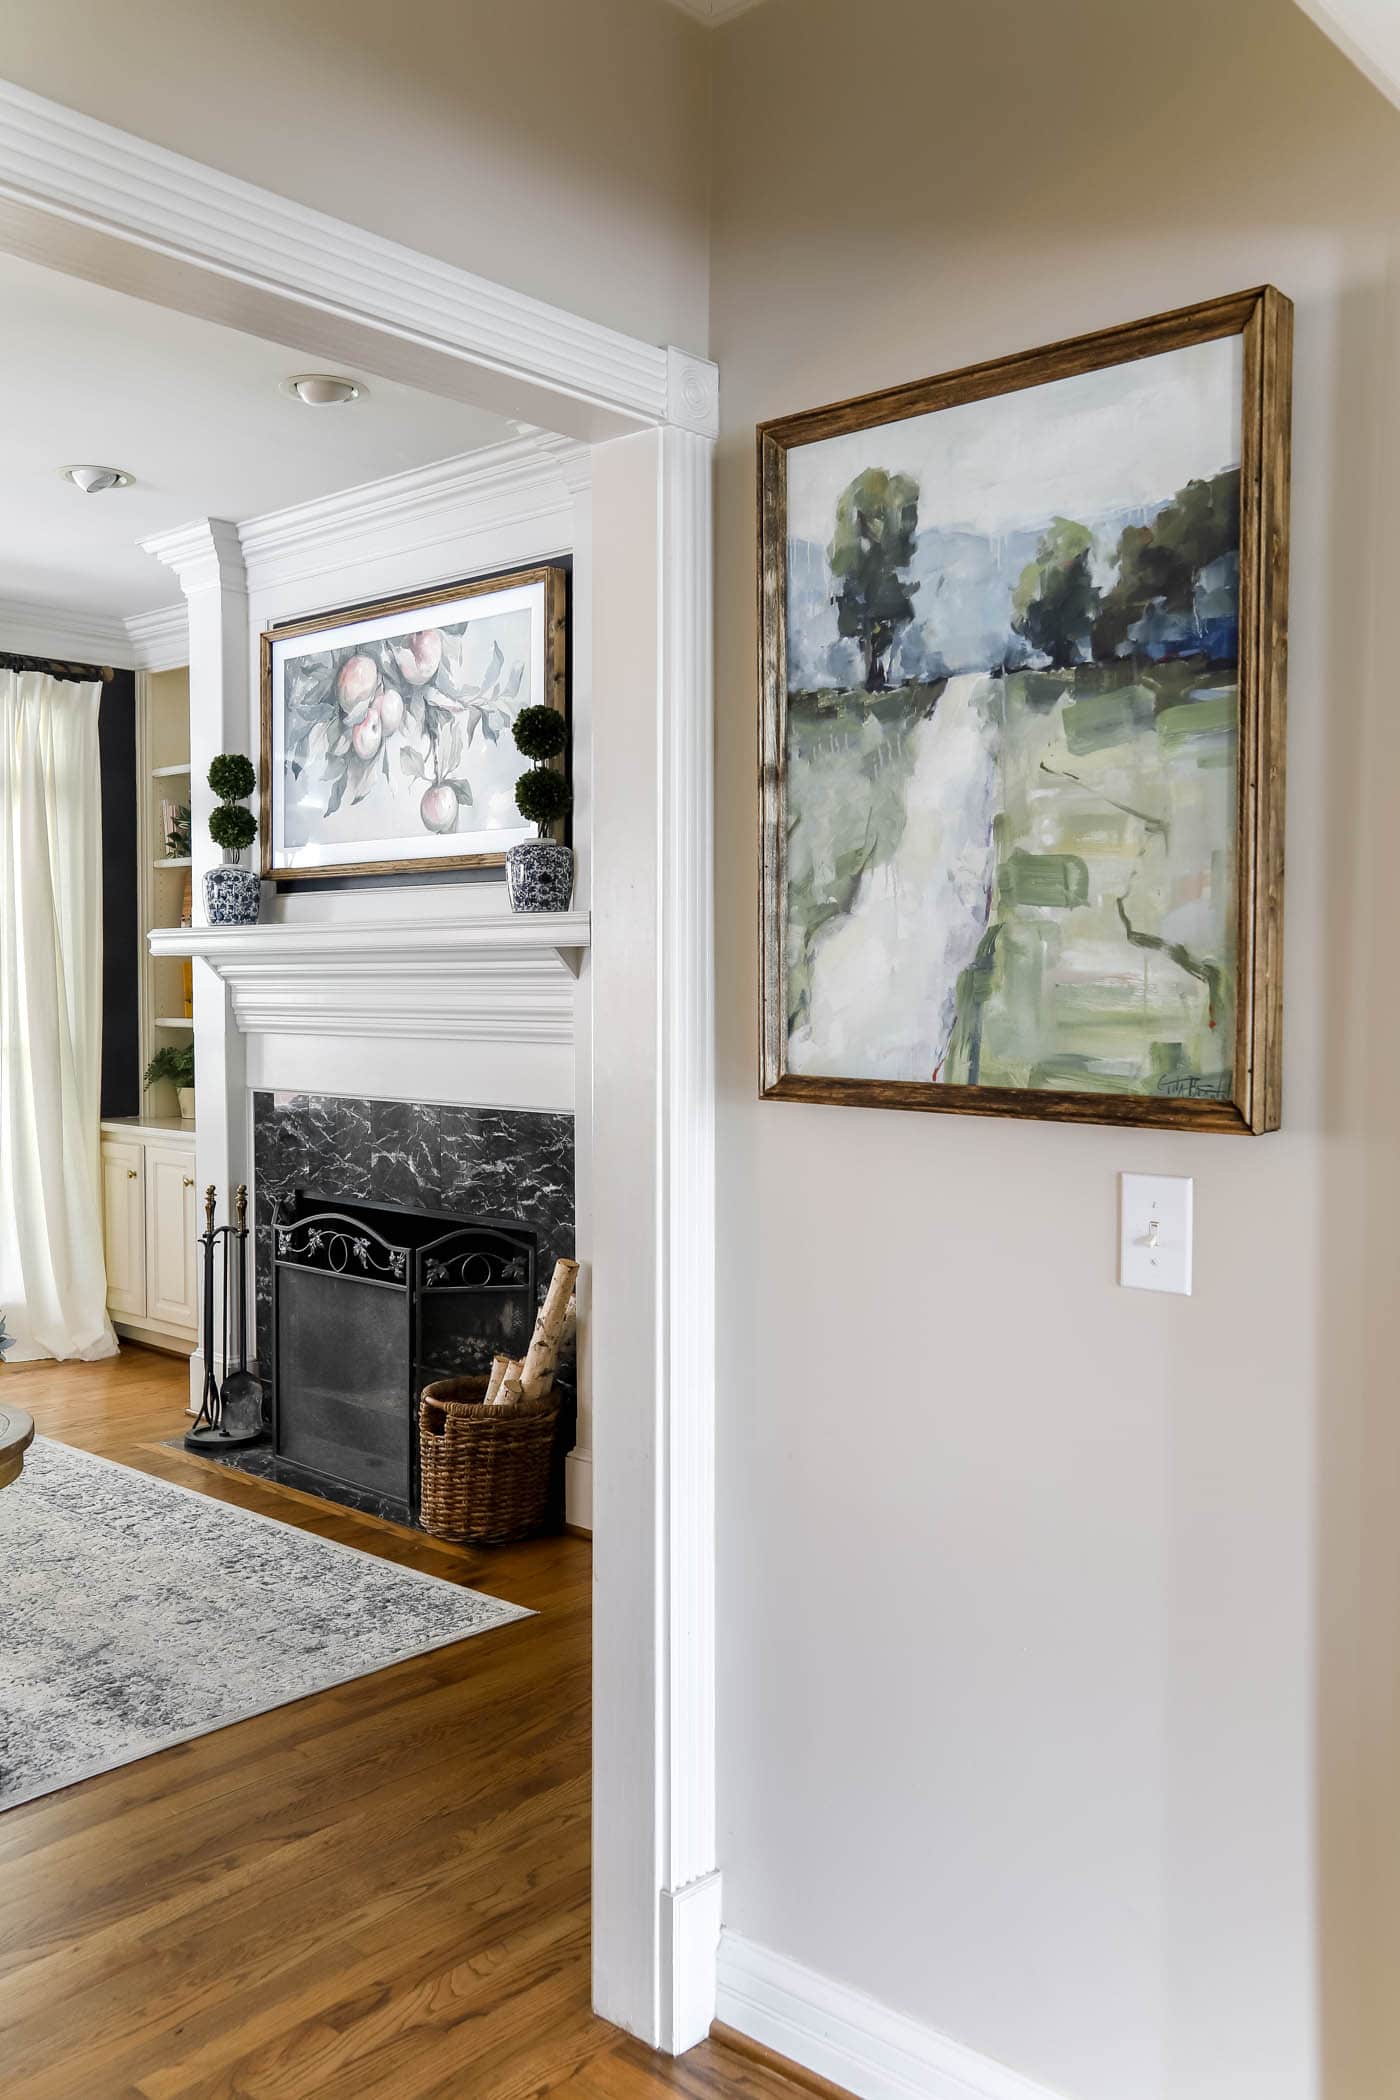
While at it, I framed out a canvas painting near my entry way. I saved nearly $200 by ordering it unframed. And I knew I could make a beautiful frame for it.
Another reason to make your own frames is that you get to choose the style, color and size that coordinates with the rest of your home and decor. So, this is a wonderful DIY skill to have in your back pocket.
Materials Needed to Frame a Canvas
- Wood Trim of your choice:
- Modern, simple option: Use lattice or 1×3’s or 1×2’s in the length of your canvas perimeter. I used three 4 ft. pieces of lattice for my original canvas frame.
- Traditional, elaborate option: Use 1×2 or 1×3 boards plus an ornamental molding trim piece at the length of your canvas perimeter.
- Wood glue
- 1.5-inch finishing nails
- Sandpaper
- Paint or Stain, of your choice
- Polyurethane or Polycrylic, optial
- Wood Filler, optional
- Sawtooth Hangers or D-rings
Tools Needed to Frame a Canvas
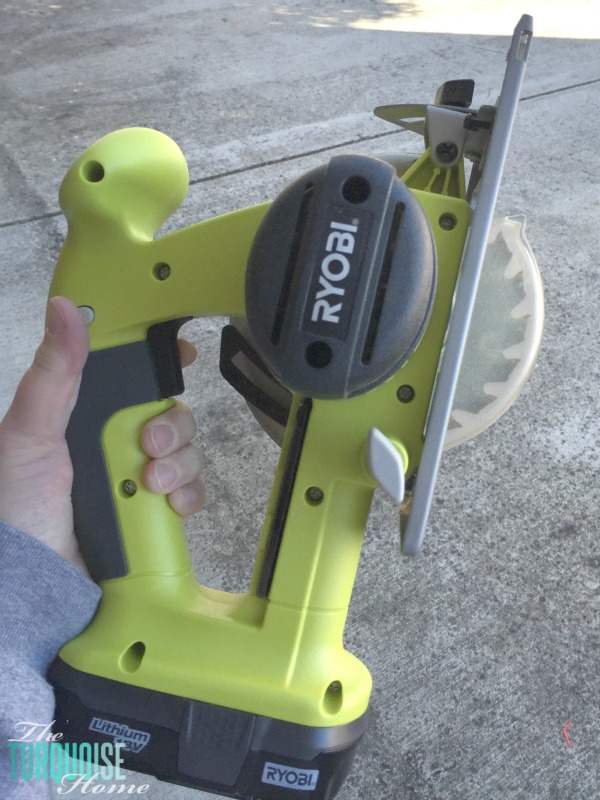
- Miter Saw – If you don’t have a miter saw, you could try miter shears or a hand saw and miter box. If you choose a butt joint, you can also use a circular saw, instead.
- Brad Nailer – I used this brad nailer!
- Pencil
- Tape Measure
- Rag or foam brush
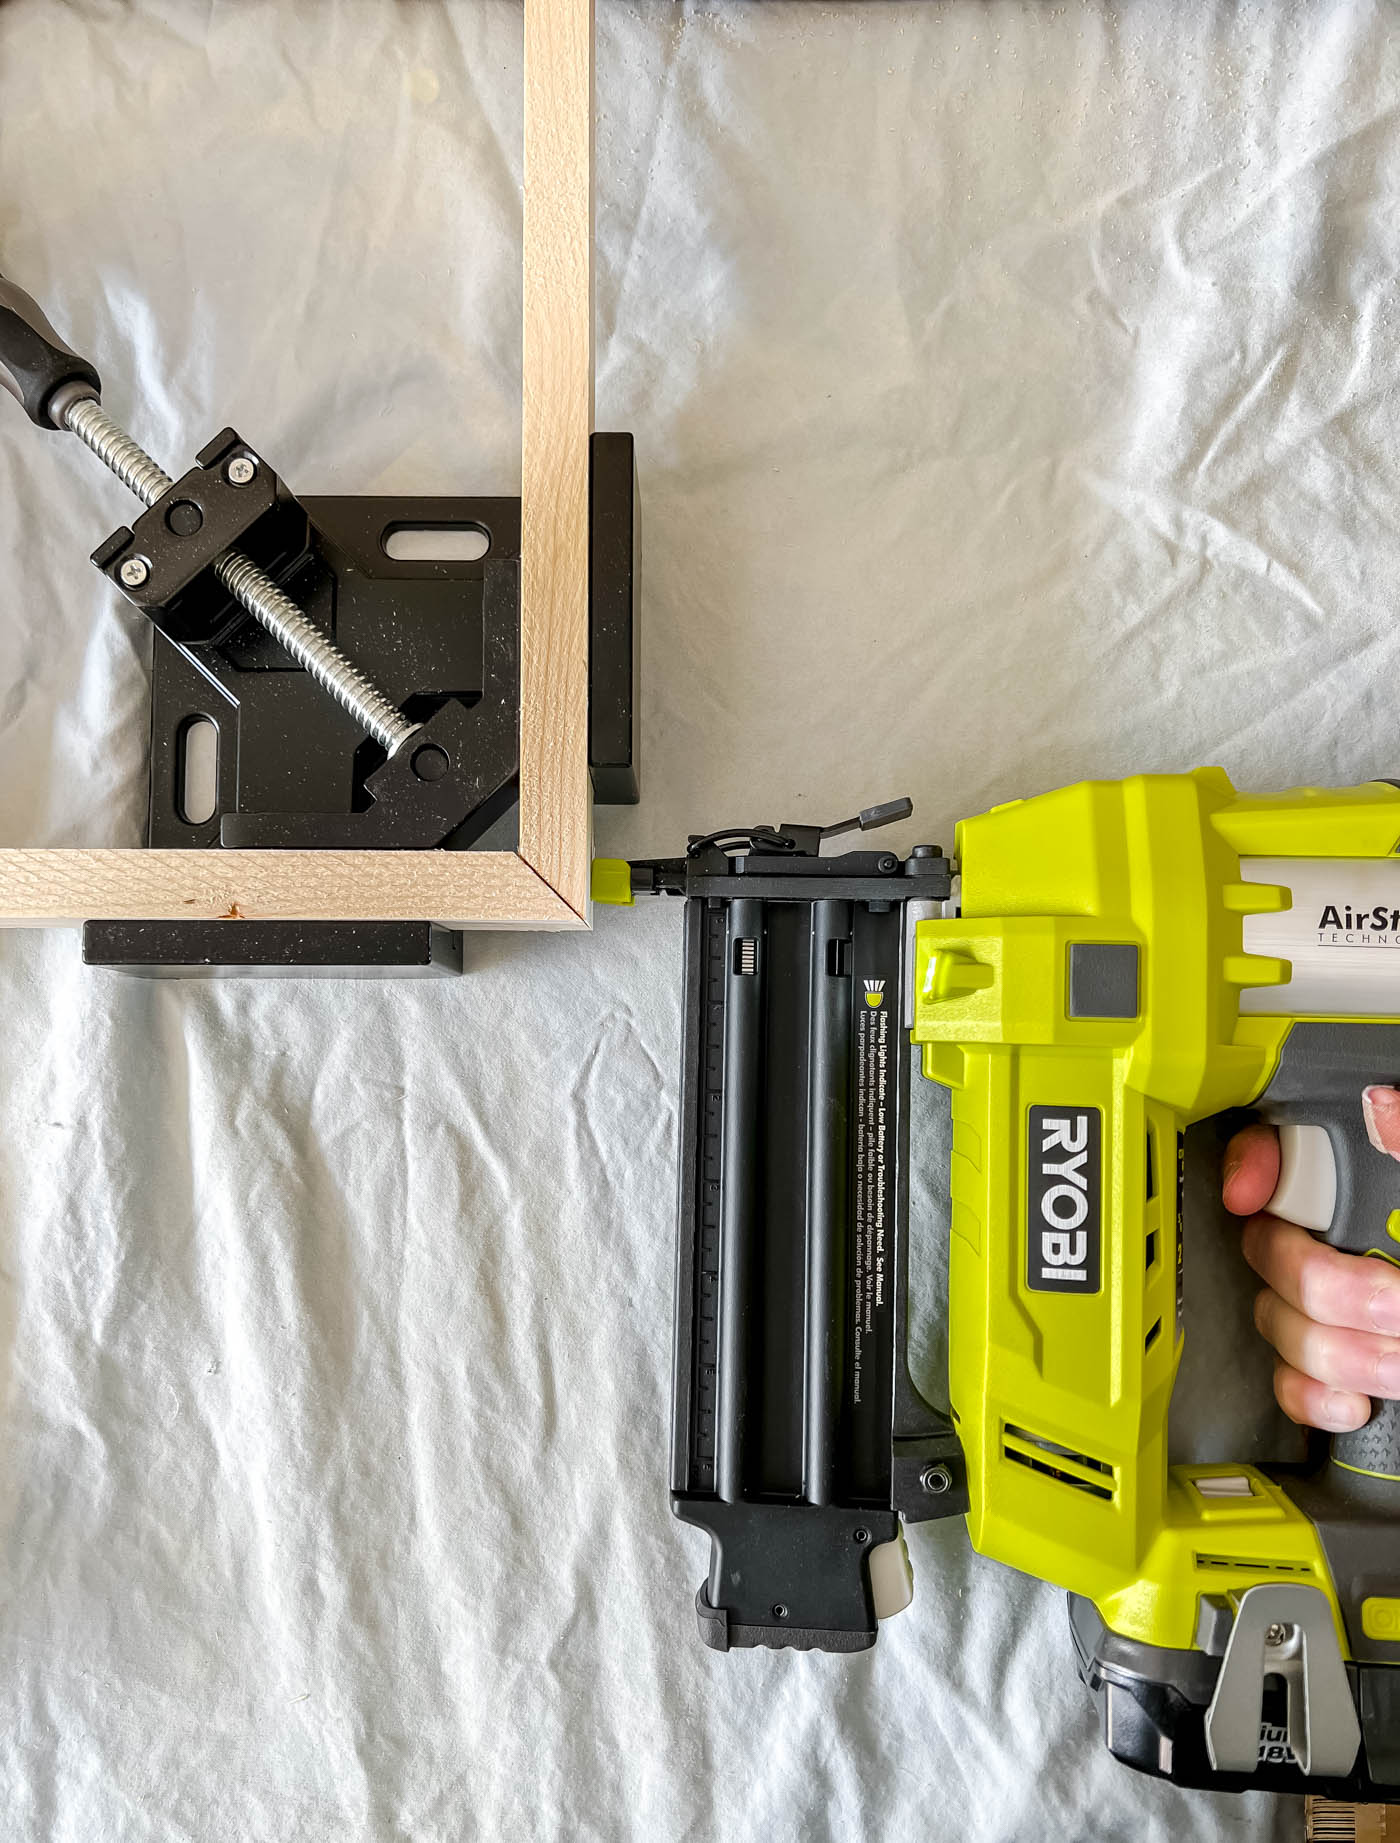
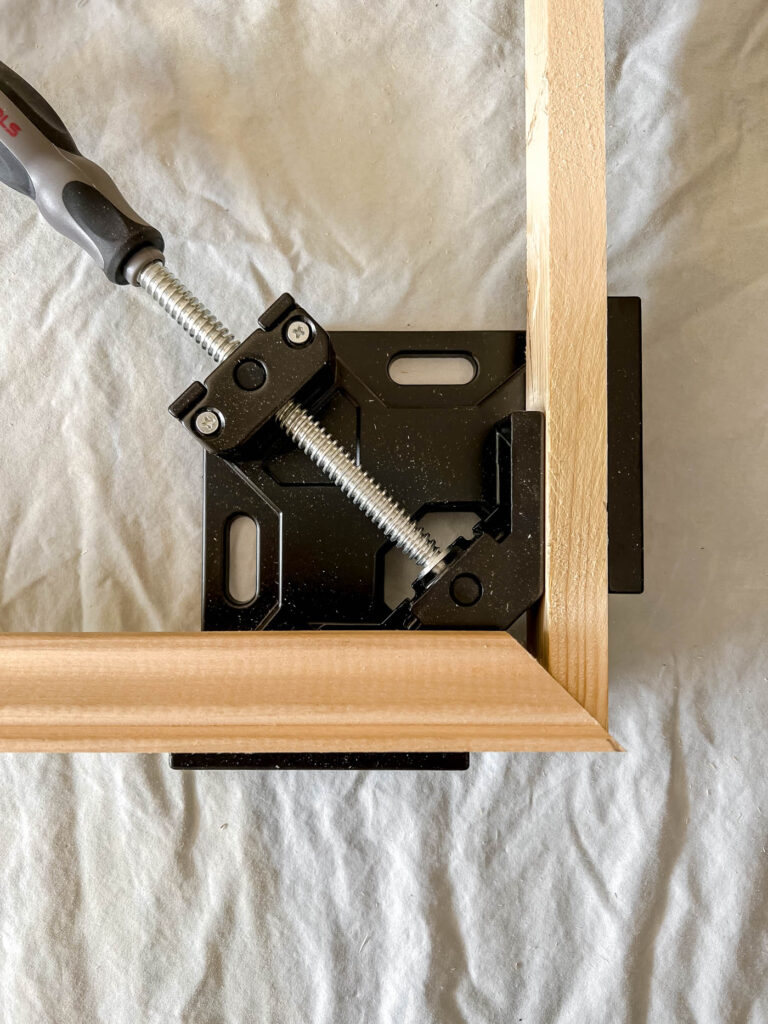
- Corner Clamps, optional, but pretty amazing
How to Frame a Canvas Instructions
Let’s jump into the steps you will need to take to upgrade your unframed piece of art.
1. Choose Your Corner Joint
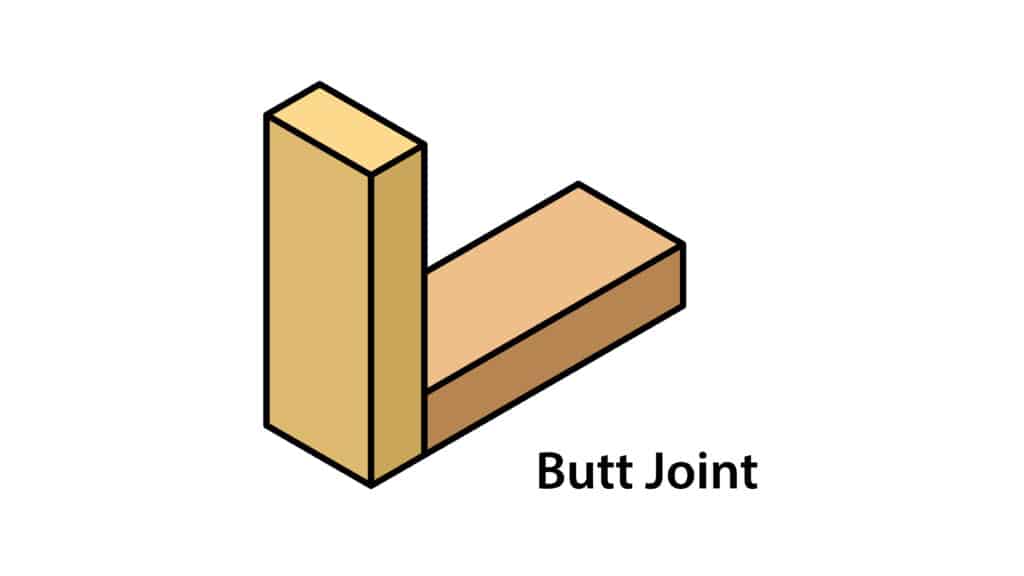
First, you need to decide which corner joints you want to use when building your frame. I’ve used one of these two options: miter corner joint or square butt joint.
Both are technically butt joints because the ends are butted up against each other. While there are other ways to join a frame together, these are the easiest and by all accounts, the only ones you need when framing art.
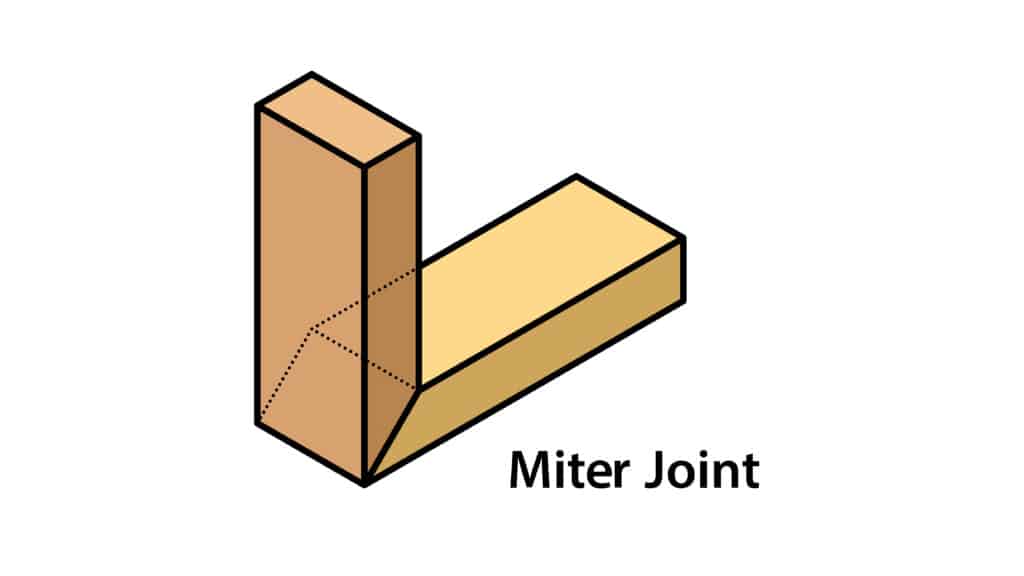
The Miter Joint
A miter joint consists of mitering each end of the wood frames at a 45-degree angle, and then butting them up to each other. They are usually glued and clamped in place until the glue dries. You can also add a brad nail to them to keep them held together. I use a brad nail just for extra security.
The Butt Joint
A square butt joint simply means you have one side of the frame overlap the other side of the frame and glue and/or nail them together. I used this style in my original framed canvas with lattice boards. And you can see another example of it below in my beach canvas.
Your decision of which style to use will determine your frame measurements. It will also determine which tools you need. A miter joint will need a miter cut (45 degree angle), and a butt joint will merely need a square cut.
2. Determine & Gather Supplies Needed
Now that you know your joint type, you’ll need to figure out how much wood to buy. You will need to measure the dimensions of your art, which will give you the perimeter and will determine how much wood you need to buy.
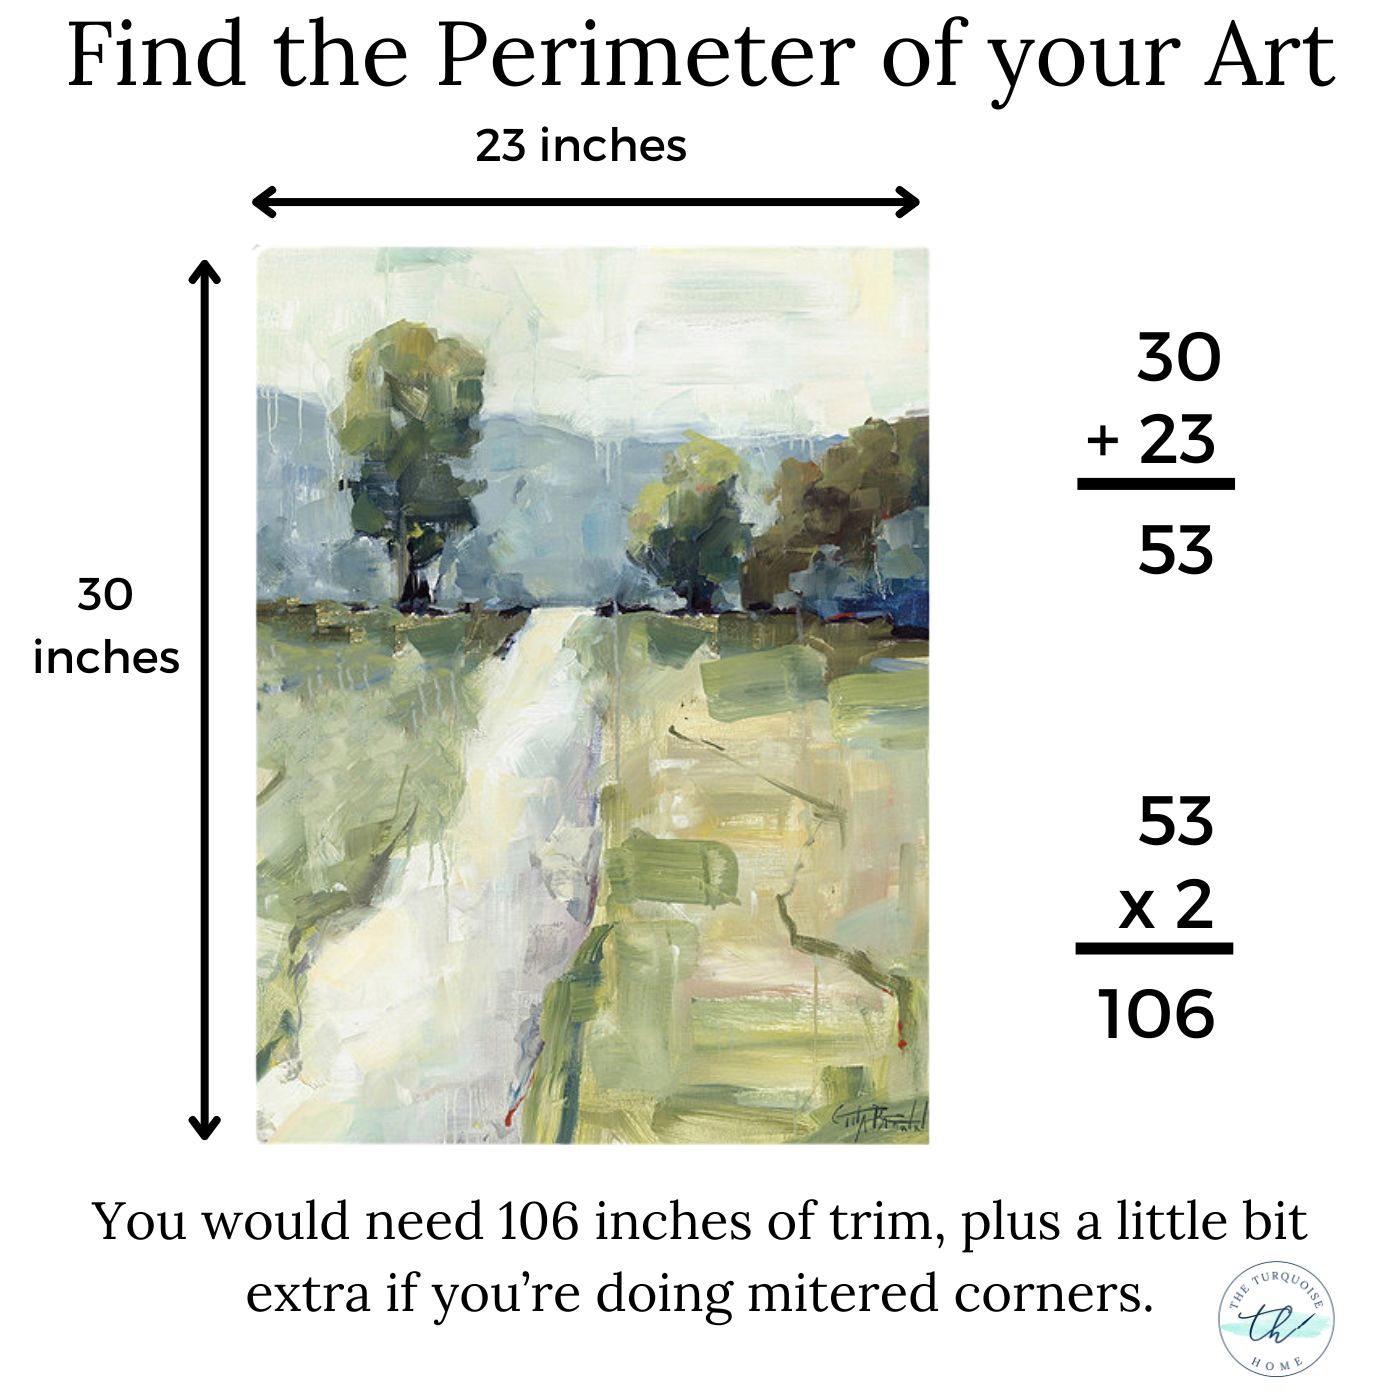
Use the above graphic to determine the perimeter. Simply add up the length of each side, but add some extra allowance if you’re using mitered corners, because the ends of those will extend past the corner of the canvas.
Also, you don’t want to be splicing pieces of boards together. So, I figured out how long my boards are, which are usually 8 feet long (or 96 inches). And while technically for the example above, I could get away with 1 8-foot board and a little bit extra. I would instead get two 6-foot boards because each board would allow me to get two pieces out of it and not have to splice them together. I hope that makes sense!
With this information, you’re ready to purchase and gather all of your supplies from the supply list above.
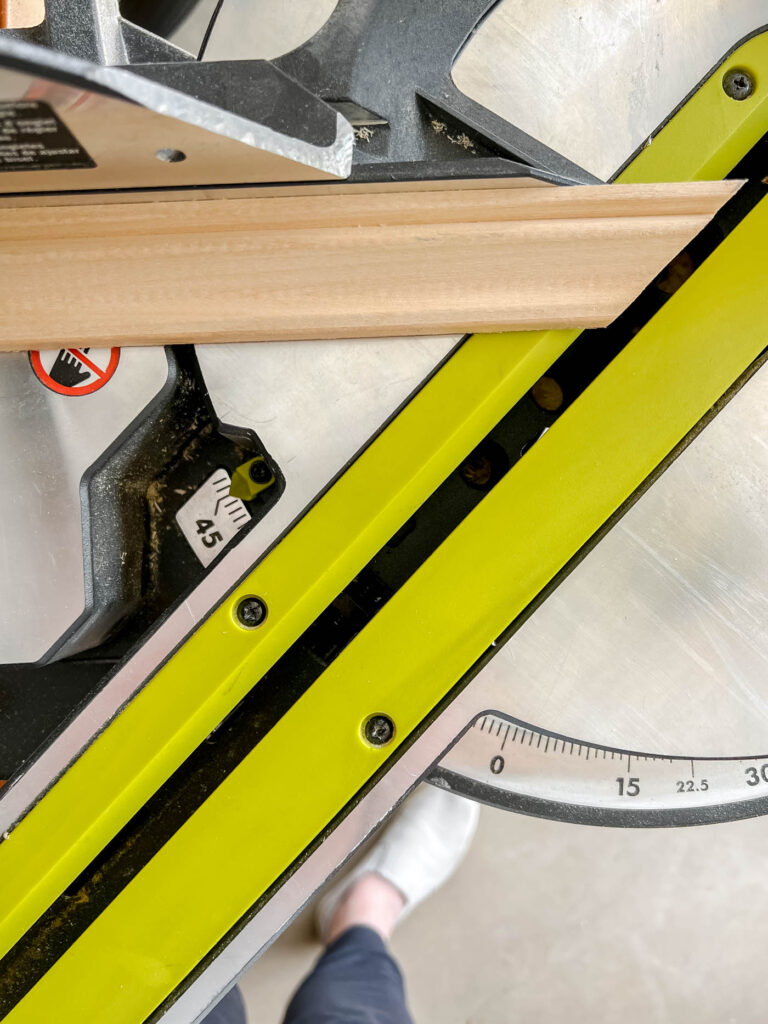
3. Measure and Cut the Frame Pieces
You can paint or stain your wood pieces first before you cut them, but I prefer to cut my pieces first. This way I can sand down any rough edges caused by the cutting and then finish them off later.
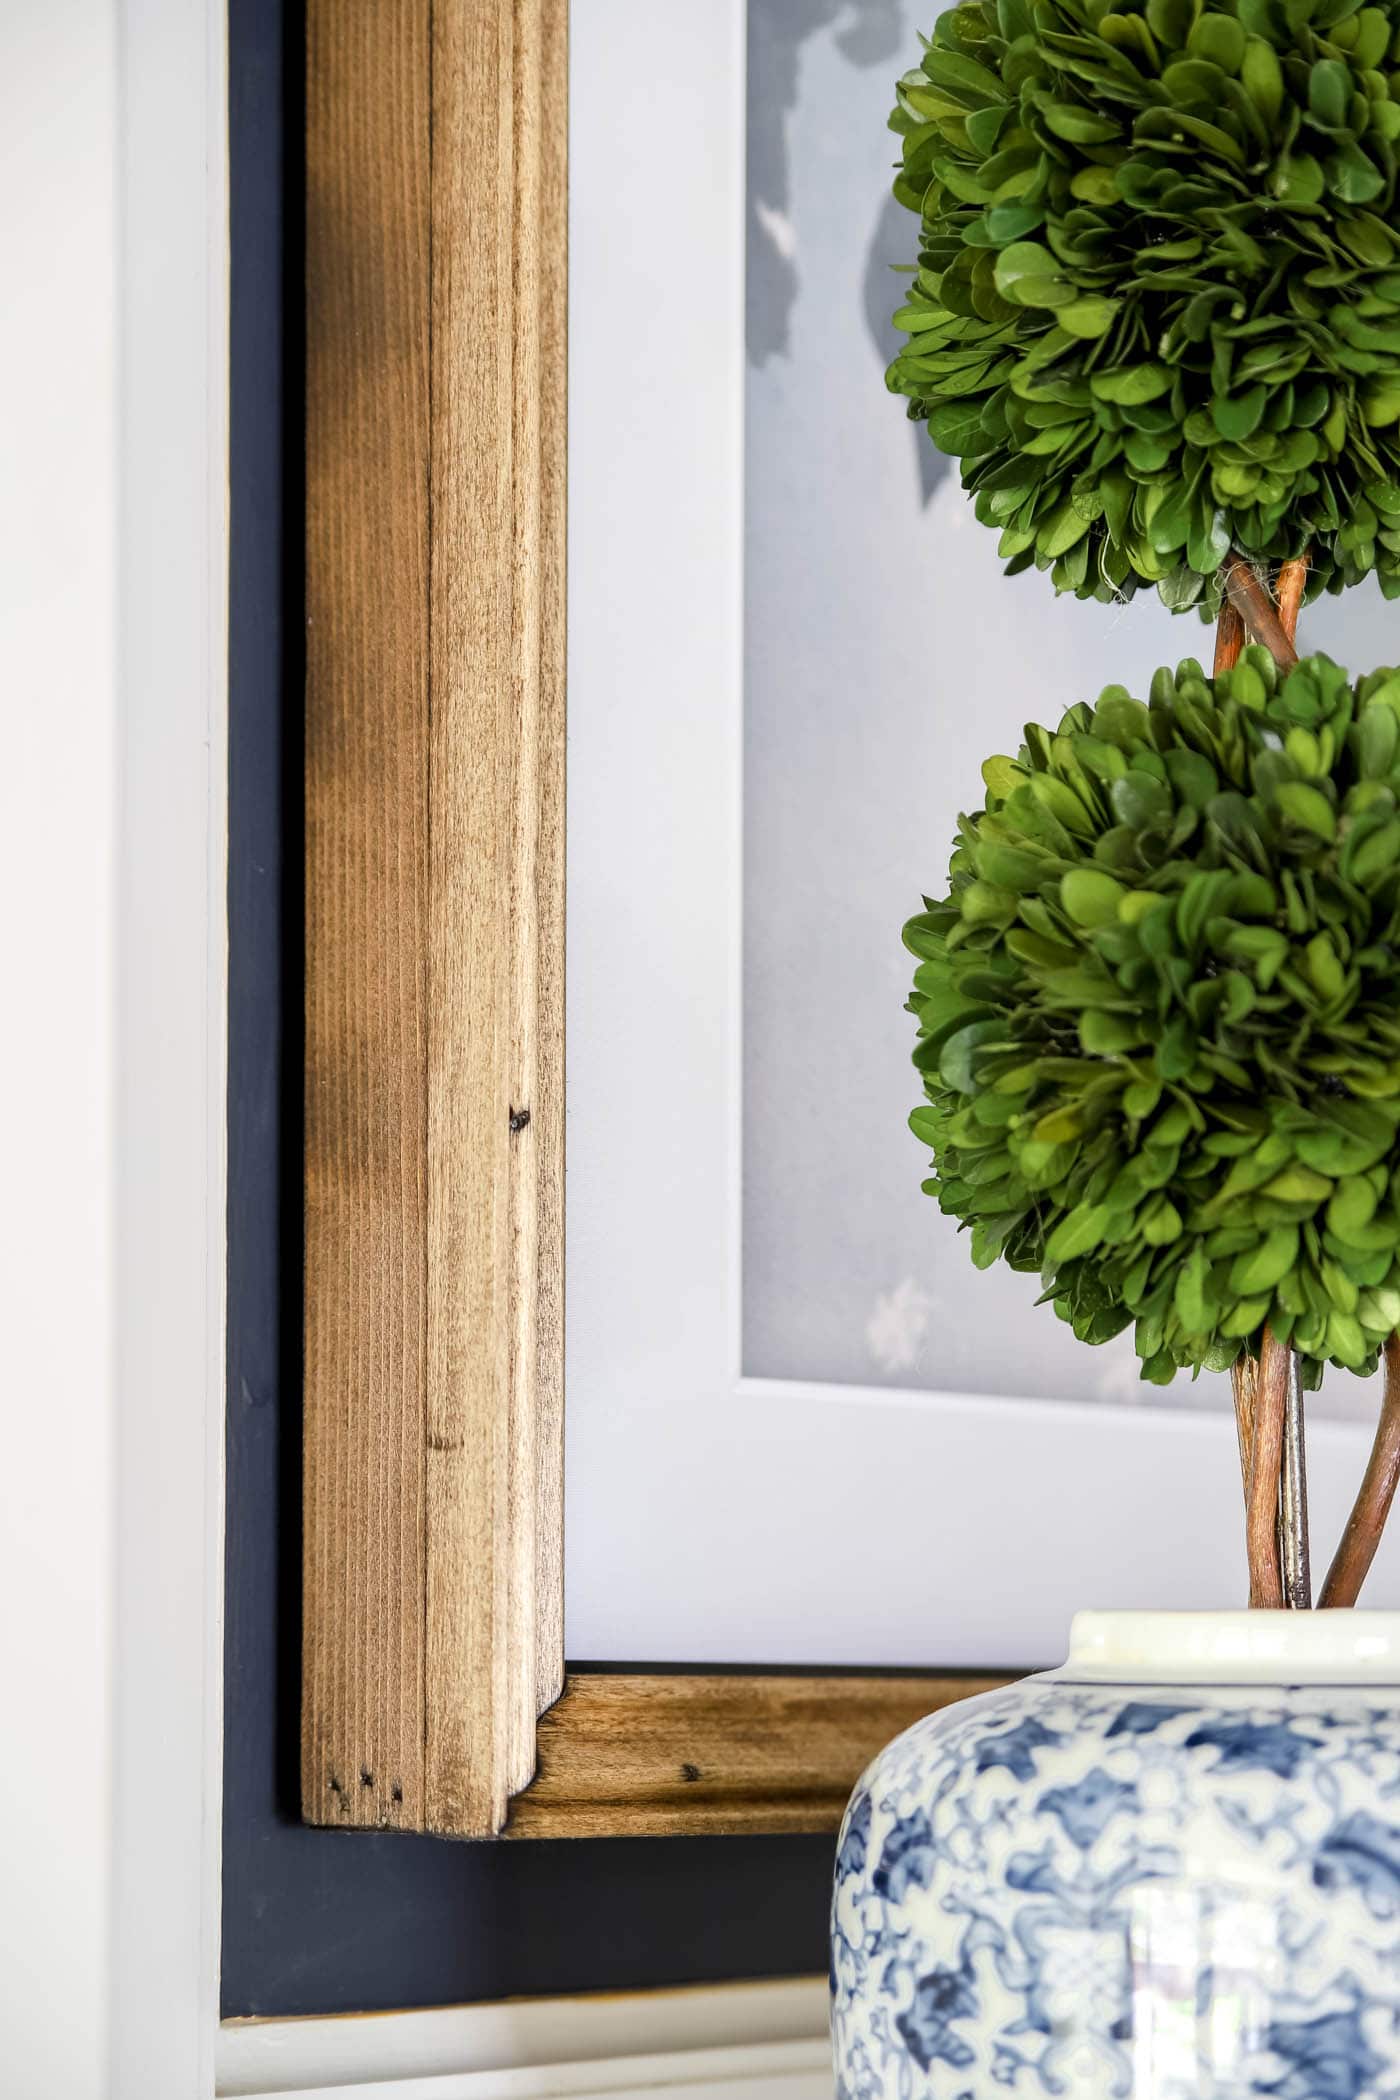
If you’re doing a fancier miter joint, you will have two pieces of wood: the side of the frame and the decorative trim piece that sits on top. See the below picture to see how they will fit together. You’ll have to cut both pieces at a mitered angle with the shorter side matching the length of the frame.
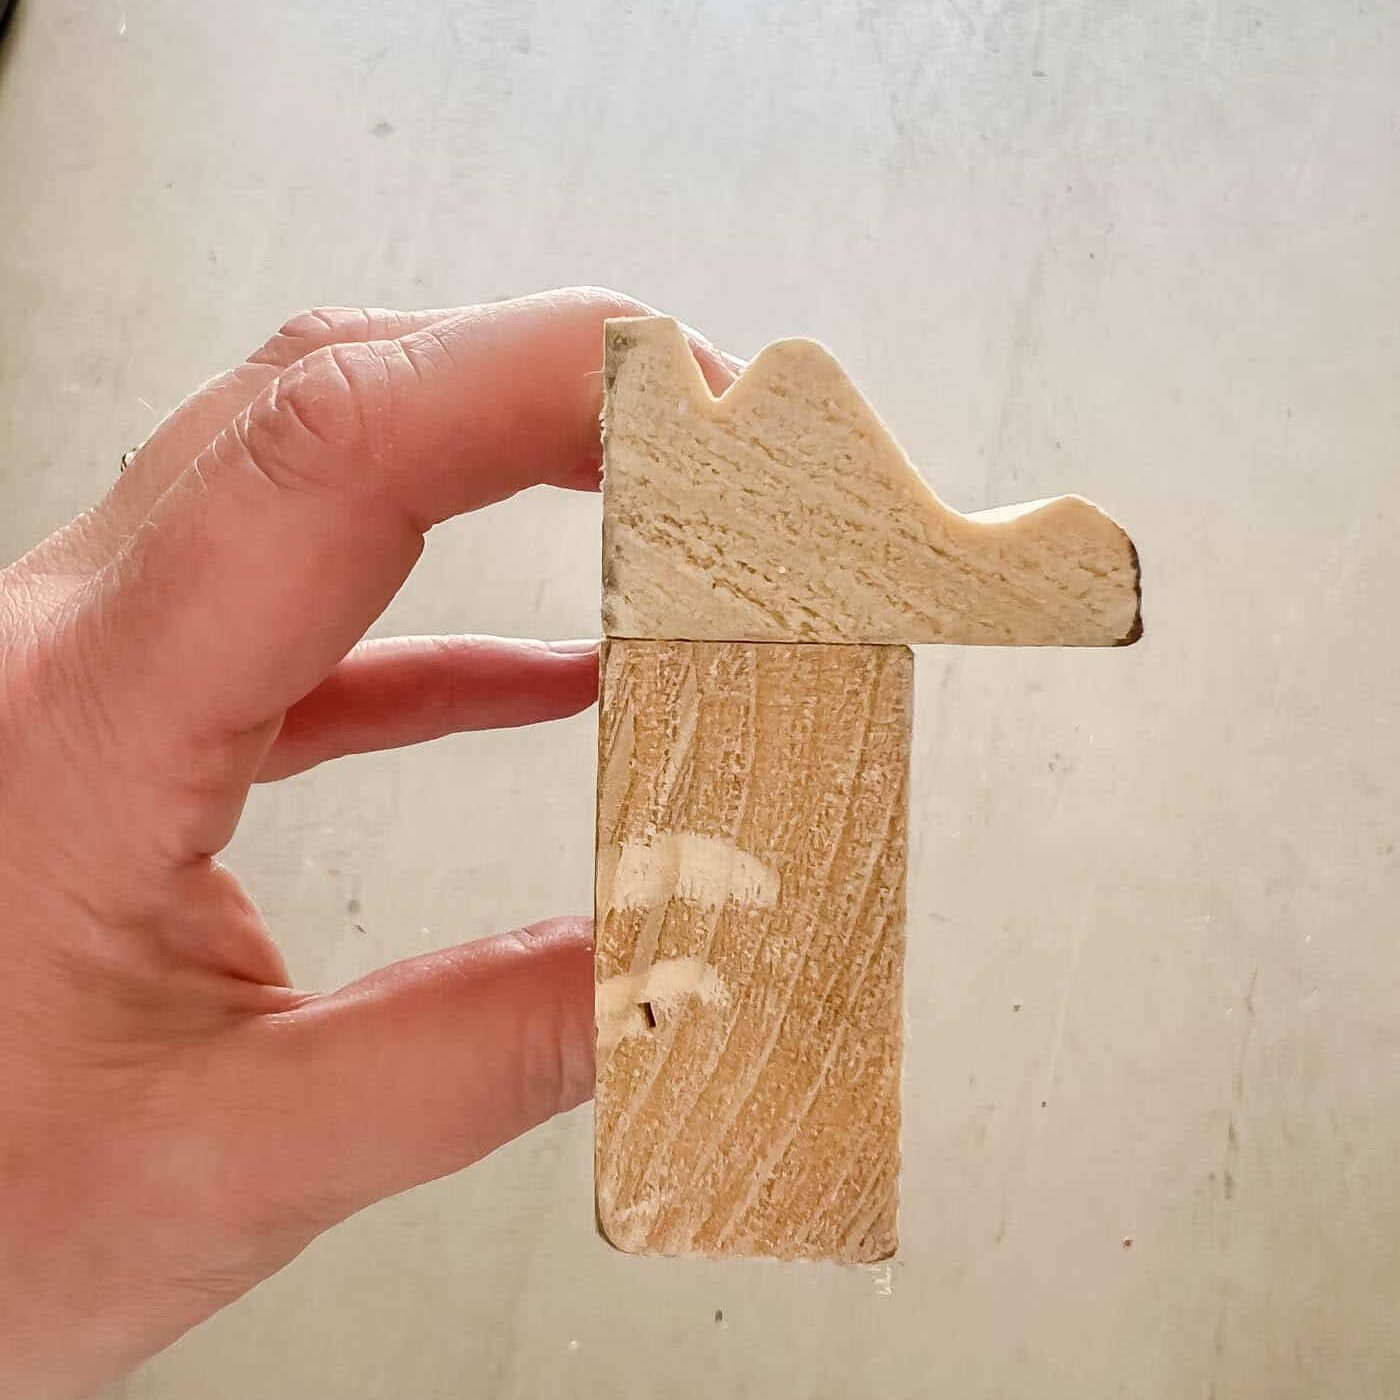
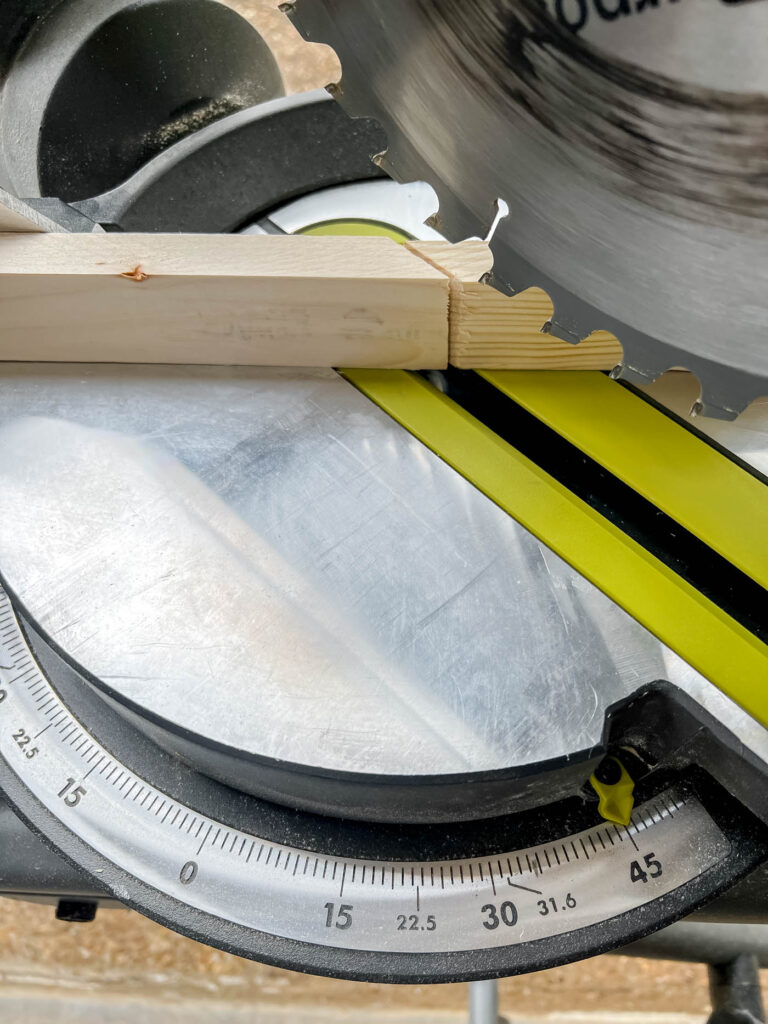
The first piece you’ll cut is a 1×2 piece of trim that will cover the sides of the canvas. You’ll want to cut the inside angle of the boards at the length of your frame sides. Make those 45-degree angled cuts perpendicular to each other so that the corners will fit together.
Then cut the decorative trim piece laying bottom down on the saw. And you’ll want to make sure the highest part of the trim is the longest length of the cut.
If you are doing a simpler miter cut, you can just do the first 1 x 2 board and it will just cover the sides of the frame.
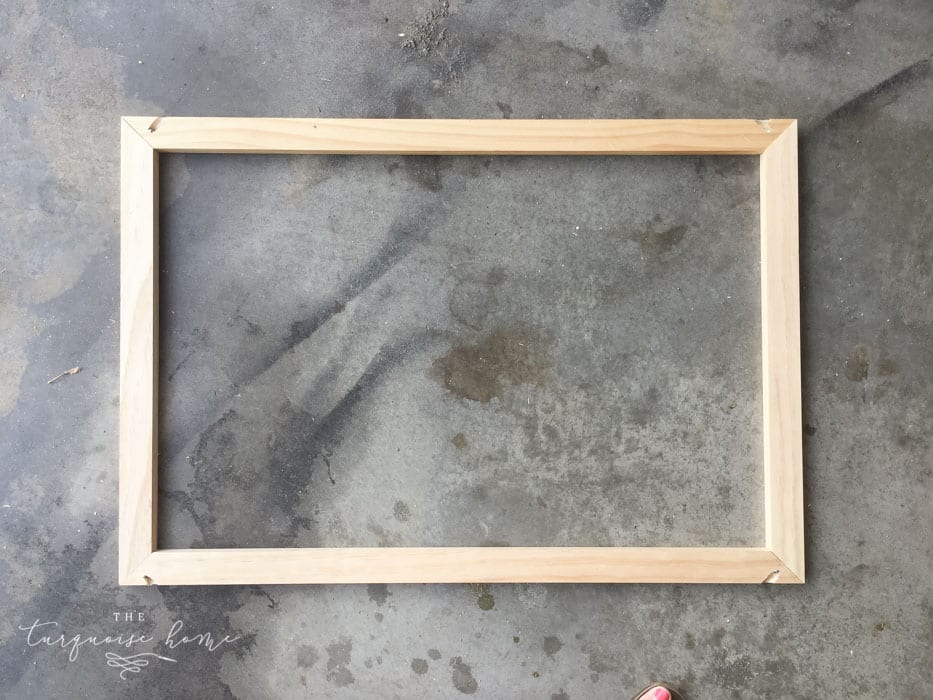
4. Assemble the Frame with Corner Braces
Assemble the frame without the canvas inside of it using glue, clamps and a brad nailer. Glue each corner with wood glue. Then clamp it together and nail them together with a brad nailer.
Add the decorative trim piece on top of the frame sides, if you’re going the fancy route. I used wood glue on the corners nailed them from the top down into the bottom frame. And if you’re not going the fancy frame route, you can skip that last part!
5. Paint or Stain the Wood
Sand down any rough edges or splintered wood and paint or stain the boards. Fill any nail holes with wood putty or filler and let it dry before staining or painting.
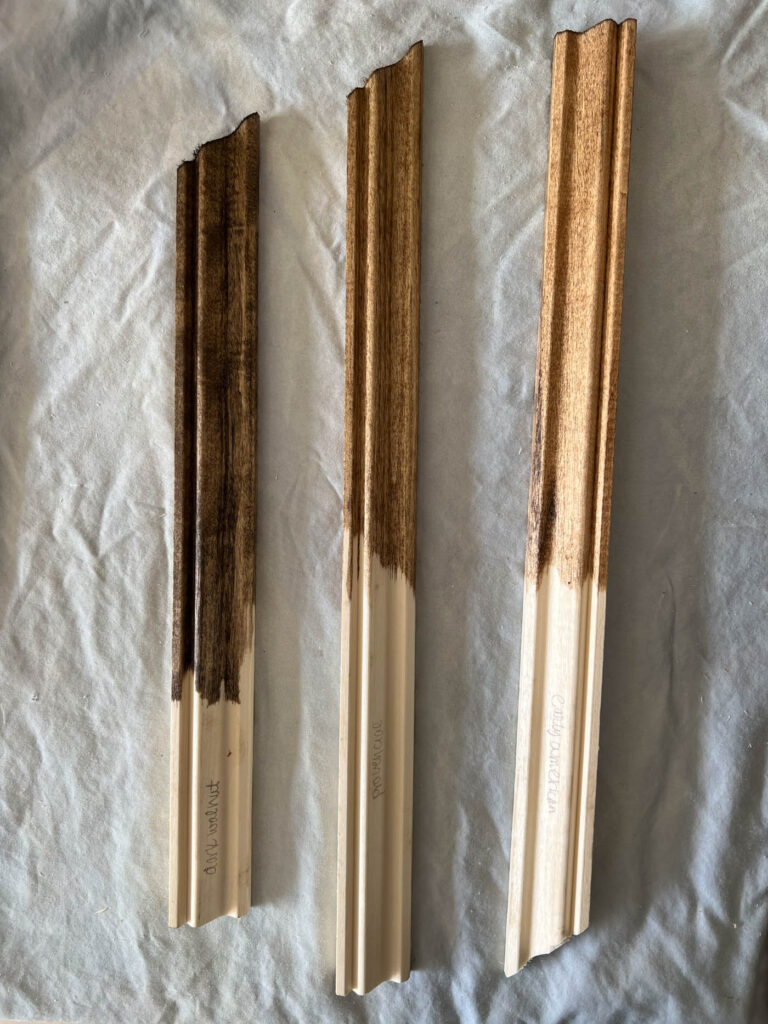
I was testing out a few wood stain colors (l-r: dark walnut, provincial, early American). In the end, I chose dark walnut.
I highly recommend sealing your wood frame with a polycrylic or polyurethane before hanging it. This will protect your frame for years to come!
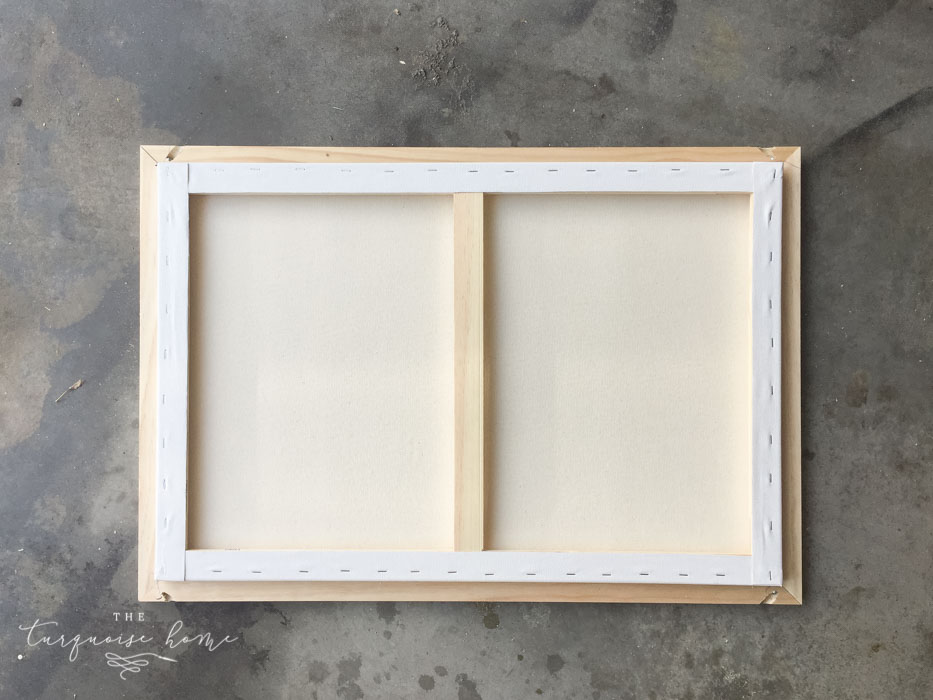
6. Attach the Frame to the Canvas
You can glue the canvas onto the frame, or if it’s tight enough, you might just need to place it on top of the canvas. You could also nail it into the canvas, but I wouldn’t recommend that unless you plan to keep it on there forever. You’ll want to be careful to put the nails toward the back of the frame (closest to where the wall with be) so it’ll be less visible and won’t damage the front of the canvas.
7. Hang the Frame on the Wall
Use some type of frame hanger, like a sawtooth hanger or D-rings, for hanging your framed art on the wall. I hope you love how it turned out!
I hope you love your newly framed art piece. And I know you will enjoy it for years to come!
MORE POSTS YOU WILL LOVE:
- DIY Frame for a Frame TV
- DIY Picture Frame Moulding <– If you can make a frame, you can do this!
- The Samsung Frame TV Review: Is It Worth It??
- DIY Window Cornice Board with Fabric
- How to Frame a Builder-Grade Mirror

I’m going to do the same with a painting my adult daughter painted for me. I’ve had the wood in the workshop for about 6 months now… You have motivated me to finish it 🙂
What a great idea, thanks for this 😍
Love the framing information!
This is exactly what I was looking for for my simple artwork;) I just wonder if it would be possible to glue the frame instead of nailing it? What do you think?
Absolutely! I think glueing it could work well depending on the size!
What’s th Elaine color on your wall. Its kind of greige? I like it and am trying to find a good color for my living room.
I really wanted to read your article but due to all of the pop-up ads and videos that were playing prevented me from even beginning to enjoy what you wrote. Too bad! Got to make that $.50 don’t you?
Honestly your attempt to be snarky just shows your inability to properly read. Everyone else can gather the info here. Since you’re the only one who can’t, I’m thinking it’s a you problem.
I swear – this blog has more adds in the blog page than the comment section. Pirated movie websites have less adds than this
Thank you so much for this! I need it, as I’ve just started painting large canvases (usually I use paper) and paying for someone to do it is expensive. Your solution is simple, affordable and most important– confidence-building! Especially helpful to see your side by side before and after. Yup, that little frame makes a big difference.
Thank you so much! What a great idea! I will do the star, and the frame!!!!
Well, I for one found out exactly what I needed to know. Sometimes people put too much information and the blog becomes tedious and boring. I appreciate your simple advice and am headed to the store for some lattice strips, Which I had no idea there were boards called that. I always thought the term lattice was for that criss cross garden panels.
Also, I think anything other than brad nails would be tacky and might split the canvas frame. If you don’t want to see them, it would be easy to countersink them and add a touch of wood filler with your finger before staining.
The beautiful artwork is really complimented by this look. Good job!
Found this googling ‘how to frame canvas’ and I have to say this tutorial is just lazy – you completely skipped over the part where you actually build it, what kind of nails you used, actual nail placement. It’s as if you built this first and realized you forgot to document it. So you went back and took some photos of the components but totally neglecting the ACTUAL build. It’s about as useful of having an ingredient list but no recipe.
Illona, let me offer a bit of advice that might aid you in completing what most would consider to be a fairly straight forward and simple project. First, consider the source. This is not an “instructable” where every nitpick detail is outlined for those who don’t want to take the time to think through things themselves. This is a blog, and a very nice one at that, where projects are displayed, inspiration offered, and basics covered. Second, take the time to both read the post and familiarize yourself with the basic tools and techniques needed to complete the project prior to posting. Outlined for you there you’ll see that she uses brads to bind the lattice to the canvas stretcher bars. Brads. Not nails. If the actual placement of the brads is of concern to you I would advise you to consult google… or i can save you some time and tell you that for a project this size and weight the placement is not really a concern. Think it through, make it sturdy, and voila, you’re done. Third, your critique on the build sounds like it comes from personal experience and I thank you for sharing your opinion. Once again, this is just about as simple as attaching tape to wrapping paper to wrap a present. If you’re confused I would definitely do a bit more research. Thanks for sharing such enlightened thoughts! I hope you have a great weekend and were able to complete your project with few to no hang-ups!
That was such a satisfying response. ***CLAP*** Some people are so unhappy, unsatisfied, and just mean.
Bunch of Karens on this blog hahaha
I was thinking of trying this this weekend! I don’t see exactly where you put the nails in the lattice though. I would love for the nails not to show (like yours), but I can figure out how you got the nails in there without it showing! How did you do it?/Where exactly did you put the nails?
The brads she used (not nails) are smaller and shorter than nails, so they won’t be very noticeable at all. Placement isn’t too much of a concern, unless you’re concerned about the wood bowing out. At the corners, and about every few inches around should do it.
Hi Emily….The brads she used are smaller and thinner than nails, with just a hint of a head on them, so they are barely noticeable, if at all. The placement of them isn’t too much of a concern, unless you’re worried that the wood will bow away from the canvas. I’d do the corners first, then the middle. If it’s a really big piece, then I’d do additional brads every 5-6 inches, so 3-5 brads on the short ends, and 5-7 on the long ends. You can countersink them if you want by tapping the head of the brad into the wood ( I use a sharp screw or awl with a hammer), then filling with wood putty and stain. I am SO excited to see this tutorial! I have several canvases I’ve painted, and needed to frame them quickly and inexpensively for our county fair entry! Will DEFINITELY be doing these!
Beautiful! I love it
did you put some nails all along sides too, not just at corners?
Yes! They are all along the sides as well. xo, Laura
Greetings from California!
Great idea, nice and simple but looks effective (I have pinned it)
Love this simple and quick tutorial. The canvas looks awesome with the frame.
I live this quick tutorial. I have a few things this will work on! Thanks!
I really like how simple this was, and the stain colour seems to go perfectly with the art too! You could even line the lattice frame with the back of the canvas so it sticks out in the front (for a different effect).