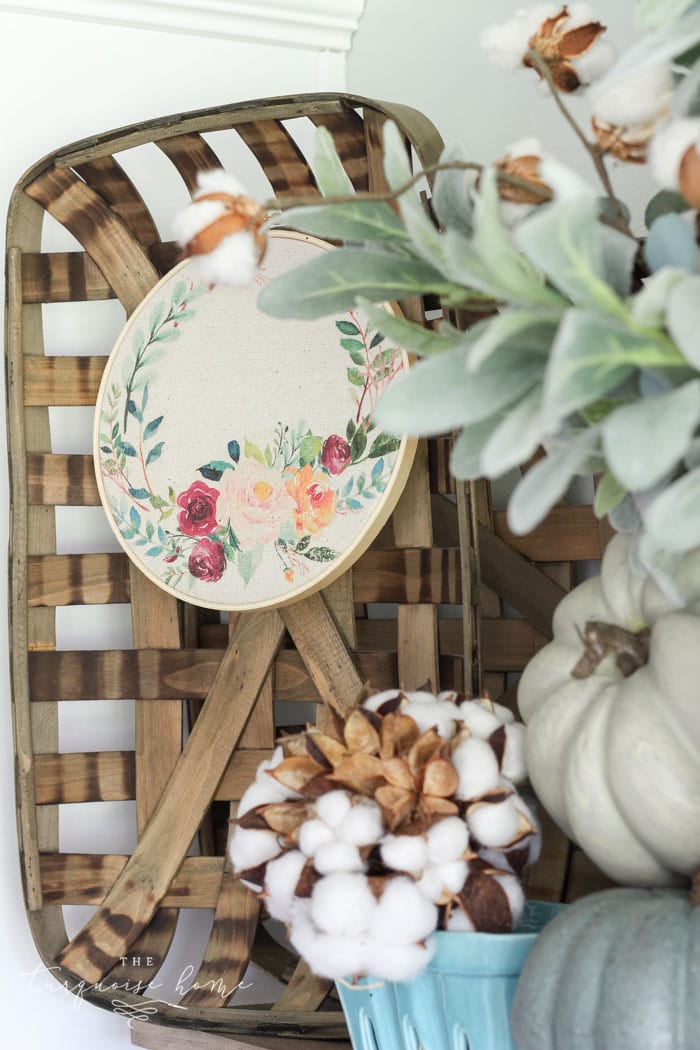
Framed Burlap Monogram
If you’ve been around for a while, then you’ll notice that I changed something out in my reading corner. Did you notice?? I made this cute framed burlap monogram from fabric scraps, so it was FREE! I love a pretty, free and easy project, don’t you!?
I’ve mentioned before how I love burlap for Fall decor. I used it for my fall bunting and am trying it other places around the house as well. It’s such a fun, texture-y material that really can be used year-round.

So … I’ve had this image saved on my phone forever. I saw it in someone’s wedding pictures on Facebook, zoomed in and saved it to my phone for safe-keeping and future reference. Heck, it’s probably not even burlap, but it’s what I had and what I wanted to use, so burlap it is!

This week, I finally got around to making one of my own. It probably took me 30 minutes from start to finish, so it’s s super easy craft project.
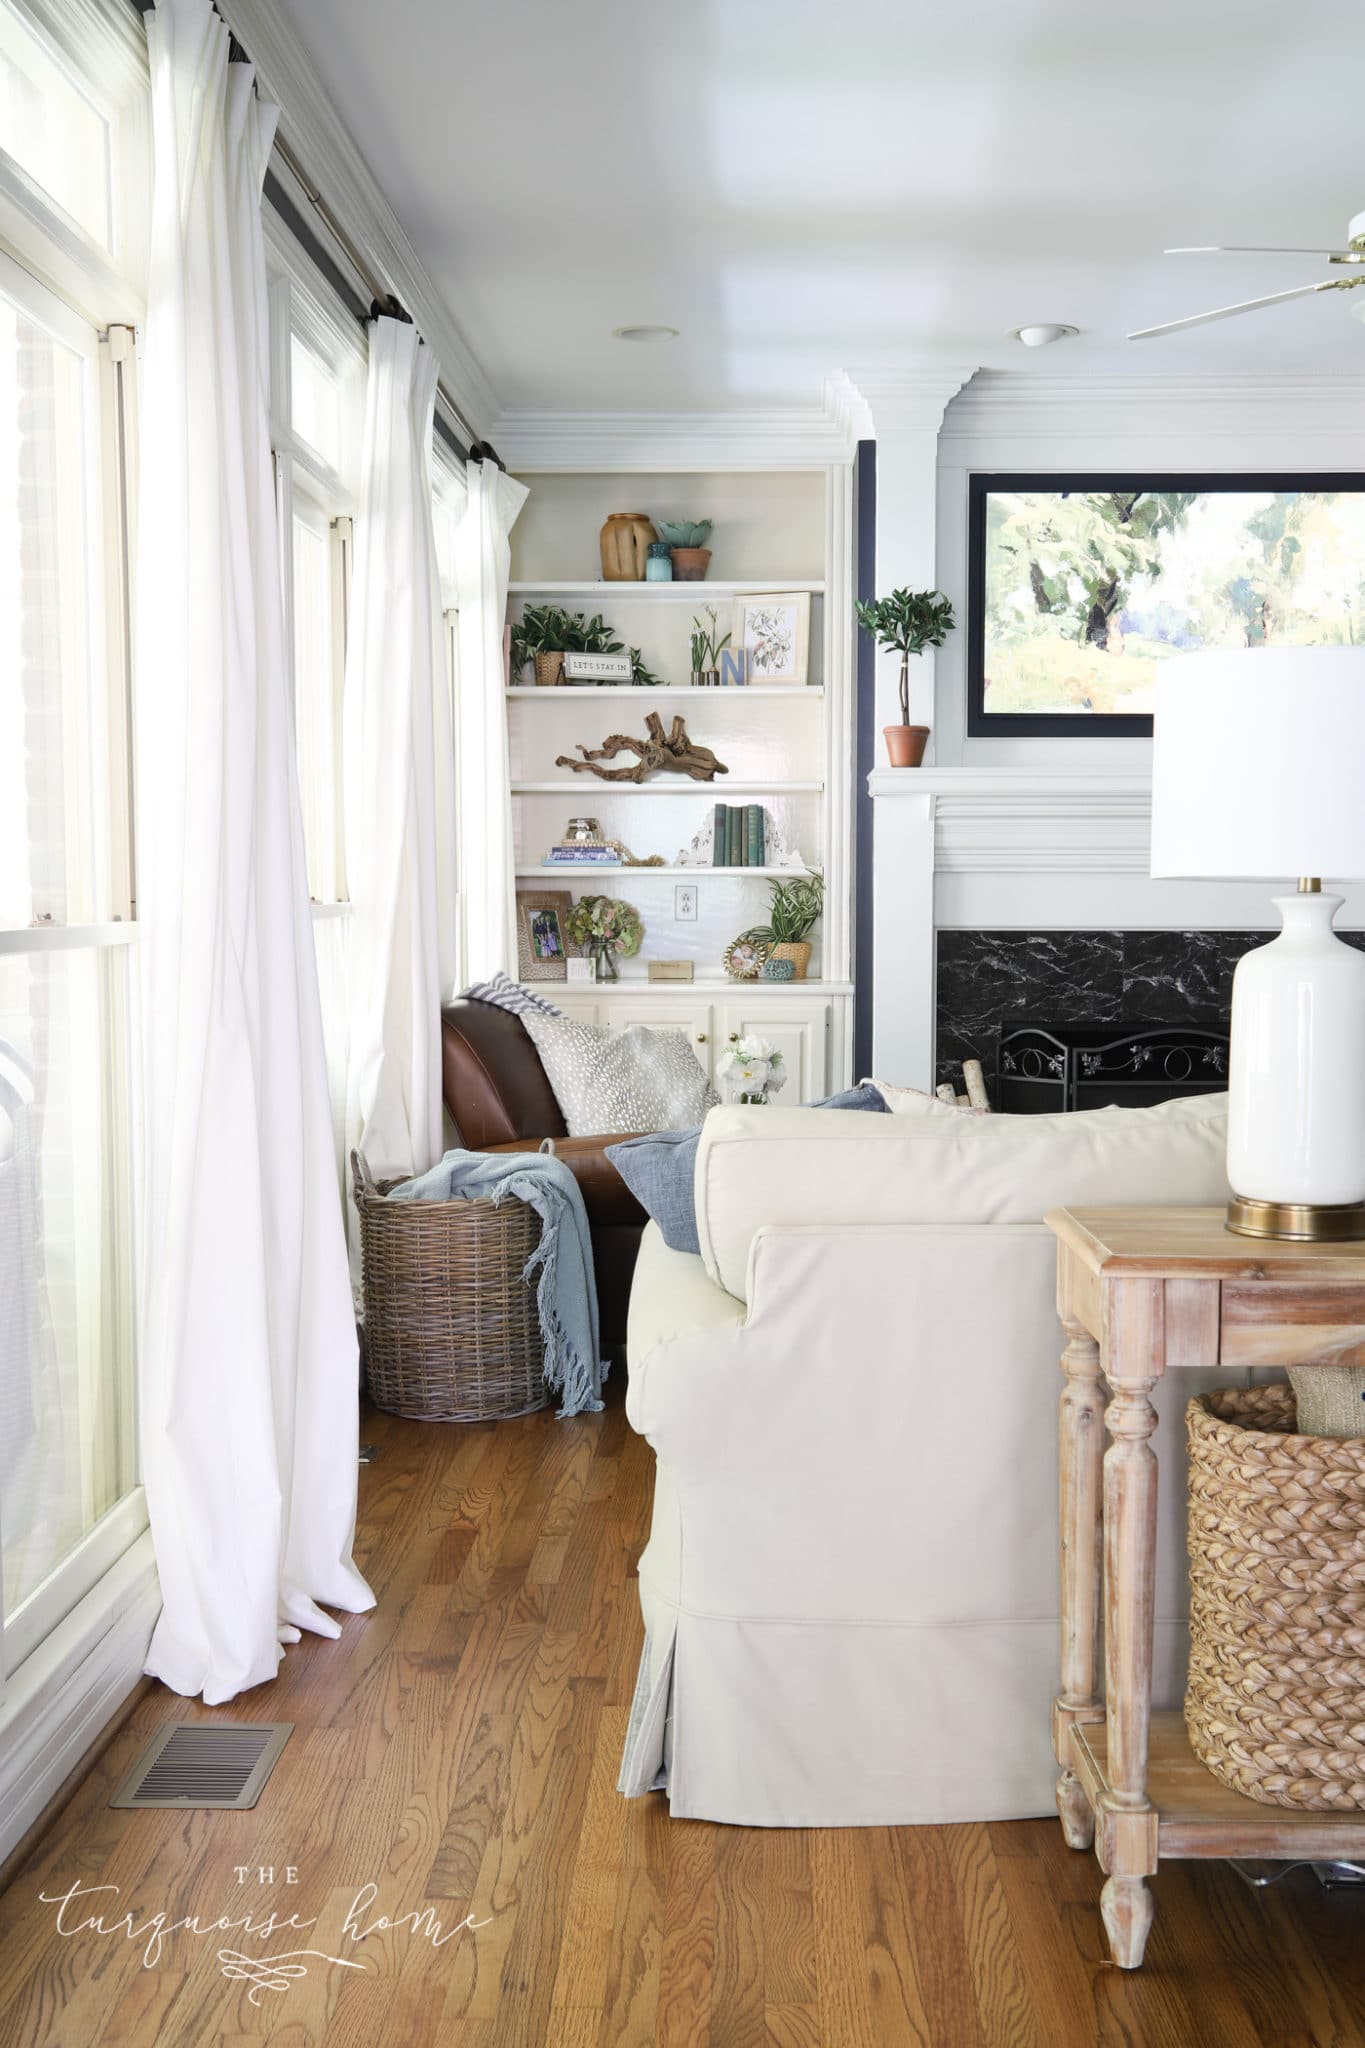
You see, I needed something to fill this frame in the corner of my living room. It had been holding my favorite Mai Autumn print called Summer Bouquet. But since summer’s over, I needed something different for the fall and winter months. Enter the burlap monogram idea!

(Update: I have since moved the Summer Bouquet to my office, and keep this pretty monogram in that frame nearly year-round!)
Tools You Need for a Framed Burlap Monogram
- Burlap
- Fabric for the backing
- Card stock or printer paper (and a computer for printing, of course)
- Frame (This can be as small or large as you’d like, but mine is 11×14 with a mat for an 8×10 size. I got the frame and mat from Hobby Lobby. Don’t forget to get them when they are 50% off, or use your 40% off coupon!)
That’s it!
I used the burlap I got in my Haven swag from OnlineFabricStore. Thanks OFS!!
And I had some scraps of fabric leftover from hemming my IKEA curtains in my bedroom. I never throw away a fabric scrap, because you never know when you might need one. Ha! I might be a fabric scrap hoarder. 🙂
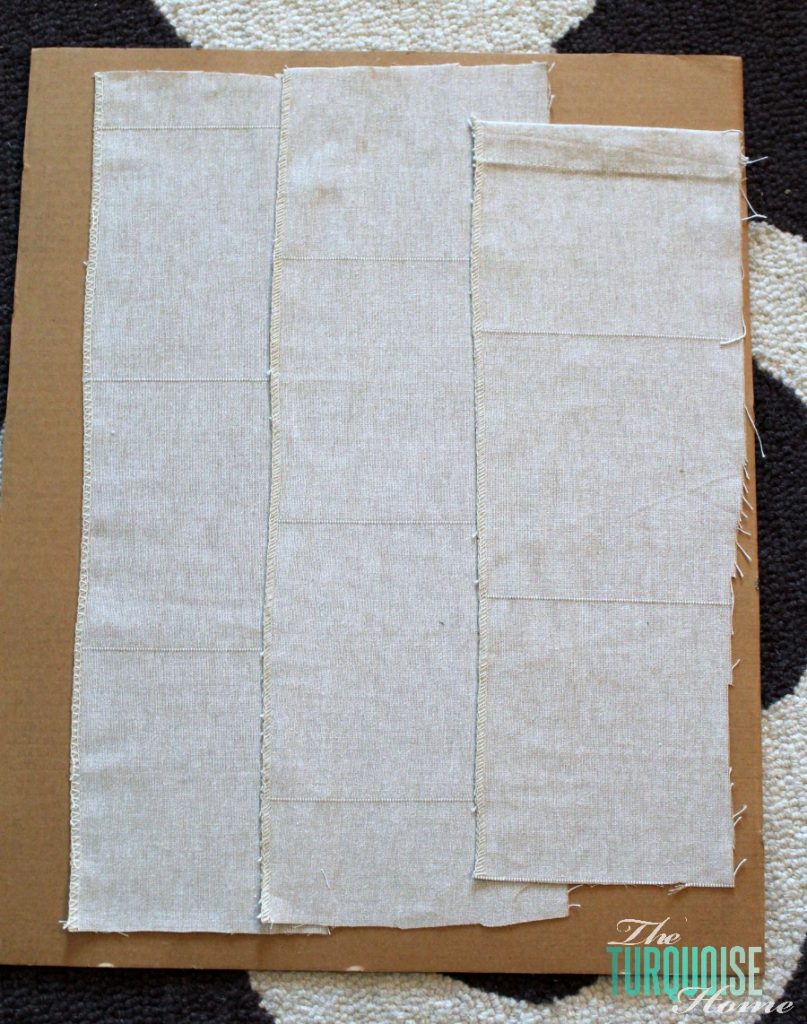
I didn’t have a scrap wide enough to fit the whole frame, so I layered them and I really like how the layering brings a little more interest to the art piece. {If you can call it an art piece.} I just taped them down with double-sided tape. I love a good double-sided tape craft.
Then I just printed out an N using Word on the computer. I used Times New Roman font. I know, yawn on the font. But I really couldn’t find anything I liked better. I printed it onto card stock to make it a sturdy enough to trace onto the burlap. When I cut out the card stock, I made the letter a little thicker than it printed out. I probably could have just bolded it in Word, but I wasn’t thinking.
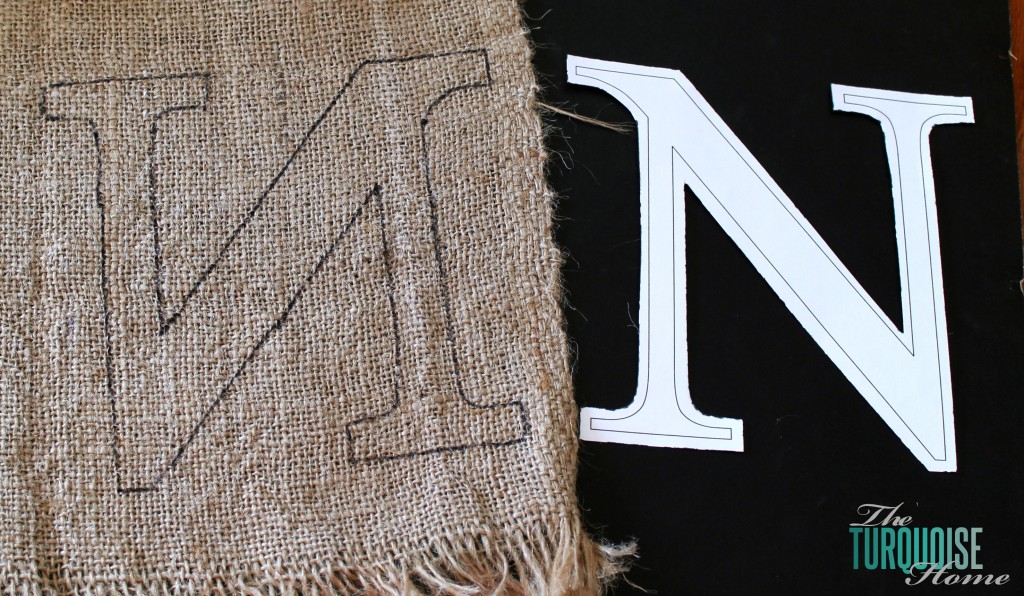
I traced out the letter and cut it out, and stuck it to the fabric strips with double sided tape. I love that it’s just on there with tape because I can change it out with different seasons if I want to. I might think of something fun for Christmas and then change it back to the monogram for winter. 🙂
In the original inspiration photo, it has an “est. whatever-year-they-were-married.” I thought that was too cute, so I just whipped that up as well. I printed the “est. 2009” in Word using my favorite script font: Bickham Script Pro. I made it a dark gray and just printed it onto card stock again. I cut it out in an oval and then cut out a burlap oval a little larger. And then taped them down underneath my monogram. And I know all of the edges are a little wonky, but to me that adds to the appeal of an imperfect homemade piece.
I didn’t take a picture of this part, but it’s not rocket science. You can see it close-up here …
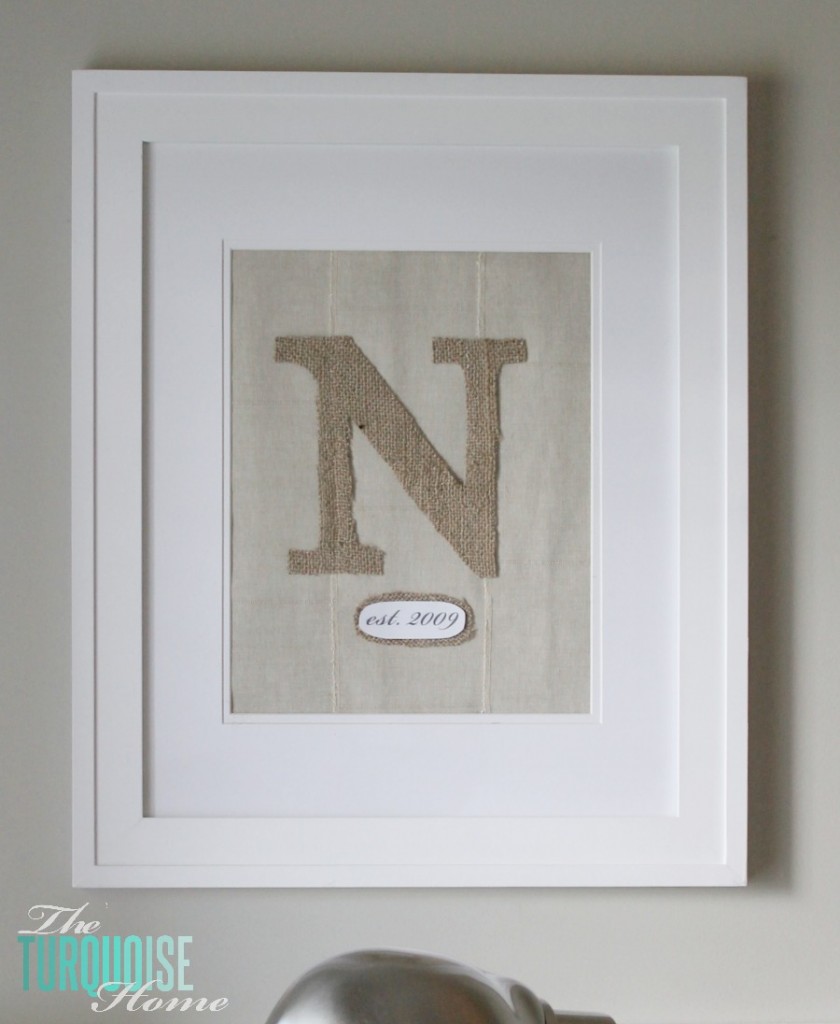
To be honest, I wish I had a cream colored cardstock for the “est. 2009.” I thought about staining the white cardstock with some tea or something, but I was in a hurry and didn’t have any tea.
I think it looks good from a distance, and I don’t expect any of my guests are going to stand on the chair to take a closer look. You may want to spend a little more time on it, or maybe you already have some cream card stock on hand.

Then I just put the frame back together and hung it up. I love how it plays well with my fall mantel. It’s an easy, handmade, personalized craft that looks cute and takes little time. Yes, please and thank you!
I hope you have a fabulous Friday and an awesome weekend!
More Posts You Will Love:

Great idea so creative. I am glad you left the est label white. I am going to try this!
Thank you! Happy DIYing!! 🙂
Gorgeous result. I am so loving this DIY. Thanks for sharing.
Beautiful Laura; it looks like you bought it! Love the simple colors too!
Thanks so much, Mackenzie!!
I think this looks beautiful, Laura. Pinning!
This is fabulous! Just wanted to let you know that you were featured at Give Me the Goods. Congratulations! Please stop by and grab a button. 🙂
Rachel @ Maison de Pax
Hi – what a great idea! Nice and easy but really effective – perfect!
Yay, a fellow fabric scrap hoarder!!! And sadly, I don’t even sew, but moving on… You’re monogram is beautiful! I love the layered fabric. So creative! This would be great for the home or even a gift! Pinning this to make my own. Beautiful!
girl … I don’t sew unless I HAVE to! 🙂
I love how your framed monogram turned out. The white est. looks nice with white frame. Great post and tutorial how you put it together. Happy days
I love what you have done.
Thanks, Craft Frenzy Friday
Love. Simple and lovely.
What a cute monogramed picture. I actually love the three strip background. It add more dimension and interest to your picture. Thanks for the great idea.
I love this!!! How pretty!!! The framed monogram looks so elegant! Beautiful!
I love this idea. So pretty. Thanks tons for linking to Inspire Me. Hugs, Marty
Love this!! It’s so pretty and elegant 😉 Pinned!
Hugs,
Jamie @ somuchbetterwithage.com
So simple, yet so cute! I love the monogram! What a fun way to use burlap.
Great initial wall art. Burlap does have a fall look to it, but I think this framed letter would look good any season.
Its great, I think burlap is nice for all seasons but especially fall. I don’t think the est 2009 looks cheap at all. If you want another quick idea maybe just use stamps. It’s my goto tool when I need to do something quick! Has anyone used the silhouette fabric blade? I’ll bet that could cut these out in a jiffy.
Sincerely…
A lazy mom
Love this. I am on a burlap kick as well, such a fun fabric. Looks great.
Beautiful idea! I’d love if you’d link up to The DIY’ers.
Great quick fix for seasonal art! I’m going to have some burlap leftover from another project so this looks like a good one to pin. Thanks! ~Ali from Pies & Puggles
Such a nice idea! I really like the simplicity.
Simple and darling. Thanks for sharing! -Michele @ Neat Little Nest
I love that this is super simple and super customizable! Nice job 🙂
Very cute! I love monograms. At first glance I thought you had stitched it on with twine instead of using burlap. So much easier your way!
Whew! Not a chance of my stitching anything with twine. LOL! Definitely easier my way. I tend to always choose the easiest route.
Laura,
LOVE! You gave me an idea for a baby gift! What did you do with that pretty print! I hope you found it a happy place 🙂
Oh yay! I love when people are inspired by my projects. I hadn’t even thought about making some of these as gifts, but it’s a great idea! I just stuck the print in my decor closet … and I’m sure I’ll bring it back in the spring. Thanks, friend!