DIY Target Dollar Spot Fall Wreath
Sometimes I just want to take a moment for myself and creative a simple craft or DIY project. I’m not a huge crafter, but every not and then I want to complete a project in an hour or less, including the clean up (my least favorite part.)
While I was making my weekly trip around Target, I found some amazon fall finds in the Dollar Spot section. They had the cutest stuff! When I saw the adhesive letters, scrapbook paper and felt flower embellishments, I just knew they would be perfect on a small wreath for fall.
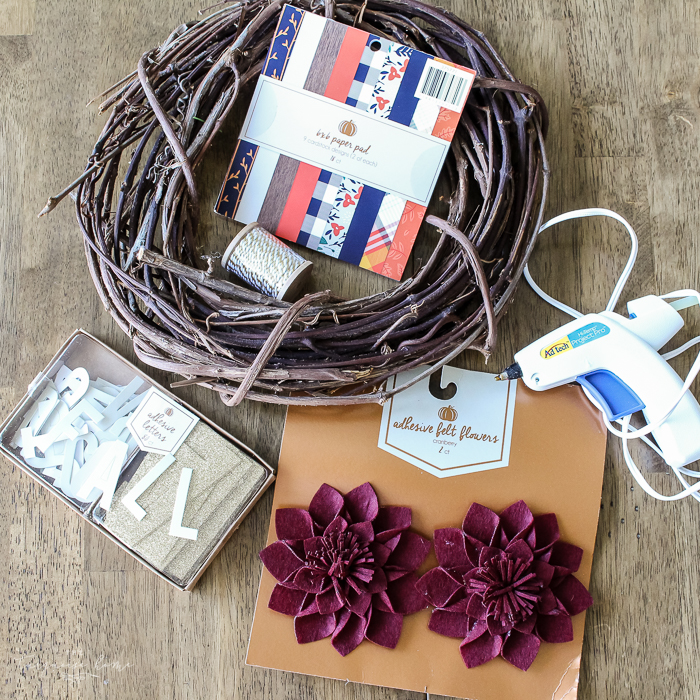
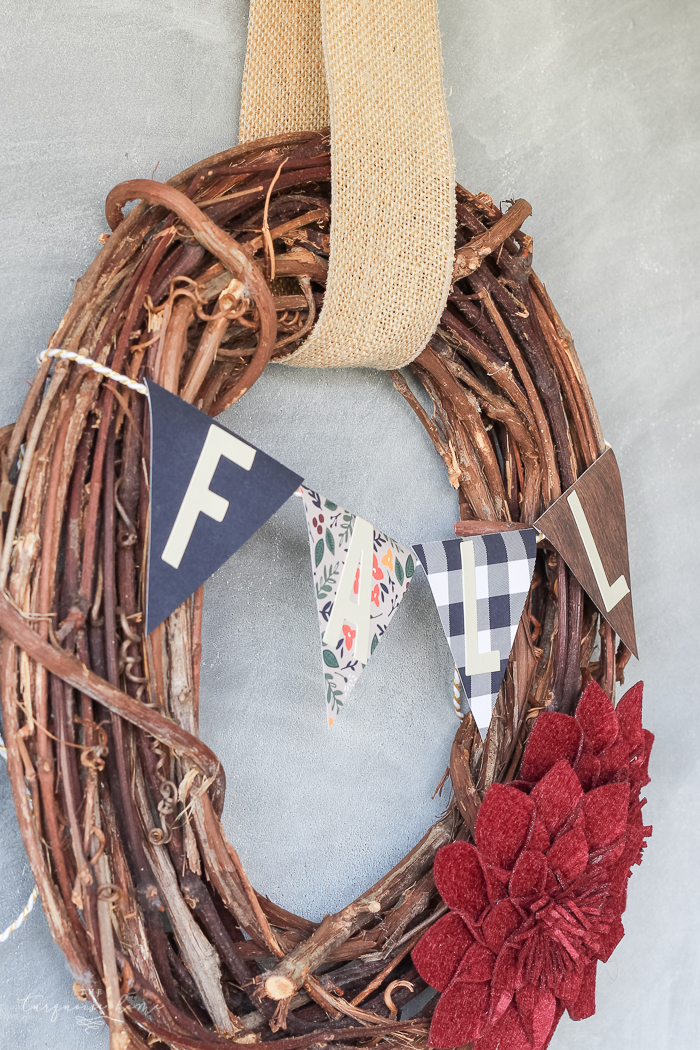
I’ve had this smallish grapevine wreath sitting around just waiting for me to pick her up and use her. Wait, do your craft supplies not sit around talking to you about how they need to be used? Oh, that’s just me? Gotcha.

So, I grabbed a few other items, like fancy string and a glue gun, which I ended up not using, and got to work.
Maybe 5 minutes later, this cute little number appeared.
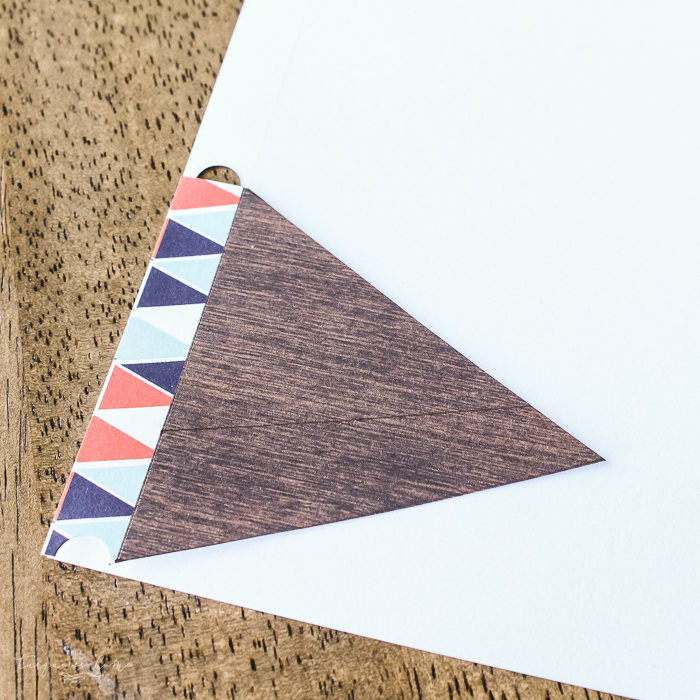
The hardest part, which can’t be classified as hard at all, was cutting out the bunting from the scrapbook paper. Aren’t those the cutest little designs? I had to make sure the triangles were big enough for the letters to fit on them. It took me a couple of tries, I’m embarrassed to admit.
You can see the line I drew in my first attempt below. Much too small!
Once you get the first one cut out, you can use it as the template and just trace the rest of them! If you need more tips on creating some bunting, then check out this post. (click here)
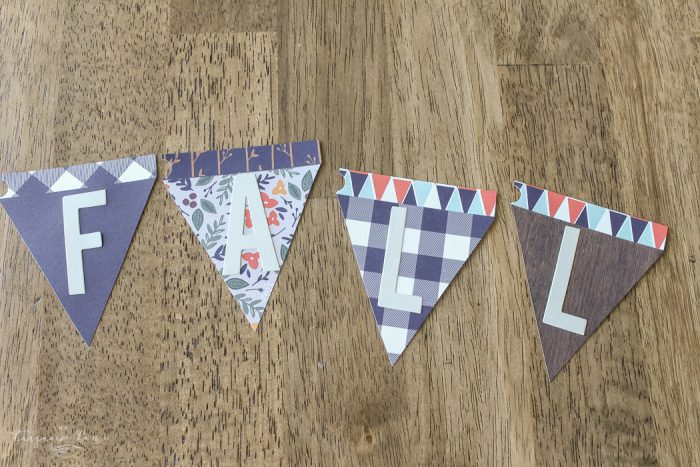
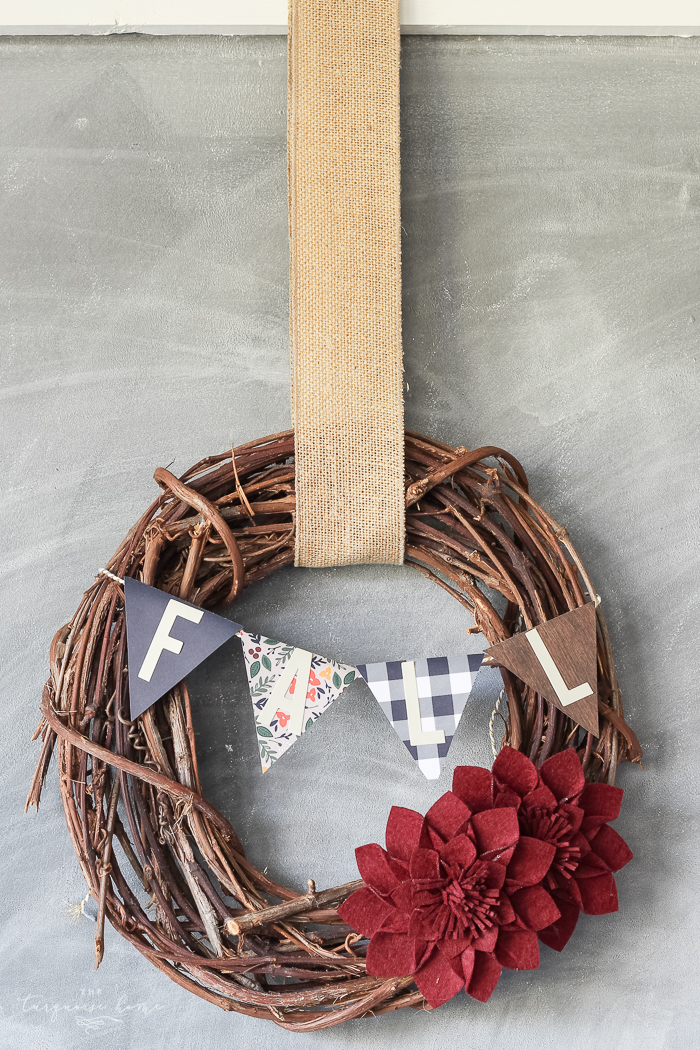
Position your letters and stick them on! These from the Dollar Spot are adhesive, but honestly the adhesive isn’t great, so if you use these, add some glue, too. You could easily make these letters with your Silhouette, too!
I used the two felt flowers to embellish the wreath. And I used some burlap ribbon I had on hand to hang it over my chalkboard. I love it! I may end up moving it later, but for now I enjoy seeing it in the kitchen.
Let me know if you try it!
And send me pictures! I’d love to see how yours turned out.