DIY Utility Sink Skirt
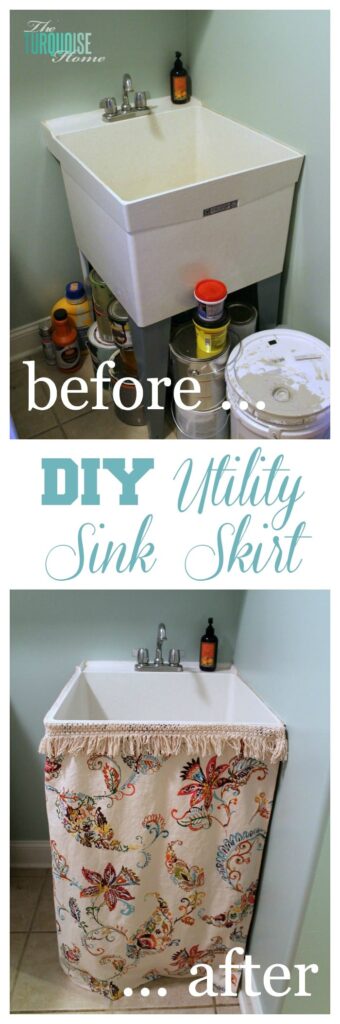
Learn how to make a DIY utility sink skirt to cover up the unsightly underneath area and give extra hidden storage space!
I’ve been working on my laundry room makeover for months now. I think probably six months or so. Ha! It’s taking me a while. But I finished on of my projects this weekend. Hooray! I have a wonderful utility sink in my laundry room. I have never had a sink in a laundry room before this house and I love having it there to wash out stains or clean up dirty paint brushes. Love it!
But I wanted to “pretty it up” for my makeover and I knew I wanted a skirt to hide my paint underneath. I loved this inspiration from Traci at Beneath My Heart. And I knew exactly what kind of fabric I would need to complete my coastal vibe.
So, let’s go back to May when I bought this fabric. Coach and I were spending our anniversary in Nashville and he took me shopping at World Market. We don’t have one in our hometown, so it was a special treat. I had been eyeing these fun outdoor pillows (which are now out-of-season and unavailable). But at the time they were $25/each, and I wouldn’t pay that much for outdoor pillows. $50 for two throw pillows … outside? I don’t think so. But I looooooved the fabric. So, as I walked around the store, I spotted the same fabric in a tablecloth. Woohoo! I knew exactly where I wanted to put this fabric.
Note: if you LOVE a fabric, but don’t want to use it in its intended way, don’t ever be afraid to cut it up and use it for something else. I loved this fabric, but I didn’t think the outdoor pillows were worth it. And in the end I got my fabric that I wanted – in the laundry room – and have enough leftover to make pillows if I want! It’s a in all around!
Tools Needed to Make a Utility Sink Skirt
- Fabric
- Fabric scissors
- Adhesive Velcro
- Sewing machine
How to Make a DIY Utility Sink Skirt
1. Measure the Sink & Determine the Fabric Needs
The first thing I did was measure my sink and figure out how much fabric I would need to cover it. I was able to use a half of the table cloth without wasting much fabric at all! Yippee!!
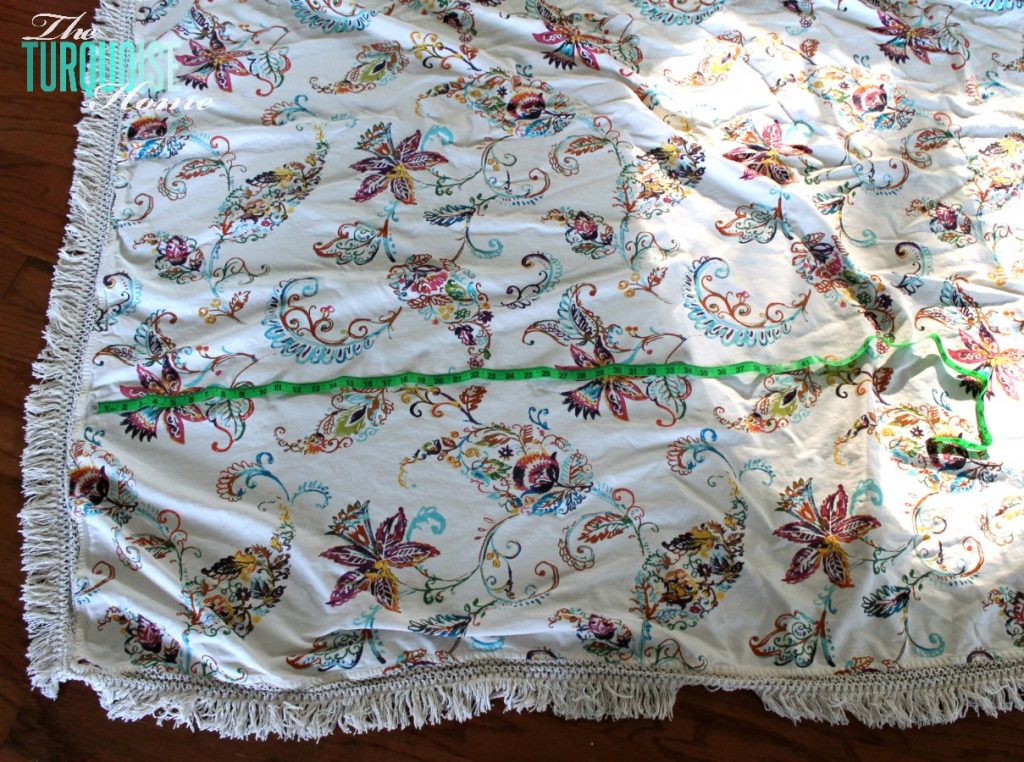
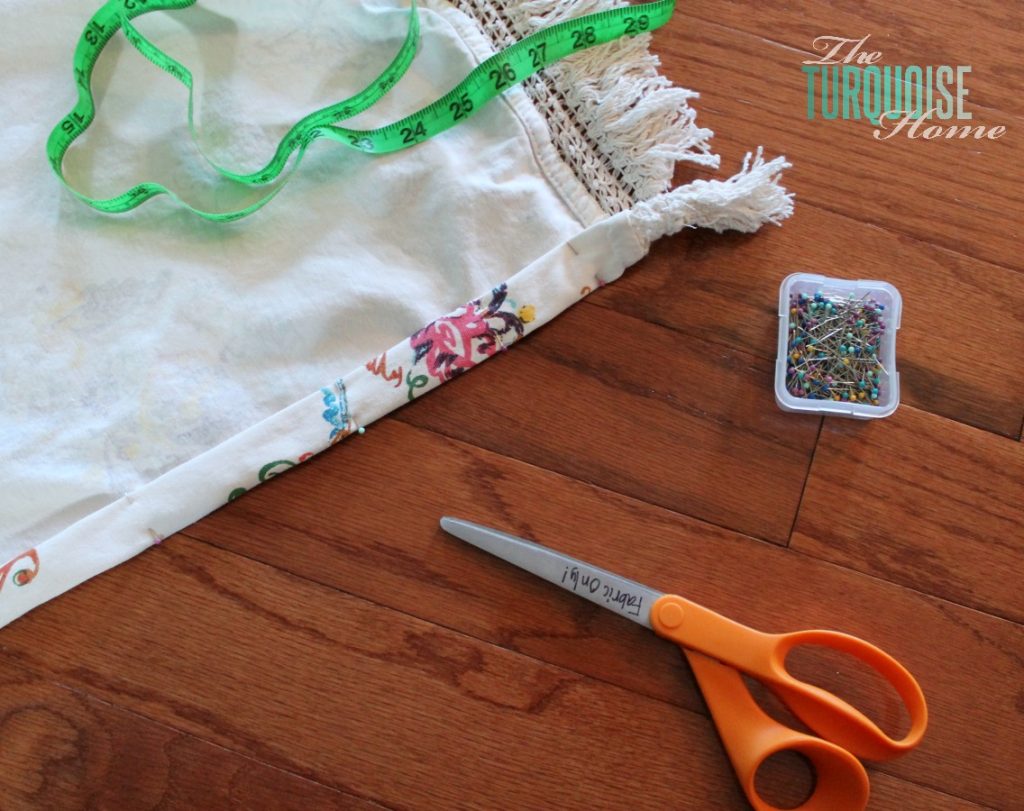
I knew I wanted to keep the fringe on the top, so I just had to cut the bottom and the sides.
2. Cut the Skirt Out
Then I cut the bottom off, which leaves me quite a bit of fabric for another project. Woohoo! And I cut the sides off as well. I knew I had some wiggle room on the sides, so I just cut the hem and fringe off.
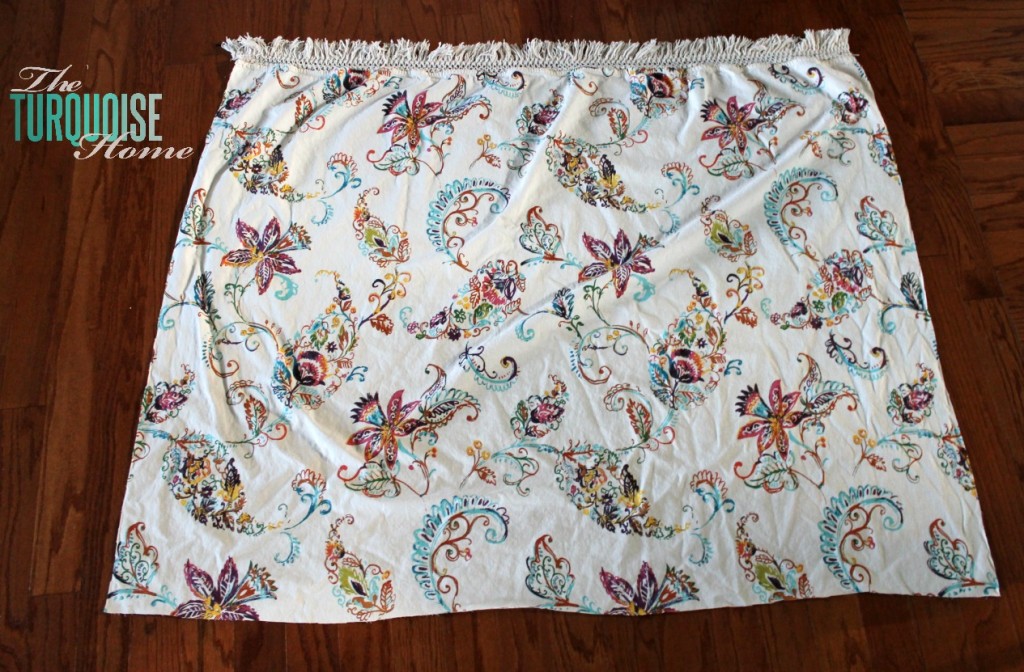
It’s starting to look like a skirt! And then I ironed it, because my gosh – look at all those wrinkles!! It’s always better to sew without wrinkles – says the worst seamstress in the world. Learn from my mistakes. 🙂
3. Hem the Sides of the Skirt
I then hemmed one side and then the other. It was pretty simple, straight lines and done pretty quickly. My sewing machine and I didn’t get into any fights over the side hems. Thank goodness!
After I hemmed one side, I did place it against the sink and pinned where the other side’s hem should go. I don’t trust myself with just some measurements and a tape measure. I fit it as I go.
4. Attach the Velcro to the Sink
Once the sides were hemmed, I attached the velcro to the sink.
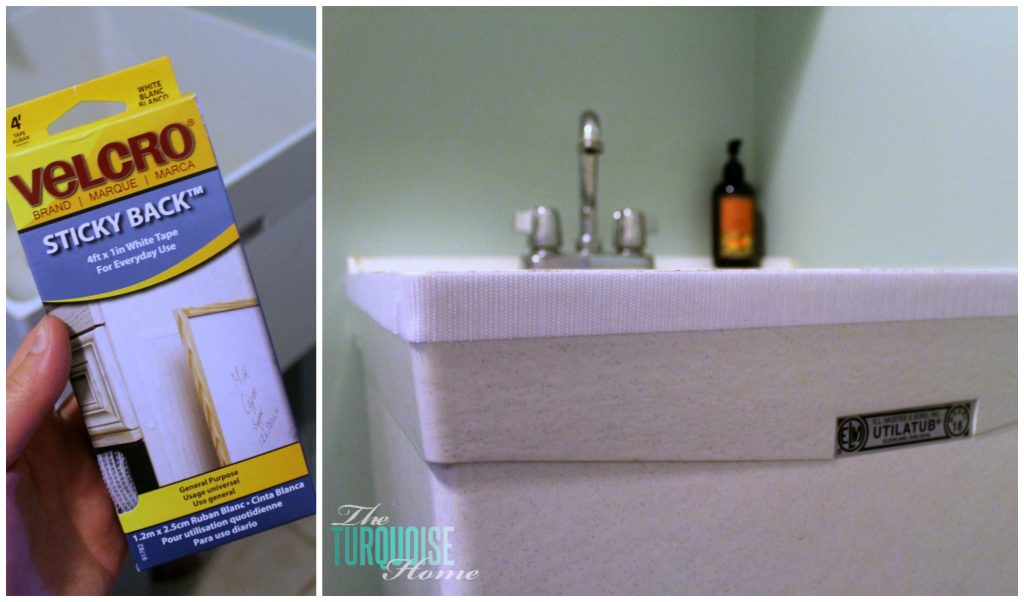
I found the Velcro at Walmart in the fabric section. It says not to use it on fabric, but I think that’s if you plan to just stick it on there and wash it. Obviously it would probably fall off if you did that. But I think it will hold up fine for this project. I stuck the “teeth” side of the Velcro to the sink and it stuck really well. I don’t think that stuff is coming off!
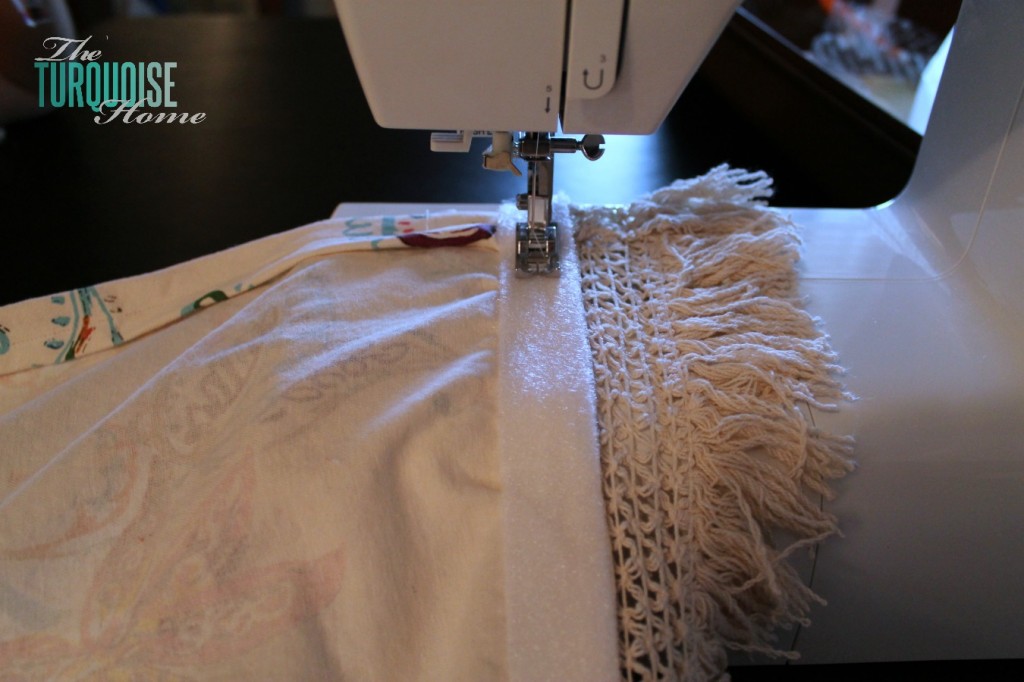
5. Attach the Velcro to the Skirt
Then I stuck the softer part of the Velcro alongside top of the fabric. I tried to sew it, but the needle ended up getting sticky and my thread kept breaking. I’m sure there’s a better way to do it, but I just decided that the sticky part was holding very well and I’d just leave it. I did get some of it sewn, but not all of it.
6. Hem the Skirt
Then I Velcro’d the skirt on the sink to measure the length of the skirt. I just pinned the bottom of the skirt while it was already in place. This was the easiest way to get the perfect hem! I sewed one last straight line and called it done!
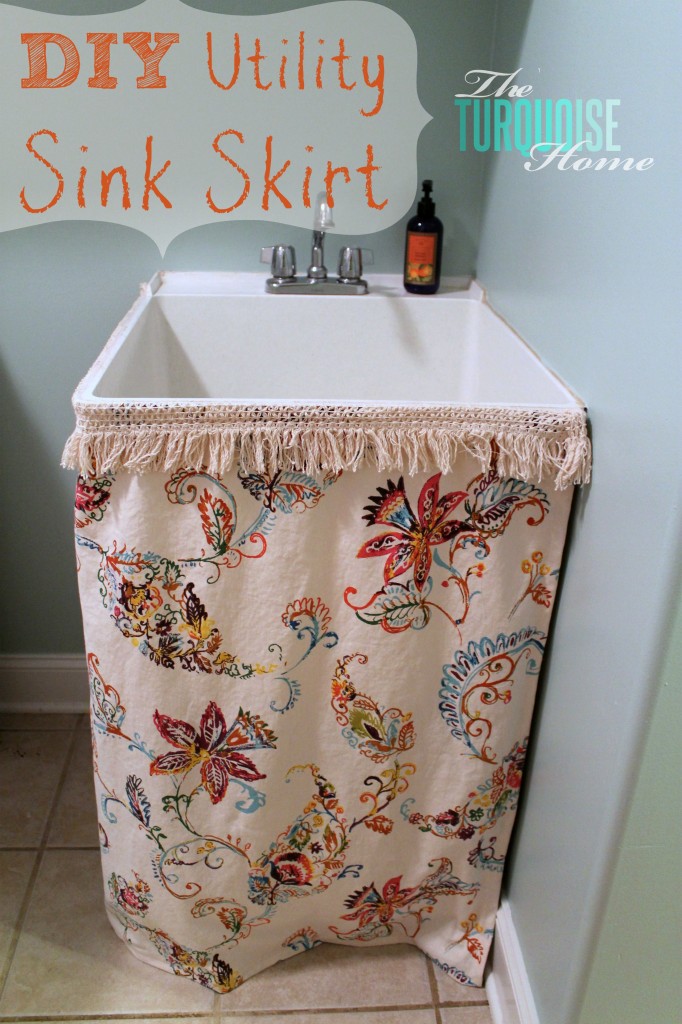
I love how it hides my paint underneath and gives the sink a much more polished look. The fabric looks great in the room and it totally brings the whole coastal vibe together.
I can’t wait to get the room finished so that I can show it off. And let’s face it, so that I can be done with it. I’m kind of ready to move on to another room! 🙂
Let’s take a look at the before and after photos. It’s amazing what a couple of hours and a little fabric can do!
Thanks so much for stopping by! If this DIY utility sink skirt post was at all inspiring or helpful, I would so appreciate your pins!
More Posts You Will Love:

Look at you fancy schmancying up your utility sink…if you saw mine you’d run around in circles and probably shed a tear or two! Thanks for sharing at this week’s Project Inspire{d} ~ pinning.
Hugs,
Mary Beth
Ha! you’re too funny, Mary Beth. 🙂 Thanks for the sweet words and always hosting a great party!!
I featured you today on Planned in Pencil, thank you again for linking it up, feel free to stop by and grab a button if you’d like!
Thanks so much, PJ! I’ll go grab a button now!!
Love this! If you haven’t linked up to Teach Me Tuesday, I’d love to have you come share your post.
Love the fabric! What is the wall paint color? I would love to know!
Hi Rachel, the color is a custom color I made using Wythe Blue and white … so really not that custom. Ha! 🙂 I would say Palladian Blue from Benjamin Moore (one step down from Wythe Blue on the card) would be your best bet!! Thanks for stopping by!
Uhm, yes! Thank you for sharing this. I’m adding it immediately to my to-do list because my sink is the same style as your but 1,000 times uglier! Thanks for linking up at the Pinworthy Project Party on Planned in Pencil!
Hey girl! Thanks for stopping by!!
Love this! What a great piece of fabric.
This looks great! I definitely need to do this in my laundry room with my utility sink. Thanks so much for sharing on Get Crafty Friday! ~ Mama Ging
I’ve done this before and I loved it. Need to do it with my sink in the laundry room in this house now. Thanks for the refresher!
Thanks for stopping by, Kathy!
Perty! As for the Velcro, from one who also learned the hard way, there is sewing Velcro available. I found it in the notions dept. at JoAnn Fabrics. Mix & Match; regular stick Velcro like you used on the sink (now I reallllyy want to put one on my utility sink) and the non-sticky velcro for your fabric and no broken needles!! My sewing machine was so happy. It also got the area under the presser foot (technical terms, huh?) all gunky. Some of us learn the hard way. 🙂
Janet
Oh wow, Janet! Such a great tip … and I wish I’d known before I tried to sew some sticky velcro. Ha! I never even thought about my needle or presser foot getting sticky. But they definitely did. Great to know about the sewing velcro. Thanks for taking the time to let us all know!
This made your sink look so much better! You did a great job! If you like to link up come over to Craft Frenzy Friday! It goes live Thursdays at 7:00 PM Central! I hope to see you there!
Thanks so much, Cara! I’ll be sure to check out your party!
That fabric is AMAZING! Good eye, girl. And way to be resourceful and just DIY your own pillows AND sink skirt out of that tablecloth. Yeah, $50 for two pillows is cray cray. Laura for the win!
Thanks girl! I hope you have a great weekend!
Looks very nice, love the fabric/tablecloth. I have a double laundry sink that I put a skirt on once upon a time. It needs to be redone because a) I don’t like the fabric anymore and b)it’s falling off the sink!! Thanks for the inspiration!
Tania
Hi Tania, thanks so much! And there’s always something to redo at the house. I’m sure I’ll redo the sink skirt even at some point. 🙂
That looks great! Thanks for sharing this tutorial. I really need to do this for ours.
Thanks Megan!! So glad you stopped by! I hope you have a great week!!
This made me chuckle ( In a good way! ) We have a disgusting utility sink in our laundry room, and I never thought of prettying it up! Gives me something else to dream about 🙂
Cheers!
Well, now you can pretty it up! 🙂 It’s such an easy DIY and makes a big impact!
This is adorable! Sharing on my FB page this week 😉
Hugs,
Jamie
Thanks girl for the sharing love!!
Supter cute. Great way to hide a not-so-pretty sink.
Thanks so much, Kathy!