The Best Grout Refresh with Grout Paint
Give your bathroom or laundry room a grout refresh! Make your grout joints look like new with this easy-to-use grout paint. No more grungy, stained grout lines! Yay!
The title of this post could also be: “How to make grout gray again” or “How to make grout beige again.” Just know that if you want dark grout, you can have that too! Whatever color your grout may be, the good news is that there’s a way to take it back to where it all started! Yay.
And boy does it make a difference!
I’ve had a bottle of grout paint for years. I was supposed to use it in our laundry room, because … gross! It’s so discolored and stained in there.
But that’s kind of how my DIY projects go. I’ll buy a tool or supply to finish a project and instead of doing said project, I’ll keep it tucked away somewhere until one day I’ll get a wild hair and just go for it. Happens all the time. (Please tell me I’m not alone. Ha!)
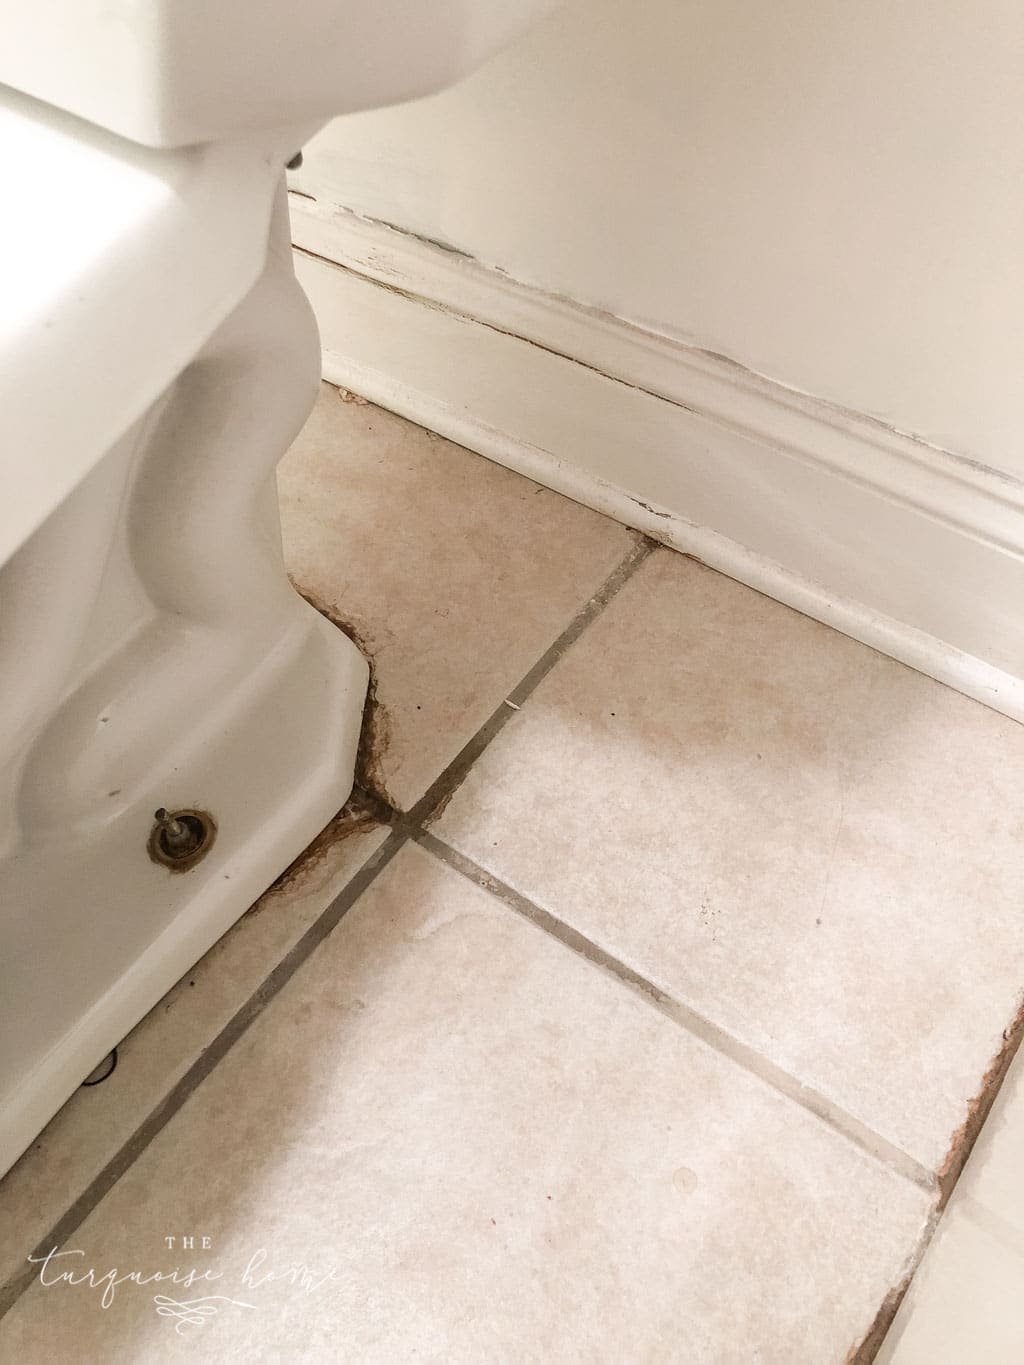
So when it came time to put the peel & stick vinyl floor tiles on in the bathroom, I realized that I would never be happy with them unless I did something about the discolored and stained grout. It wasn’t too bad in the room with the sink, but around the toilet there were terrible stains that were there when we bought the house.
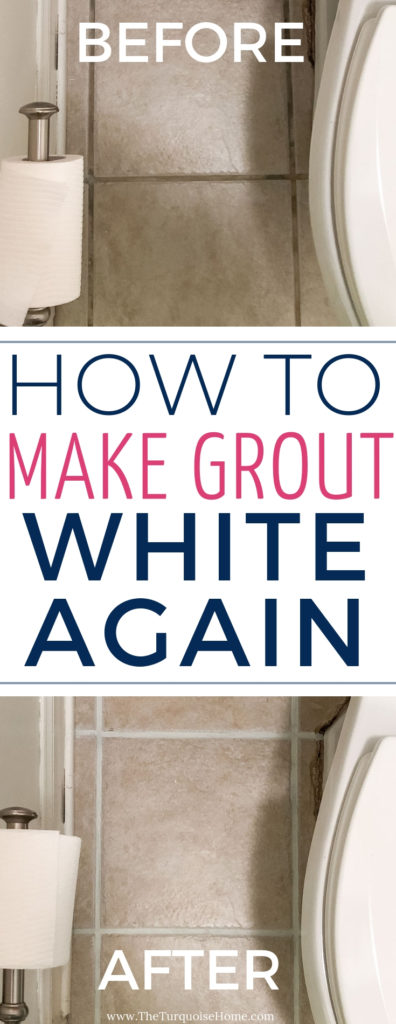
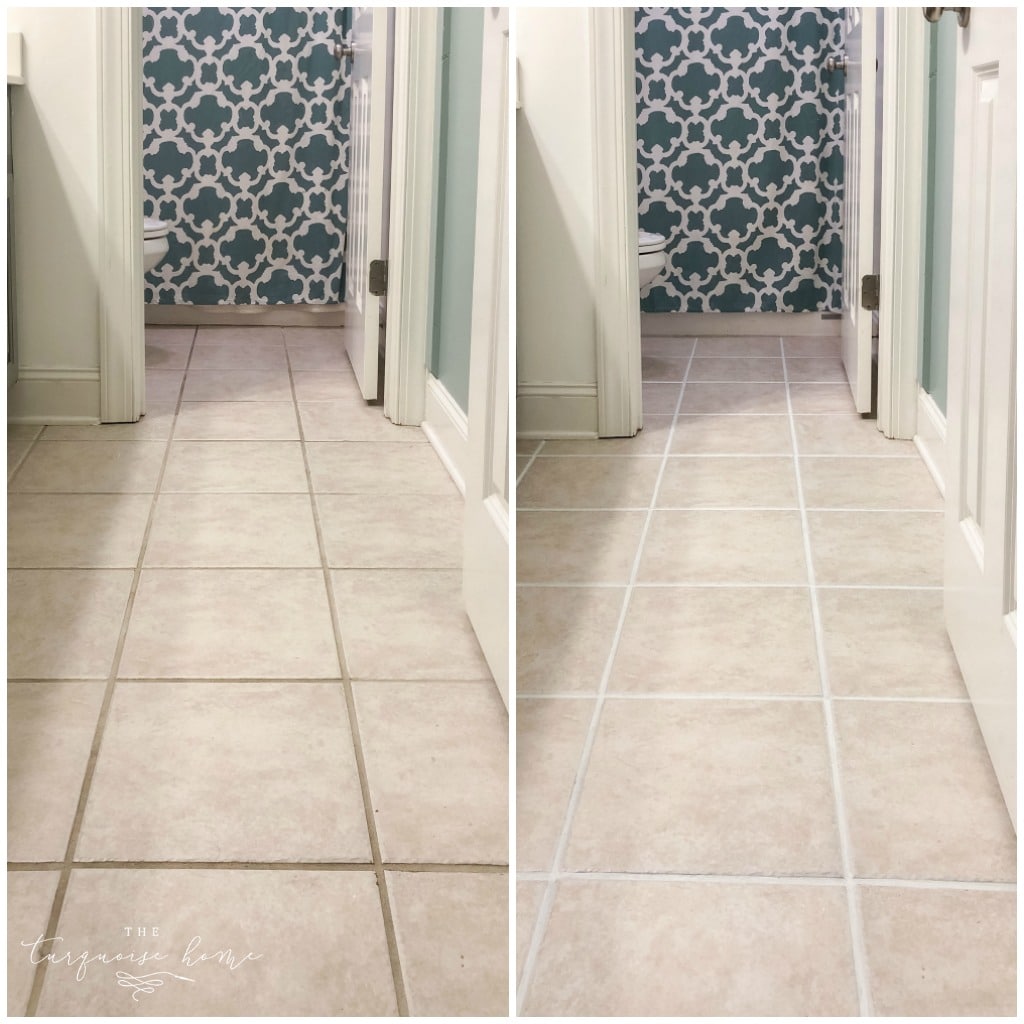
This is how they looked before the white grout paint.
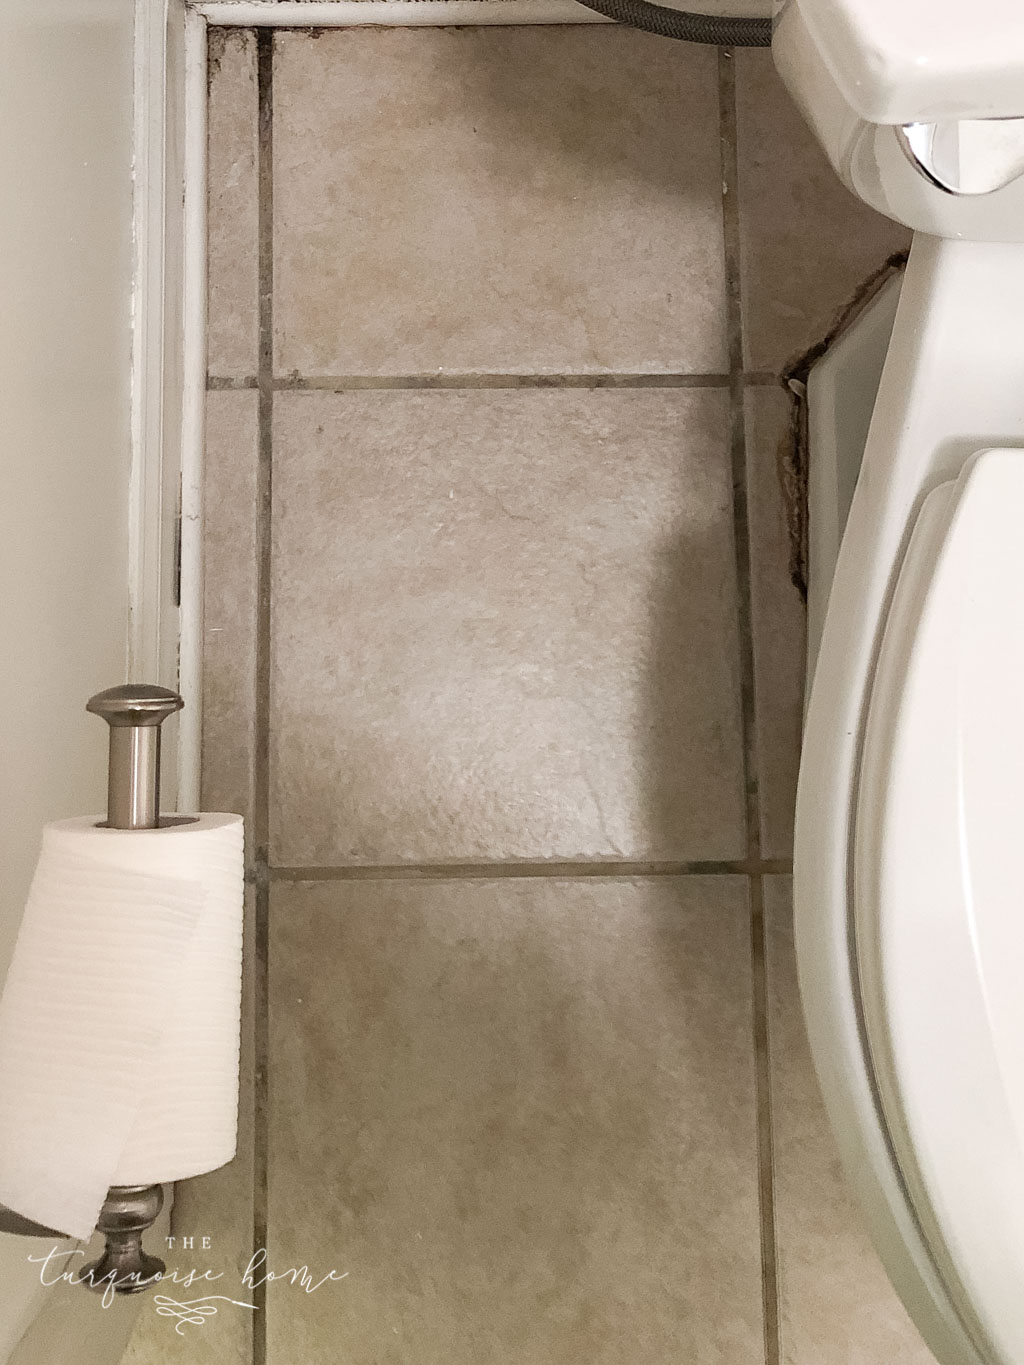
So gross. And trust me, I’ve scrubbed them clean and they just won’t budge.
It was a pretty painless process, except for my old lady knees having to be on the tile while I painted. Other than achy knees, it was an easy and quick process.
This post contains affiliate links for your convenience. See my full disclosure policy.
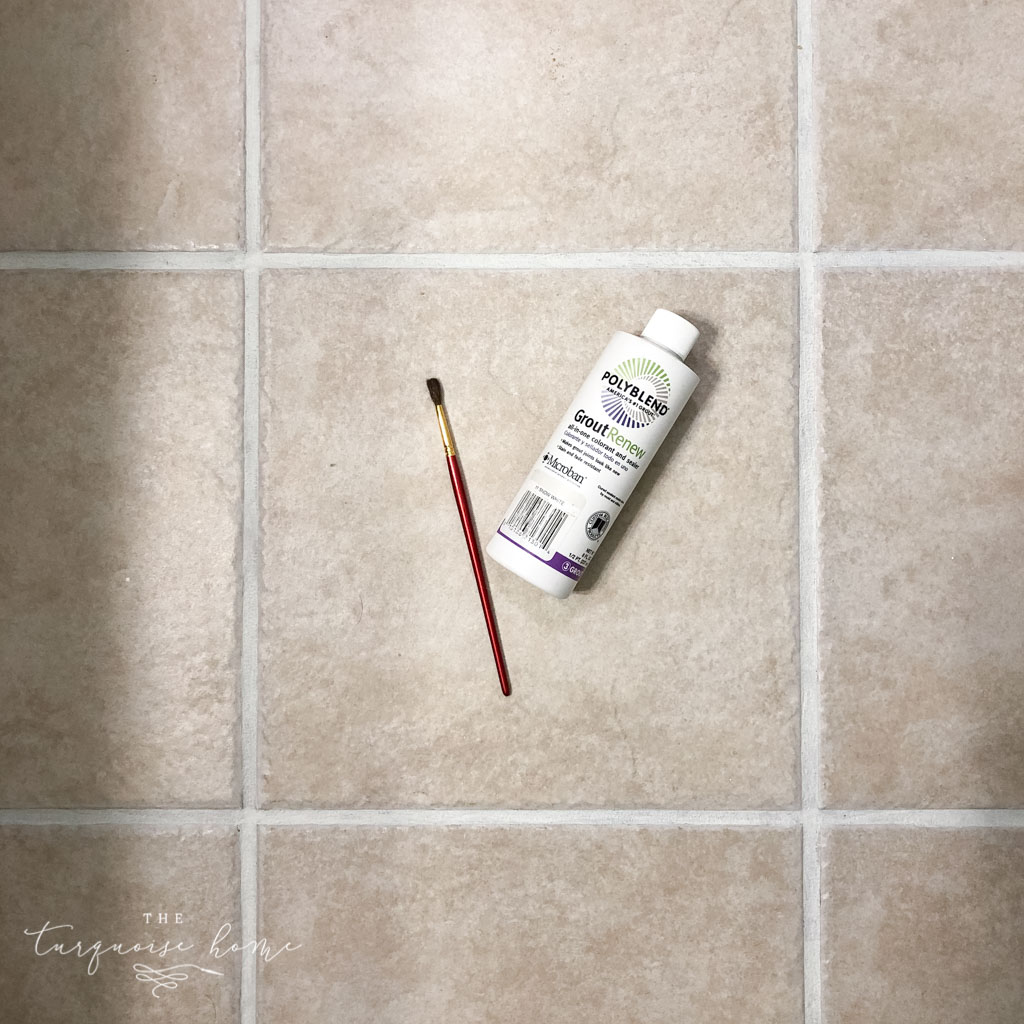
Supplies You’ll Need to Paint Your Grout
1. Polyblend Grout Renew – in the color of your choice. I used Snow White. They also have a paint pen, now!
2. Small craft paintbrush or toothbrush. The instructions called for a toothbrush to apply the grout paint, but I decided a craft brush would be more precise.
3. Rag or tissue – for wiping paint off the tile
4. Krud Kutter or other degreasing cleaner
Steps to Make your Grout White Again
1. Clean Your Grout.
You want to scrub your grout clean before applying the grout renew. I used Krud Kutter and let it sit on the grout for a while, then wiped it up with a rag. If your grout is super dirty, you may want to use an old toothbrush to scrub it while cleaning it.
Let it dry completely before applying the grout paint.

2. Apply the Grout Paint
Apply the paint or grout stain with a small craft brush or toothbrush. I chose the craft brush route because I wanted to be precise and not spend as much time cleaning paint off the tiles. (Although my new vinyl tile stickers will go right over them, so it probably didn’t really matter. I’m just a perfectionist like that.)
Essentially, you need a stiff bristle brush to apply the paint precisely.
I chose the “Snow White” color because it wasn’t a stark bright white, but still looks white next to my tiles.
3. Wipe Any Excess Paint off the Tiles.
I used a piece of toilet paper to wipe the paint off the tile pretty quickly. I worked in small sections on the bathroom floor and wiped the tiles off before moving on to the next section. Small sections = one tile at a time.
4. Let it dry.
The bottle says to let it dry for 24 hours before using the room and 72 hours before you get it wet. So I kept the door closed and locked for a few days and we just used the primary bathroom for a little bit. I could easily unlock it if people needed it, but it kept us from using it unnecessarily for a few days.

It was a super easy and quick process!
It took me a couple of hours to do my small bathroom. So, if you have a larger area it would take longer. But it’s something you could work on a little bit each day and come back to it.
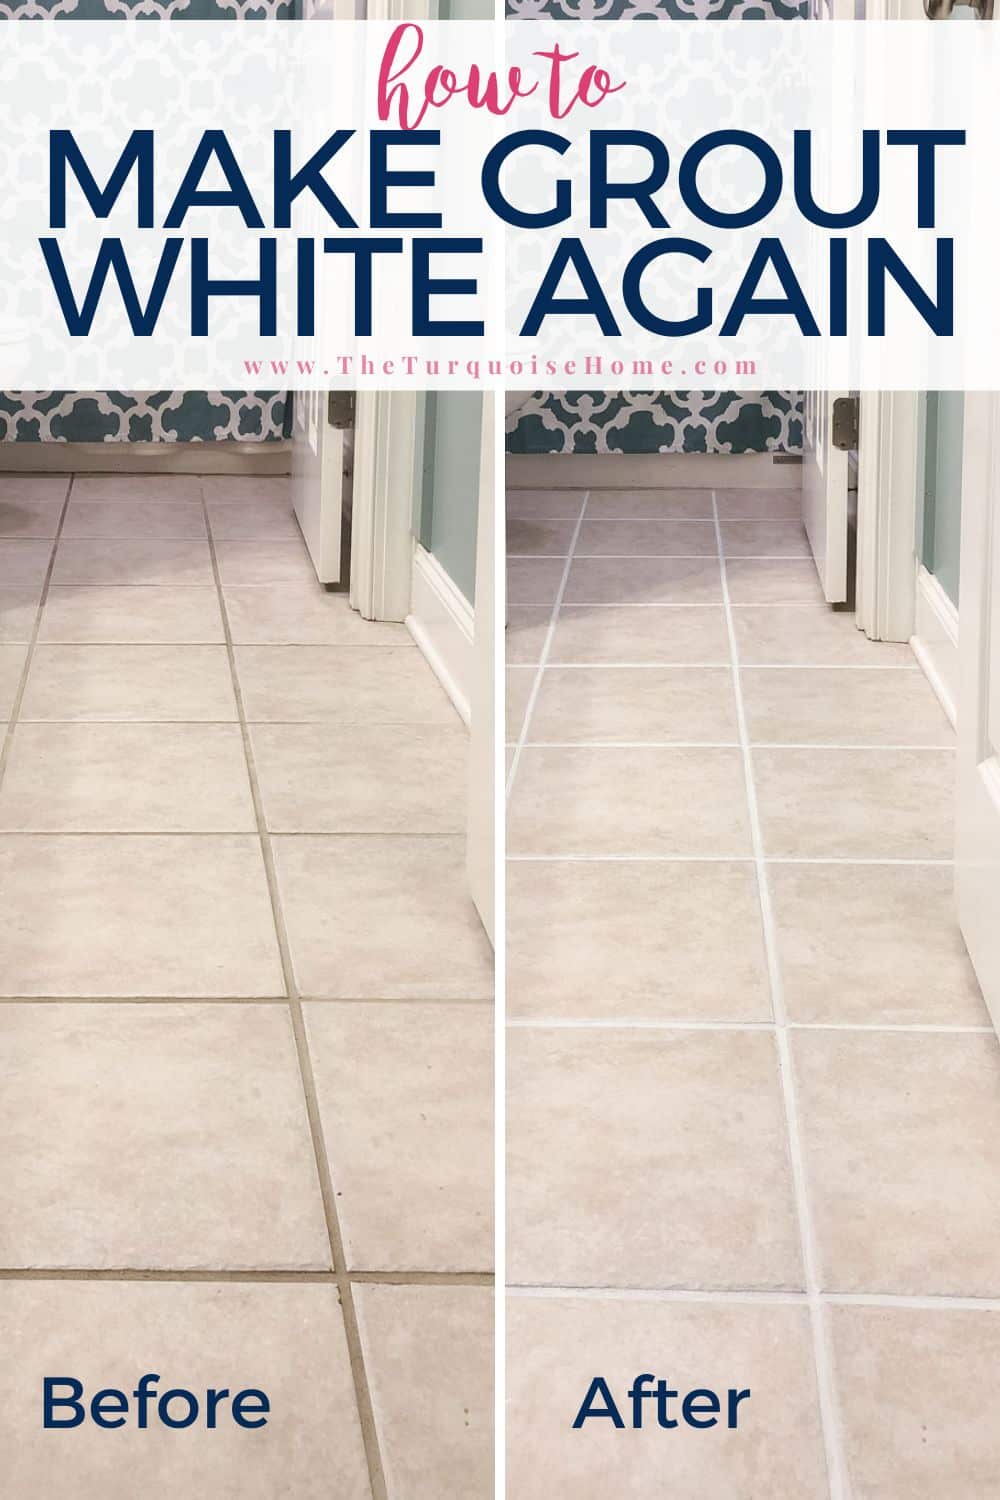
This is how it looked before and after. What a transformation, right? I’m going to tackle my laundry room next becauseit’s so bad!
Now it’s time for me to lay the peel & stick vinyl tile in the bathroom and I’m so excited to see that transformation! Click here to see my whole vision board for the girls’ bathroom refresh.
It’s coming along and I just have a couple of things left before I’m done!
More Posts You Will Love:
Hi, it looks great. I was wondering how it is holding up? Is the paint chipping? Please let me know. Thanks! Lisa
Hi Lisa! We’ve since moved from that house, but it held up perfectly for over a year. I think it would last a very long time! xo, Laura
Thanks for sharing this! I am not crazy about the tile in my bathrooms, but changing the grout could make a huge difference! I also like the peel-n-stick ideas for my laundry room that has icky vinyl.
Traci
I think I’m going to do this in my laundry room as well. If you want to get the grout clean though, there is a product called Folex that works wonders!! I use that and some magic erasers or just regular rags to clean my grout and it’s AMAZING. Even the really bad stuff should come off without much scrubbing. Folex also works for laundry and anything, really. It’s original use was for carpet stains. Anyway… thank you for opening my eyes. I’ll try this in my laundry room first and then go from there 😊
Thanks Laura for the info and tutorial. Looks good.
Can you apply sealer over the paint to make it last longer?
I’m sure you can!! It’s supposed to be a sealer in and of itself, but I’m sure an extra coat of sealer wouldn’t hurt it.
it looks different but I am not sure the original grout was white. I think it was beige.
You’re right… the original grout was a beige color. But I decided to do white because the new peel & stick tiles going on top are white and gray!
And if you had white grout, you could use this product. Or any other color they have, because they have a ton of colors to use! 🙂
Looks so good! I don’t have tiles on the floor but when I did my bathroom I put in coloured grout.My daughter did a fixer-upper a year or so back so we again put coloured grout which is much better when you are renting out houses. We are about to embark on another renovation so coloured grout for us!!
How often do you have to do it?
I applied it once to get this look! I’m not sure if you mean how often to keep it looking good? I think just once because it also seals the grout making it easy to wipe clean! xo, Laura
I love Grout Renew. I did my three bathrooms and laundry room. My mom wanted her kitchen done, so I did that as a Mother’s Day present last year for her. It was a gift of time and knees. 🙂
Yes … the knees part is rough. Definitely a gift! 🙂 I’m sure she loved it!! xo, Laura
Looks so crisp! Good job!
Thanks Jenna!!