Organized Arts & Crafts Storage Ideas
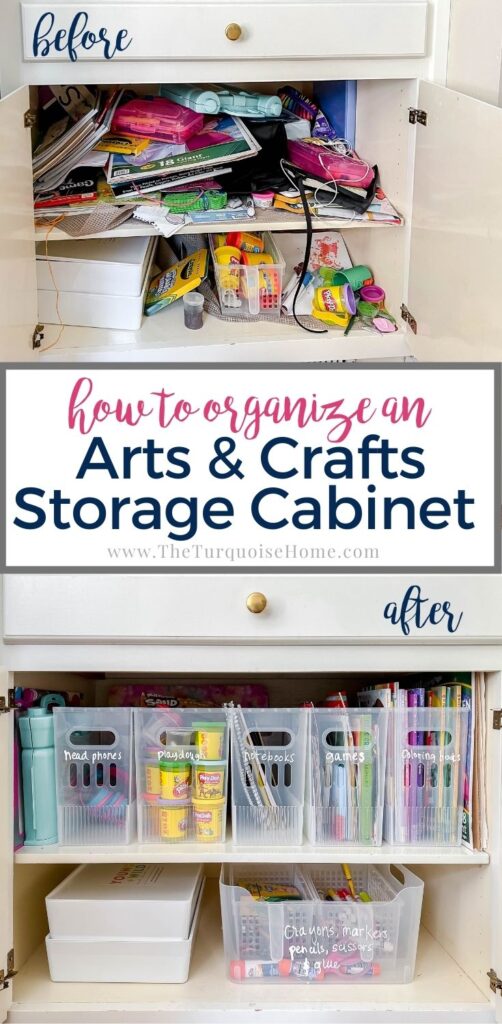
Learn how to organize an arts & crafts storage cabinet in 6 easy steps and less than an hour! And reap the rewards for years to come!
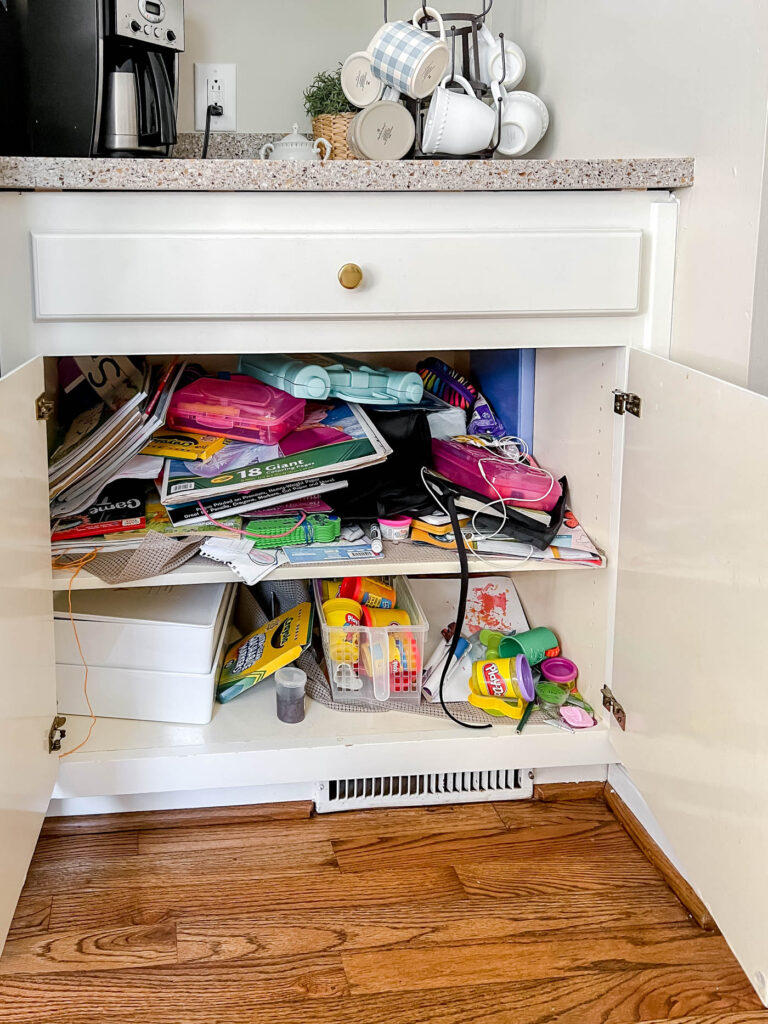
Do you ever have a cabinet that is a mess, but you close the doors and move on? For years??
This is where I was with our kid’s art cabinet in our kitchen. Yes, it might be a weird place for an arts and crafts storage cabinet, but let me back up.
When we moved in, we had more kitchen cabinet space than we knew what to do with. And the girls are always writing letters, drawings and doing craft projects at the kitchen table. So, it made sense to put some basic art supplies in the kitchen.
But after a couple of years, it was a mountain of a mess and I knew I needed to address the problem area. Every time we opened the doors I was afraid it would all come tumbling out!
This post contains affiliate links for your convenience. See my full disclosure policy.
Tips for Organizing Cabinets:
When I’m starting a small organization project, I like to remember a few tips:
1. Keep Categories Simple
I like to have the simplest system possible. We use our cabinet for notebooks, coloring books, games, headphones, play dough, utensils (organized within 1 bin).
I don’t try to get specific, so it can fluctuate with our needs. The categories are not super rigid.
2. Make it easier to return items than get them out!
If it’s easy to put things way, ie: an open box to drop them in, things will be a whole lot more likely to be picked up.
This one simple tip is life-changing, I tell ya!
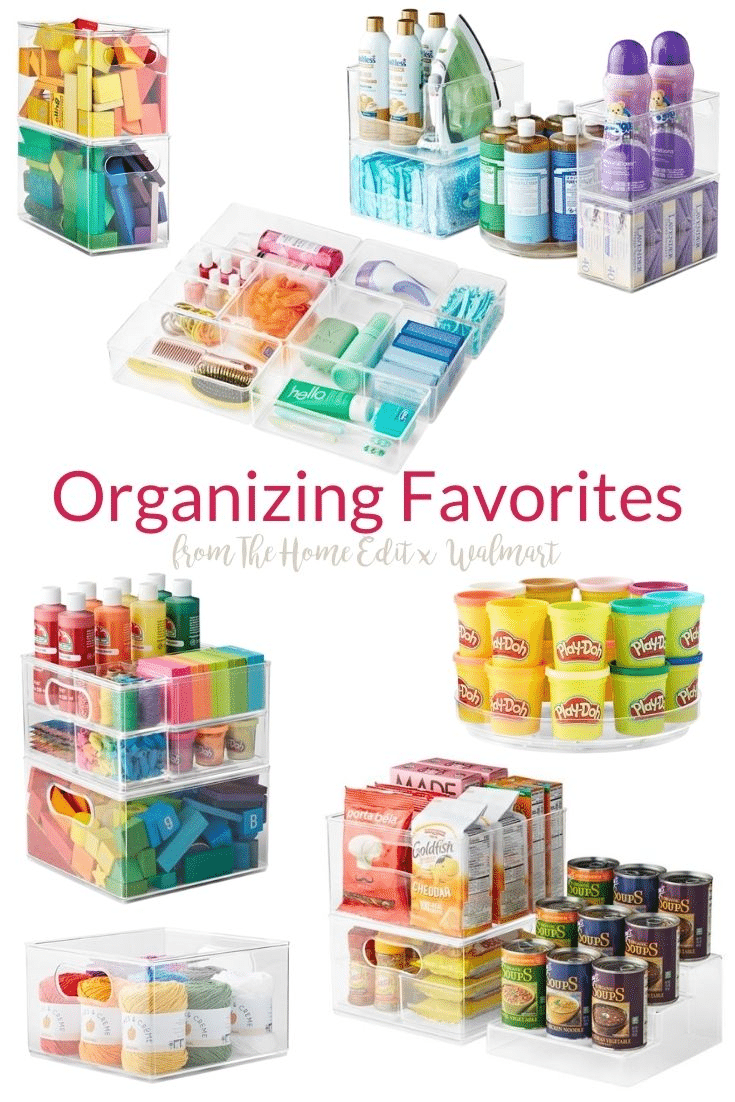
3. Use Clear Bins
When storage is already behind a door, I like to use clear bins. In my pantry that is open almost 24/7, I wanted closed baskets for storage. But in an art cabinet where I’ll only see the contents when I’m looking for art supplies, I’d much rather have clear storage containers to be able to see what’s inside!
Shop Favorite Arts & Craft Organization Pieces:

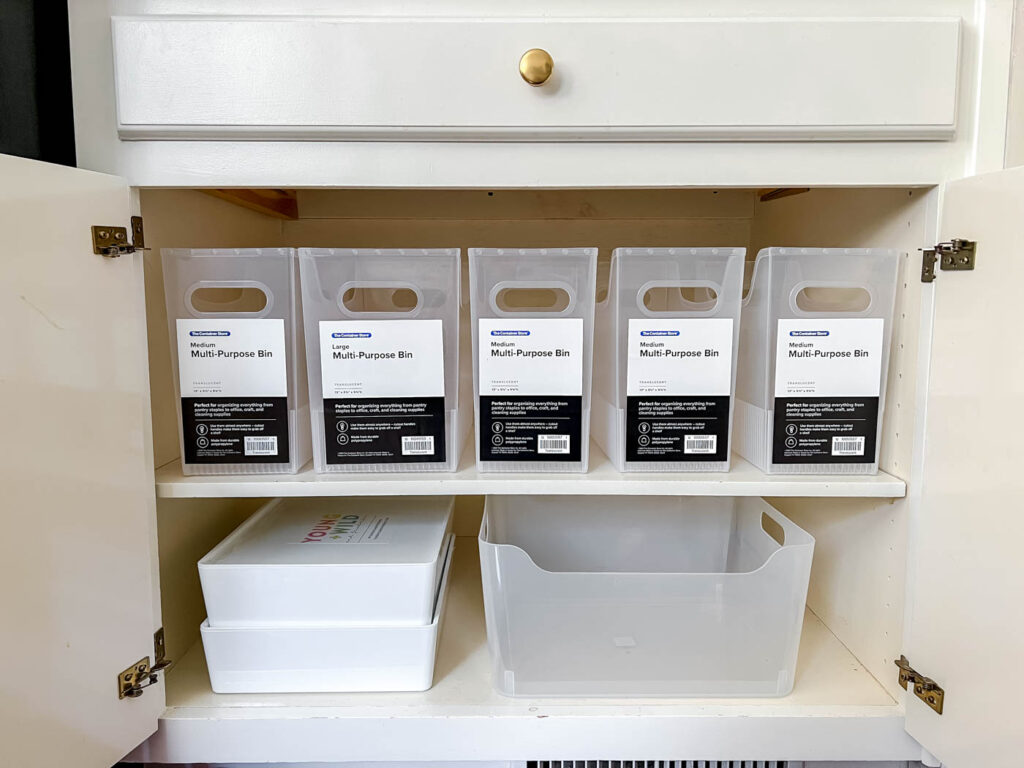
I knew how we used the cabinet. We mostly had books, papers, games, play dough, markers and crayons in there. So, I brainstormed what kind of containers would be best for books/notebooks and corralling markers, pencils, etc.
Always check the measurements of your cabinet before ordering to make sure the bins will fit.
I found these awesome multi-purpose bins with handles that would allow me to stand up the notebooks and still fit in my cabinet. I loved that they had handles – easy to carry to the table and easy to pull out to drop things in them.
And then for the bottom shelf, I found these clear storage bins, also with handles, that were perfect for stacks of paper and our utensils. I had to put the second bin behind the first, but it’ll hold construction paper and plain paper.
It’s so much easier to clean up!
Ready to find peace in your home again?
You can’t decorate a home with clutter. Get started on your decluttering journey with 30 days of encouraging and helpful e-mails to keep you motivated!
Steps for Organizing Any Cabinet
As always, when organizing a space, I like to do these steps:
- pull everything out of the space
- sort into similar piles
- throw trash away
- clean the surfaces of the cabinet
- organize everything into bins
- label!
The whole process took me about 45 minutes and I couldn’t wait to show my daughters when they got home from school. They loved it! (My oldest said it was a crafter’s dream come true. Win for Mom!!)
And already it’s been easier to clean up the kitchen table for dinner now that we have a place for everything and it’s easy to put things away.
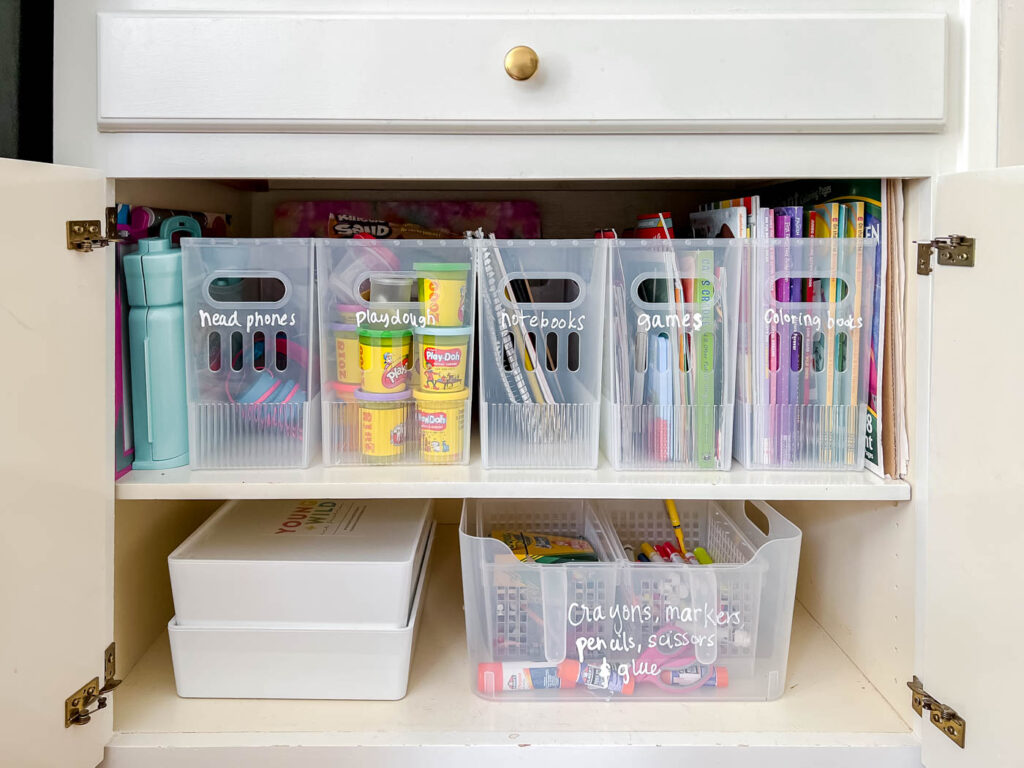
Those two boxes on the bottom left are our sensory kits from Young, Wild & Friedman.
I’m waiting on a new power cord for my label maker, but in the meantime, I wrote on the bins with my chalk marker. I can just wipe it off when I make the labels, but until then it helps everyone in the family know where to put things!
Labels are great for taking the guess work out of cleaning up.
And I know we’re going to keep it organized because every space that I’ve taken the time to truly organize and label, like our pantry and garage, has stayed that way with minimal effort.
I hope these arts and craft storage ideas inspire you to get one space in your home organized! I promise it will make you feel like you accomplished so much and you will reap the rewards for years to come!


Laura, your post on organizing arts and crafts storage is a real game-changer! As a fellow organizer, I can’t stress enough how impactful simple solutions like clear bins and easy-to-use labels can be. They make finding and returning items a breeze and encourage the whole family to keep things tidy. Your approach to keeping categories flexible is innovative, especially in a dynamic space like a kitchen. Seeing how a well-organized space can transform everyday activities into enjoyable experiences is inspiring. Keep up the great work!
Love it! Looks so inviting!
And I ALWAYS forget to take the before photo- so kudos to you on remembering that. 🙂
Well this is awesome Laura, good job. So easy to use.
This looks great! I love a good organization project. This week I finally (after living here almost two years😬) organized the really large but shallow drawer in our bonus room built-ins where I had just dumped my sewing supplies. With spools and bobbins of thread and lots of small tools and notions, it was a jumbled/tangled mess! I did like you said and pulled it all out, got rid of trash, sorted, and used shallow boxes I had been saving from things like jewelry, greeting cards, etc. plus a wooden tray so I could separate and organize. So much better! I should have taken a before photo. Thanks for sharing! I love that you used extra space in your kitchen for those things since it’s close to where your girls use them! Thanks for sharing!