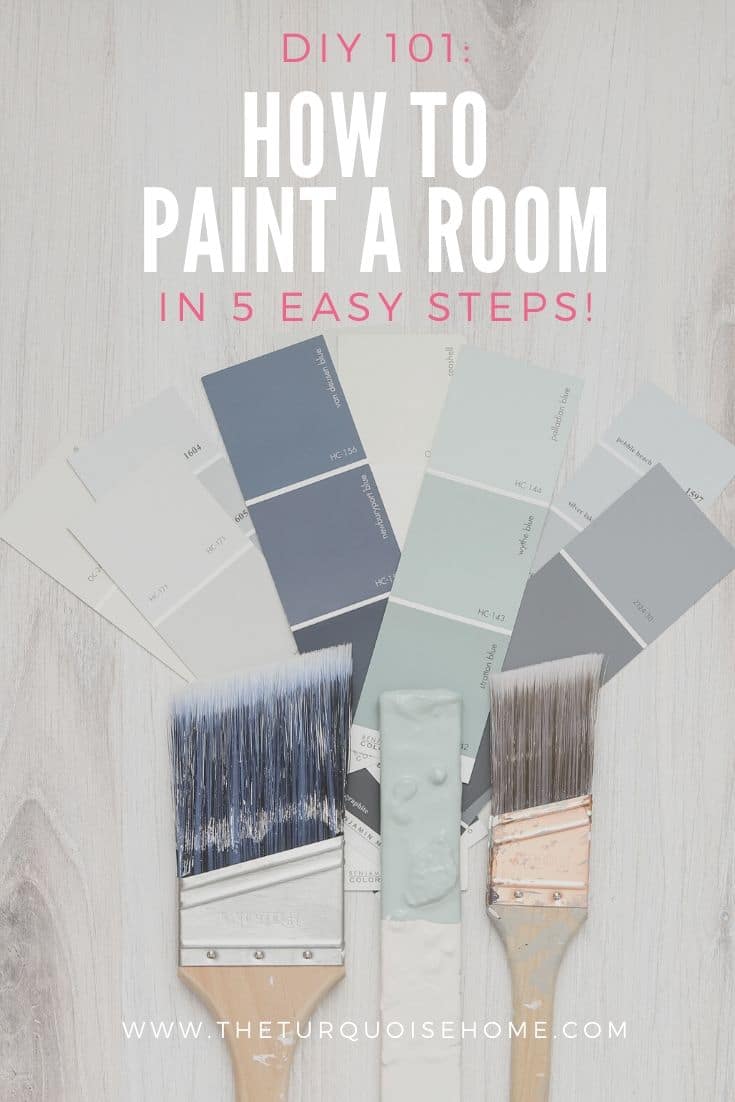
Paint a Room Like a Pro in 5 Easy Steps
You can learn how to transform your space with a $40 gallon of paint and these easy steps!
Some people might think I’m crazy that I love painting a room, but I love the transformation that comes at the bottom of a paint can. Sure, you can paint furniture or a small craft project, but painting a room with a $40 can of paint makes a huge impact.
I recently painted my office/guest bedroom. It was the last builder beige room in the house. After 4 years of trying to work in a room with flat beige paint, it was high time that I painted it a color that I loved.
So, I did something I’ve never done before.
Yep, my very first white room (and it won’t be my last). I LOVE it. I chose white for a variety of reasons, one of which is that when I need to take photos of small projects for the blog, I’ll have a white backdrop built in.
RELATED: How to Create a Whole House Color Palette
I also painted my kitchen recently, which has led to several conversations about painting rooms yourself vs. hiring it out. I’ve done both, but mostly painted rooms myself. I prefer to do the painting, because I find that some professionals that I’ve hired aren’t nearly as precise or careful as I am.
Before you start painting a room, you need to choose your paint color. This can be a daunting task, so I highly suggest you take my advice in this post about How to Choose the Right Paint Color without Regrets.
Every time I follow my own advice, I love the color. When I am impatient and don’t go through the proper steps, I always, always, always regret it and end up disliking it until I can re-paint.
Affiliate links are provided for your convenience. Please see my full disclosure policy here.
PRO Tip
Any time you are choosing a new paint color, you need to try out the real paint color in your home first!
The easiest and quickest way to do that is with Samplize! I solely use them for paint samples now. There’s no mess, no leftover sample pots of paint. Plus, these no-mess, peel-and-stick rectangles made from real paint, are easy to move around the room and easy to save for future reference!
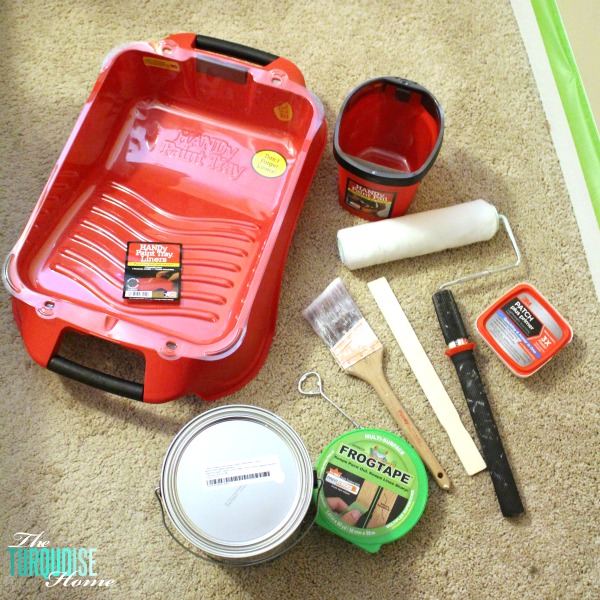
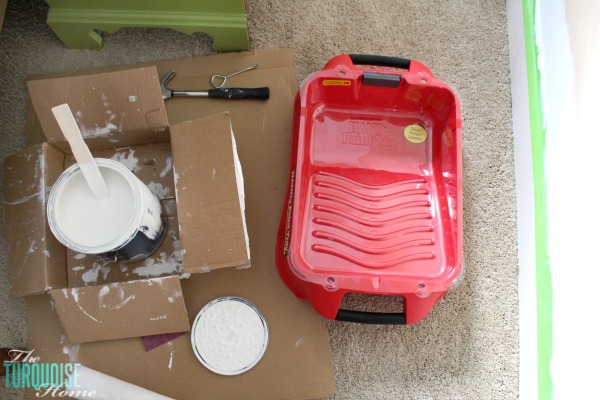
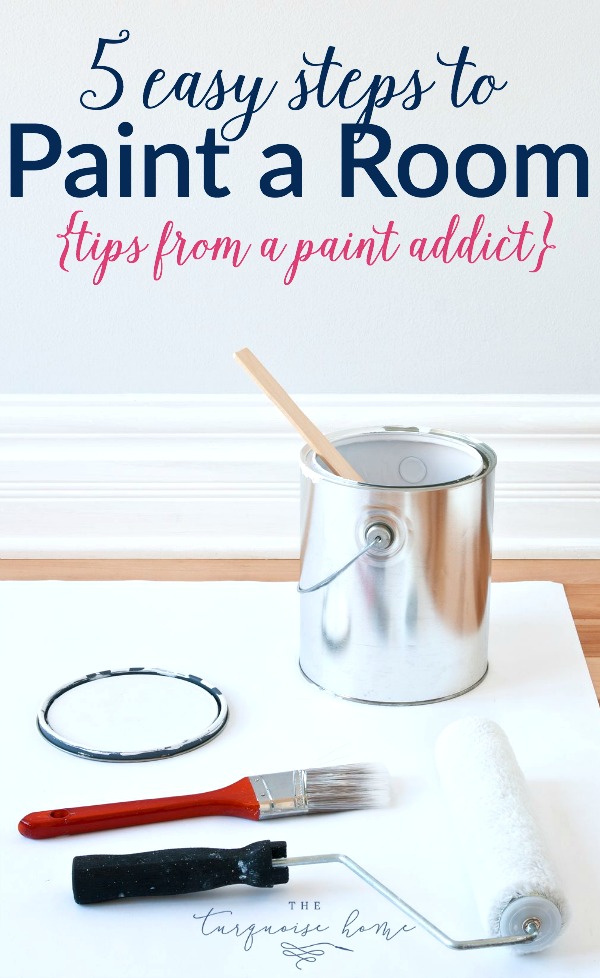
Tools you Need for Painting a Room
- Paint – just making sure you’re paying attention. 😜
- Roller Covers
- Extendable roller frame – These are fabulous even for painting an 8-foot room, because they easily extend to reach the top of the wall without having to reach up high with your arm or stand on your tip-toes.
- Purdy Paint brush – Some people get super fancy with all kinds of trimming gadgets, but I LOVE these angled brushes for “cutting” in a room (painting the wall where it meets the trim).
- HANDy paint pail – I LOVE this paint pail because it easily fits on my hand and it has a magnetic brush holder inside the pail that will hold your paint brush for you. You won’t believe how many times you’ll use that paint brush holder! (Don’t forget the liners for easy clean up.)
- HANDy roller tray – I’ve used the same old rusty paint tray for years, because a paint tray is a paint tray, right? Well, this product beats out the old, standard tray by far. The wide, sturdy base eased my fears about knocking it over. And the base is plenty deep for lots of paint, which means less trips back to the paint can to refill. This one uses liners, too. For super easy clean-up, just throw them away, but you can wash and re-use them, too if you want to save a little money.
- Press’n Seal food wrap or regular plastic food wrap – for wrapping your tools when not in use
- Frog Tape – it seals the edge better than any other painter’s tape I’ve used.
- Spackling – This one is my favorite, because it’s patch and primer in one.
Steps for Painting a Room
Step 1 – Prep
You can’t just pick out a color and start slapping paint on the walls. You need to prep your room and your walls first. You’ll want to wipe down the walls and baseboards. I just use a damp rag for the baseboards and a dusting mitt or Swiffer cloth for the walls. Scrub off any thing sticky on the walls, too.
Then gather your supplies, of course.
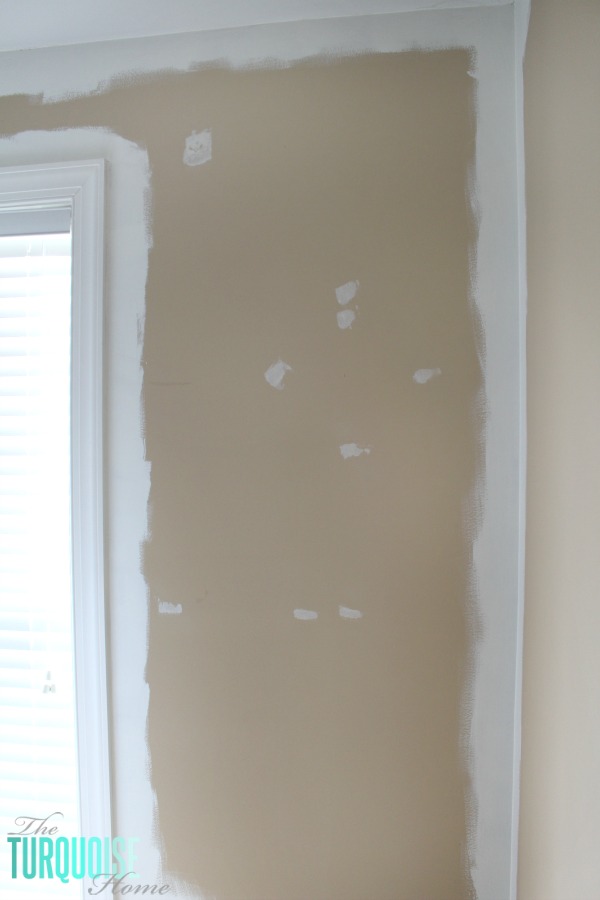
Step 2 – Patch Any Holes
I also patch any nail holes that are left in the walls that I’m not going to reuse. If I’m just going to hang a piece of art back up, I don’t bother patching it, but otherwise it gets patched with spackling. I love this stuff. I use a small speckling knife to apply it to the walls. But sometimes just my finger will do in a pinch.
Tip: If I am painting over flat paint, then I don’t sand the walls. But if I am painting over any other type of finish, then I lightly sand the walls with a medium grit sand paper. After I sand the walls, I will wipe down the walls and base boards with a damp cloth.
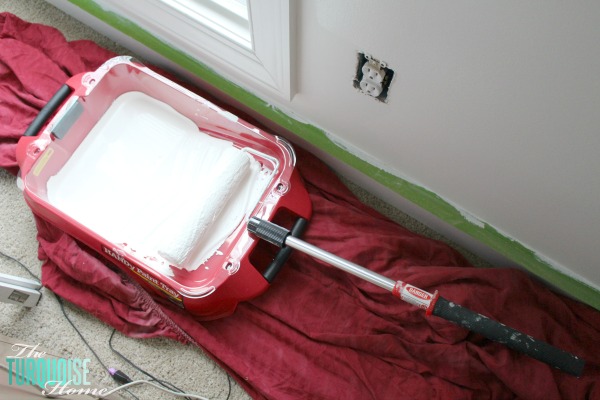
Step 3 – Tape the Baseboards
I just use my frog tape on the baseboards around the room. I find that this helps protect the baseboards and flooring if any paint happens to run down the walls, or if the roller splatters paint at all.
Find out in the next step why I don’t tape the window frames, door frames or ceiling.
Step 4 – Trim or Cut In the Room
I don’t tape the door or window frames or ceiling, because I use an angled brush and I cut in the edge of the walls.
It takes a little bit of patience and a steady hand, but I find that this method works better for me than taping and painting sloppily along the wall. It also saves a lot of time and you don’t need any fancy tools, methods or equipment.
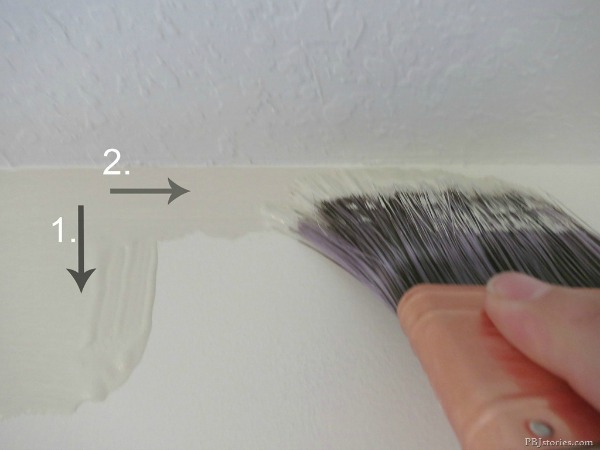
I found this fabulous tutorial for cutting in a room at PB&J Stories. It’s exactly how I do it. Start with a down stroke in the corner, and then keeping the brush horizontal, drag the brush along the ceiling edge.
Paint Like a Pro Tip: If you find that you need to take a break from painting while you’re in the middle of working, let’s say your kid needs to eat lunch or something like that, then cover your HANDy paint pail with the Press’n Seal food wrap, and wrap your wet paint brush with some regular plastic food wrap and set them aside until you come back.
If you’re going to be gone for several hours, then stick your paint brush in the fridge. If you’ll be gone for a day, then stick it in the freezer.
Step 5 – Roll the Wall
You’ll want to roll the wall using different angles, roll to the right and roll to the left, to make sure to get a nice even coverage. When you dip your roller in the paint, use the part of the tray that’s textured to roll the excess off.
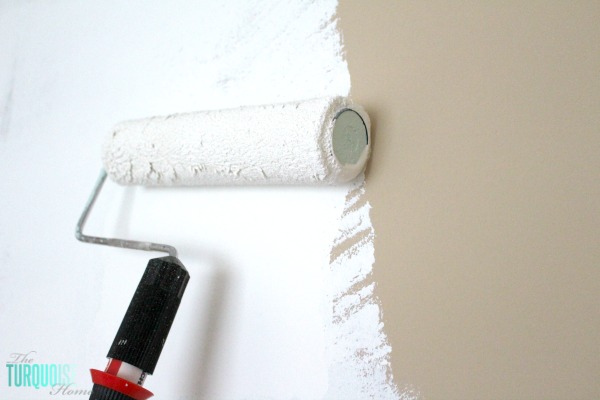
You want the roller to be loaded with paint, but not dripping. As you paint, be sure to notice that the coverage is even and that you’re not leaving drip marks behind. Roll lightly over drip marks to smooth them out.
Repeat steps 4 and 5, as needed
Some walls may only need 1 coat of paint, but I find that I usually need 2 coats to get a good coverage, and sometimes 3. It has everything to do with the quality of paint, the color you’re painting and the color that you’re painting over.
Darker colors like browns, reds and blacks will need more coats to get an even coverage, especially if you are painting a lighter color over them. I would suggest if you are painting over a really dark color with a lighter color, to paint it first with a tinted primer.

In my experience, though, I buy the nicer quality paint plus primer and can cover most rooms with most colors in 2 coats.
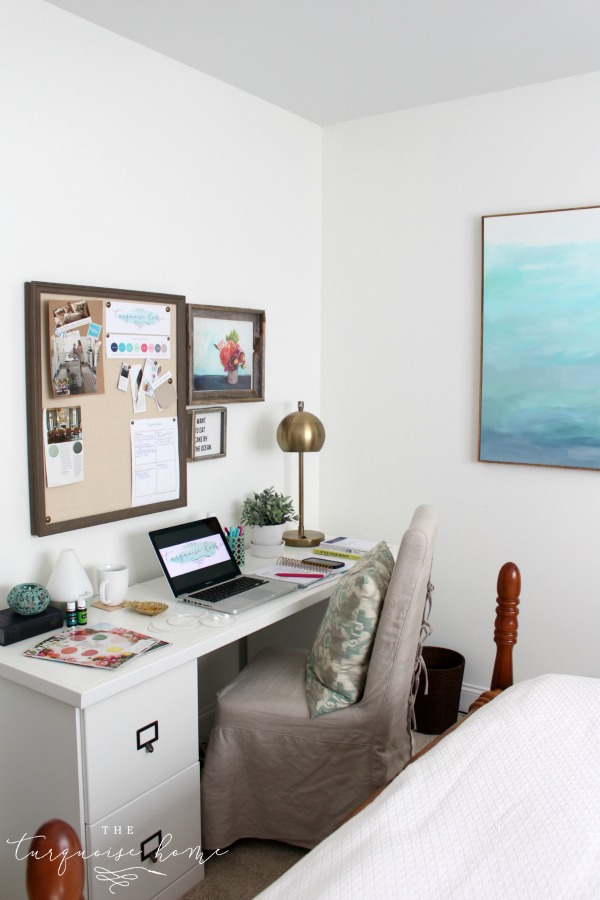
Bonus: You all get a sneak peek at my new office corner!
Yay! You’re done! And you now have a beautiful room to sit back and admire.
If I’m able to work straight through, I can finish a regular-sized room in a day. That means a 12×12 with 1-2 doors and 1 window. If there are a lot of doors or windows and the room is larger, it’ll take me 2 days.
If my kids need me to keep them alive and feed them, change their clothes and keep their bottoms clean, then it’s taken me as long as a week before. So, it just depends on what you have going on.
Do you paint your own rooms or hire it out??
Which room is first on your list to paint?
For an even more custom look, try painting your outlet covers, too!


Hi Laura, I saved all of your links to your favorite products for painting, thanks! Question: when you cut in around the windows and doors, do you do it all at once and then paint the walls, or do you cut in one section at a time and paint walls right away? If the paint dries, does it show? I was afraid to paint myself but my budget and your tips are encouraging me to try!
Hi Laura! I do all of the trimming work around the edges, windows and doors, and THEN I paint the walls with the roller. It doesn’t show once you put on two coats! It’s definitely less noticeable to do trim first and then walls vs. the opposite. You’ve got this!
Hi Laura,
Thanks so much for your reply! I’m glad to hear the cutting in can be done first. Thanks again for suggesting all the right products to get good results. There is a dizzying array in the paint stores so your amazon links are really helpful. I’ll let you know how it goes!
Thanks for making it looks so easy. I will surely follow your tips! I will be painting my room tomorrow.
Some good tips here thanks. I’m just about to tackle my halls, stairs and landing which is a big paint job. I like the idea of the angled paint brushes.
Paint jobs are not hired out, I try to enlist my children. The 1st area to paint on my paint list is the back entryway and my long narrow hallway. I have a lot going on this year, I hope I can get to that. By the way, I love the white walls. It is fresh and clean. Nice. Thank you for the cutting in tip and link. Painting tape costs a ton if you do the whole house……I’ve taped all the edges before. It’s a lot of work too.
We paint our own rooms, but we have decided to hire out for the living room because it has vaulted ceilings unless you have any tips for doing that other than climbing up a very tall ladder. Neither one of us is young enough to recover from a fall any longer.