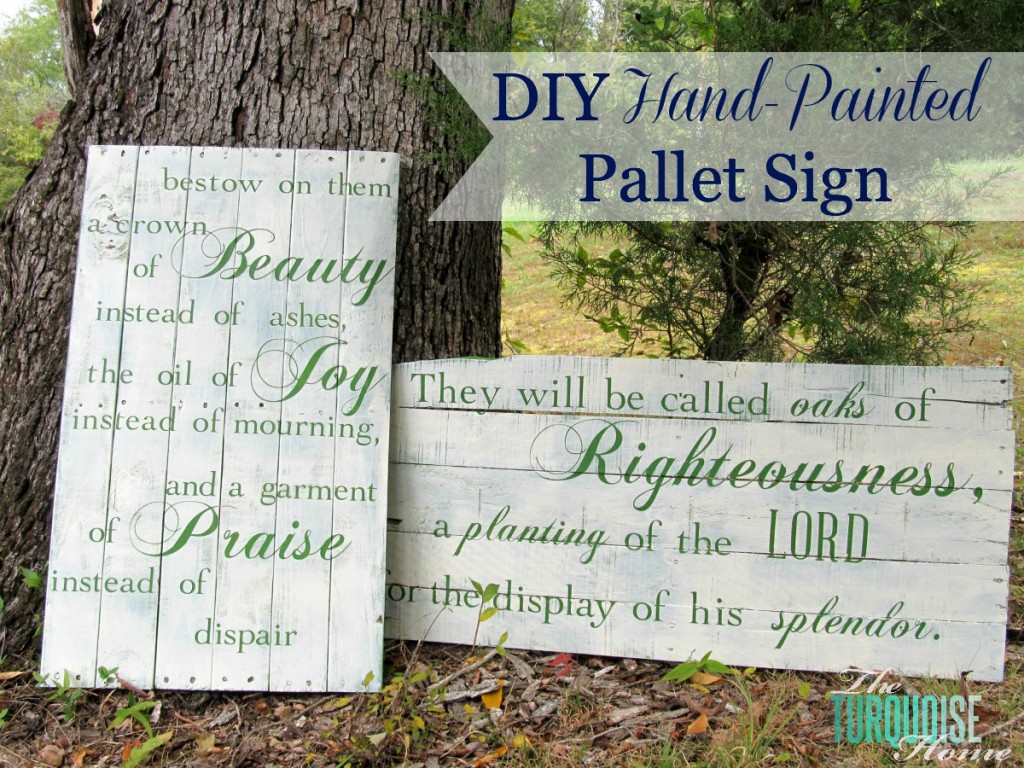
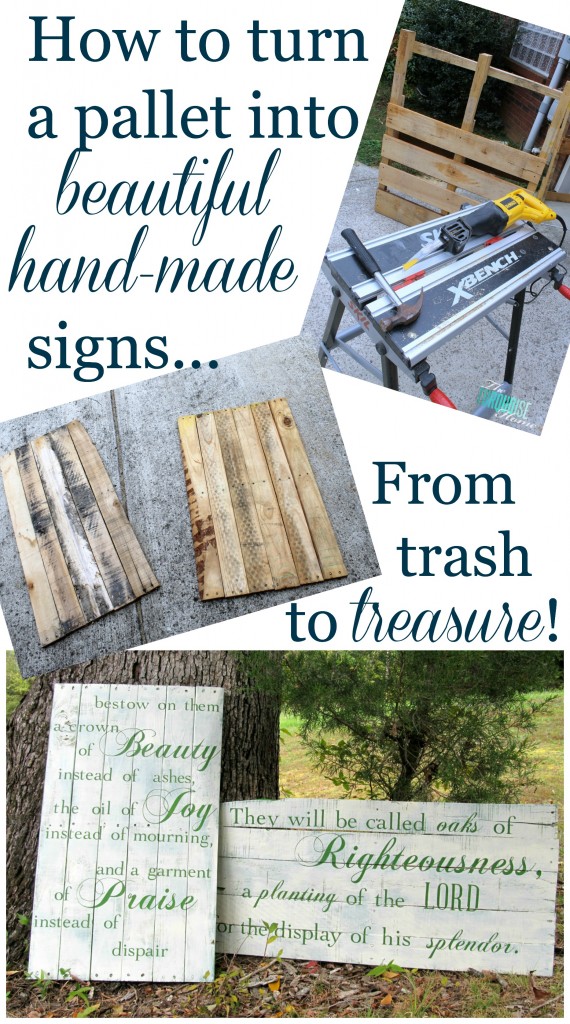
DIY Hand-Painted Pallet Signs
These DIY pallet signs make a beautiful gift that is sure to be loved for years to come! Or you can create one for yourself and enjoy the hand-crafted goodness in your own home.
I know I’ve been promising to share the gift I made for my friends’ wedding last weekend, and didn’t want to make you wait any longer! My friend, Lara, asked me a couple of months before her wedding if I would make some signs with special Scriptures on them for her wedding.
She also wanted to be able to hang them in her home. Isn’t that such a great idea? I love being able to use something for an event and then continue to enjoy it after the party is over. And the idea of giving a hand-made gift sounded perfect!
This post contains affiliate links for your convenience. See my full disclosure policy here.
Materials Needed to Make DIY Pallet Signs
- wood planks from a pallet or the hardware store
- Kreg Jig (A must have tool for any serious DIYer!)
- Contact paper
- Silhouette Cameo or stencils (I love my Cameo for creating custom stencils.)
- Painter’s tape or Transfer Paper
- Mod Podge
- Foam paint brush
- Paint
How to Make a DIY Pallet Sign
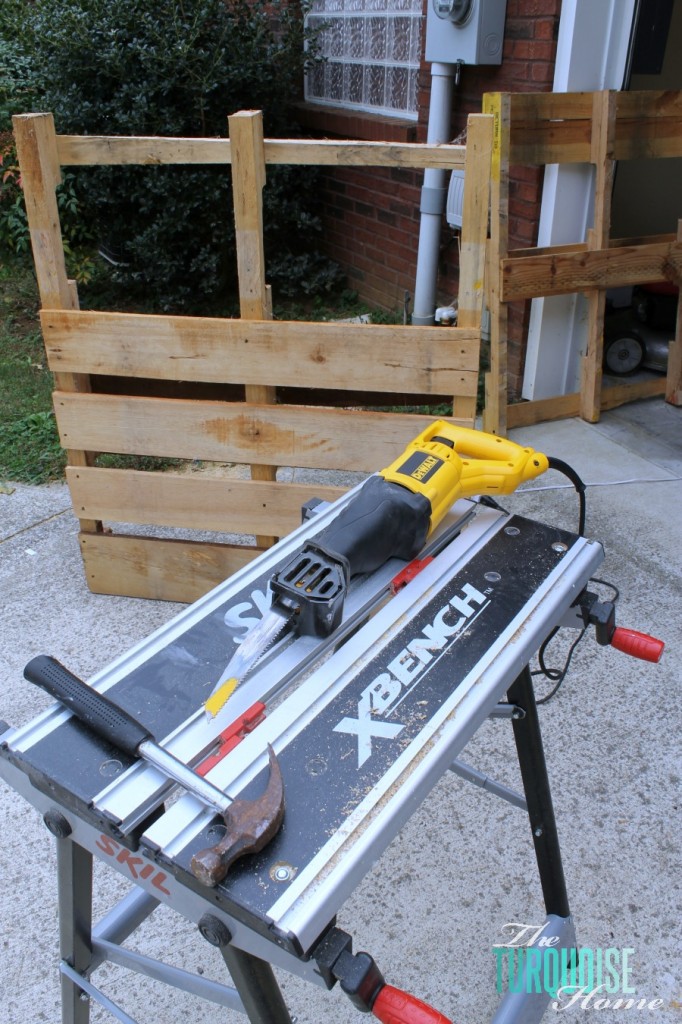
1. Remove Pallet Boards
First, I removed my boards from my pallet. I use my DEWALT Reciprocating Saw with a demolition blade for cutting through wood and nails. A sharp, new blade will cut through the pallet joints very easily. Sometimes I knock the boards loose with a hammer first and then cut through them with the saw.
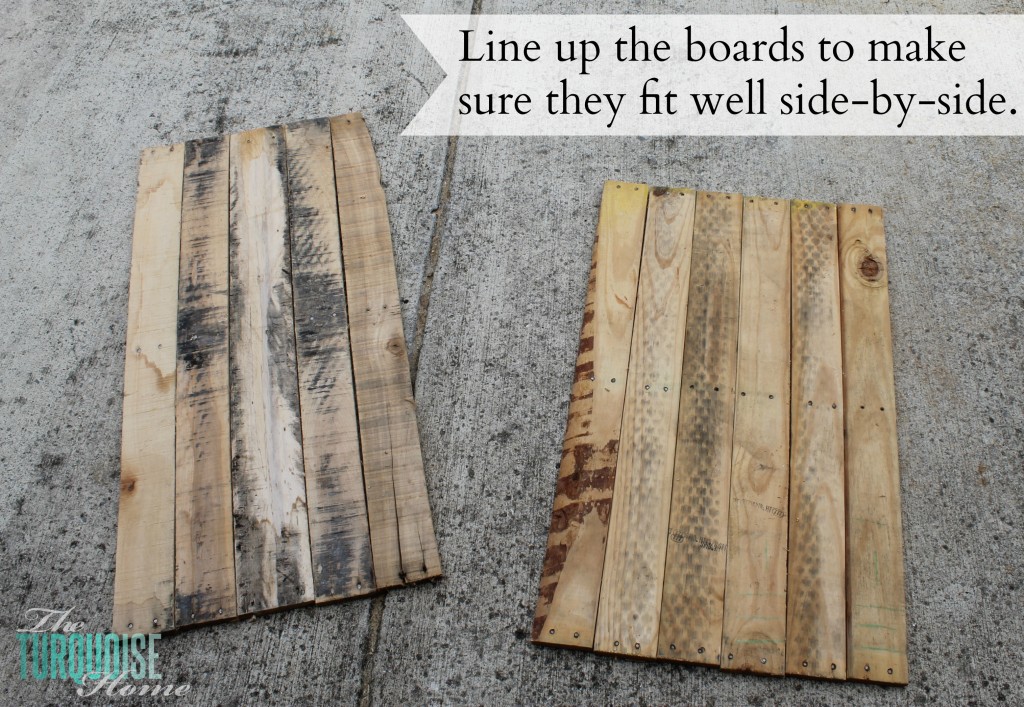
2. Arrange Board Placement
Once I cut off enough boards, I laid them side-by-side on the ground to make sure they fit well together. I had to rearrange them a few times to make them work.
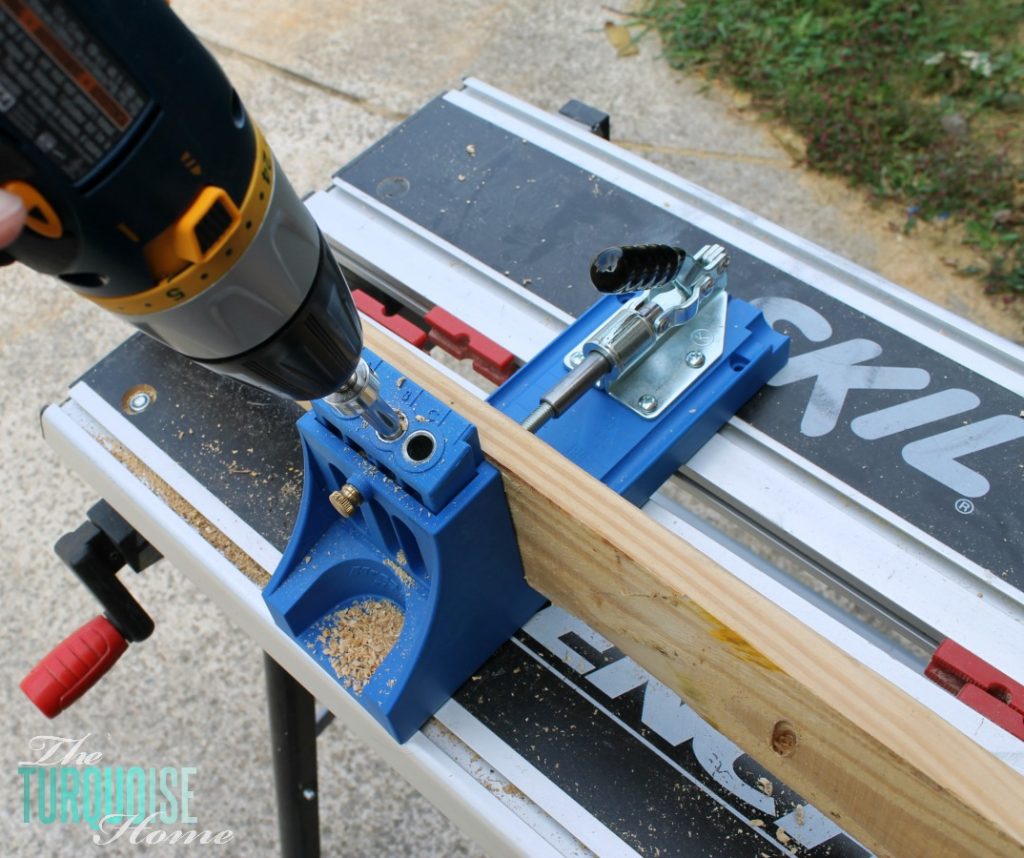
3. Attach Boards with Kreg Jig
I used my Kreg Jig to attach my pallet planks to each other. In my opinion, if you do any kind of wood-working projects, then a Kreg Jig is a must. It is my favorite tool in my garage. And it makes attaching wood side-by-side and creating joints a breeze!
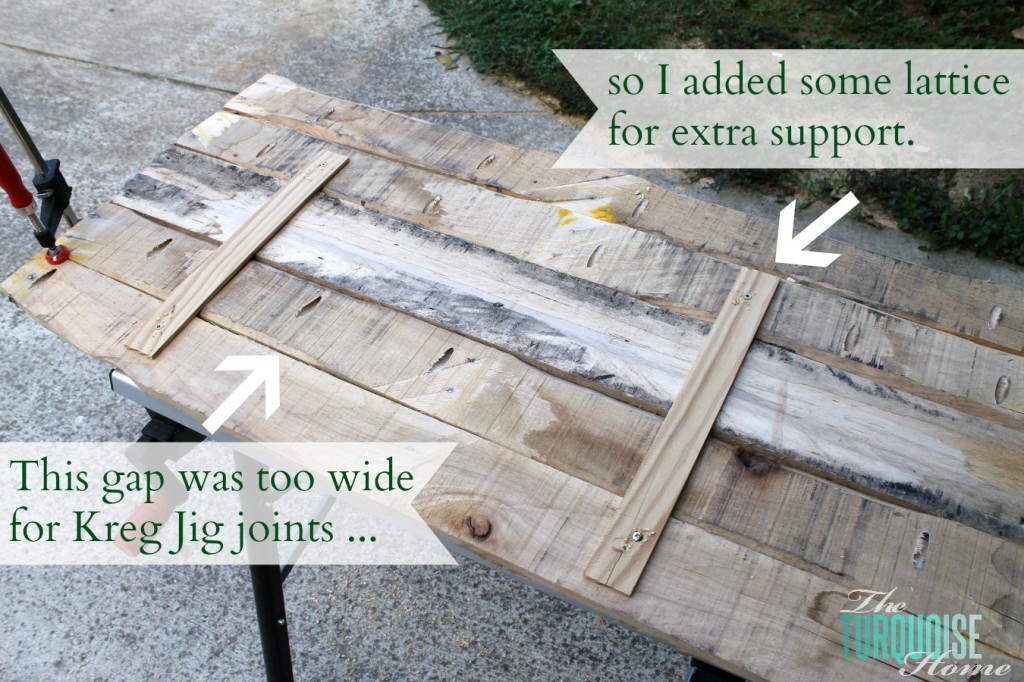
4. Reinforce with Support Boards
Once I got them all attached, I did have to attached a couple of reinforcements on the back of one sign. And if you don’t have a Kreg Jig, then you can use this method entirely. Just get a couple of scrap wood pieces that run the width of your sign and screw them into each board. I did this with my pallet sign on my mantel before I had my Kreg Jig.
5. Sand Down Rough Edges
Then I sanded my signs with my orbital sander. I didn’t get a picture of this step, but it’s pretty straight forward. 🙂
I wiped the sawdust off with a damp cloth and brought them inside.
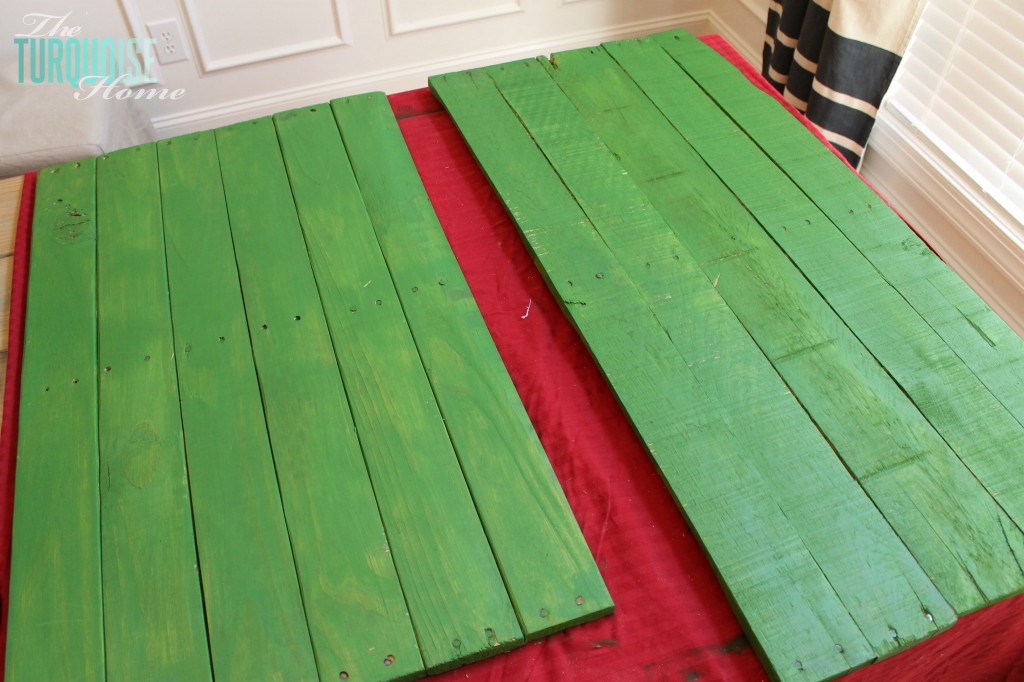
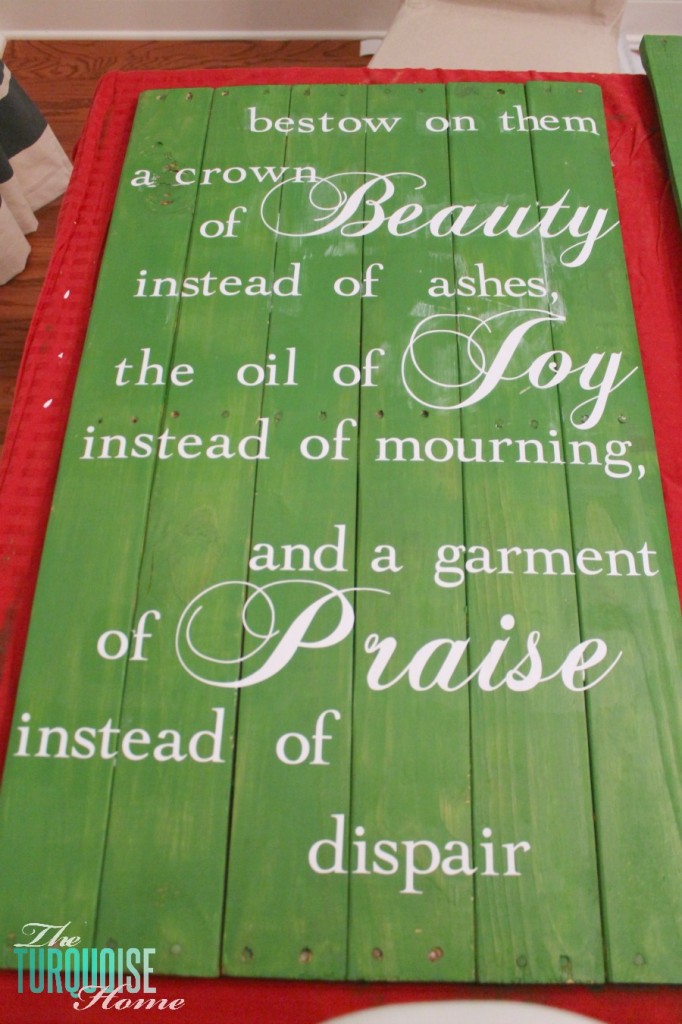
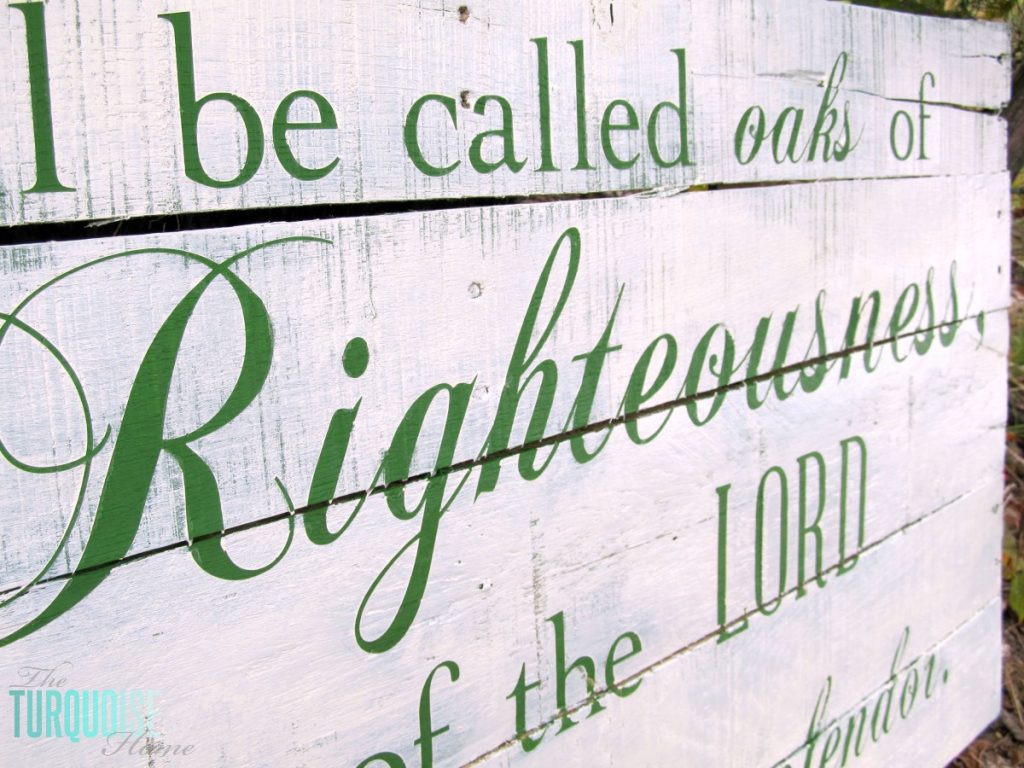
6. Paint Signs the Text Color
I painted them this beautiful green color that the bride picked out. It’s called Pantone Online Lime and I had them mix me up a sample pot of it at Lowe’s.
7. Create Vinyl Letters
Now, here comes the time consuming part…
I am going to try to explain how I designed the typography on the signs, but I’m such a novice at Photoshop Elements and using my Silhouette Cameo. So, don’t laugh at me. This is me winging it… and maybe you’re a winger too, so you’ll get this. A winger, not a swinger … just making sure you’re still with me. 🙂
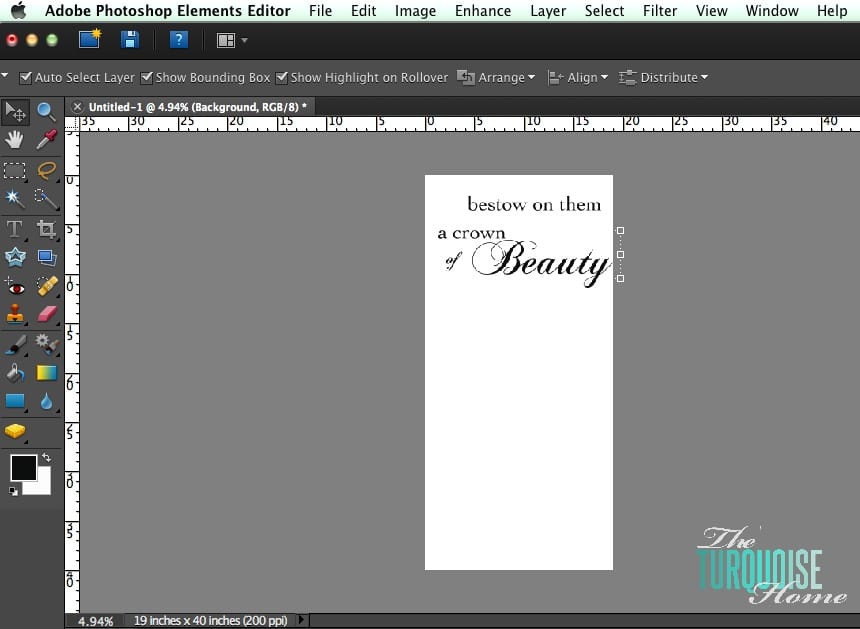
I started in Photoshop Elements, because I knew I could create a document using the same measurements at my board. That way all of my letters would be to scale.
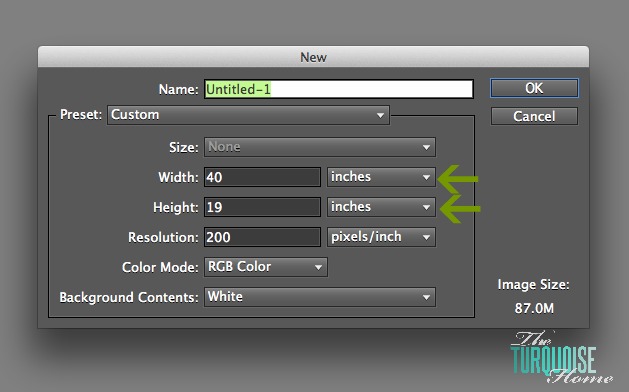
And then I just started designing my signs. I used these two fonts: Cochin and Chopin Script.
Once I had everything arranged just the way I wanted, I went into my Silhouette Studio software and used the same font size that I was using in Photoshop Elements and cut my words out of plain white contact paper. The last time I made a sign with my Silhouette, a kind reader alerted me to the fact that I could use contact paper or shelf liner for adhesive stencils. And it worked like a charm!
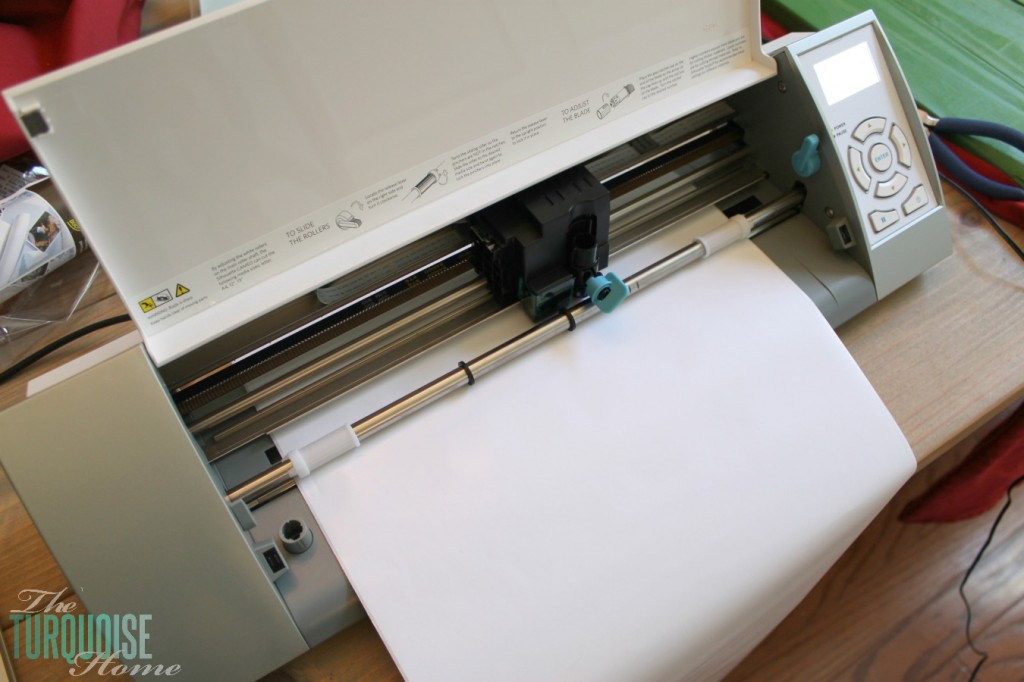
I used this tutorial from Shanty to Chic for my Silhouette settings. And the only thing I changed was I set my blade to level 2 instead of level 1. That way it cut through the sticky layer of the contact paper and didn’t cut through the backing.
8. Place Vinyl Lettering on the Board
I then removed each letter one at a time and placed it on the board.
Let me tell you … this took forever! {Update: now I know I could have used transfer paper, which would have been … awesome!!}
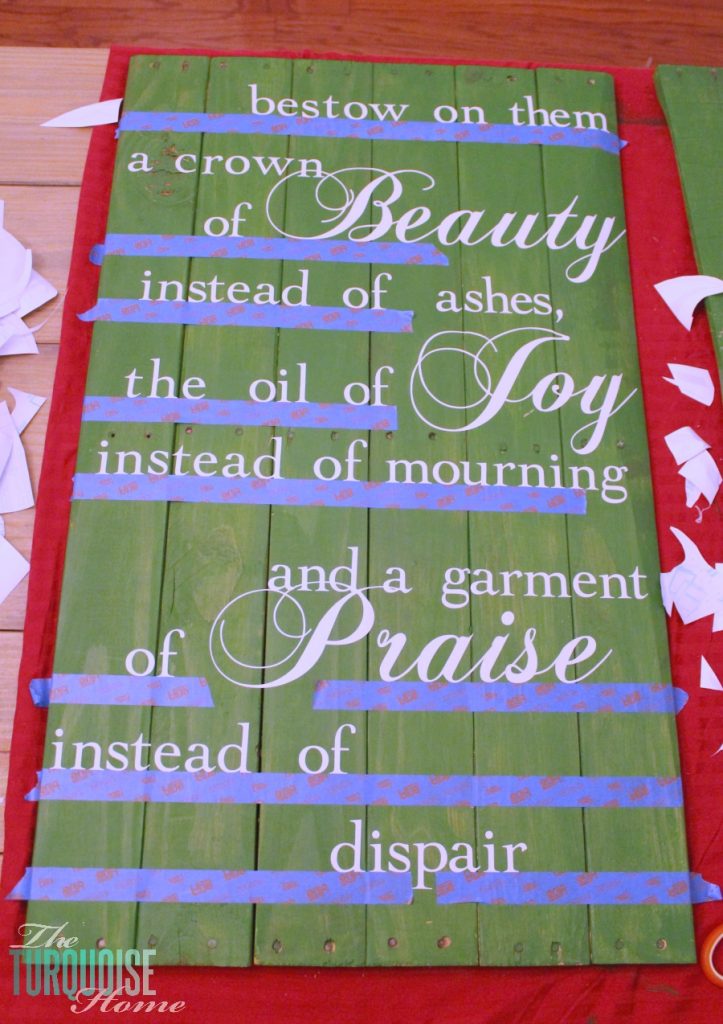
{I used painter’s tape as a guide to keep my words from being wonky.}
The script letters took the longest to place because of all the squiggly lines, but I love the script, so it was worth it. I finally got smart with the second sign and realized I could pull the backing off of the word and the sticky side would stay in place as I pressed it all down on the board. And then I just peeled up anything that was unwanted. Much faster. {Sorry I didn’t get a pic of this process.}
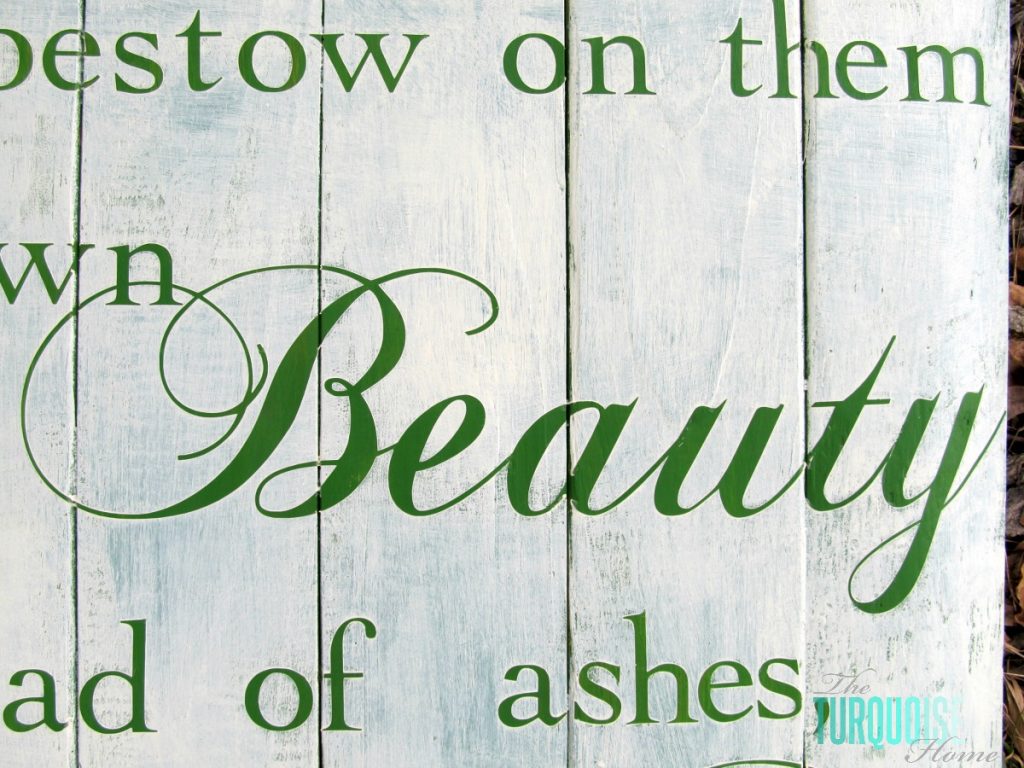
9. Paint over All Letters with Mod Podge
Once all of my letters were down, I used a trick I found from Sugar Bee Crafts.I painted around all of my letters with Mod Podge! That way if there was any bleed underneath the stencils, then it would be clear Mod Podge and not white paint. How handy!!
You can see in the picture below the white stuff around “Beauty,” “ashes” and “Joy.” That would be the secret ingredient doing its trick!
I let the Mod Podge dry.
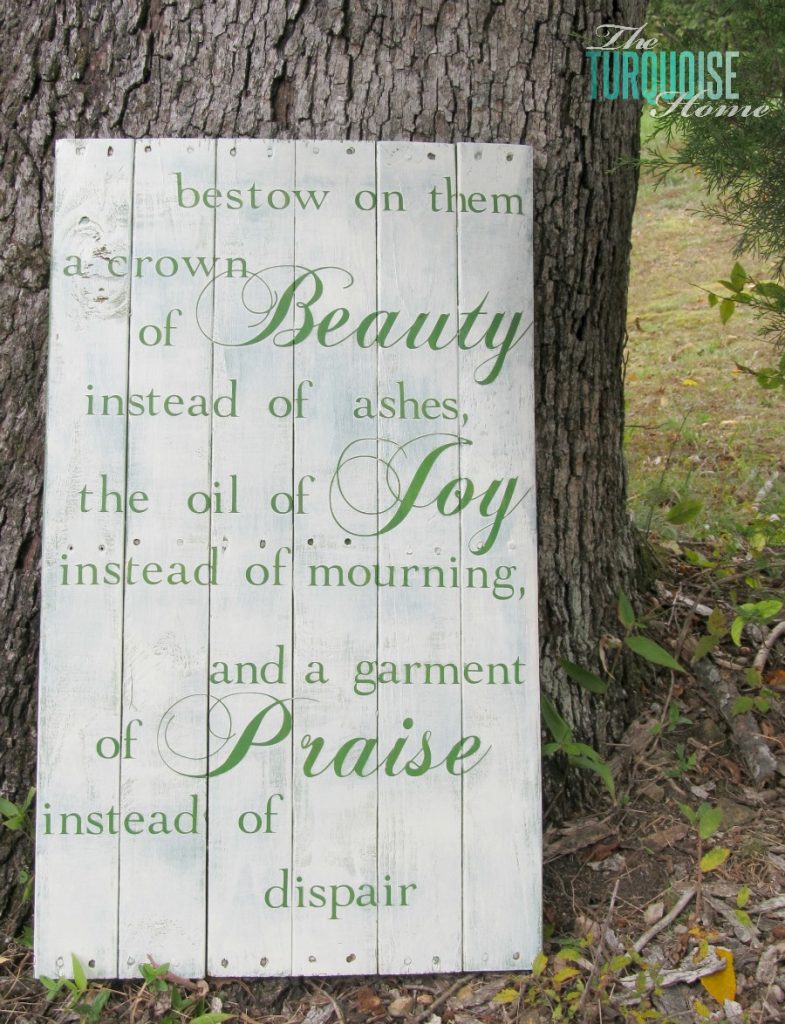
10. Paint Over the Sign with Background Color
Then I took some of my Sherwin Williams Antique White paint that I had on hand and kind of dry brushed it on in all different directions. I wanted it to be a thin coat and let the green come through in spots.
(Yes, I know that “dispair” is misspelled. #facepalm)
11. Peel Off Vinyl Lettering
After the white had dried most of the way, I peeled off the white contact paper to reveal the beautiful green beneath. I didn’t wait for it to dry completely because I probably forgot to mention that I was finishing these up at 2 am, the day I was leaving for the wedding. Um, yeah … maybe should have started on these a little sooner.
I always say I do my best work on a deadline! 🙂
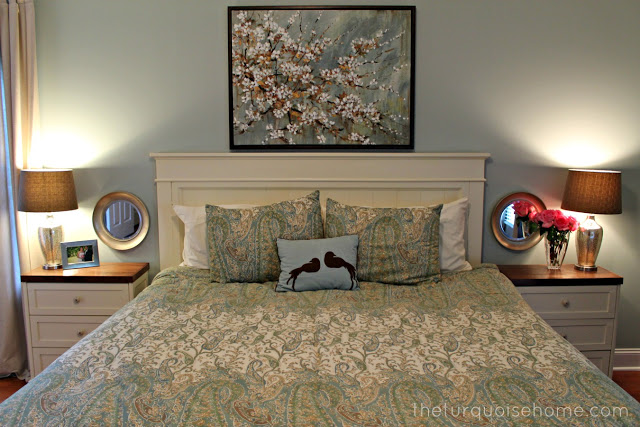
But, I absolutely love – a million times over – how they turned out. I’ve been wanting to make some for my master bedroom for years now … and I think now that I’ve tried it out on a friend, I can do it for myself. Ha!
Just a little note: there was some bleeding underneath the stencils where the letters overlapped where two boards met, but I thought it looked fine. If you don’t want that to happen, then you probably don’t want to have letters overlapping two boards.
I love how all of the thin scripty parts came out. Can you have a crush on “scripty parts?” I think you can. Swoon!
Seriously, this is my favorite DIY project yet. And I don’t say that about every one. I can’t wait to make more. I’m just going to keep saying that until I do make more. 🙂
Are you wondering what these looked like at the wedding?
Well, I was too busy having fun that I completely forget to snap a pic. But one of the other bridesmaids happened to grab a one with her iPhone, so I’ll share what I’ve got.
This was on the table as guests entered the wedding.

So pretty, right?
I hope you’re inspired to make a sign of your own. I just love how beautiful they are and can add such a personal touch to your home!
More Posts You Will Love:


It would have been better hand-painted to be more truly ‘handmade’. I know time was not on your side.
Awesome! No words. You always go one step beyond.
There is so much great, useful information here. Thank you! Thank you! Thank you!
Read our guide if you wish.
DiYsBest
Thanks again 🙂
Just wondering, do these not get damp & how far in advance could they be made? Would they need varnishing to be long lasting?
I think the signs look beautiful. you guys have done a wonderful job. I also have been making signs for many years I use a vinyl cutter and some stencils. I enjoy this type of work. 😎
What other software can I use beside Photoshop Elements to make my format for the stencil? I have the Silhouette Cameo already. Love love love did I say LOVE enough (lol) the pallet sign. It’s just beautiful.
Diana
I think you can use the Cameo Designer studio software, too. I just didn’t have it at the point. Thanks so much, Diana!
Lovely! I love the Mod Podge technique!
Have you discovered transfer tape? That makes moving your cut out letters from the backing paper to the board SO much easier!
I use clear transfer tape – you can use it over and over. Best thing ever. You don’t have to move each letter that way.
Yes! I have since discovered transfer tape and you’re right, it would make it MUCH easier. Will be using that next time I plan to make one of these!! 🙂
Hi there smart girl! I LOVE all of your tools! I love tools! Lol. OK, I am dying to reuse my wooden pallet to make a sign. I keep seeing all these tutorials and everyone says to take scrap wood and screw it to the back. Well my question is: How come the screws don’t stick out of the wood on the front side? If you use tiny screws are they going to hold??
I don’t have a silouette or cricut machine. Do you know of a way to make letters w/o one? Don’t say Freehand!! I do not have a steady hand!!
Thanks for the great tutorial!
LOL Dawn. 🙂 I have used stencils from Michaels or Hobby Lobby before I had a Silhouette. They worked fine! And you just have to find the right length of screws that will go through both boards without poking through the front. I luckily have a plethora of random screws, so it’s not trouble. But you may just need to measure your board’s thickness and go to the store and buy just the right length. Good luck!!
I love these signs, but they are not really for anyone on a strict budget. I was disappointed that they took equipment that most people don’t have and some of us can’t afford to go buy. I do love them though.
Hi! You definitely don’t need expensive equipment to make signs like these. I made signs long before I had a Kreg Jig or a Silhouette. And while they make it easier, it’s not necessary. Just line up your boards and then screw in two boards, long ways on the back. And there are lots of stamping and stenciling options at the crafts stores. Hope you end up making some anyway!! 🙂
Love the tutorial. Beautiful work. Please note “dispair” is spelled “despair”.
Yeah, it’s a bummer that I misspelled that, especially since it was a gift. 🙁
They are beautiful but you spelled despair wrong. :/
Absolutely beautiful. What a wonderful way to use pallets! I especially like the “oaks of righteousness” sign. Thank you so much for sharing at Grace at Home.
Those are gorgeous signs! I really need a Silhouette!
Yes you do! It’s fabulous!!
Gorgeous signs! Thanks for the tip on the mod podge. I will have to try that next time!
Smart idea! love pallets repurposed!
Awesome Paint, On the beginning of your writing I never expect this will make a design like this. Please let me know can I use Photoshop except Photoshop Element ? Thanks for your great design.
Either one would work fine!
These are so beautiful! Would love to try it. Found you at Tasteful Tuesday Party!
Pallets seem to be all the rage and I love how you have re used yours! Great signs! Be sure to stop by my blog and enter for a chance to win some handmade card I have been working on in my newly organized scrapbook room. its small, but does the job! Take care!
Holy cow, these are awesome! Wonderful tutorial! I’d love for you to share with our Life Created Tuesdays link party! This week’s party is now live 🙂
Erin
These are awesome Laura! I have two pallet signs in my garage right now waiting for me… Wishing I had a silhouette!! I love how crisp the white and green looks together:) pinning
Thank you Krista! I know a bunch of bloggers are giving away Silhouettes right now. Go enter them all and cross your fingers! 🙂 Or maybe you can get one for Christmas. It’s taken me a while to get used to using mine, but now I am using it for so many things. I really love it!!
Gorgeous, Laura! That scripture happens to be a favorite of my friend Gianna…I’ll have to share this with her. Also, MAJOR props for tackling that lettering with contact paper. I’ve used contact paper before as a transfer paper substitute, but never as a vinyl substitute. I know how tricky it is to work with. I’m so impressed with the outcome, though! I’m sure your friend was so touched by the gift these signs. Not only are they great decor for the wedding, but now they can be displayed in their home and enjoyed for years to come! Brava!
(Also, I’m loving your little scrolling blogroll down below in the footer. I’m just now seeing that for the first time. And OH there’s me! What an honor! Thanks, friend.)
I think I need to get myself one of these! My house would be filled with pallet art and subway signs!
Beautiful work as always Laura!
My house is quickly become filled with lots of typography thanks to my Silhouette! 🙂
These signs are gorgeous!!! You are motivating me to start on my pallet ‘flag’ soon!
Thank you for sharing 🙂
Thank you Tamy! I bet the pallet flag turned out awesome!!