How to Paint Kitchen Cabinets without Professional Equipment
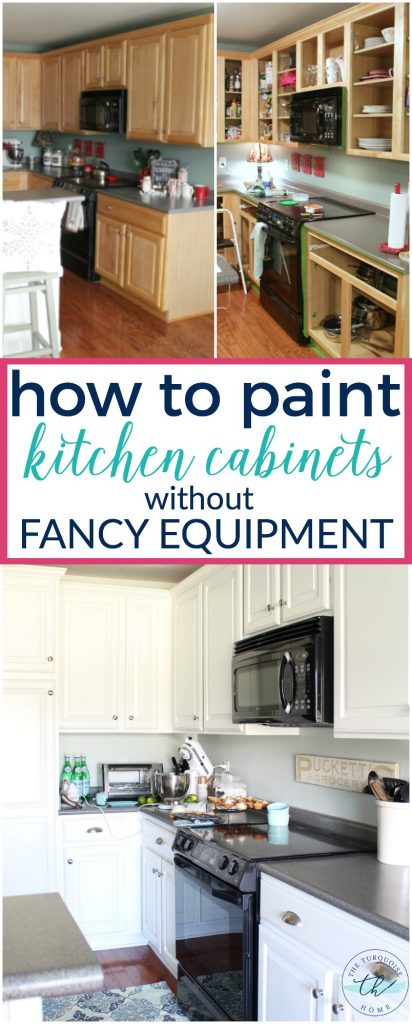
How to paint kitchen cabinets without professional equipment isn’t hard when you follow these easy DIY steps in this full tutorial. I’m so excited to finally have them finished! These DIY painted kitchen cabinets changed the entire look of my kitchen with a little elbow grease and minimal financial investment. I would do it again in a heartbeat for these amazing results!
First of all. Before we get into this in-depth home improvement tutorial on how to paint kitchen cabinets and transform your old, tired space into a fresh and amazing one, let me just warn you.
Painting your kitchen cabinets it a whole lot like childbirth. 🤪
There is lots of labor. Lots of swearing. The commitment will take you longer than you expected, further than your DIY abilities can even imagine.
BUT! Big but. At the end of the whole thing … when those big, beautiful, gorgeous, freshly painted cabinets are staring back at you, you will forget it all in a wave of hopeless love.
It’s true. All of the anxiety I’d built up for so many years, thinking about how difficult it would be to paint my kitchen cabinets, was all valid.
But I’m here to tell you, that even though you will curse my name during the process, the end result is more than worth it.
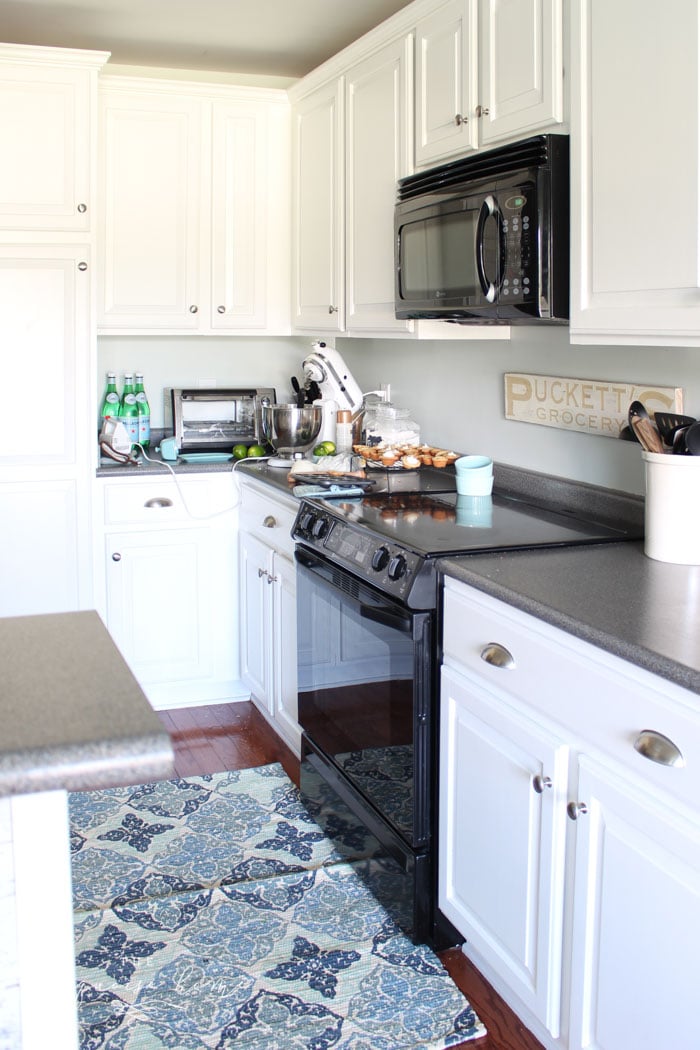
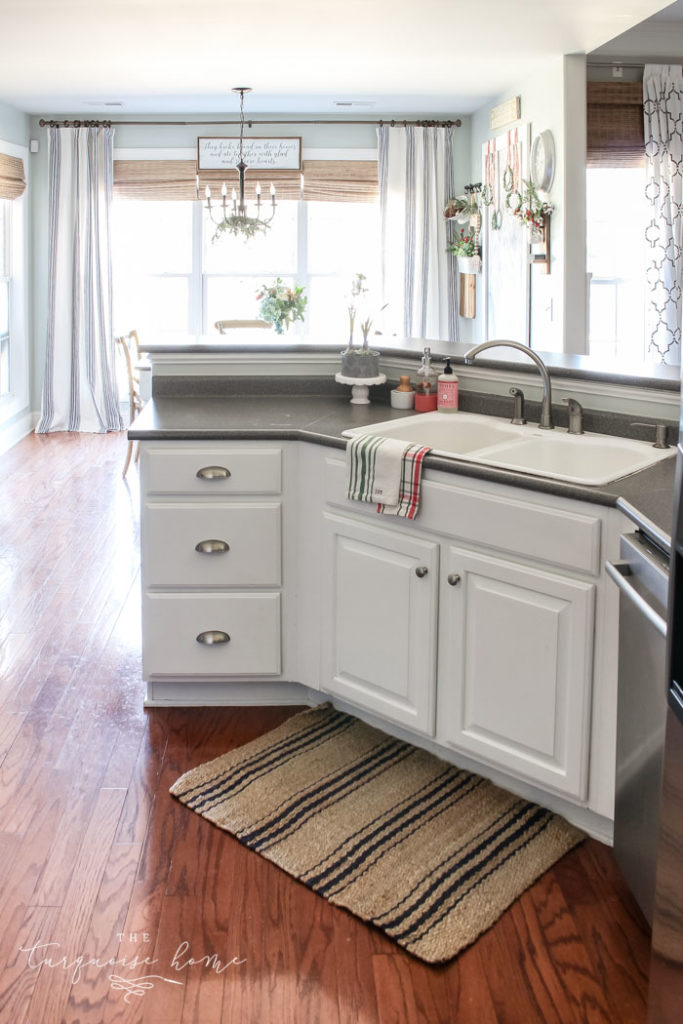
Before and Afters of my Kitchen with White Cabinets (here)
Gah!! So, so worth the effort right there, folks. Every morning when I wake up and walk in there, I think “ahhh, my dreams came true.” 🙂
I have written about painting cabinets before. I did a few things differently this time, so I’ll share a whole new tutorial here. And I’ll share the differences as we walk through the process.
Want to Save This?
Enter your email below and I’ll send it directly to your inbox!
How to Paint Kitchen Cabinets: The Timeline
First, let’s talk timeline. I did not paint the insides of my cabinets. So, this timeline is the time it took me to remove all of the doors, prep them, paint them and then prep and paint the outside of the cabinet boxes.
It took me about 4 weeks of working solid during nap times and after the kids went to bed. My mom came and helped me one day (and she is a hard worker). And then my husband helped me hang them back up. Other than that, I did this all on my own.
I did hire a babysitter to come every afternoon one week because I needed to get them finished before Christmas. So, if you’re a stay-at-home mom who is going to be tackling a small/medium sized kitchen, then plan on it taking you 4-6 weeks. 🙂 Just to be on the safe side.
Or you may be super woman and finish them in a weekend. Just don’t tell me OK? It’ll hurt my feelings.
How to Paint Kitchen Cabinets: Supplies
OK, here’s what you’ll need to paint your cabinets with a roller and a brush like me. (Grab a cup of coffee, because this one’s a long ‘un.) This post contains affiliate links for your convenience. See my full disclosure policy here.
- Painter’s Tape
- Degreaser
- Wood filler
- Sander or sand paper (I vote an electric sander, and this is my favorite.)
- Foam roller
- Liquid Deglosser
- Primer – How to prime to get a smooth finish
- Paint
- Paint Brushes (I love Purdy brushes the most. They last forever if you take care of them!)
- Tack Cloth
Best Paint for Kitchen Cabinets
Before we dive into the steps, here’s a big tip. I get asked “what type of paint to use on kitchen cabinets?” all the time, so this should help!
The paint that you use when painting your cabinets it HUGE. Do not cut corners when it comes to your paint.
You will want to choose a semi-gloss or gloss paint made for painting cabinetry. The shinier sheen will be easier to keep clean and the special cabinet painting formula will leave a harder finish. I’ll share about the two brands I’ve worked with so far in my painting cabinet journey.
Ace Hardware’s Door, Trim and Cabinet Paint: The first time I painted cabinets, I used Door, Trim and Cabinet paint from Ace Hardware. I painted my bathroom cabinets, which you can see here.
It’s amazing, y’all. It was the only cabinet paint I’d ever used, and it went on smooth, didn’t leave brush strokes and has a durable finish. To this day there are no chips on those bathroom cabinets.
It is a very thin latex paint that glides on and dries extremely smooth and hard. You want to paint with multiple thin coats of paint, so I did. And after a few minutes I would go back to a door and check for drops or pooling in the low parts of the cabinet doors. I could lightly run my brush through the pools or drips and the paint would level out again and not show brush marks.
Benjamin Moore’s Advance Paint: It is not as thin and dries much faster than Ace’s paint. After two coats on my doors, you can see some brush strokes in the beveled parts of the door.
If I ever use this paint again, I would add a paint conditioner like Floetrol, which is a latex-based paint additive that reduces brush marks. I just assumed that BM’s Advance paint would be like Ace’s paint. But that was my mistake and I should have tested it first.
Final thought: I think BM Advance is a fabulous paint, but if you use it, I would highly recommend adding a paint conditioner like Floetrol to your paint (mix according to the directions on the bottle).
How to Paint Kitchen Cabinets
Step 1: Gather Your Supplies
Choose your paint color and paint and purchase it. I chose Simply White by Benjamin Moore for my color, and I only needed 1 gallon. Then gather your tape, sander/deglosser, drop cloths, degreaser, brushes and rollers.
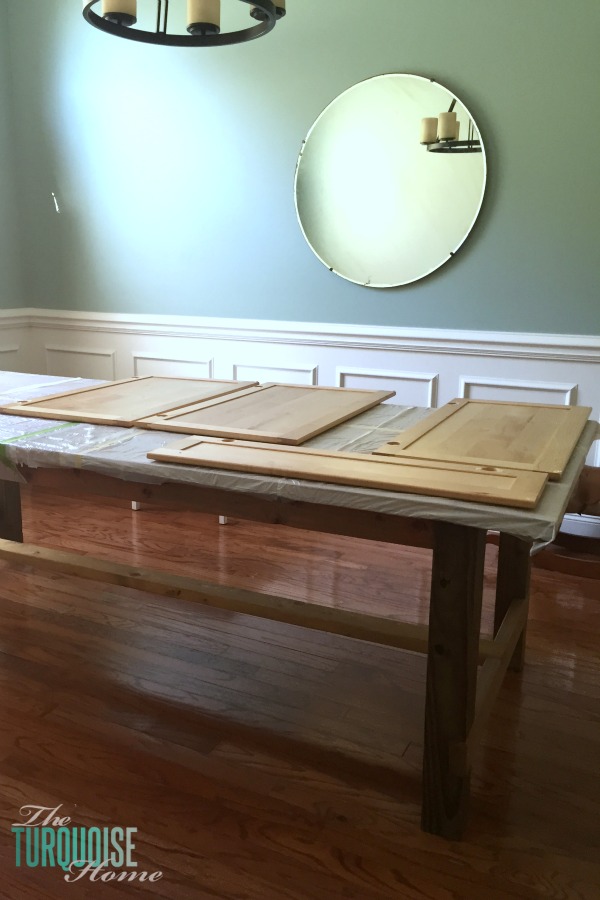
You’ll also want to clear a space for painting. I used my garage for the sanding and priming (because it’s smelly) and I brought the doors and drawers inside to my dining room for painting.
I also moved some of my kitchen appliances into the office. I have a 1-year-old, so she was playing in the bottom cabinets the whole time the doors were removed. It was just easier to have them mostly cleaned out.
Step 2: Remove all Doors & Hardware
Oh my word, y’all. This step took my forever. I should have asked my husband to help, so learn from me. Any able bodied person can help take off the doors and hardware, so recruit them. 🙂
Now, you DO want to do a little extra prep work when removing your doors and hardware to make reinstallation easier. Putting cabinet doors back where they belong can be problematic if you don’t note where the door goes exactly. Trust me. When they are all laying in a pile in your dining room, they kind of look (mostly) the same.
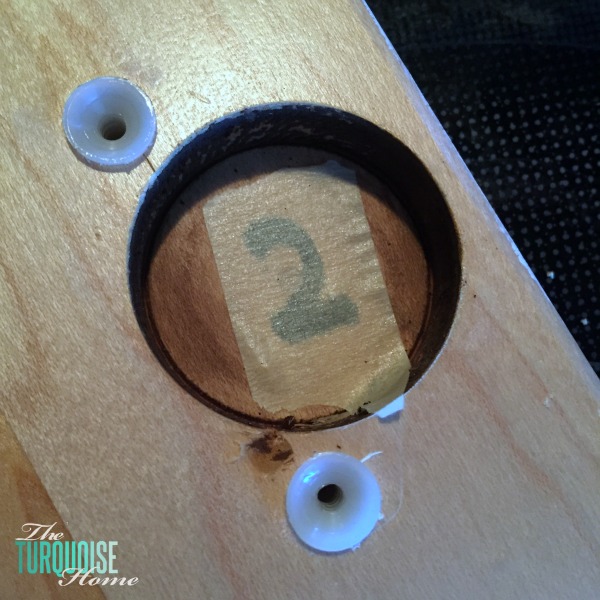
Choose a starting spot in your kitchen/room and number your doors as you remove them. I wrote the door number under where the hinge goes and put a piece of tape over it. That way if you get paint down in there, it won’t matter. Just peel back the tape to reveal your number!
And then I labeled the inside of the cabinet with a coordinating sticker. I actually numbered each hinge as you can see on the stickers below.
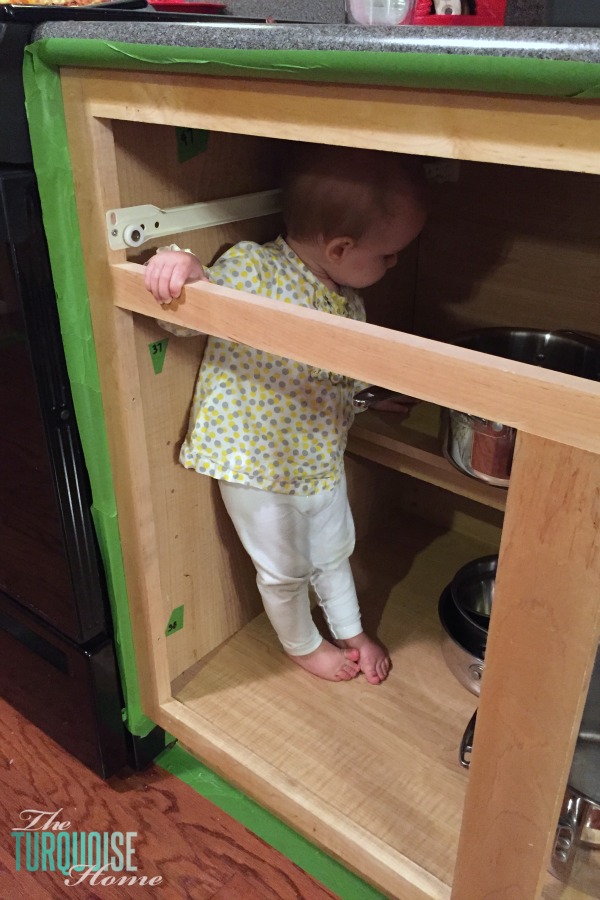
I numbered all of the hardware and put each door’s hardware inside it’s own plastic baggie and taped it inside the cabinet. Remember, I didn’t paint in the inside of the cabinets, so I could store them there. If you’re painting the insides of your cabinets, you’ll have to get a different system. (I didn’t tape the hardware to the inside of my bottom cabinets because 1-year-olds.)
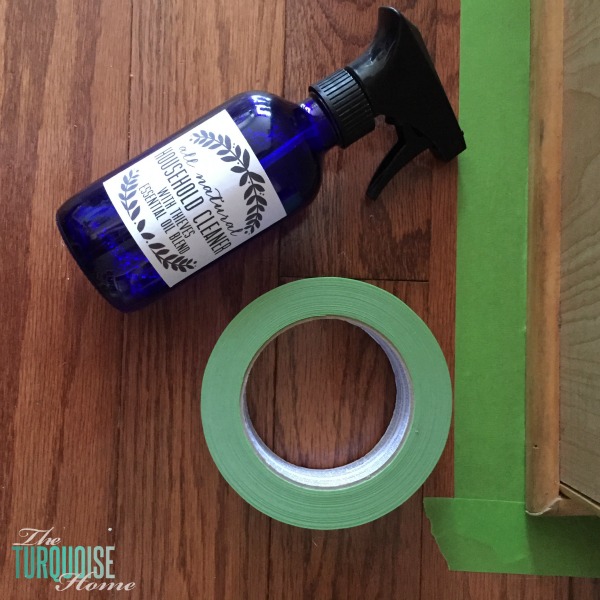
Step 3: Clean with a Degreaser
If you are painting your kitchen cabinets, especially, you will need to give the cabinets a good cleaning with a degreaser. I used some organic, natural stuff from the store for a general wipe down and some lemon essential oil for the really sticky stuff.
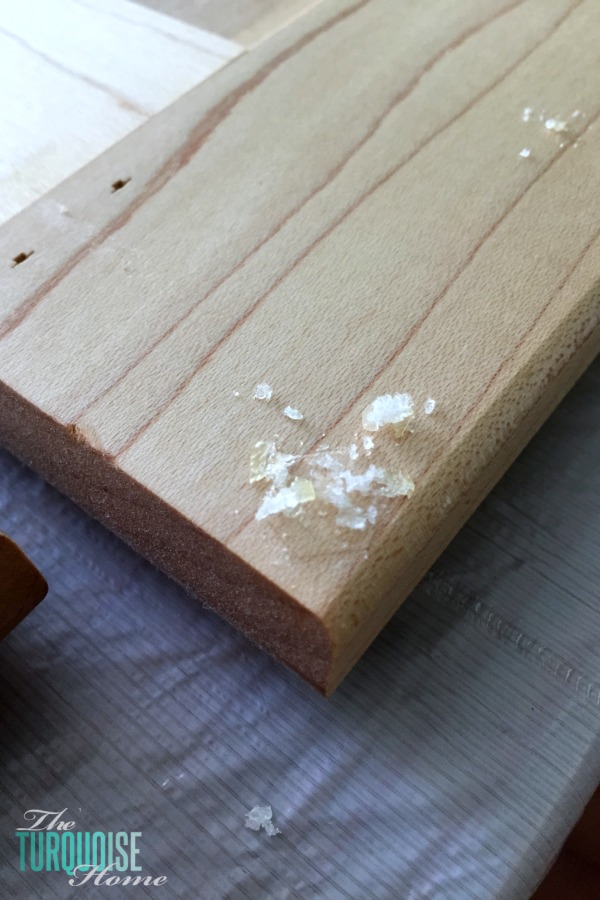
The rubber stoppers on some of my doors and drawers had disintegrated to leave a sticky mess!
I had no idea how dirty my cabinets truly were. They were nasty. You don’t want 3-year-old spaghetti sauce residing under your pretty new coat of paint. Do not skip this step!
Step 4: Fill and Drill Hardware Holes
If you’re changing out the hardware on any of your doors or drawers, you’ll want to fill the holes with some filler (this is my favorite) and then sand them.
I knew I was changing them, but didn’t know what hardware I would use on my drawers, so I just filled them. I’ll drill new holes whenever I get the new hardware. #stilldeciding
Step 5: Patch, Caulk or Fix Cabinets
If your cabinet boxes, doors or drawers have any cosmetic or structural issues, fix them now. I had a drawer where the drawer front was coming off. A few minutes with my brad nailer fixed that problem. I also caulked any cracks in the corners and filled any holes in the toe kicks.
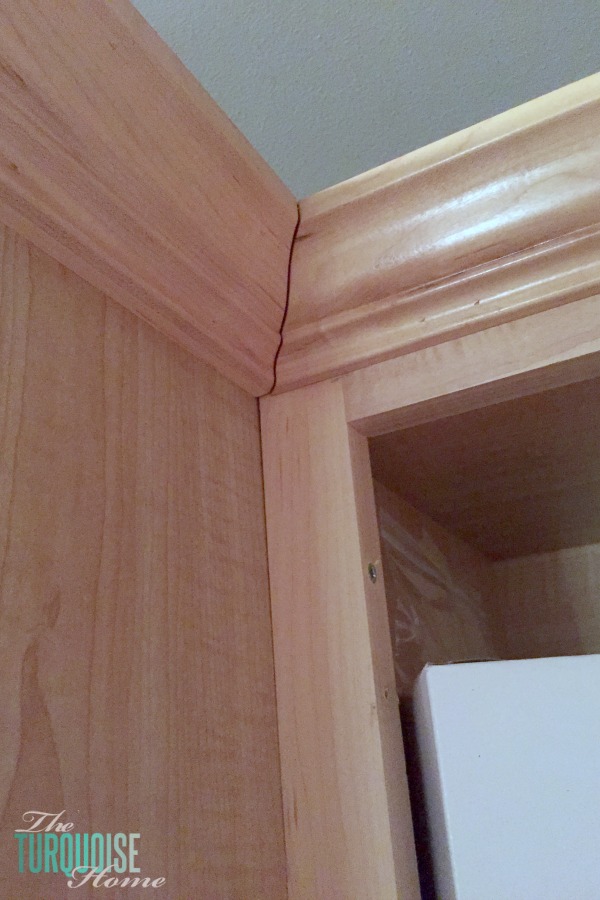
It’s much easier to see any holes or cracks when the cabinets are white, so take the time to make them look nice.
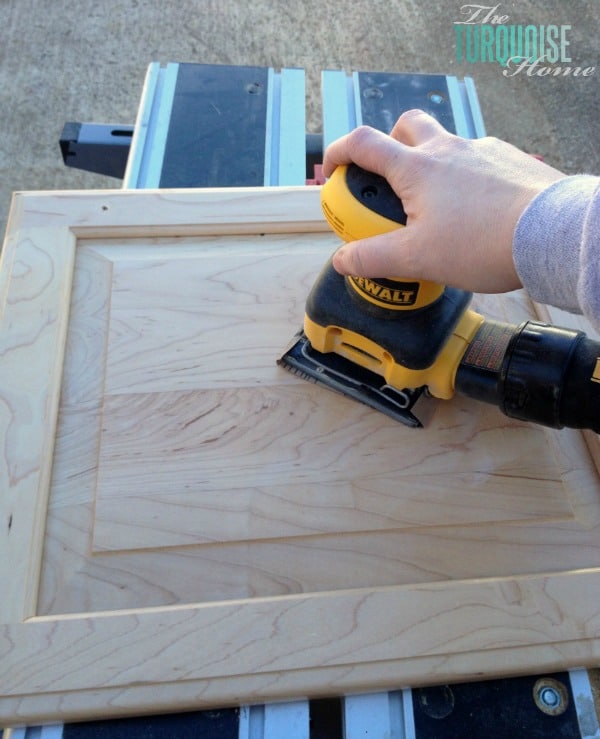
Step 6: Sand (or degloss) all the Things
Hunker down, because you’ll be here for a hot minute. (Are we there yet?!?)
You’ll want to sand all of the doors, front and back with a finishing sander. Trust me, you’ll want an electrical sander. You do not want to do this by hand.
Change your sandpaper fairly often, because you don’t want to spend a ton of time sanding and it’s not really working. You’ll use lots of sandpaper, but it’ll be worth it.
Don’t try to get down to the raw wood, just rough up the slick finish so that the primer can grab onto it. I use a medium grit sandpapers for this step.
Wipe them down with a tack cloth when you are finished sanding.
For the cabinet boxes in the kitchen, I tried something different this time. I didn’t sand them because:
- I didn’t want to remove everything from the cabinets.
- I didn’t want to have to seal off the rest of my house or clean up sanding dust for the rest of my life.
So, I chose a liquid deglosser instead. Let me tell you, it’s smelly stuff, which means lots of nasty chemicals. You just wipe it on your cabinets and let it dry. Don’t wipe it off before painting.
Y’all just be warned. The chemicals are so strong. I was wearing the recommended rubber gloves when applying it, and when I was almost done I noticed that my hand felt like they were burning.
I took my gloves off and I had a rash all over the tops of my hands. I assume it was the latex from the gloves mixing with the chemicals in the deglosser and causing a reaction on my hands. Blech.
The deglosser works fairly well, but I think sanding is better. I would probably do the deglosser again (to save time), but just apply it in stages so my hands wouldn’t break out. But I will say that I’ve seen some chipping on my cabinets where we hit them when putting away dishes. I’ve not had any chipping on my cabinet doors, so it makes me wonder if it’s the deglosser that made the difference?
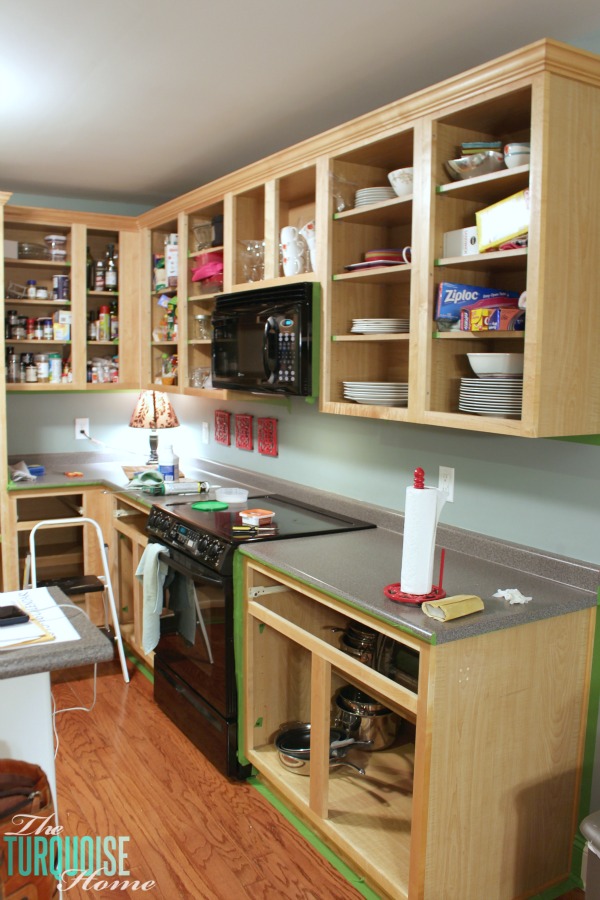
Step 7: Tape the Cabinets
Now that everything’s all fixed, sanded and filled, grab your painter’s tape and start taping off all of the floors and walls inside next to the cabinet boxes.
Can you see why the prepping takes forever??
Step 8: Prime All the Things
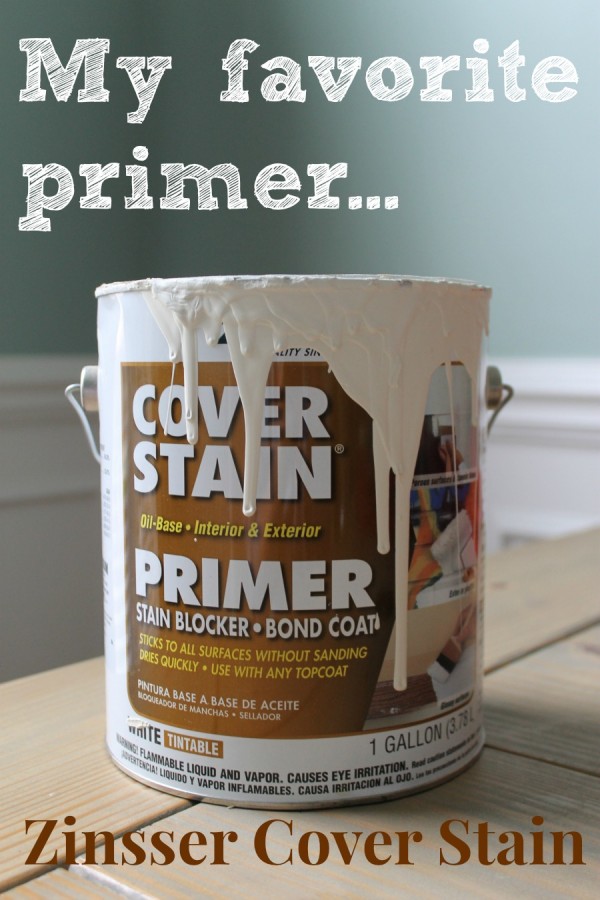
Prime everything. Don’t try to cut corners by using a primer and paint in one. Use a high quality primer, like the one in the picture above.
RELATED: How to Get a Smooth Finish with Primer
Since primer is oil based, I use a cheap, throwaway brush and a foam roller. Check out this post to find out how I get a beautiful, smooth finish without spraying them! My favorite primer is Zinsser’s Cover Stain primer. It is awesome.
Since I was painting my kitchen cabinets white, I used the off-the-shelf white primer. But if you’re doing a dark paint color in your cabinets, I recommend getting the primer tinted to the color you’re painting the cabinets.
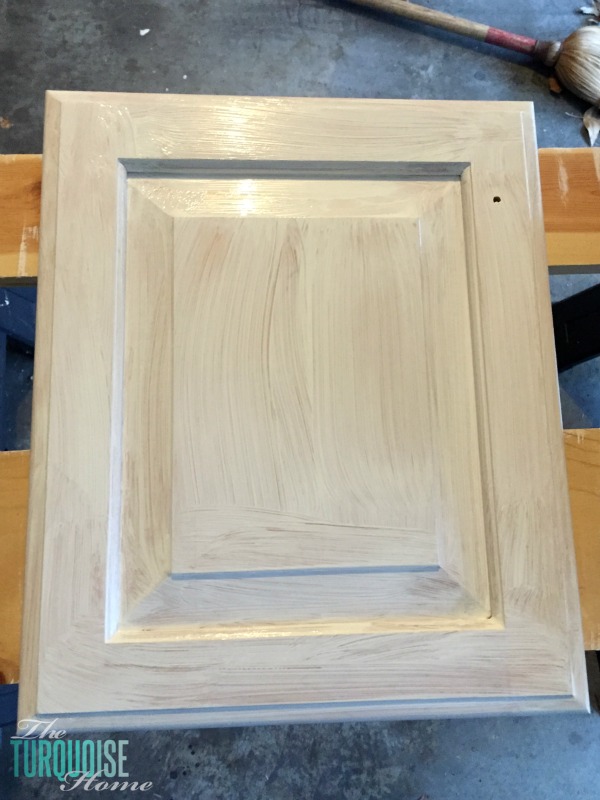
Step 9: Sand any Drips or Runs
If you have any rough spots or drips or runs from the primer, then sand them very lightly using some fine sandpaper. You don’t want to knock off the primer. I didn’t need to sand because I used my trick to get a smooth finish.
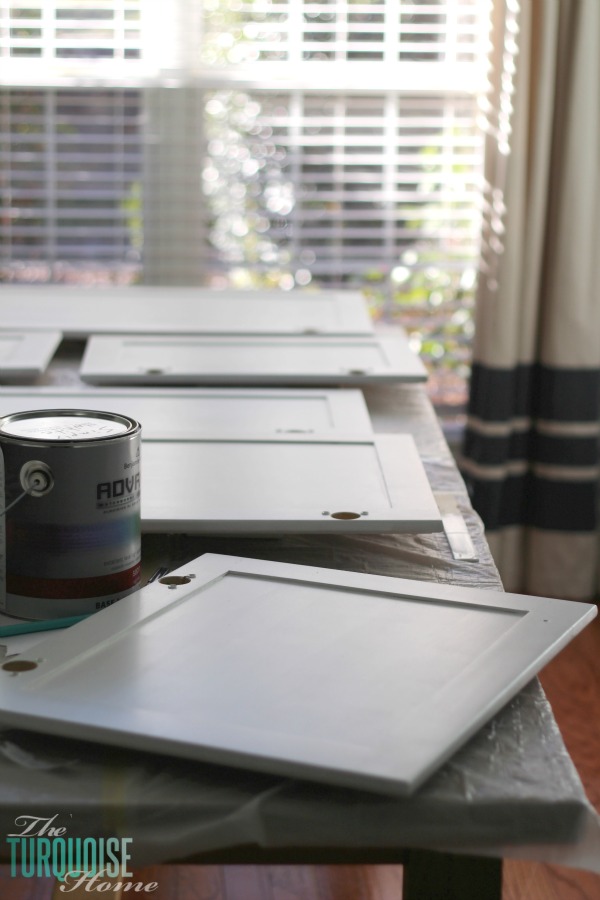
Step 10: Paint (finally!)
After all of that prep work, which feels like it will go on forever, it’s finally time to paint. Hallalujah!!
I start with the backs of the cabinets and paint all of the coats that I’ll paint on them. So if I’m doing 2 coats, then I paint 2 coats on the back and then move to the front. That way when I flip them over to paint the front, then if it gets messed up, it’ll just be the back. No problem.
On the front side, I paint the beveled areas first with a brush (purdy brushes are my fave!), and then I paint the flat areas with a foam roller. This helps minimize the brush strokes and potential drips or pools of paint. You will want to make sure not to use too much paint so that it pools up in the corners.
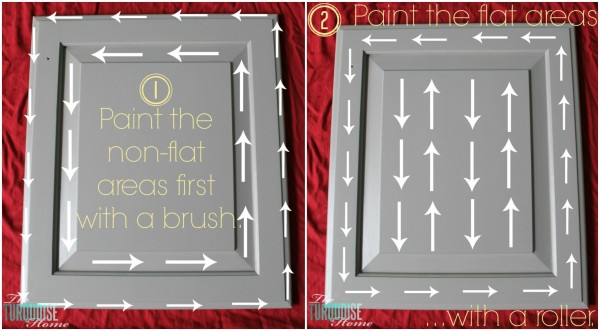
No worries – my cabinets aren’t gray. 🙂 I grabbed this picture from when I painted my bathroom cabinets.
Step 11: Sand again
Follow the instructions on your paint for when you can apply a second coat. Wait that amount of time before you check for drips and lightly sand to minimize them. I had a couple of spots from painting the first coat that I had to sand down.
If there weren’t any trouble spots, I skipped the sanding.
Step 12: Repeat steps 10-11.
My cabinet doors needed 3 coats of paint, so just gauge how they look after 2 coats and then decide if you need more or not.
Let them dry and then re-hang them! Woohoo! I was so excited to get my doors back on in time for Christmas. I was insane to tackle them during the holidays, but the pain and sruggles were worth it!
I’m so happy to check this project off the list that’s been hanging around for 4 years!!

Do you have any advice for painting cabinets, like getting your best friend to move in with you to watch your kids so you can finish quicker?
Or warnings about what to avoid, like be sure to use paint conditioner so you don’t see paint strokes?
More Posts You Will Love:
- Painted Kitchen Cabinets: 2 Years Later
- Budget-Friendly DIY Kitchen Cabinet Ideas
- How To Display Kitchen Cabinet Wreaths
- A Coastal Summer Living Room & Kitchen
- A Peachy Summer Kitchen
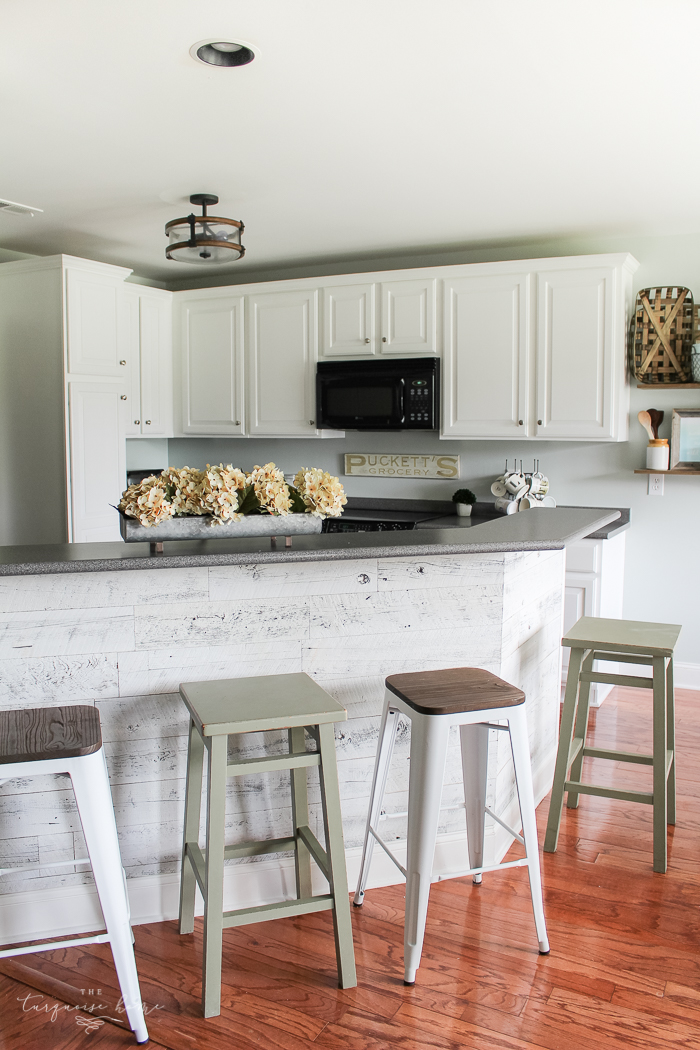
On the outside of your peninsula, is that shiplap or wallpaper? It looks great!
Hi there! It’s peel and stick reclaimed wood panels. Here is a blog post all about it: https://theturquoisehome.com/reclaimed-wood-wall/
Hope this helps!
What gloss did you use for the kitchen cabinets from BM?
Hi Lori, I’m sure I used semi-gloss for my cabinets.
Do you paint the underneath of the top cabinets?
I’m just now seeing this post (thanks to the power of Pinterest!) because I need to paint my kitchen cabinets before putting my house up for sale. It looks like a lengthy process but I think it’ll be worth it. Thanks for posting!
One question- how did you do the drawers? Did you leave them in place? Remove the whole drawer? I’m assuming you can’t take the fronts off the box?
Another question (I guess that makes two questions lol)- How did you do your island?
Hi Denise, I removed the whole drawer and just taped off the drawer boxes and just painted the drawer fronts. I don’t have an island, but it’s a peninsula/bar, I guess? I just painted it like the rest of the cabinets. 🙂 xo, Laura
i am painting my cabinets now…when I’m on the FINAL coat of my finished color, do I sand it one last time? Won’t that leave a dull finish where I sanded? I’m concerned that I will have brush strokes still visible and need to sand, but then you will see the spots I sanded. Make sense? I’m only on coat 2 so maybe by coat 3 or 4, I won’t need to sand the finish.
Help! 🙂
Hi Molly, you’ve probably already finished your cabinets by now, but I don’t think you have to sand the final coat. I don’t think I did! 🙂 Thank you! xo, Laura
great detailed tutorial. It turned out great.
We painted our cabinets as well, but with a sprayer.
http://shirleyandchris.net/blog/2017/05/15/diy-painting-ikea-kitchen-cabinets/
What finish did you use for the paint? Satin or semi?
I believe it was semi-gloss!
You don’t happen to remember what base it was do you? They have base 1,2,3 and 4
Hi Cheyenne! I just checked the can and it’s Base 1. 🙂
Thanks for sharing your experiences. I’m doing some research on painting. I have an old coffee table and I want to paint it. Now I know how to do that.
Hi Laura,
I am planning to list my condo and the kitchen has maple cupboards. I’ve been thinking of painting them and read your post with interest. I love the look of your white cupboards and appreciate your tutorial. I must confess, however, that it is more work than I realized. Are there any shortcuts? For instance, when I painted my kitchen, I had used the non-toxic non-smelly Benjamin Moore paint that was paint and primer all-in-one. It covered well and didn’t smell.
Do I really need to remove the cabinet doors if I paint very carefully and cover the counters/appliances/floors? Can I use a paint that includes a primer? Do you know anyone who has used shortcuts? Thanks so much!!
Hi Susan, If you liked the other paint you used before, then I say go for it! And no, you don’t have to remove the cabinet doors. I wanted to remove mine in order to sand them outside, but you could totally sand them in the kitchen as well. With small kiddos, it just wasn’t appealing to me to have to cover everything and sand inside. 🙂
When you mentioned keeping the doors in place, I thought of Kate at Centsational Girl. She used a Rustoleum kit and left the doors and drawers in place. See how she did it here: https://centsationalgirl.com/2011/07/mini-kitchen-makeover/
And then my friend Tasha painted her cabinets without sanding or priming and she says they’ve held up great almost 2 years later. Check out her tutorial, too! http://www.designertrapped.com/2014/06/how-to-paint-kitchen-cabinets.html
Good luck!!
Hi, thanks for posting. I am currently painting my kitchen cabinets now. Sanded, primed and painting with BM advanced as well. Do you think polycrylic or polyurethane is needed as an extra protection?
Beautiful kitchen!
Hi Teressa, it’s my understanding that BM Advance paint does not need a top coat. So I didn’t use one. I’ve also heard (and experienced) that polycrylic can yellow over time and I’d hate for my white cabinets to turn yellow.
i love your kitchen cabinet colors but I also want to know where you purchased your bar stools from. Love the color.
Hi Marilyn, the green barstools were given to me by a friend who was going to throw them away. And then I painted them with Annie Sloan’s chalk paint in chateau gray. The white and wood barstools are from Target and you can purchase them here (affiliate link): http://bit.ly/1U2P8Pi. (By the way they are 15% off this week, plus and extra 10% off!) 🙂
Incredible and beautiful. Great job and thanks for in depth sharing.
This turned out fantastic, and it looks so professional! The color makes the whole room look much lighter and gives your kitchen a whole new look! I am definitely saving this for when we redo our own kitchen!