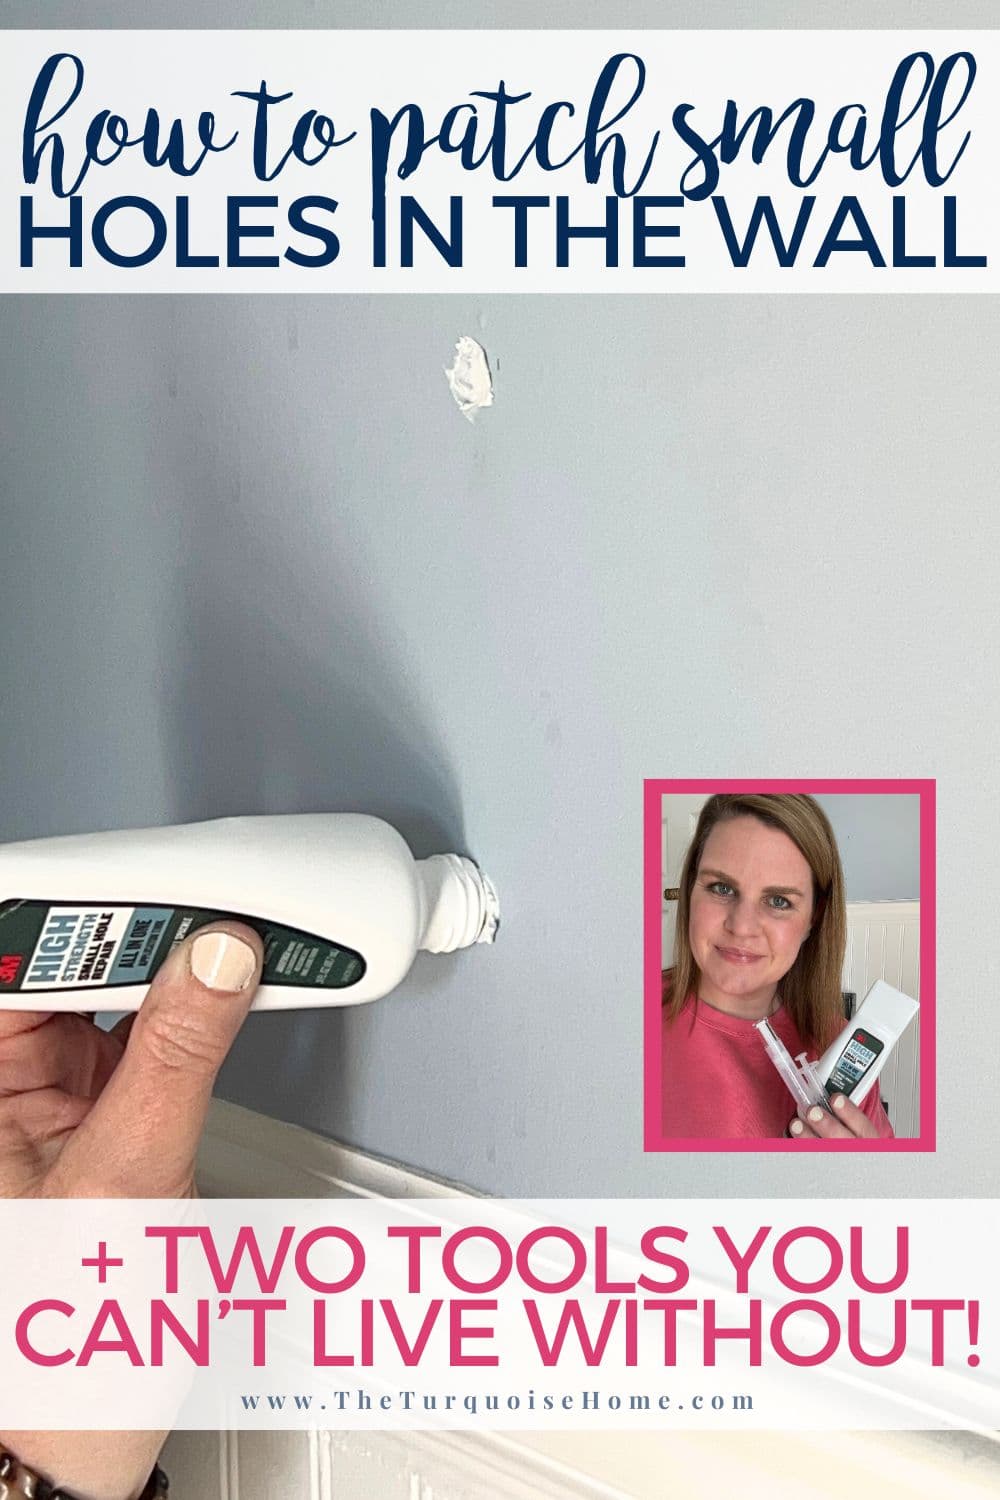
How to Patch a Small Hole in Drywall
At some point in homeownership, you will need to know how to fix your drywall. Learn how to patch a small hole in drywall with this easy tutorial.
Holes in the walls happen. Maybe you were moving furniture, trying to hang up a new piece of art, or dealing with a little-too-rowdy game of indoor basketball. Whatever the case, a hole in your drywall doesn’t mean you have to call in a professional or live with the damage. Patching drywall might look intimidating, but trust me—it’s totally doable, even if you’re new to DIY.
I’ll be honest it’s one of my least favorite home repairs! And so for many years, I’ve left holes in my walls for way too long! So, this year I’m on a mission to make fixing small holes in the walls slightly less overwhelming. Let me share my best tips and tools with you!
This guide will walk you through everything you need to patch a hole in drywall, whether it’s a small nail hole or a larger-than-you’d-like gash. With a few tools, a little patience, and this step-by-step guide, you’ll have your walls looking good as new in no time!
Want to Save This?
Enter your email below and I’ll send it directly to your inbox!
This post contains affiliate links for your convenience. See my full disclosure policy.
What You’ll Need to Patch Small Holes in Drywall
Before you roll up your sleeves, gather all the materials. Most of these can be easily found at your local hardware store.
For small holes (under ½ inch):
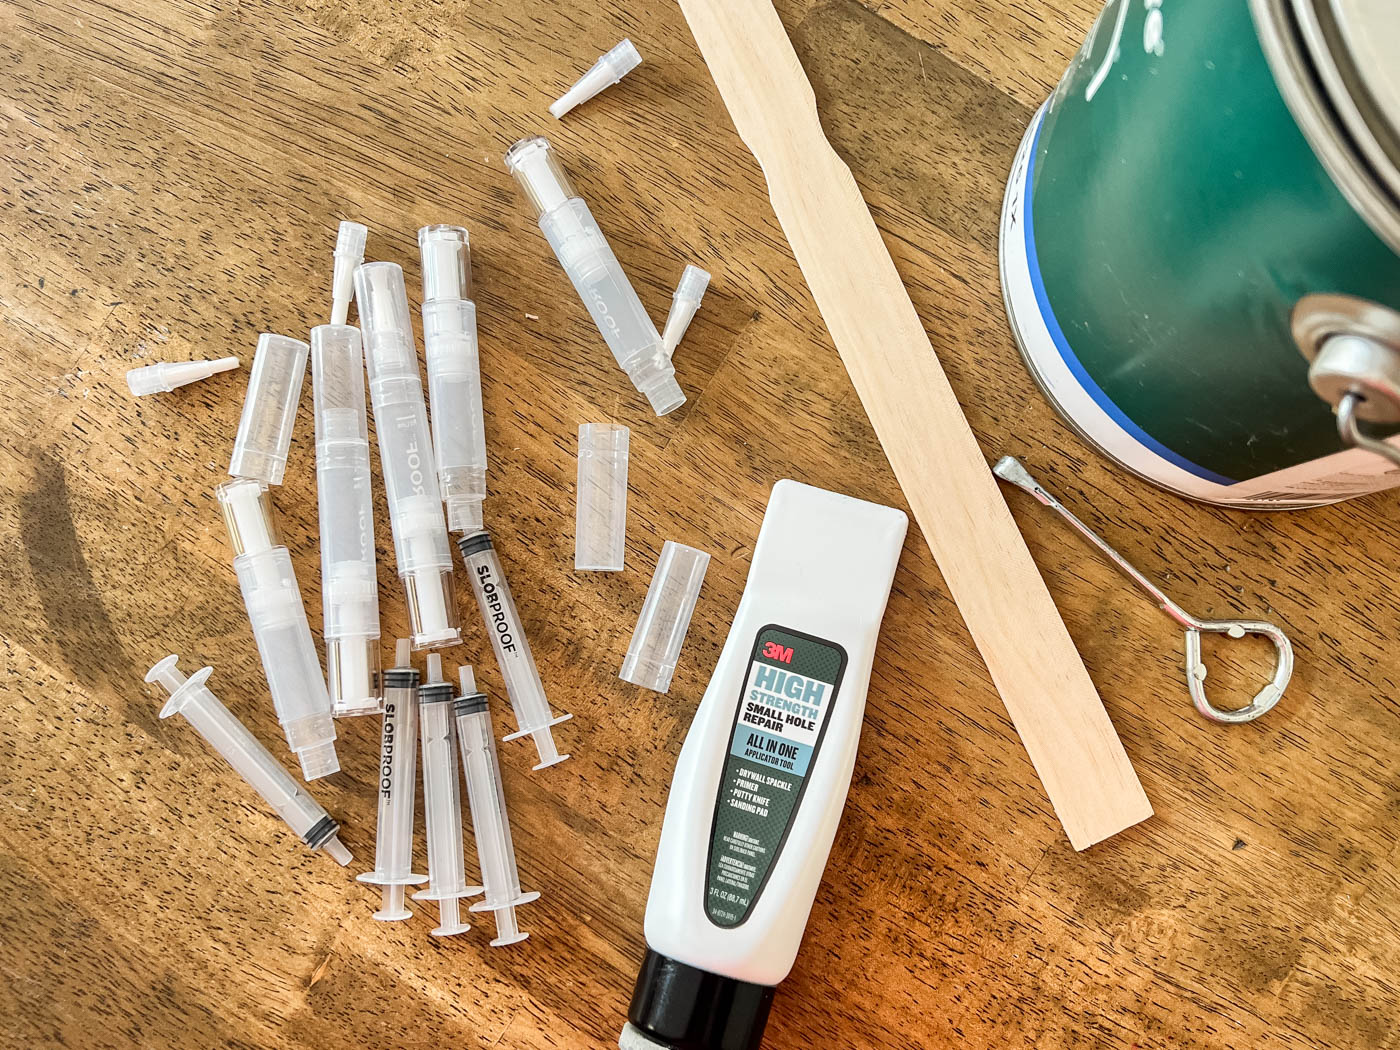
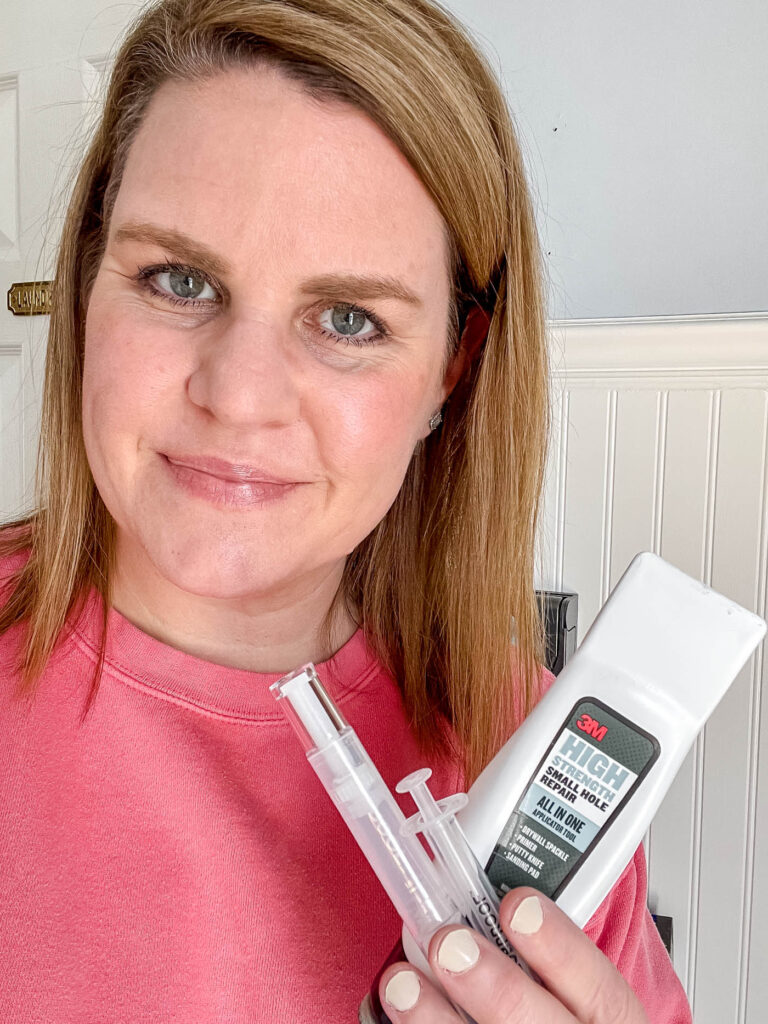
- Spackle or lightweight joint compound (Or THIS all-in-one tool that I use!)
- Putty knife
- Sandpaper (medium and fine grit)
- Touch-up paint and a paintbrush (I use these paint pens for quick and easy touchups!)
For medium holes (½–6 inches):
- Self-adhesive screen patch
- Spackling compound (all-in-one tool includes putty and knife)
- Putty knife
- Sandpaper
- Or, you can grab this drywall repair kit and it includes the spackling, putty knife and sandpaper for holes up to 3″ wide. (Here’s a large hole drywall repair kit if your hole is between 3-5″.)
- Paint and a paintbrush
For large holes (over 6 inches):
- Drywall patch or a piece of drywall
- Utility knife
- Drywall saw
- Spackling compound
- Mesh drywall tape, optional
- Putty knife
- Sandpaper
- Paint supplies
How to Patch a Small Hole in Drywall
This is for small nail or screw holes less than 1/2 inches in diameter. It is very simple to address these holes, and I have two favorite tools that will make this chore so much quicker and easier!
1. Assess the Area
Knock away any raised edges with sandpaper.
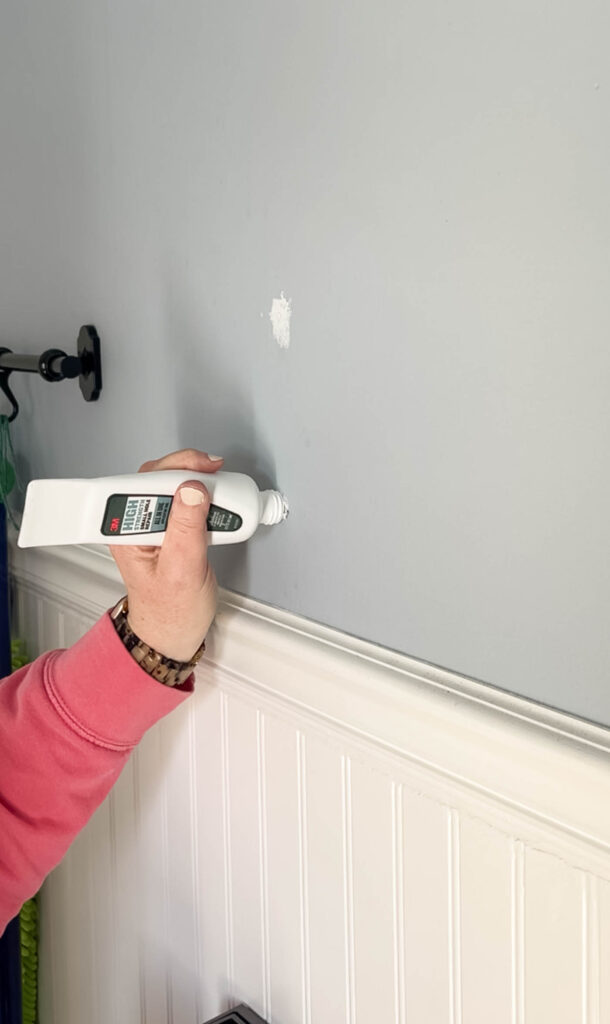
2. Fill Hole with Spackling
Using spackiling and a putty knife, or this all-in-one tool I love, fill the hole with spackling putty.
Scrape the excess off with the putty knife. Leave it a little bit higher than the wall, so that when it dries it’s not sunk down into the hole.
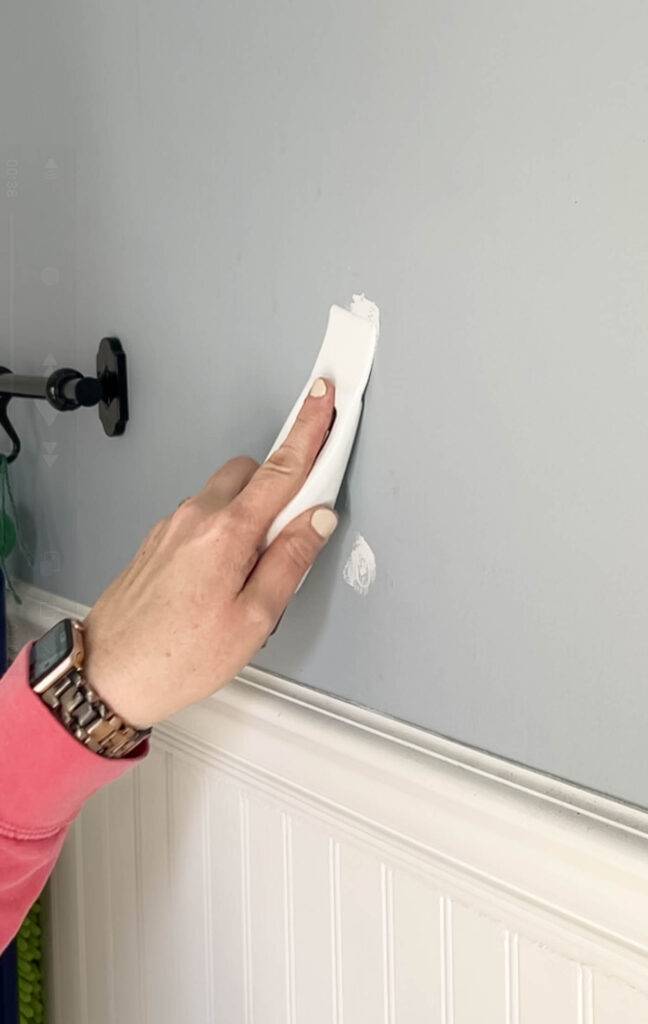
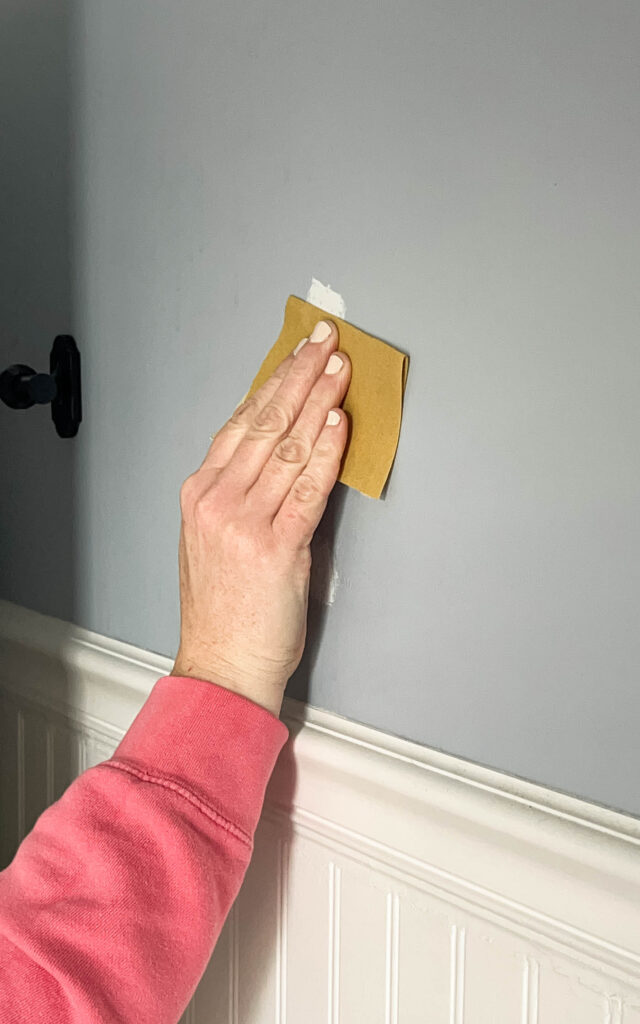
3. Once Dry, Sand It Down
Once the spackling is dry, use fine-grit sandpaper to make the hole flush with the wall. Wipe away any excess dust.
4. Paint Over the Area
Paint over the area with a paintbrush or a refillable paint pen, like this one. I love keeping these paint pens on hand for quick and easy touch-ups!
Let it dry and the wall should look good as new!
How to Patch a Medium Hole in Drywall (½–6 inches)
When it came time to fix the hole in my drywall, caused by a poorly installed (by me) toilet paper holder, I thought I’d be cutting some new drywall and doing an extensive repair.
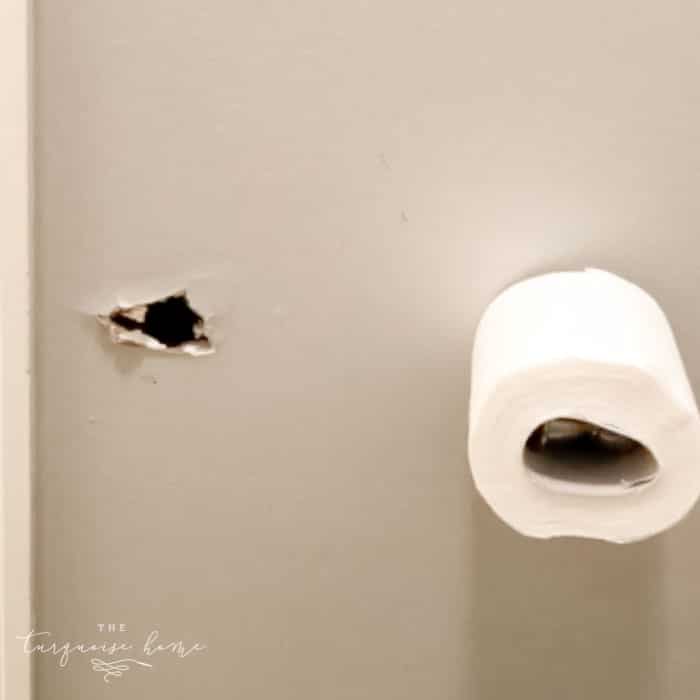
While I was purchasing the spackling compound, I saw this drywall repair kit. I was intrigued, so I took a closer look. And it looked like just what I needed! The hole that I needed to patch was about 2.5 inches in diameter, so this patch was perfect.
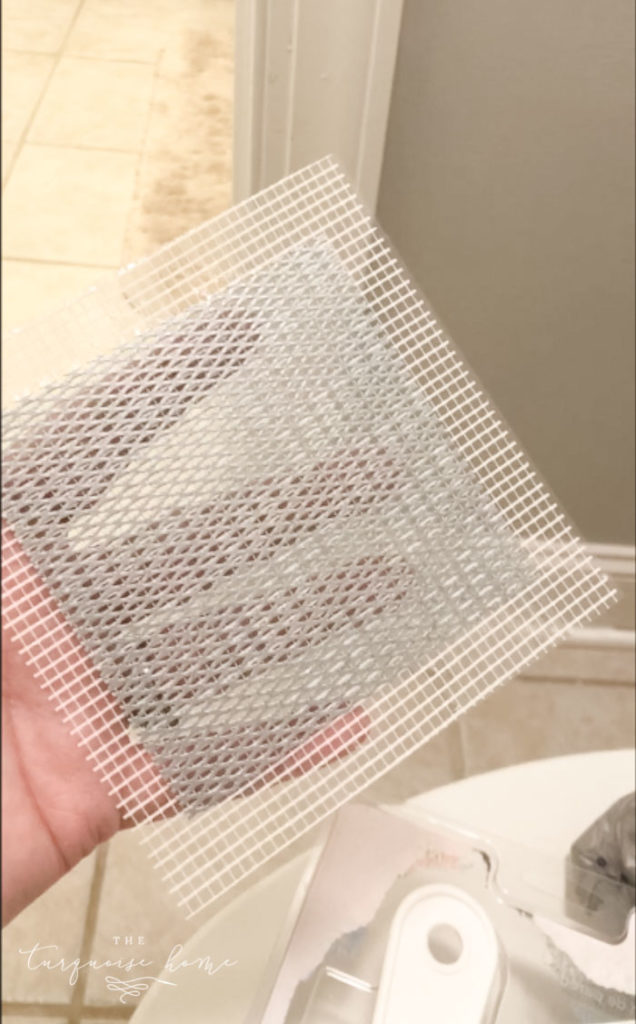
I mean, I knew that I wasn’t going to be able to just slap some compound on the hole like it was a nail hole. This large of a hole needs a mesh screen for structure and support. It’s the perfect solution for covering the medium hole in the drywall and keeping the spackling compound from falling into the hole.
How to Fix Small Holes in Drywall – Video
You can watch the video below, or follow the simple steps I’ve laid out for you. (Note: I apologize for the photo quality in this post as most of these are screen grabs from the video. For some reason, I can’t remember to take videos AND photos. Ha!)
The latest on Youtube:
1. Sand the area clean and free of debris.
Knock off any extra drywall on the hole’s edge to achieve a flat working surface. Remove any wallpaper around the area if the wall has wallpaper on it.
2. Wipe the area clean, ensuring it’s dust-free.
3. Cut the Mesh Screen to Size and Install
If I was dping this over again, I would have cut my mesh screen down closer to the size of my hole. So, do that first, if you need to.
Remove the backing from the adhesive screen patch and apply firmly over the drywall hole.
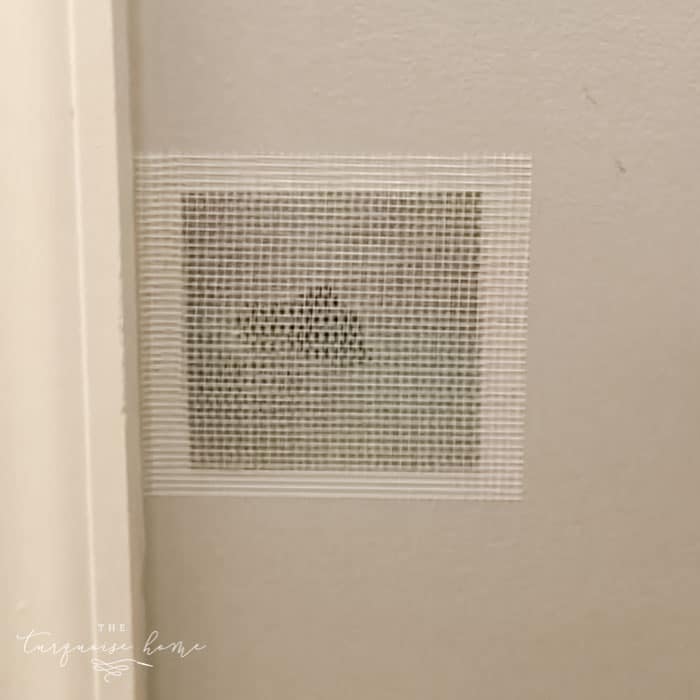
4. Add Spackling Compound to Adhesive Mesh Screen
Apply a thin layer of spackling compound over the screen patch until you have reached an inch past the edge of the patch. It won’t be pretty, but we’ll do this a few times to make it look nice!
Let it dry for 2-3 hours.

5. Sand the spackling compound until smooth.
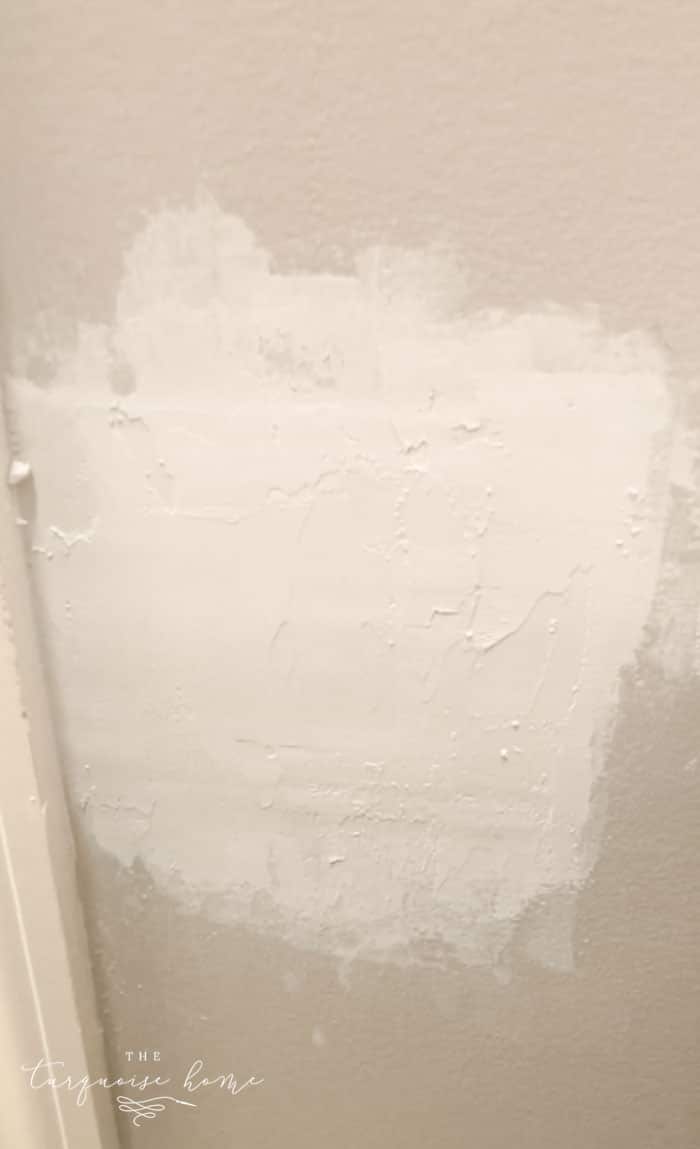
6. Repeat steps 4 and 5 until you have a smooth area and can no longer see the screen patch.
I had to apply 2 thin layers for mine to look good and smooth. Be sure to really smooth down the edges of the spackling to make sure they are flush with the wall.
7. Now you’re ready to paint!
Paint the wall with a good quality paint brush, like this one!
How to Patch a Large Hole in Drywall (over 6 inches)
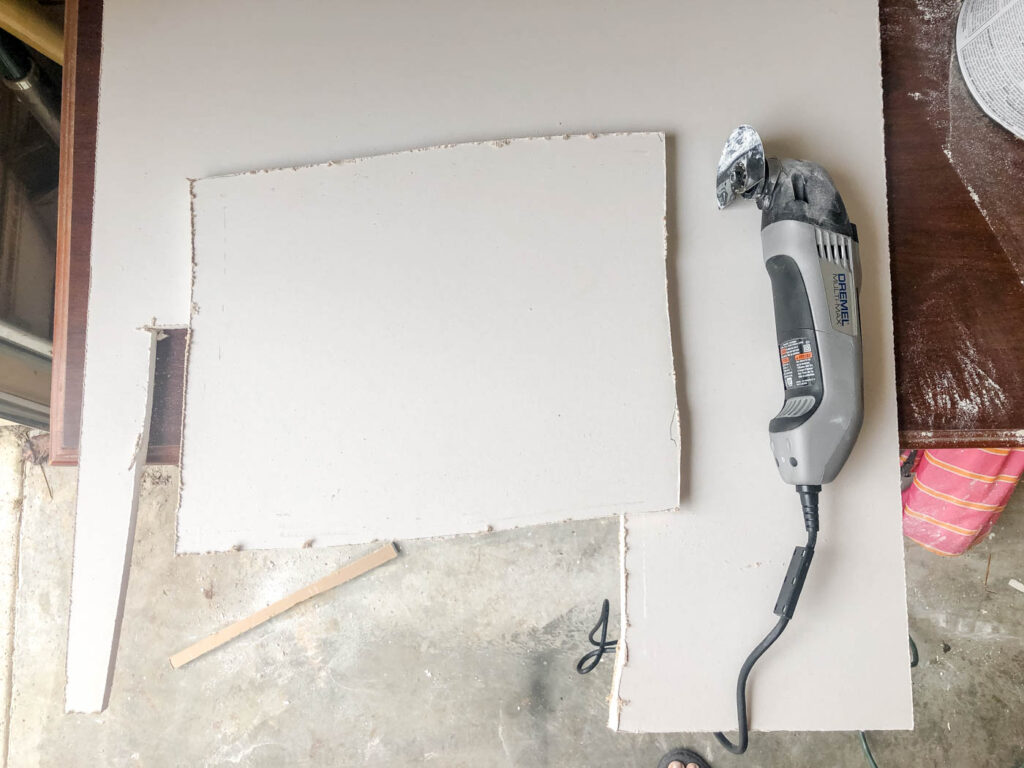
When we moved from our previous home, I had to fix a large hole in our garage where our deep freezer was pushed into the wall by the car. Oops!
It was obviously larger than any patch would cover, so I had to grab a piece of drywall and cut it to fit the hole in the wall. Let’s walk through the steps.
1. Assess the Damage
Start by examining the size and shape of the hole. If it’s larger than 6 inches wide, you’ll need to install a new piece of drywall rather than using standard mesh patch and spackle.
Pro Tip: If the edges of the drywall around the hole are frayed or uneven, trim them back with your utility knife for a clean work surface. Trust me, smooth edges make all the difference!
2. Prepare the Hole
Go ahead and use a stud finder to locate your studs. It’s helpful if you can expose a stud or two in order to attached your new piece of drywall to it.
Use your drywall saw to enlarge the hole into a square or rectangle if needed. Clean edges are easier to work with than irregular shapes.
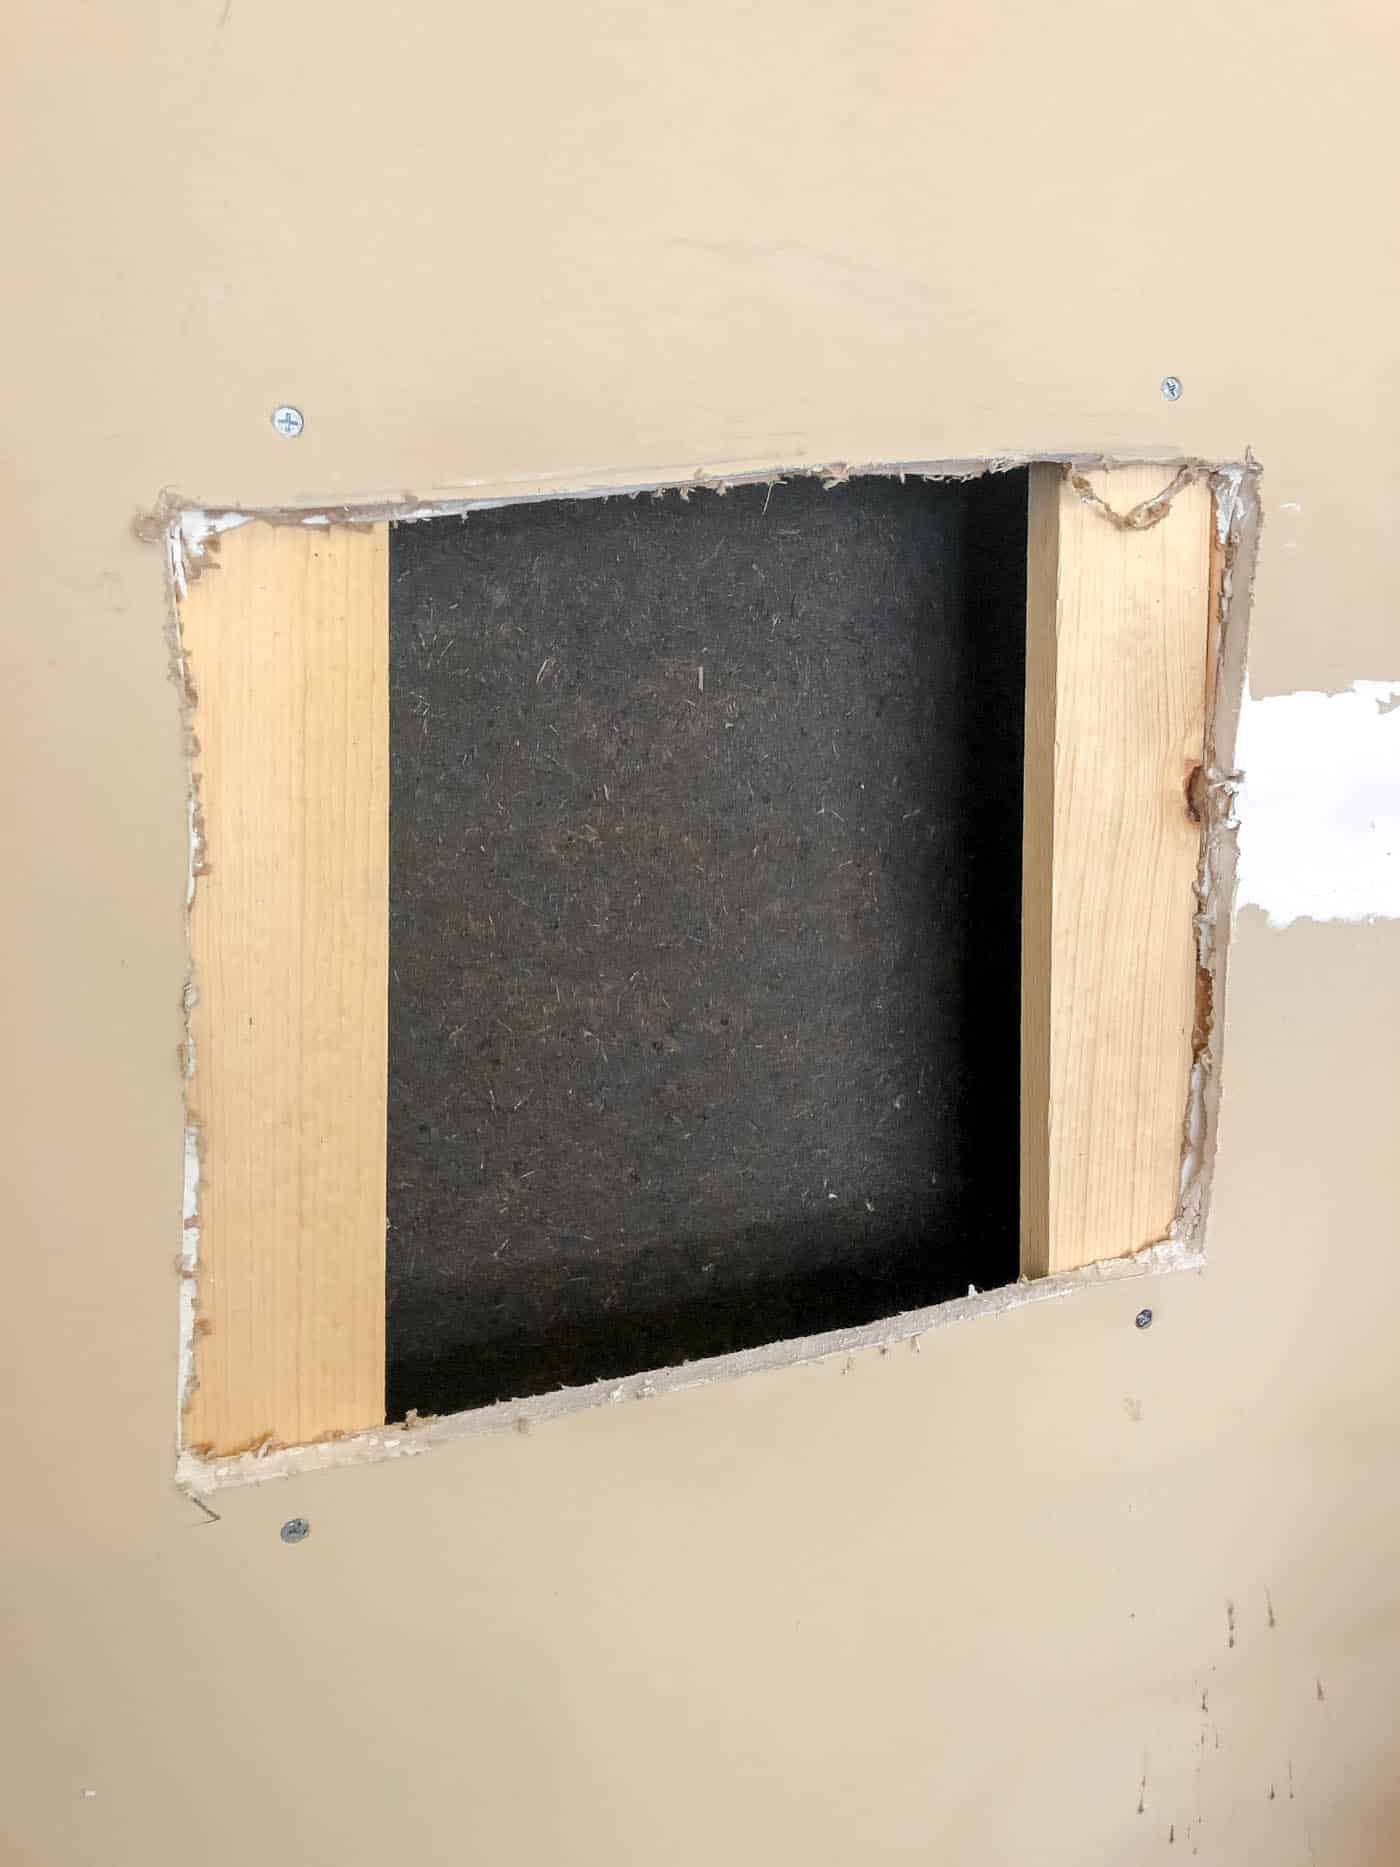
If the hole reveals a stud behind the wall, great! You’ll anchor your patch directly to the stud. If not, you’ll need to install a support—more on that next.
As you can see in the above photo, I used drywall screws to screw the existing drywall into the studs to keep it well attached.
3. Measure and Cut the Drywall Patch
Use your damaged piece of drywall as a template by placing it on the new drywall board and tracing around it. Cut out the exact size you need with a drywall saw or reciprocating saw.
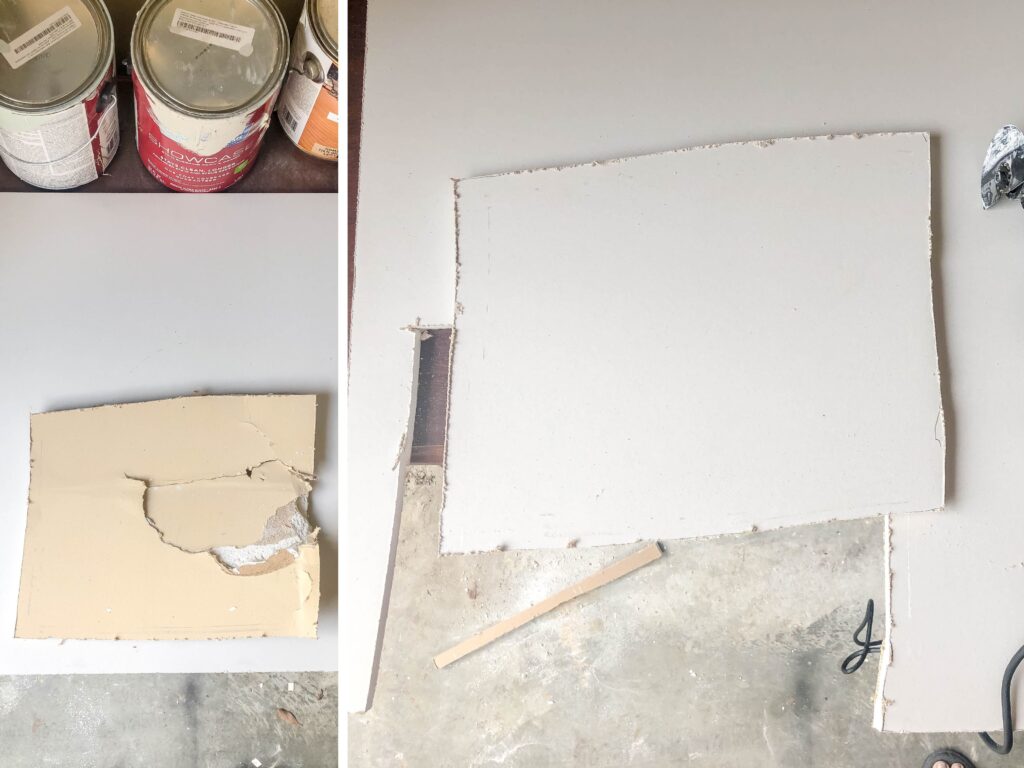
Or, if you don’t have the extracted piece, determine the dimensions of the hole. Then, use these measurements to cut a new piece of drywall from your drywall sheet. Aim for a snug fit, but if you’re slightly off, don’t worry—you can smooth it out later.
4. Install a Support (If Needed)
For holes larger than 6 inches without nearby studs, create a support by anchoring a small wooden board (a scrap 1×2 plank works well) behind the hole. Insert the support through the hole, then secure it in place with drywall screws using your drill. This provides stability for your patch.
5. Secure the Drywall Patch
Place your drywall patch into the hole and secure it with screws into the studs or the support you just added. Use a screwdriver or drill to drive in the screws until they’re just below the surface—don’t overdo it!
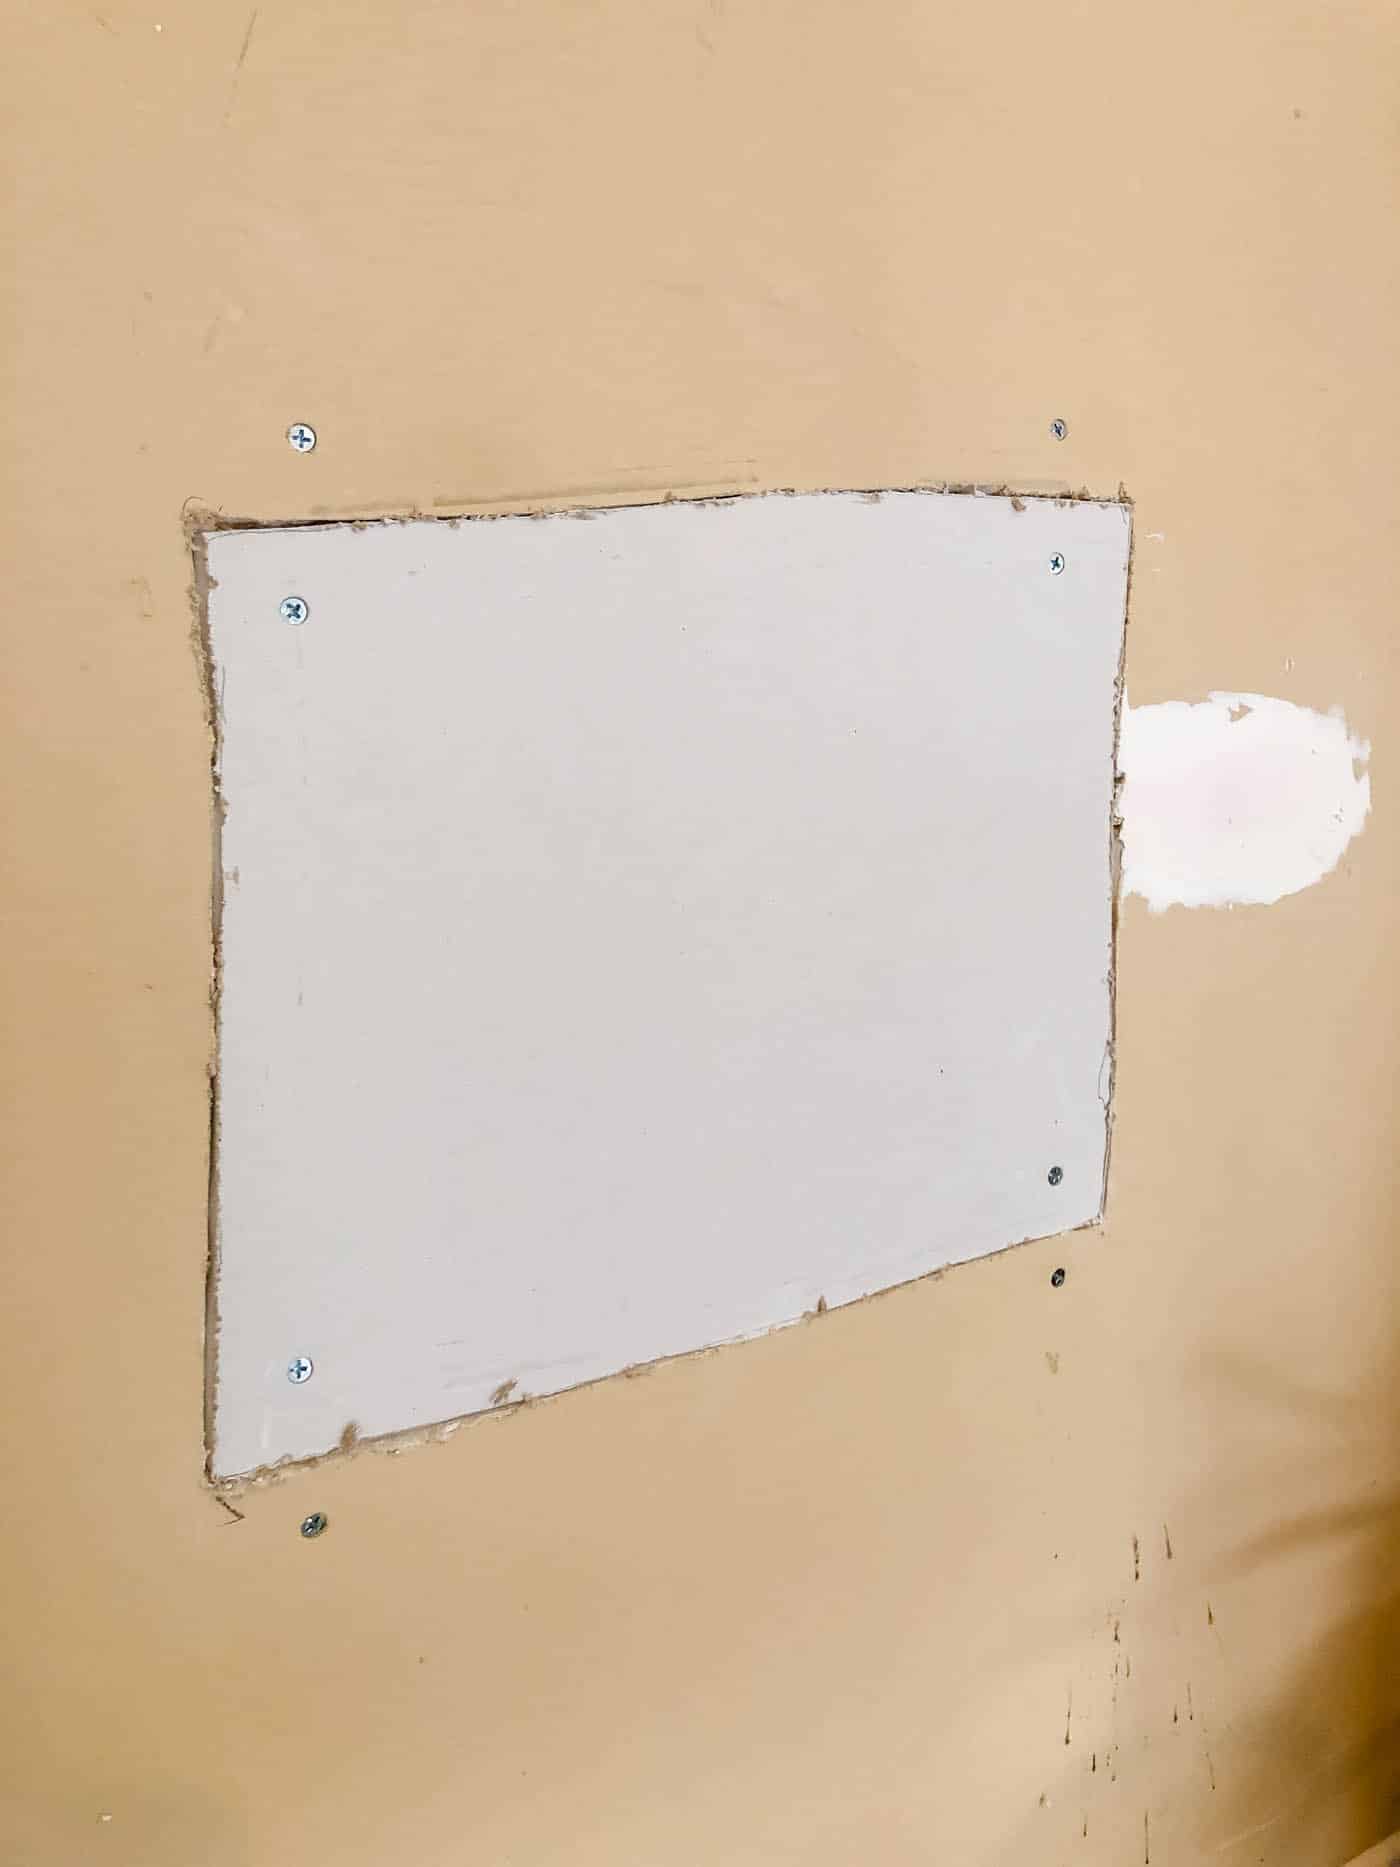
6. Tape and Apply Joint Compound
Time to make everything smooth! Cover the seams around your drywall patch with mesh or paper tape. Then, using your drywall knife, spread a layer of joint compound over the tape and screws.

Helpful Hint: Feather the edges of the joint compound outward to blend it into the wall. This helps the patch “disappear” once painted. Apply thin layers—piling on too much compound can create bumps.
Personal Note: I did not use mesh tape around the seams, but if I were doing this on an inside wall, I would have!
7. Sand It Smooth
Once the joint compound dries (check your product instructions for timing), sand it down with medium-grit sandpaper to remove high spots. Follow up with fine-grit sandpaper for a smooth finish. Remember to wear a dust mask—sanding creates a lot of fine dust!
Run your hand over the sanded area to check for imperfections. If you feel any bumps or dips, apply a second layer of joint compound, let it dry, and sand again.
8. Prime and Paint
You’re almost there! Apply a coat of primer over the patch to seal the surface and ensure the paint adheres properly. Once the primer dries, paint the area to match your wall. Use the same technique and finish as the surrounding wall for a flawless look.
Personal Note: My favorite moment is standing back and admiring the end result after it dries—it’s like a brand-new wall! The satisfaction of a completing a simple task is undeniably good!
Final Thoughts
If you enjoyed this post or would find it helpful later, please save it to Pinterest or share it with a friend! And comment below if you have any additional tips or tricks. We’d love to learn from each other!
More Posts You Will Love:

Did you drill the holder back in the same spot? If not then did you move it and patch the right side as well?
Can I still attach a curtain rod in the same place after all this dries?
Mmmm, I’d be hesitant to put it right in the exact spot.
That’s a great post, Thank you so much for sharing this with us. Keep going