DIY Bookshelf Ledges for the Nursery
This DIY nursery bookshelf tutorial is so simple with just a few supplies and simple tools! They make reading bedtime stories so fun!
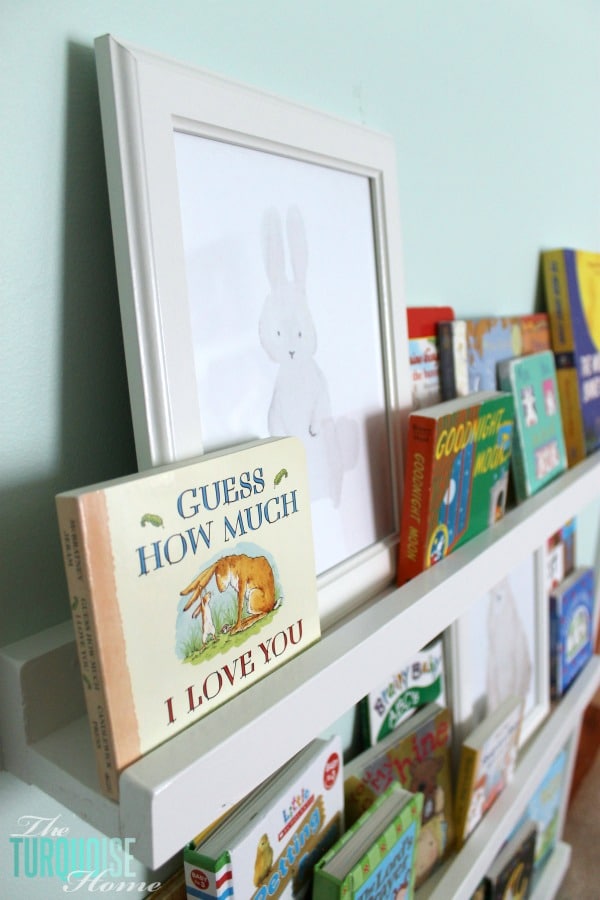
I’ve had these simple DIY bookshelf ledges on my to-do list forever. Now that I finally finished then in Baby G’s room, I immediately thought, “why in the world did it take me this long!?!?” They were so simple; I love the price; and they make such a huge impact. Perfect for storing books on an empty wall in a kids room or play room.
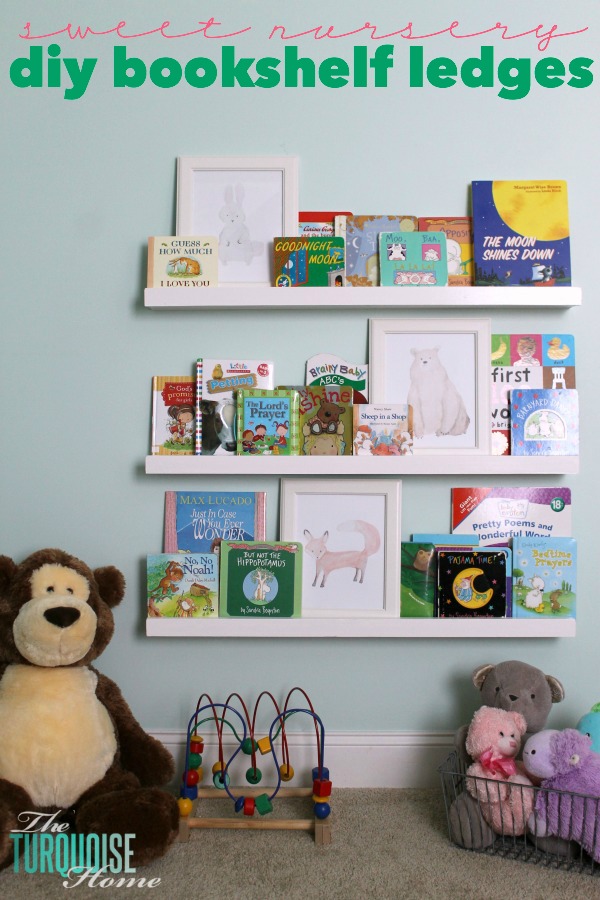
I also love the fact that the kids can see the books easily, which means they want to read more! My older daughter is already handing me books more often because she sees them on the wall and not tucked away on a traditional bookshelf.
These were made using the Ten Dollar Ledges plan from Ana White, only I used 1×3’s instead of 1×4’s. They are called $10 ledges because an 8 foot ledge costs about $10. But I made mine 3 feet long, so they are more like “less than $5 ledges.” 🙂
OK, so here’s how I did it.
Supplies You’ll Need for DIY Bookshelves:
1. 1 – 1×2’s in the length of your choice (I bought enough to make 3 – 3 foot ledges)
2. 2 – 1×3’s in the length of your choice (I bought enough to make 3 – 3 foot ledges)
3. Miter saw or circular saw (optional)
4. Kreg Jig (optional)
5. Drill
6. Wood glue
7. Sander and/or sand paper
8. Screws
9. Paint (I used Simply White from Benjamin Moore in semi gloss)
10. Paint brush
11. Wood putty
12. Level
How to Build the DIY Nursery Bookshelf Ledges
1. You’ll want to cut your wood down to your desired length. I bought 6 foot boards, so I just needed to cut them in half to make them 3 feet. I used my miter saw, but they will cut them down for you at the hardware store (sometimes for a little fee).
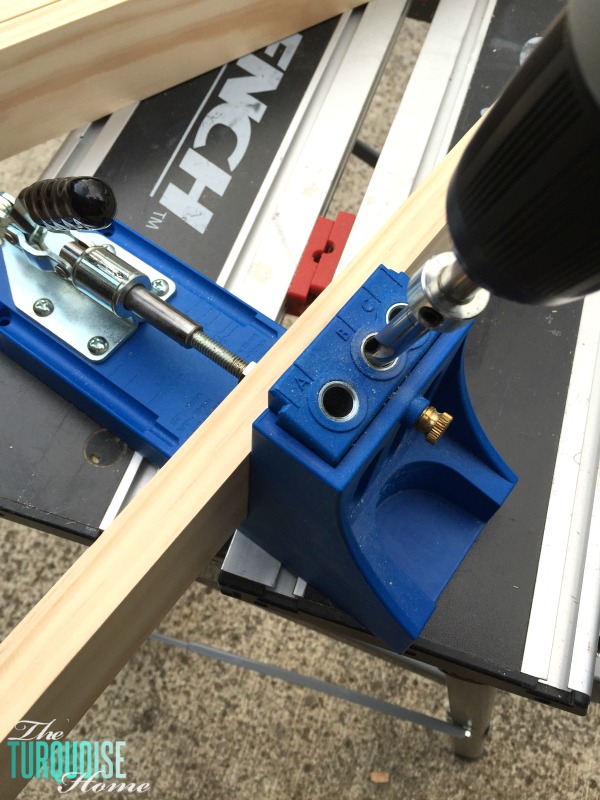
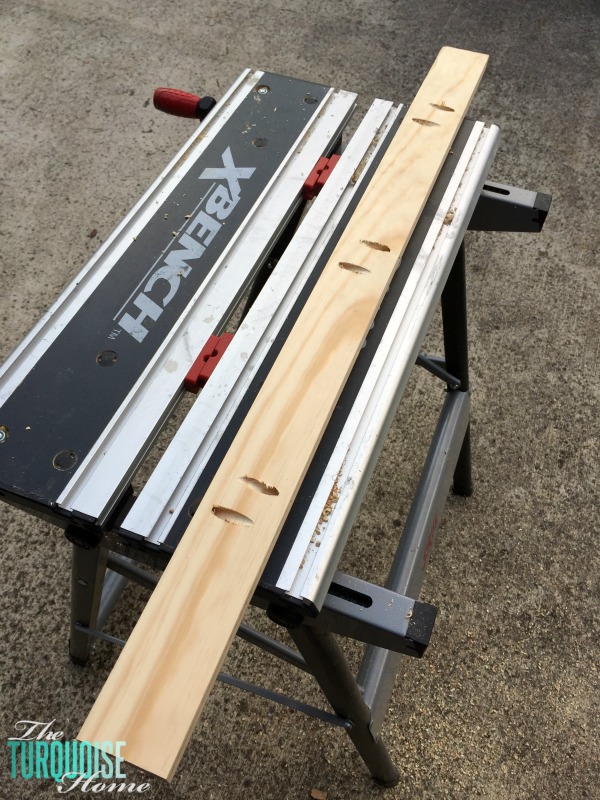
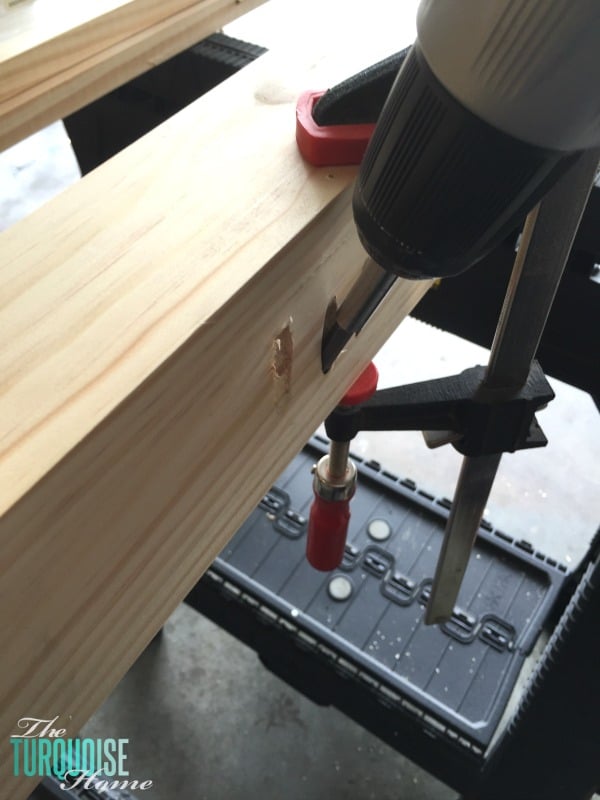
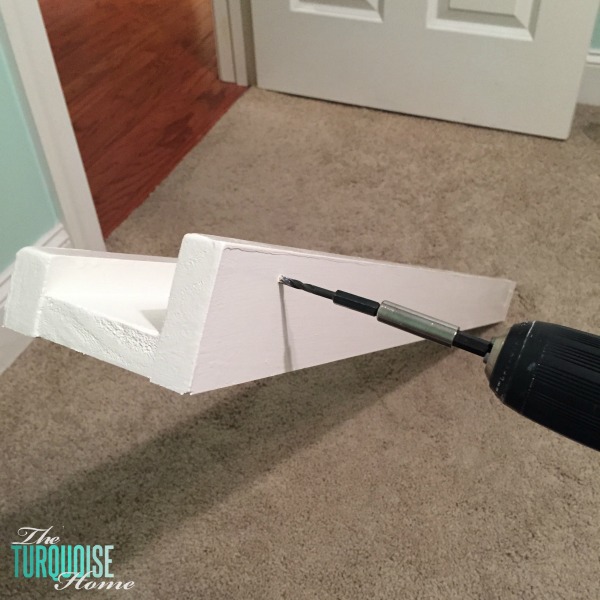
2. I took one of the 1×3 boards and drilled three Kreg Jig holes pointing in both directions along the board.
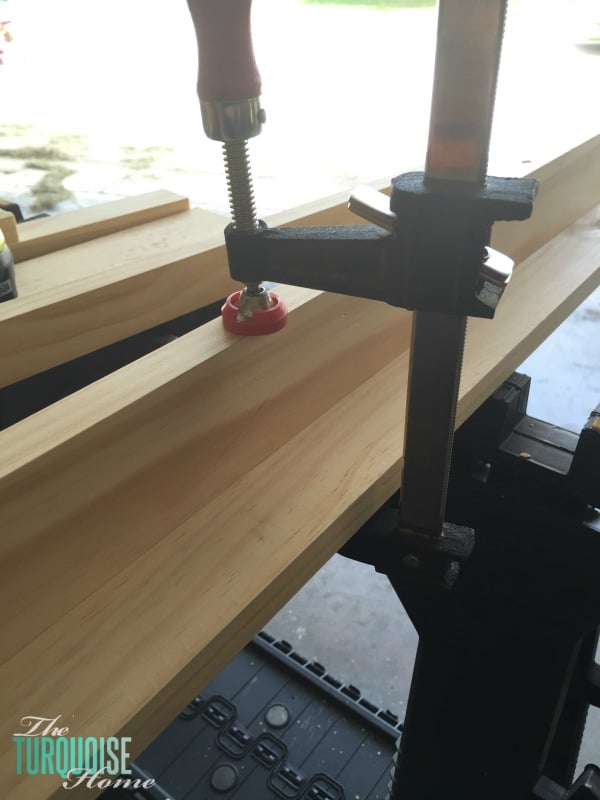
3. I clamped the other 1×3 to the side of the first 1×3, put a line of wood glue between the joints and screwed them together using the Kreg Jig holes. Repeat with the 1×2 on the other side.
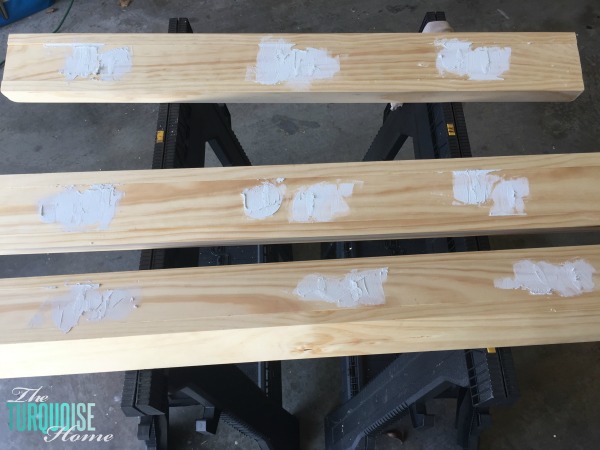
4. I filled the Kreg Jig holes with speckling, but wood putty would have worked even better. I just couldn’t find mine. 😉 You could leave these holes open since they are on the bottom of the ledges, but I thought that we might see the bottoms if we’re playing on the floor and that would have bothered me. OCD? Maybe. Let the putty dry and then you’re ready for paint!!
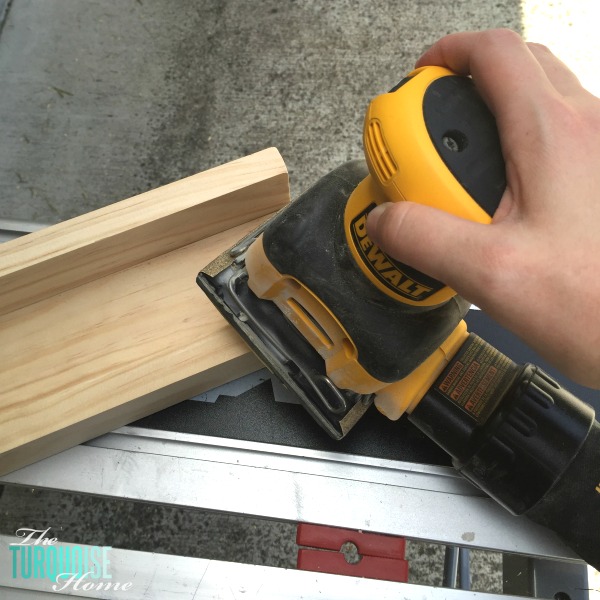
5. When the putty/spackling dried, I sanded them down and sanded the corners down a bit on the front. I don’t want the baby to fall on a sharp corner!
6. Paint your ledges in the color of your choice. I love Benjamin Moore’s Simply White, which I had color matched at Lowe’s in their Valspar paint + primer. Since it was raw wood and the paint includes primer, I didn’t prime them. But I ended up needing 3 coats of paint. So, you can either do primer and 2 coats of paint, or 3 coats of paint. You’re choice. 🙂 (This is my favorite primer, if you do choose to go that route!)
How to Install the Ledges
There are many ways you can install these ledges. Since mine are going in a baby’s room where they will probably serve as a stabilizer for a walking little one, I wanted mine to be as sturdy as possible. You could definitely use a french cleat, or another hanging method, but I chose to drill my shelves directly into the studs on the wall.
I marked my studs on the wall and marked those spots on the ledges. Then I pre-drilled pilot holes through the ledges. This made installing the screws possible. Otherwise it would have been too difficult to get them through so much solid wood.
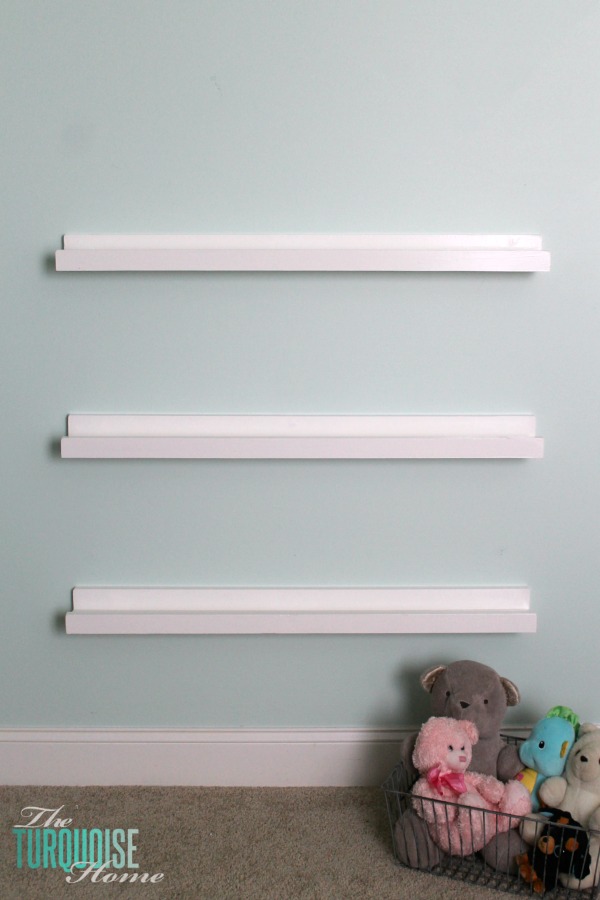
Thankfully my ledges spanned across 3 studs on my walls. So, they are super sturdy. You’ll want to use a level to make sure they are level horizontally. And then use your level to make sure they are level going up the wall, too.
I used 2″ screws. And they worked great! Be sure counter sink them so that you can putty and paint over them later!
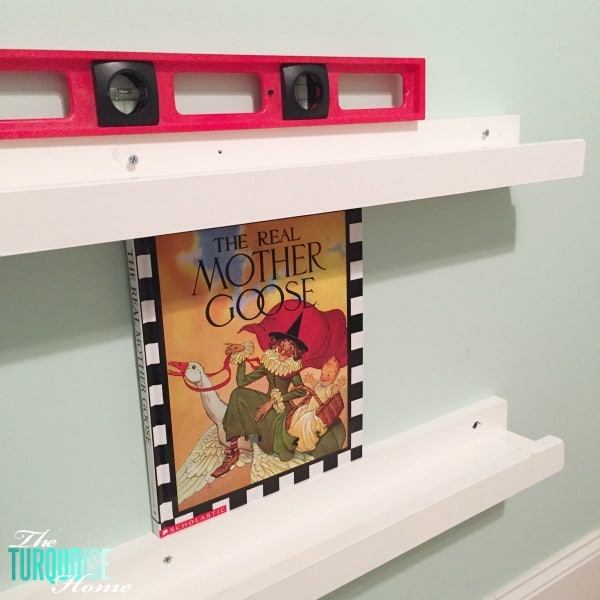
I found the tallest book in our collection and used it for a spacer. If you don’t want to use a book, cut down a scrap piece of wood for this. It’s much easier than trying to hold the ledge at just the right spot while you screw it in.
Once the screws are all in place, putty over the holes. Let that dry and then sand the putty and cover with a touch up of paint.
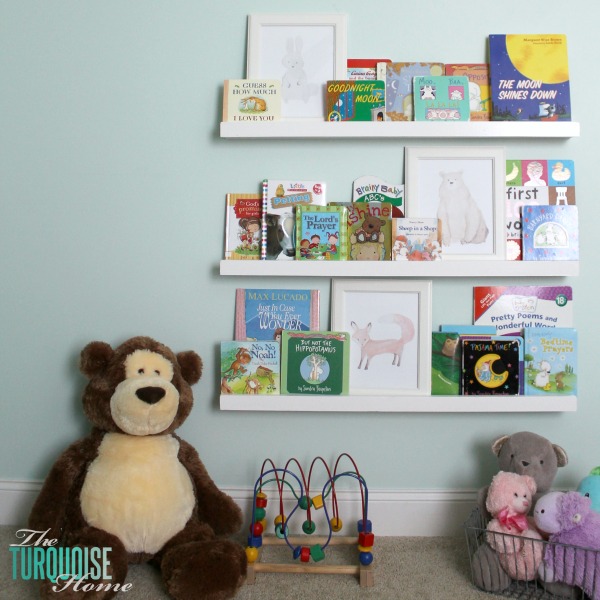
Last step is to fill with sweet baby books!! I absolutely love how this project turned out. The fact that it fills up a wall and allows the girls to access their books easily is the icing on the cake. When I’m sitting in the room feeding the baby, I just love to stare at them. Ha!
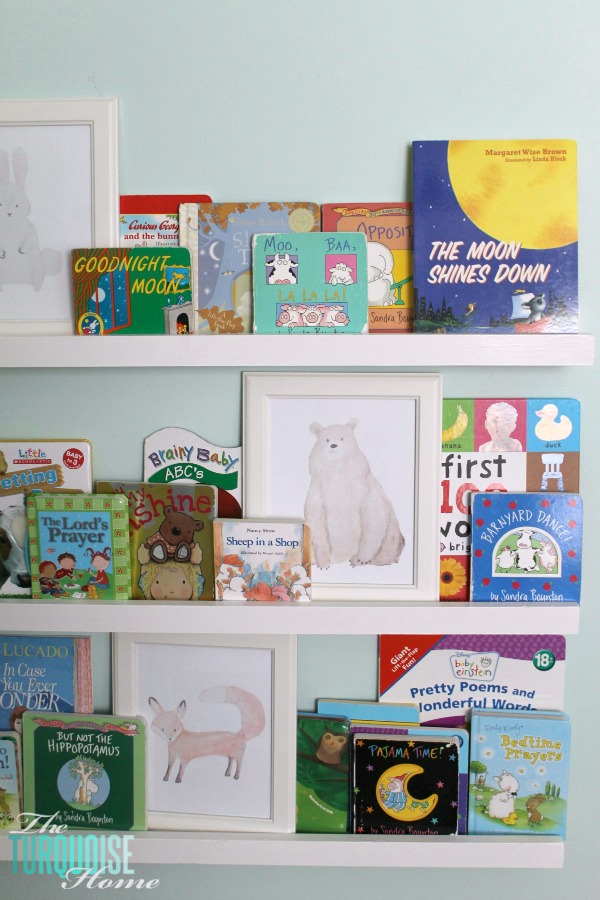
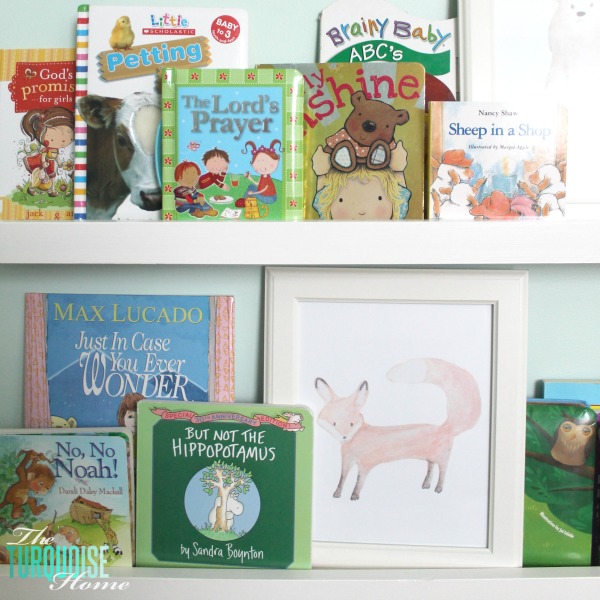
The cute woodland creature water colors are from this Etsy shop and only $5 each! So sweet and cute! Frames are from IKEA.
This is almost the end of the DIY projects for Baby G’s nursery. I am so glad that it’s almost done!!
Check out the other projects from a Baby Girl’s Woodland Nursery.

How are these holding up? I really want to install some in my just turned one year old daughter’s room, but I’m nervous she’ll try to climb them. Any issues with this for you?
These are really, really cute Laura. You amaze me!!
I absolutely LOVE these! I wish I had power tools to make them, but I like the way you set up the shelves. I always am so literal with how to use them, just up high on the wall, but this is cool because it’s like a bookshelf attached to the wall. Amazing DIY as usual Laura, pinning!
Thanks Sam! I think there are some similar at IKEA if you just want to buy them. I can’t remember the name off hand, but I bet they would be easy to find!
It’s funny you mention that Laura, I actually found some at a 100 yen store (basically Japan’s version of a dollar store). I got three they aren’t nearly as big as yours but they will hold my little girl’s books – she’s 7 weeks so she doesn’t have many! I’ll tag you as inspiration when we post a pic on instagram 😉 Thanks!
Oh yay!!! Can’t wait to see the reveal on IG!