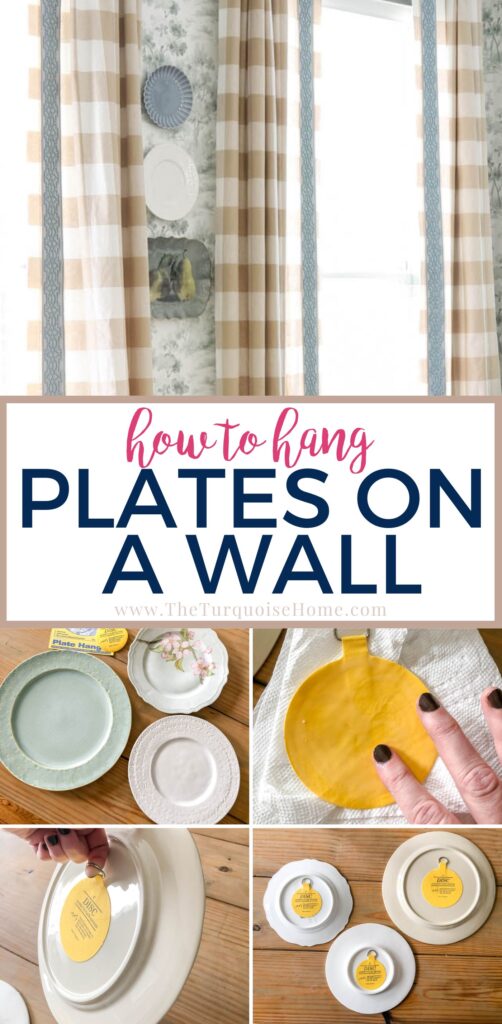
How to Hang Plates on a Wall
Learn how to hang plates on a wall with this easy step-by-step guide! Get tips on layout, hanging methods, and creating a charming, budget-friendly plate wall display.
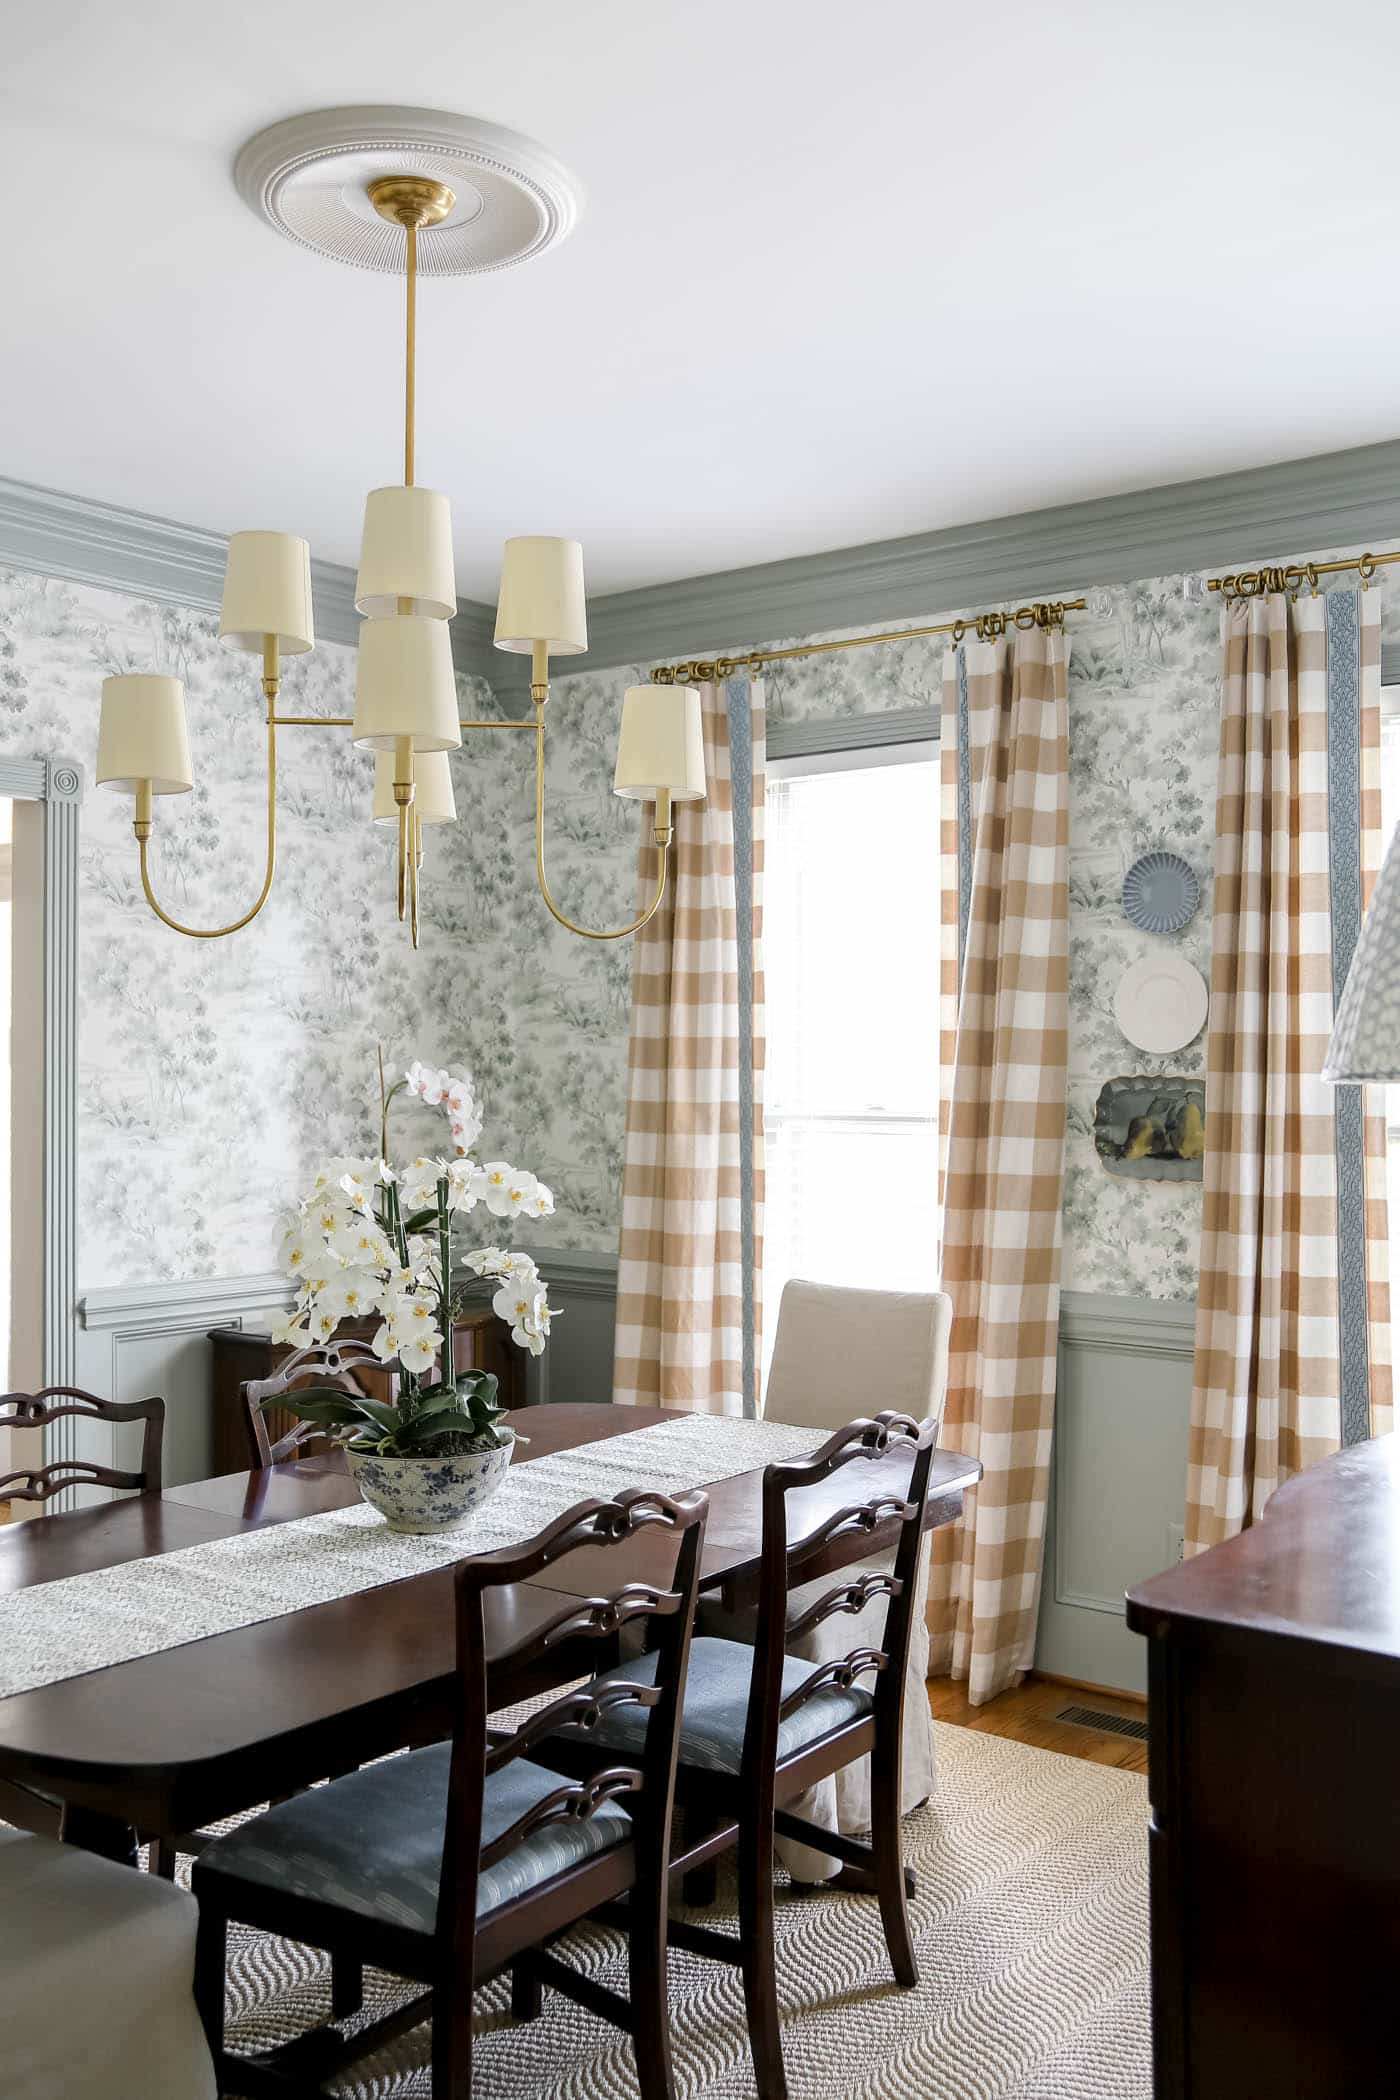
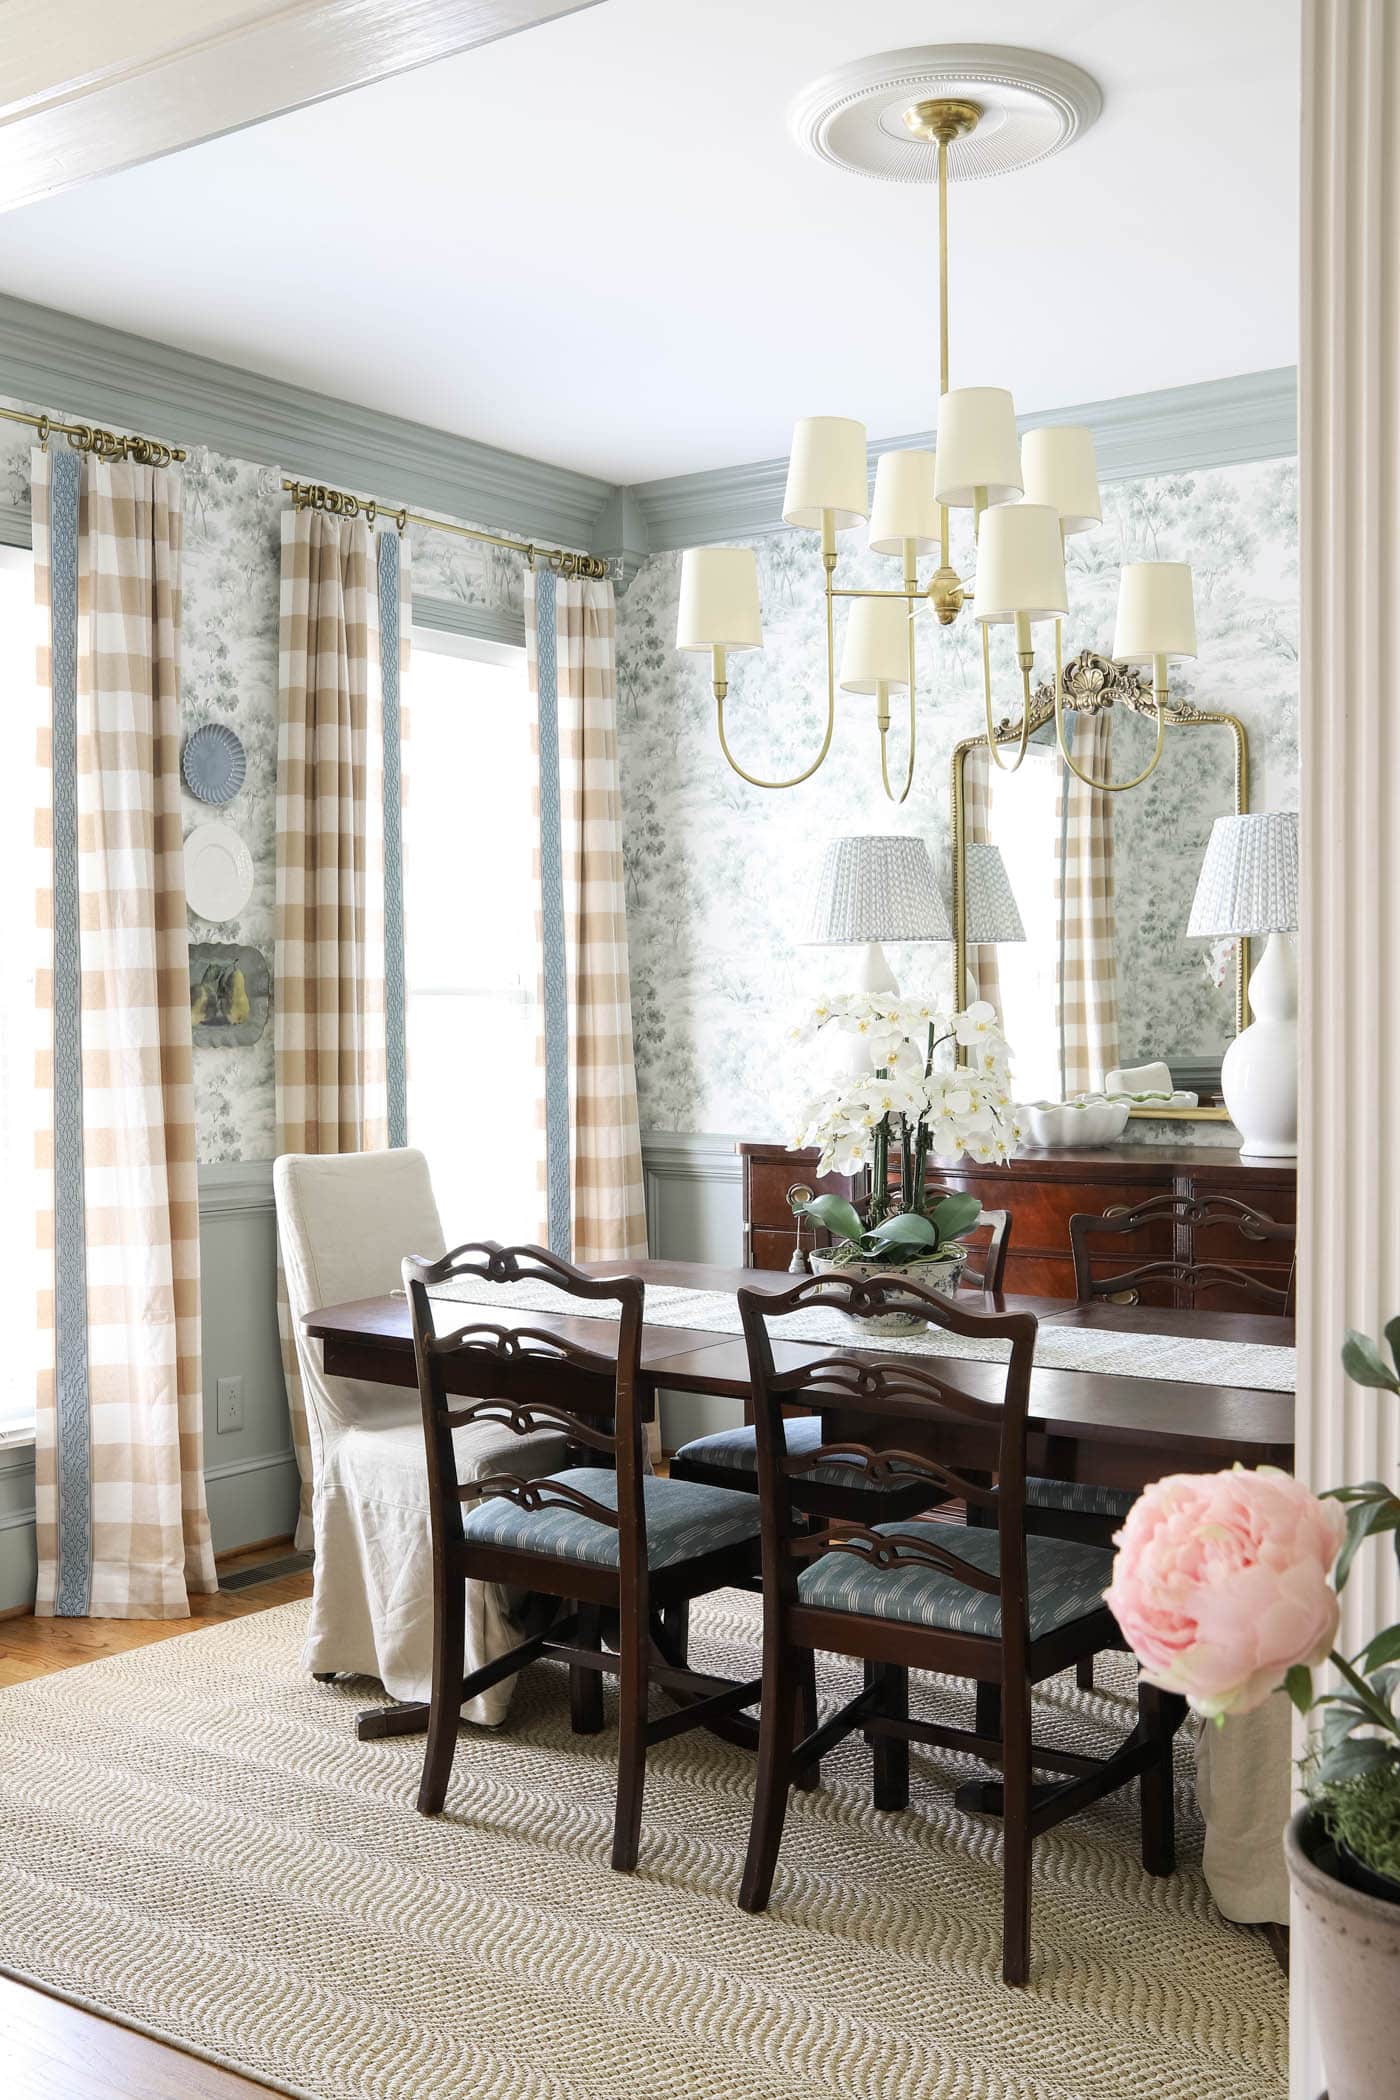
There’s just something about a wall full of plates that feels like home, don’t you think? Whether it’s Grandma’s heirloom china, a few thrifted treasures, or some sweet little dessert plates in your favorite colors — hanging plates on the wall is such a charming, budget-friendly way to add personality to your space.
I recently did this in our home and let me tell you: it’s WAY easier than it looks. So if you’ve ever been nervous about plates crashing to the floor (or just weren’t sure how to start), I’ve got you covered! Trust me, in my old home, I was too nervous to hang plates directly on the wall, so I made my own DIY industrial plate rack. But now I’m here to tell you, it’s so easy!
Let’s walk through the easy, real-life way to hang plates as wall decor without any fancy tools required.
Why Decorate with Plates on the Wall:
- It’s budget-friendly decor with big impact! You don’t need a huge budget to create a beautiful plate wall. Grab plates you already own, or head down to the thrift store, or even mix in affordable options from Target or HomeGoods. (I love to source plates from the Anthropologie home section!)
- Plates tell a story. Whether it’s your grandma’s china, a souvenir from a favorite trip, or that one cute plate you just couldn’t leave behind at the flea market; hanging plates is like curating a gallery of your memories. It’s a sentimental focal point!
- They add texture and charm. Plates bring a soft, layered look to your walls that feels warm and welcoming, especially when you mix different shapes, finishes, or patterns.
Want to Save This?
Enter your email below and I’ll send it directly to your inbox!
Supplies You’ll Need:
- Plates (any shape and size is welcome!)
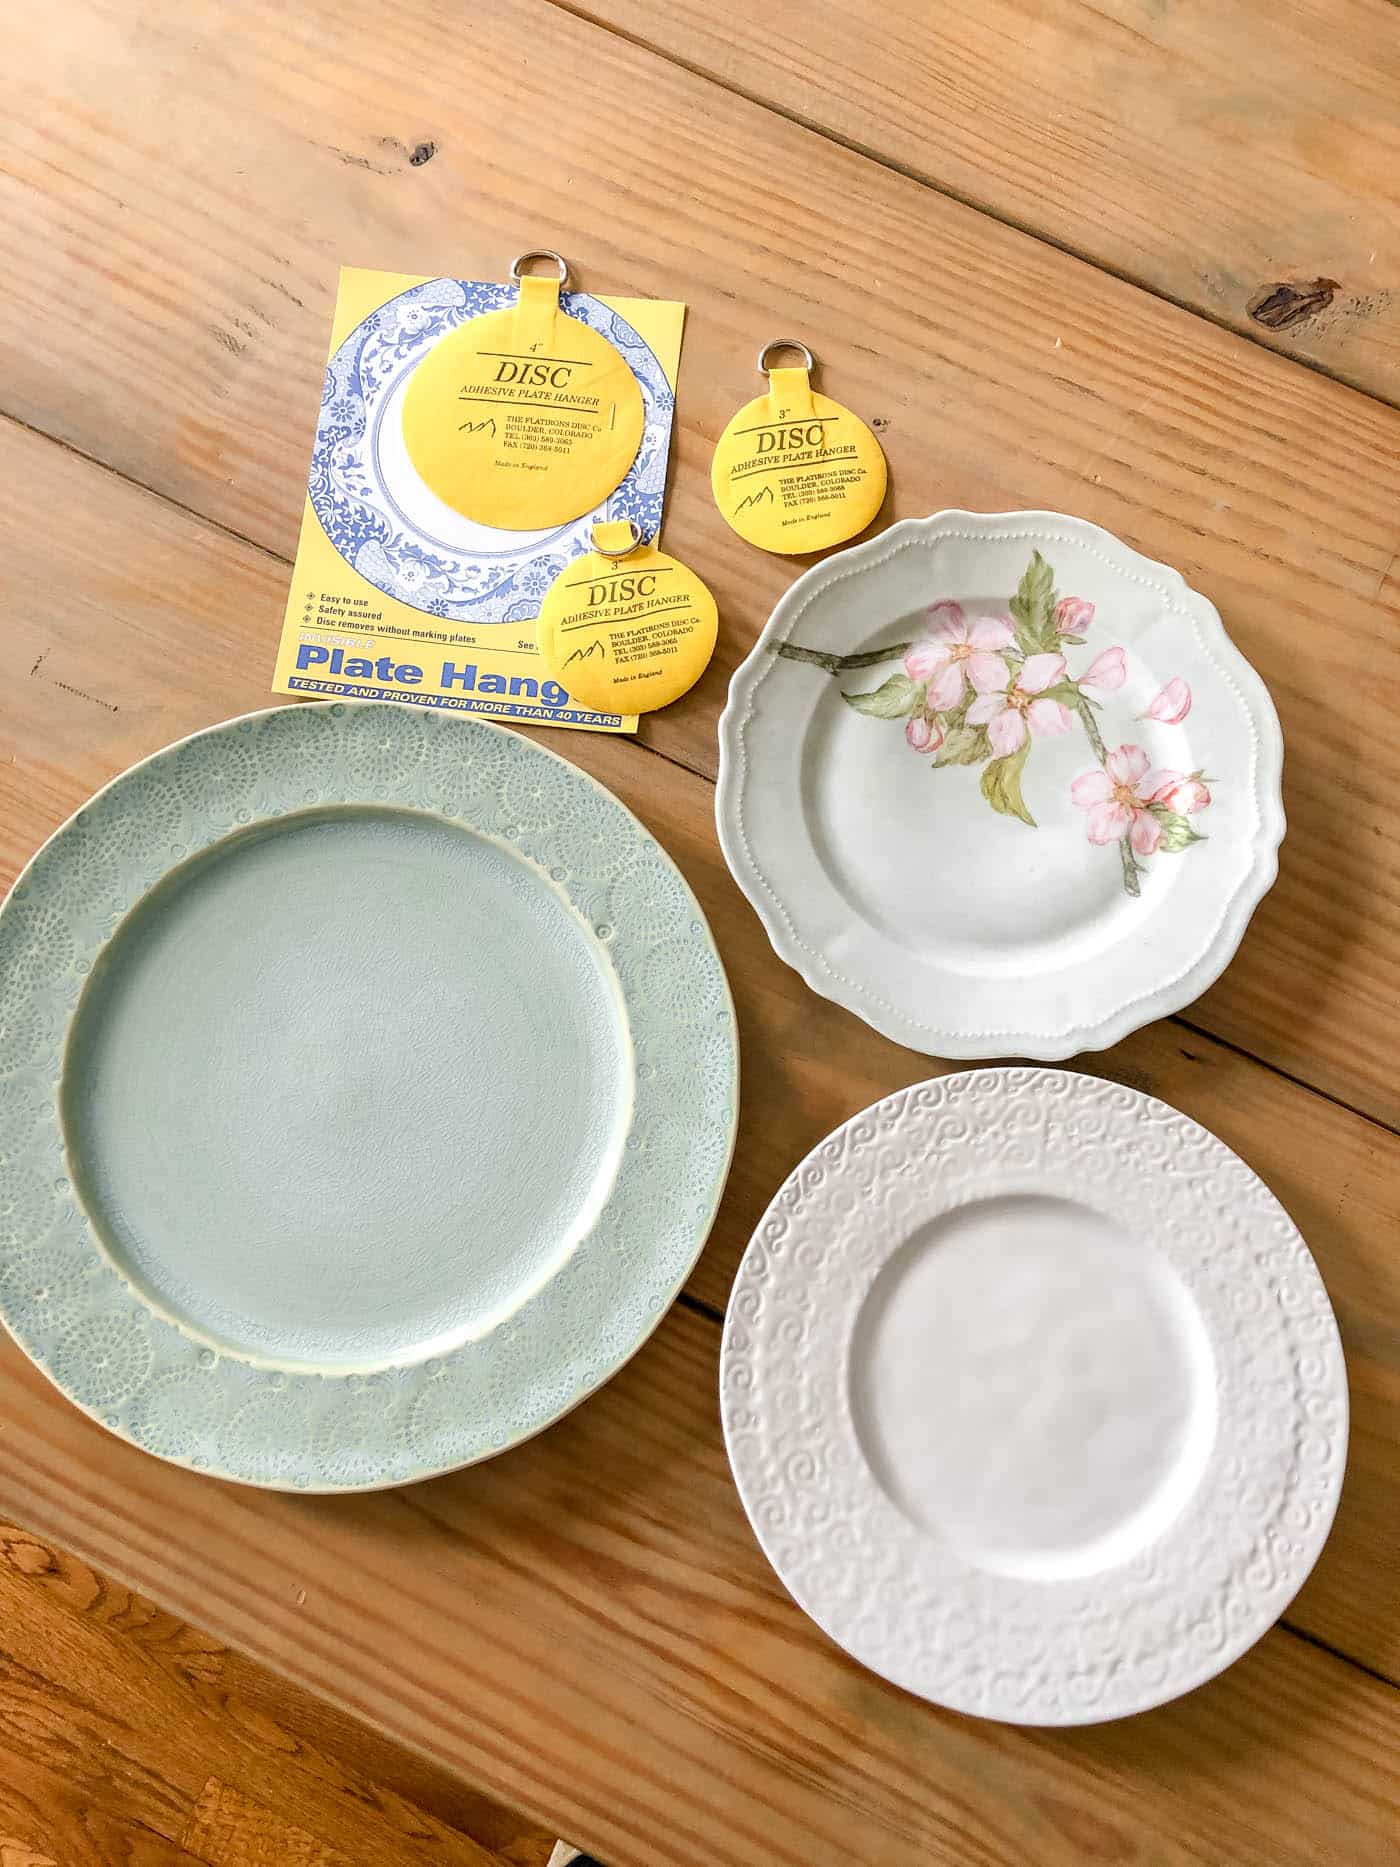
- Plate hangers or adhesive disc hangers, which are my personal favorite
- Picture hanging hooks or nails
- Painter’s tape
- Scissors
- Pencil
- Hammer
- Optional: level or measuring tape (if you’re doing a precise grid)
Hanging Plates on a Wall Tutorial
1. Choose Your Plates
Start by gathering the plates you want to hang. I love mixing sizes, shapes, and colors. It makes it feel more collected and cozy. Don’t be afraid to throw in a fun patterned plate with your solid ones or even mix vintage and modern.
Tip: Lay them out on a table or the floor first to play with the arrangement before putting anything on the wall.
2. Plan Your Placement with a Plate Template
Once you’ve settled on a layout you love, trace the outline of the plates onto a piece of kraft paper or wrapping paper and cut it out. Then, use those templates to tape your plate arrangement onto the wall.
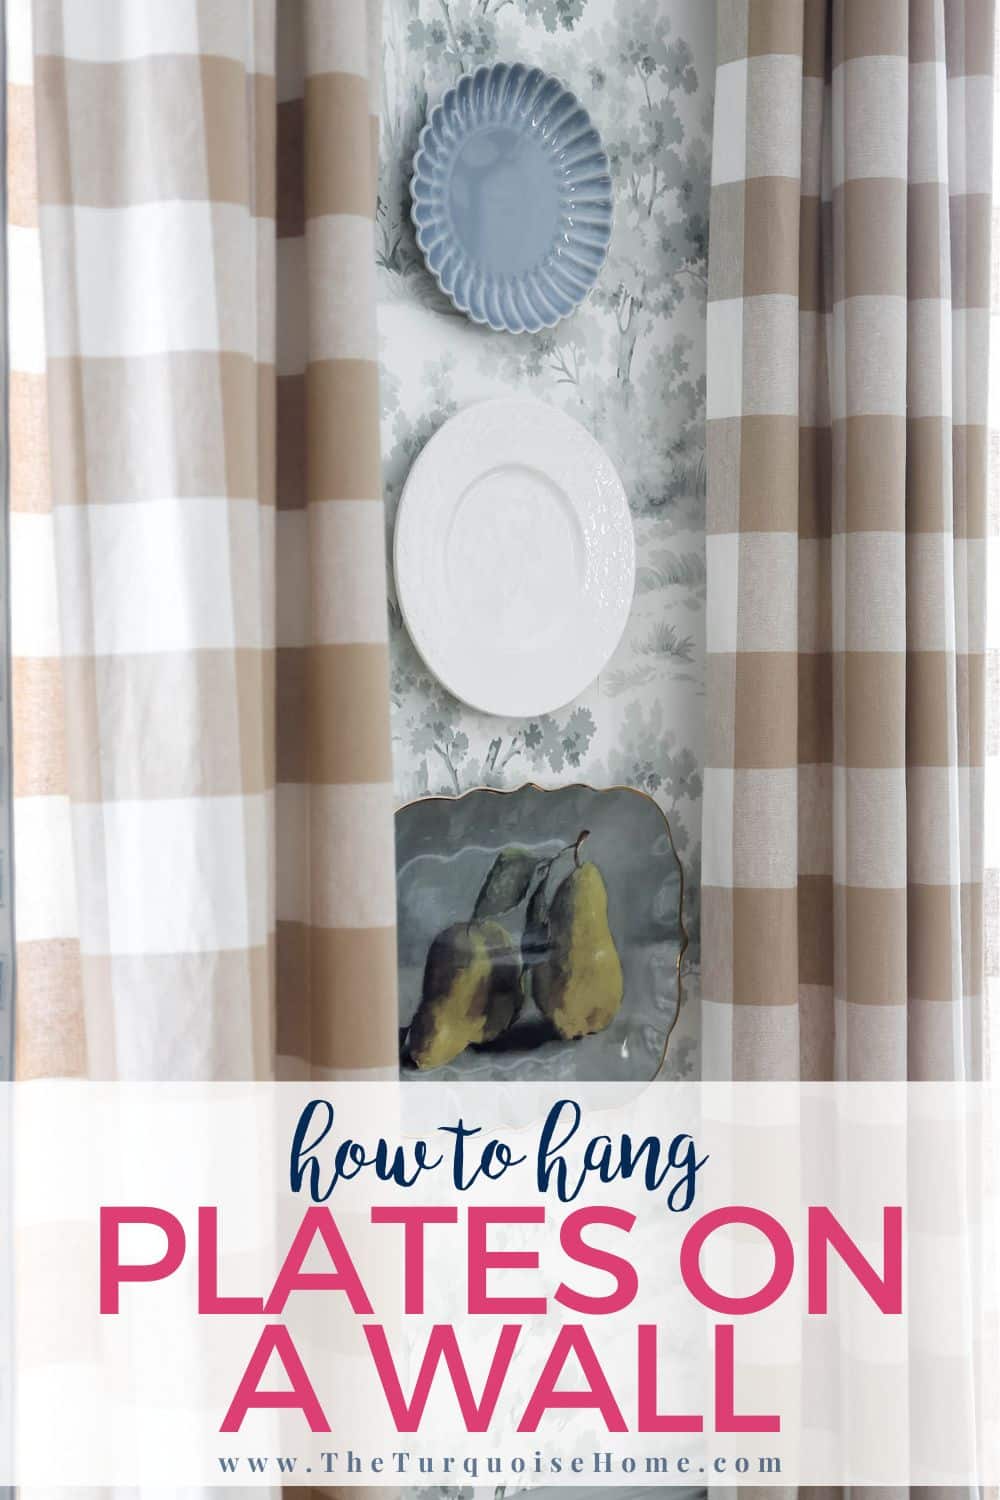
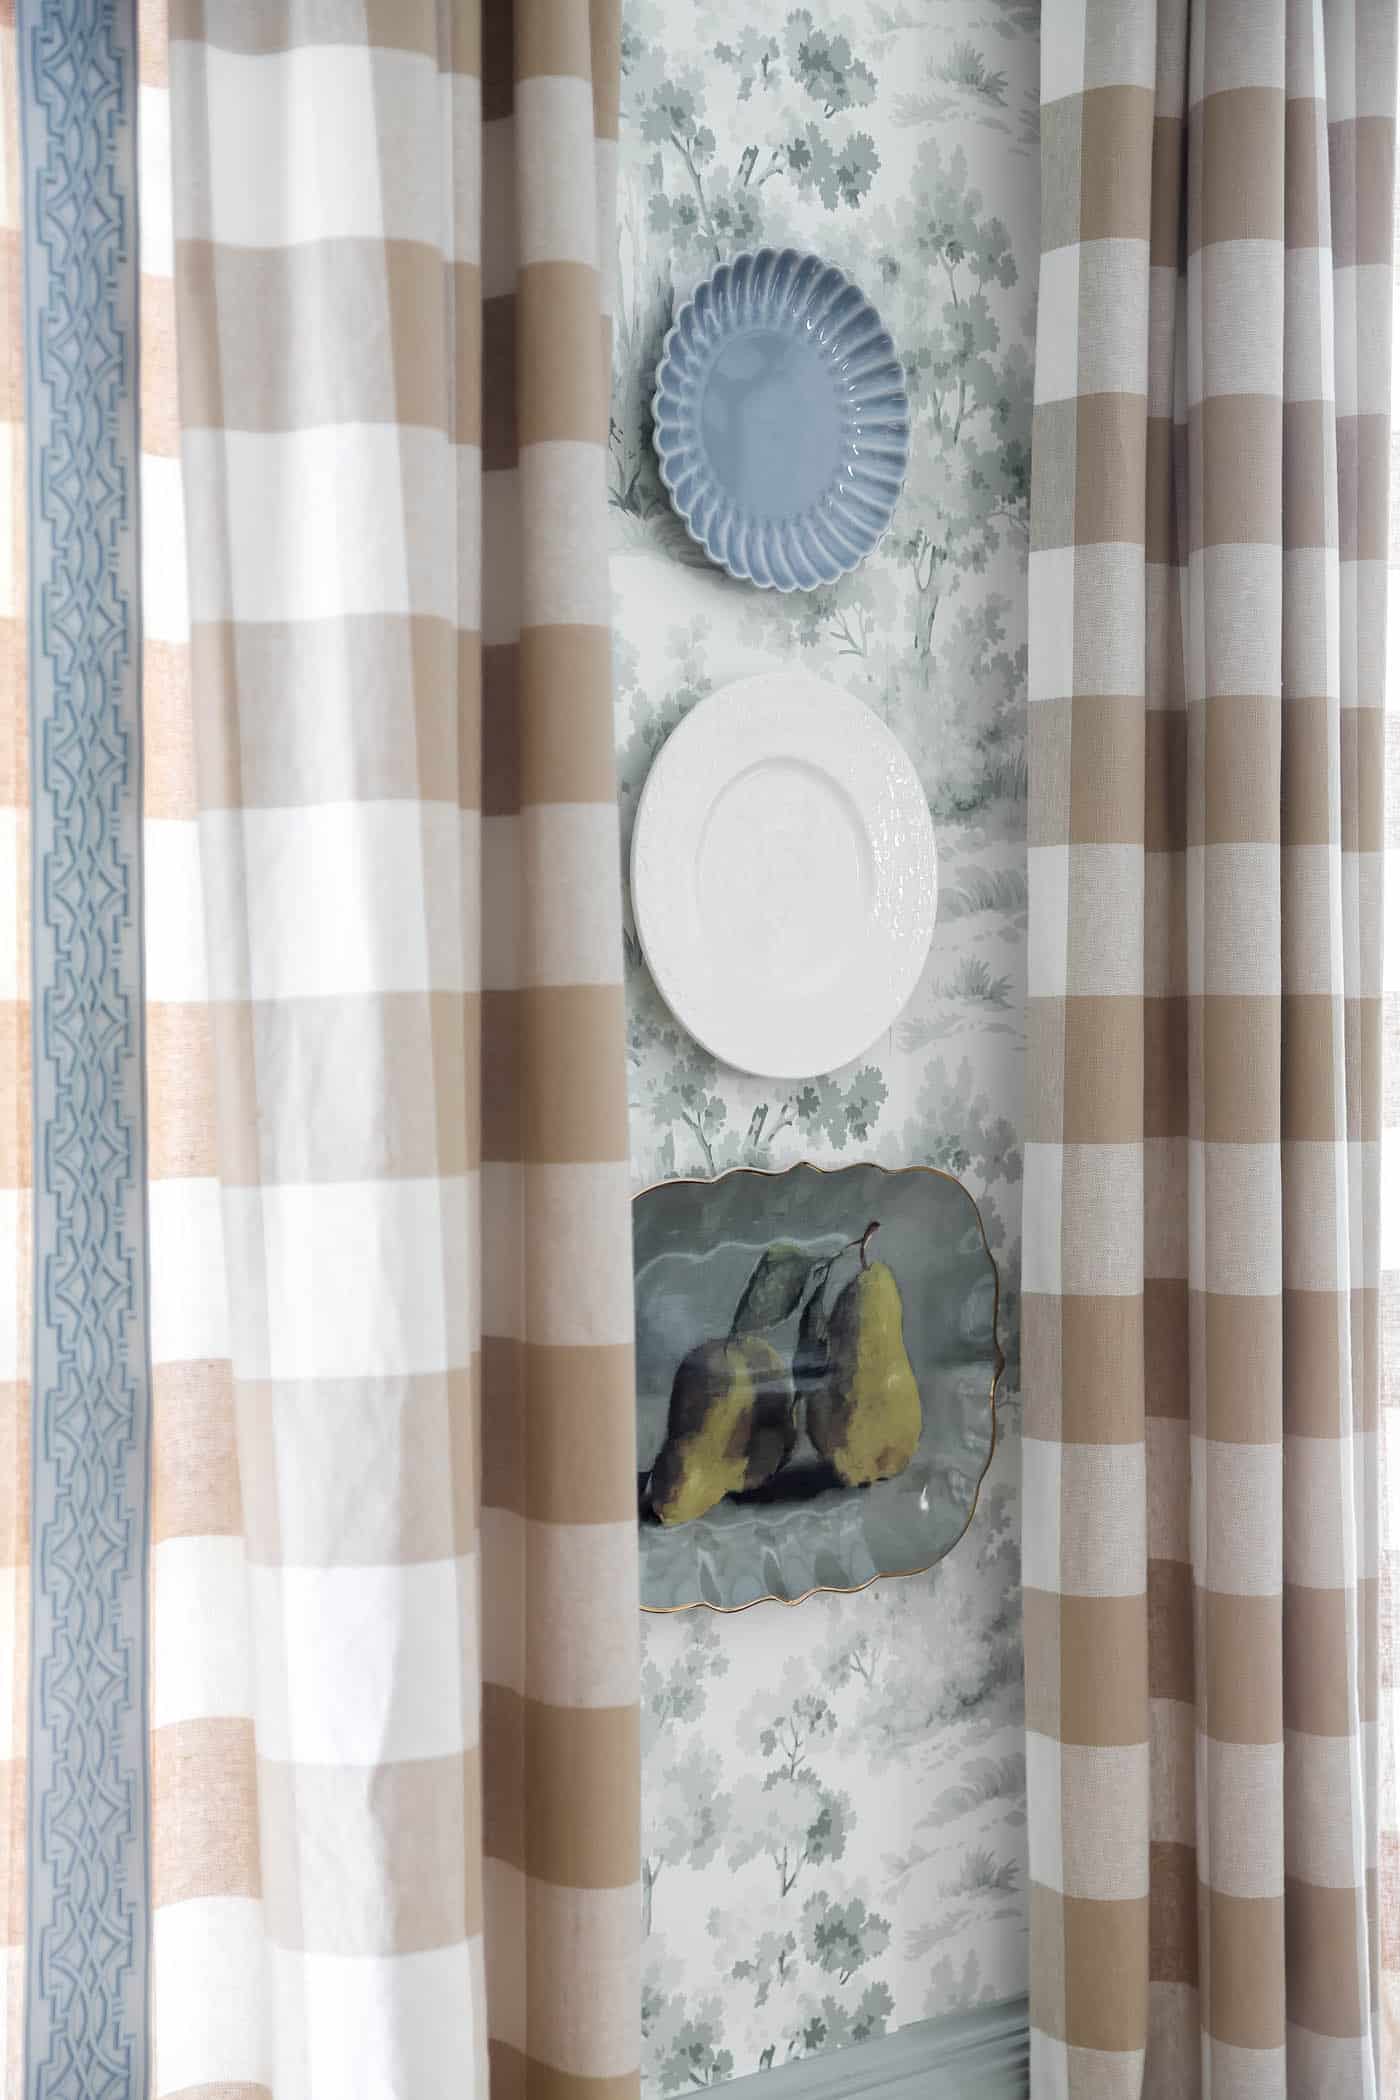
This gives you a visual guide without making unnecessary holes. I didn’t have to do this because I was just hanging 3 plates in a vertical line, but if you do more than that, you’ll need a template!
Real-life tip: Step back and look at it from different angles — sometimes what looks good up close feels “off” from across the room.
3. Pick Your Hanging Method
You’ve got two basic options for hanging plates:
Wire Plate Hangers
These are the old-school springy hangers that grip the edges of your plate. They’re super secure and easy to remove later — just make sure you get the right size for each plate. These aren’t my favorite because they can sometimes break the plates when
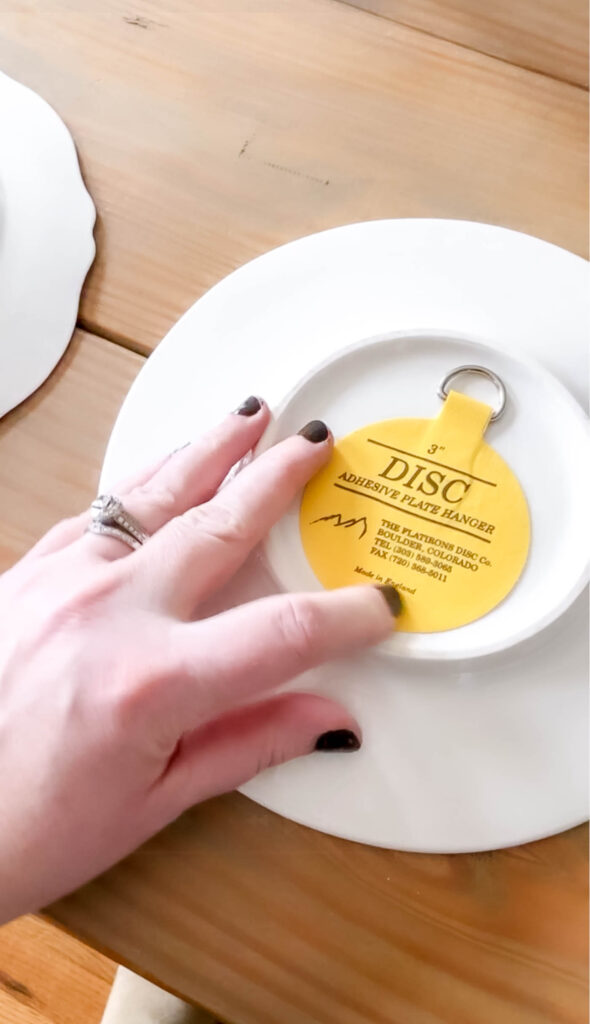
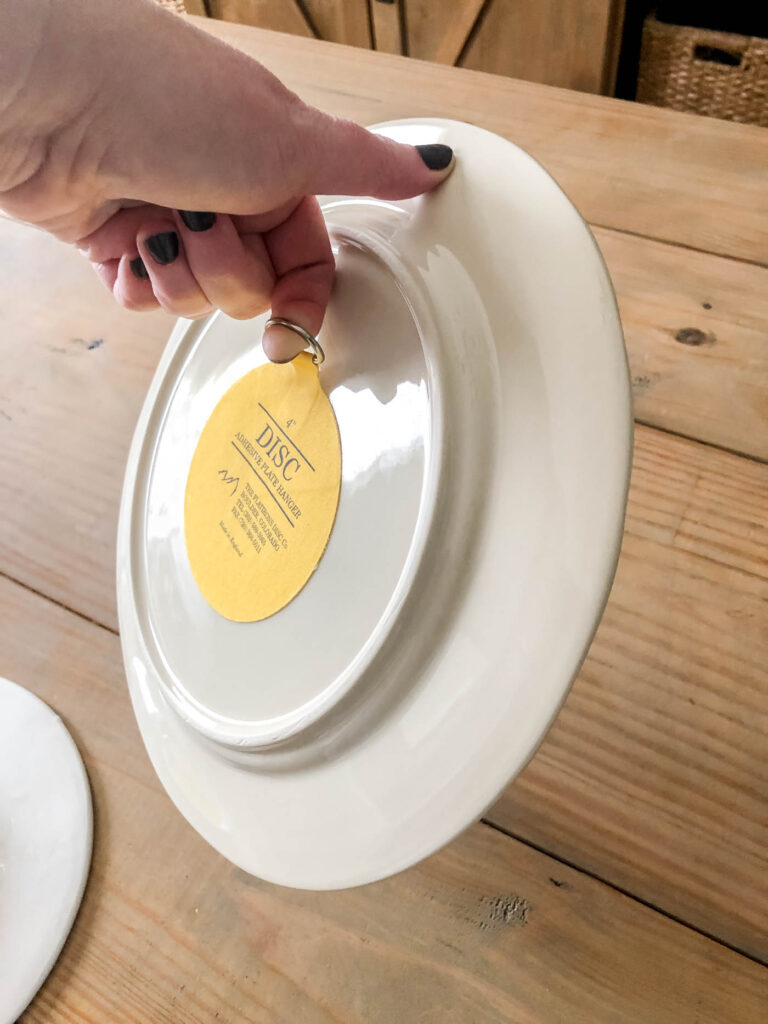
Adhesive Disc Hangers
These adhesive disc hangers, which are my favorite plate hangers, stick to the back of the plate and are great for a cleaner, invisible look. I LOVE them and this is what I personally use for hanging plates on a wall. They come in multiple sizes, depending on your plate size and weight and don’t damage the plate or wall!
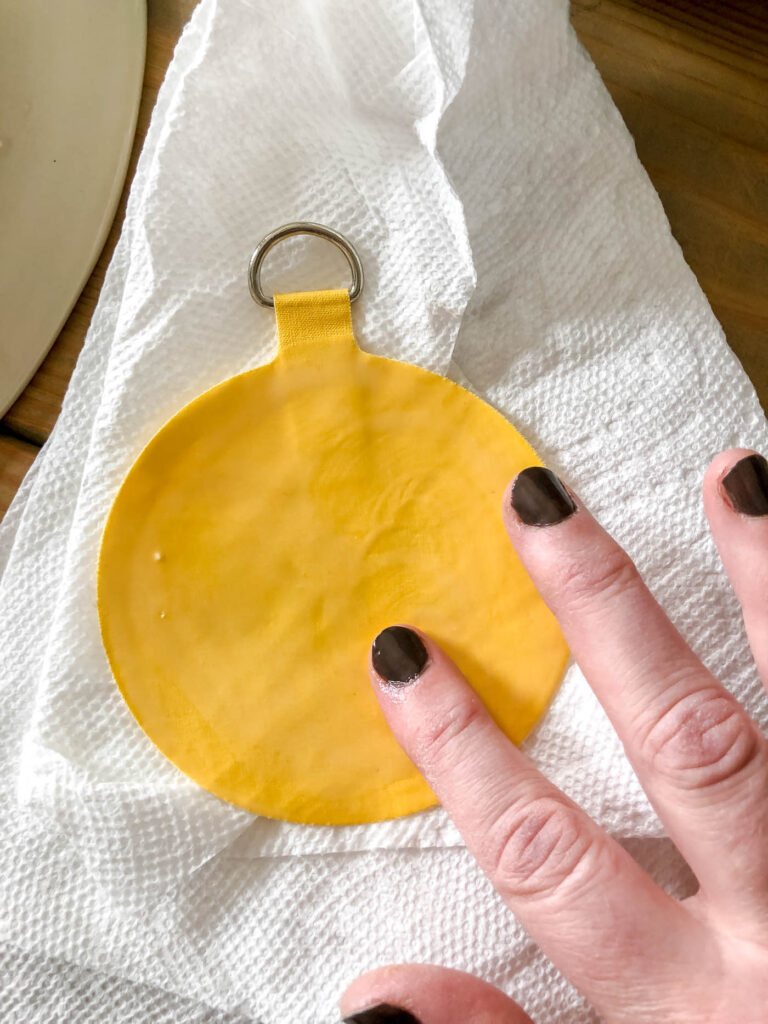
You simple massage a little water onto the back of the adhesive disk, and follow the complete directions. Just be sure to follow the drying time exactly and use the right weight rating.
I love using these because they don’t show at all on the front. And if you follow the directions, your plates are safe from falling. Be sure to test them before you hang them up, but I’ve never had any issues with mine.
4. Hang Your Plates
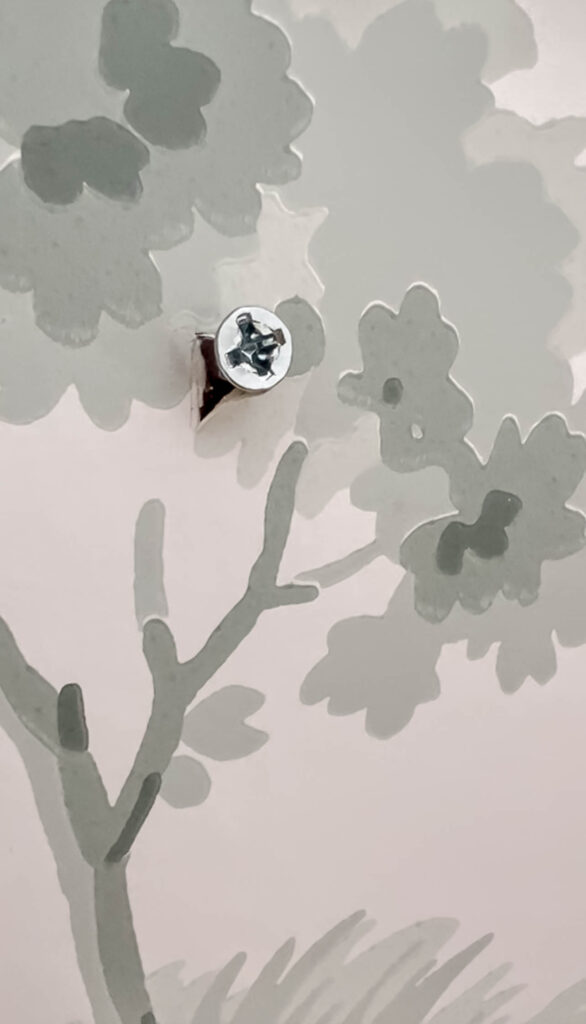
With your templates still on the wall, mark where the hook or nail should go (usually just above the center of each template). Then hammer in your nail or hook and remove the paper.
Carefully hang each plate and adjust as needed!
Optional: Use a level and tape measure to double-check if you’re hanging evenly in a straight line or grid — or just eyeball it if you’re going for that casual, collected look. Since mine were hung vertically on top of each other, I did use a level to make sure the screw holes were in an exact line.
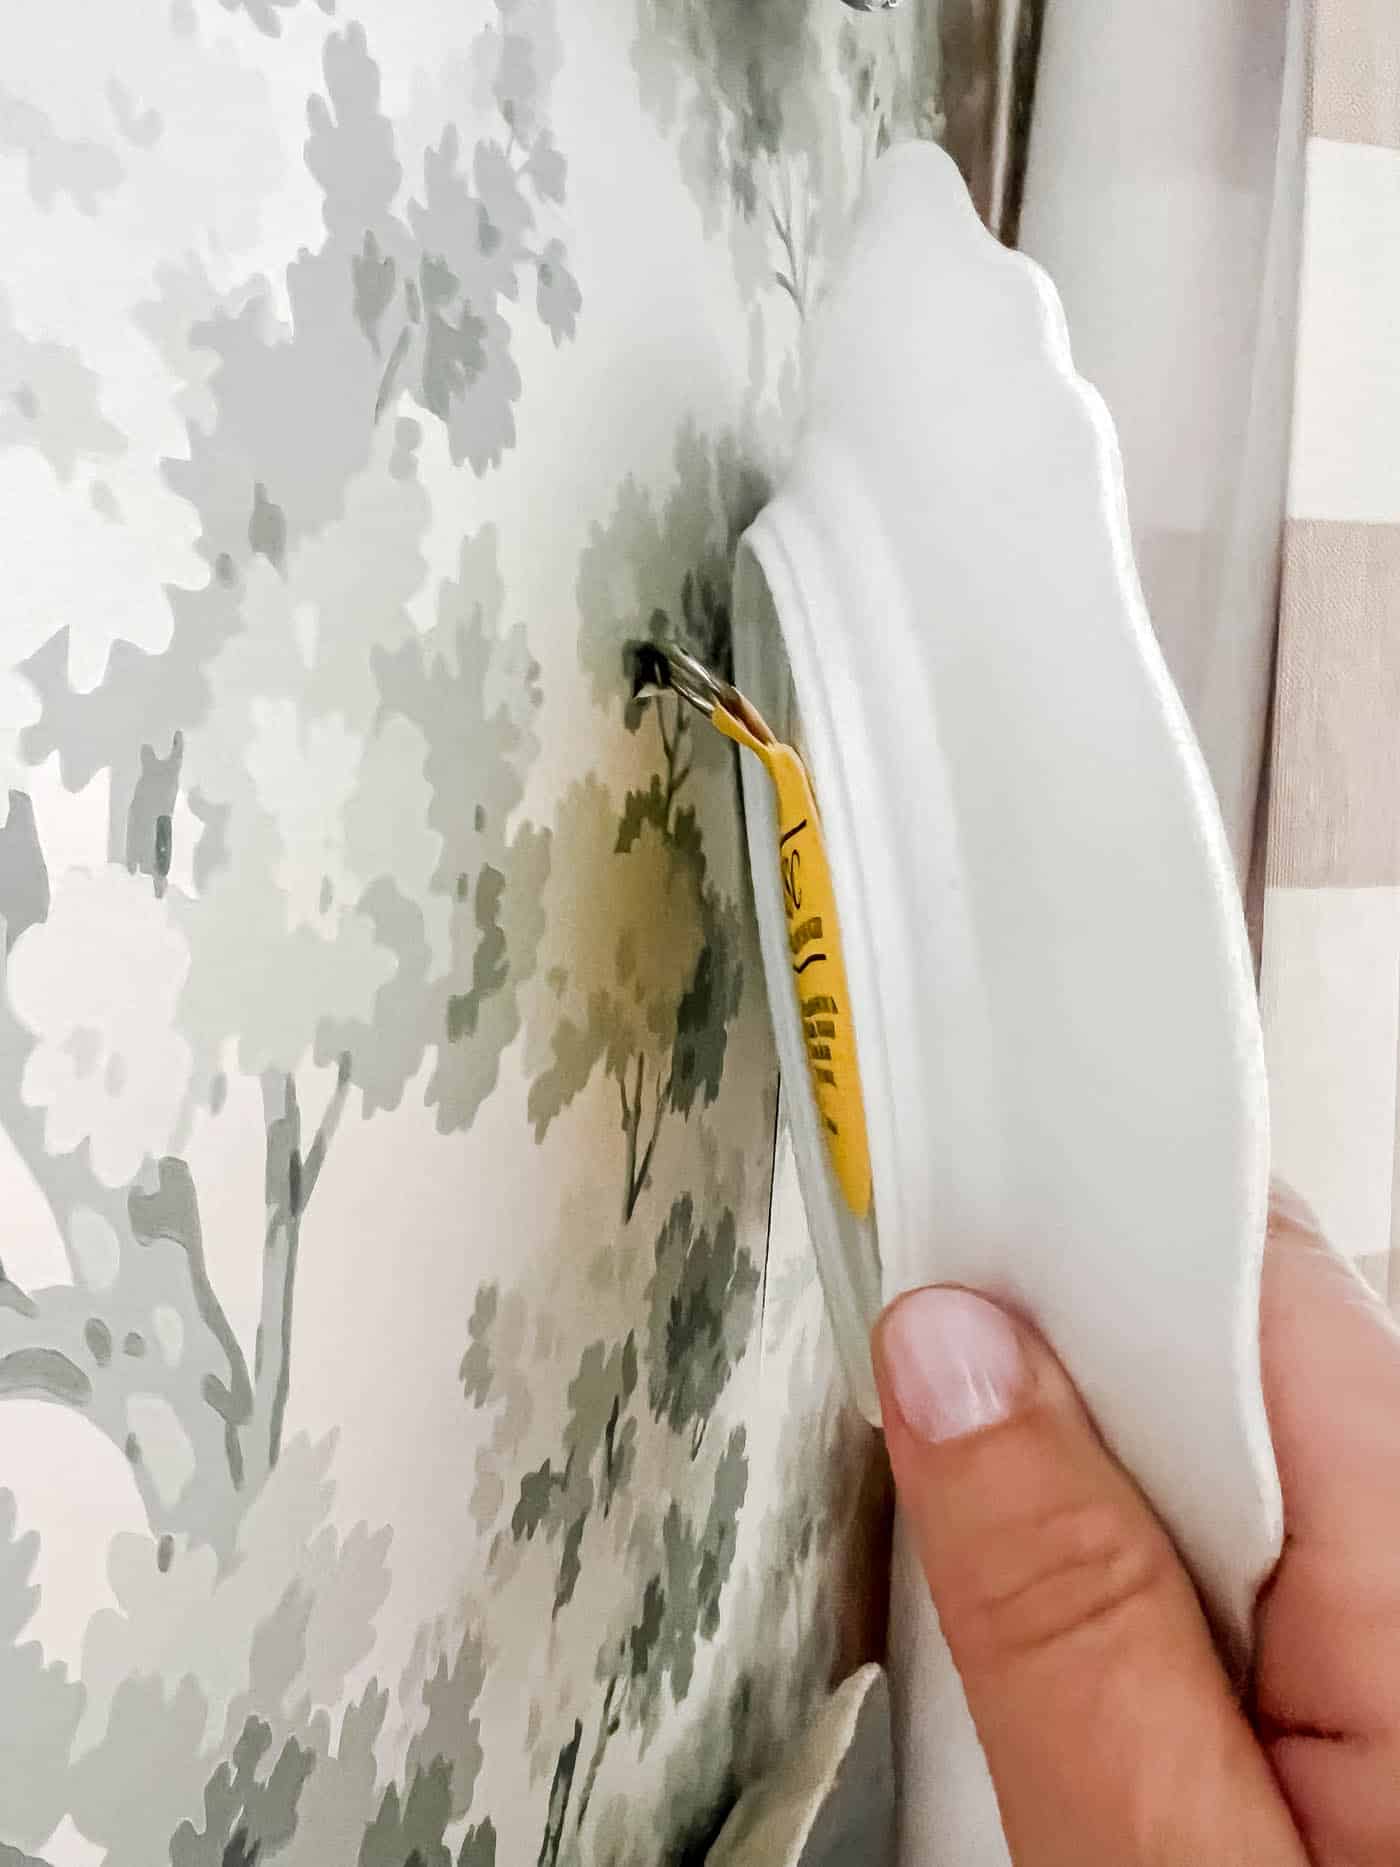
Tip for Hanging on Wallpaper: Cut a small piece of the wallpaper and fold it back where you will place a nail hole or screw. That way you’re not putting holes in your wallpaper, and if you ever change your mind, you can simply fold the wallpaper piece back over the hole when you take it down!
5. Step Back & Smile
There’s nothing more satisfying than seeing your favorite dishes up on the wall — especially when it’s something you did yourself! Whether it’s in the dining room, kitchen, hallway, or even a bathroom (yes, really!), a plate wall adds instant charm and story to your home.
A Few Extra Tips:
- Try Command picture hanging strips if you’re in a rental or want a damage-free option. Just make sure the back of the plate is smooth and flat.
- Add texture and layers by overlapping plates slightly or mixing in a small framed quote or art piece.
- Keep it balanced — if your wall feels “heavy” on one side, swap a plate or shift things around.
- Use what you love — they don’t all have to match. A little quirk is part of the charm!
Final Thoughts
I love walking by our plate wall every day. It tells a little story, makes the room feel more us, and was such a simple, budget-friendly DIY. If you’ve been thinking about doing this, don’t stress. You can totally do it, even if you’ve never picked up a hammer before.
Have you ever hung plates on a wall? Or do you have a favorite thrifted or gifted dish you’d love to display? I’d love to hear in the comments below!
More Posts You Will Love: