String Art Christmas DIY Stocking Holders
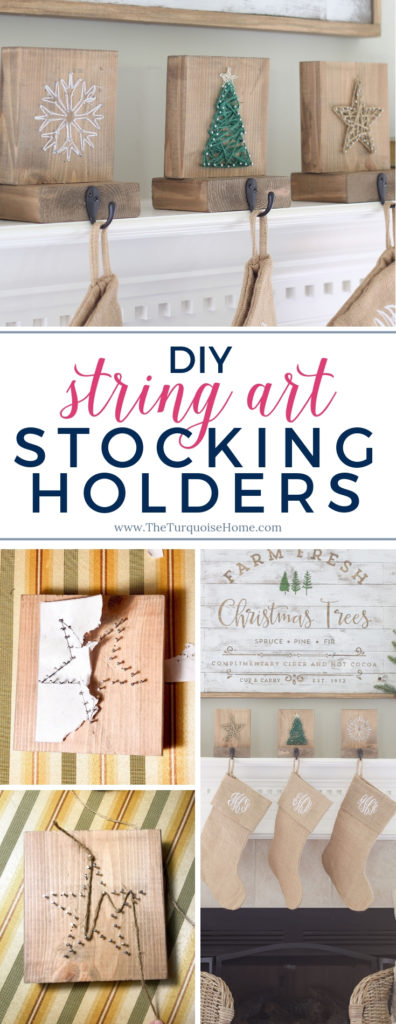
Make these string art DIY stocking holders with just a few items! All you need is a template, nails, a hammer and some string!
I thought a Christmas string art project would be fun. But then I thought, wouldn’t it be even more fun to make it functional and not just pretty? I’ve seen these DIY stocking holders around the interwebs, so I thought I’d try my hand at this simple DIY/crafty combo!
A little story: it’s funny how we even have stocking holders now, because when I was growing up (and it’s still this way at my mom’s house), our stockings hung from thumbtacks pressed into the underside of the mantel. 😂
But even if a super cute stocking holder isn’t necessary, it’s undoubtedly fun to craft and DIY! And you’re not going to believe how simple this is. It turned out even cuter than I imagined in my head.
I love sharing about all things Christmas decor! I’ve shared all about the best Christmas tree collars, how to decorate a bedroom for Christmas and how to decorate with Christmas ribbon. My hope is that these articles will help you create a home you love for the holidays!
Supplies to Make a DIY String Art Christmas Stocking Holder
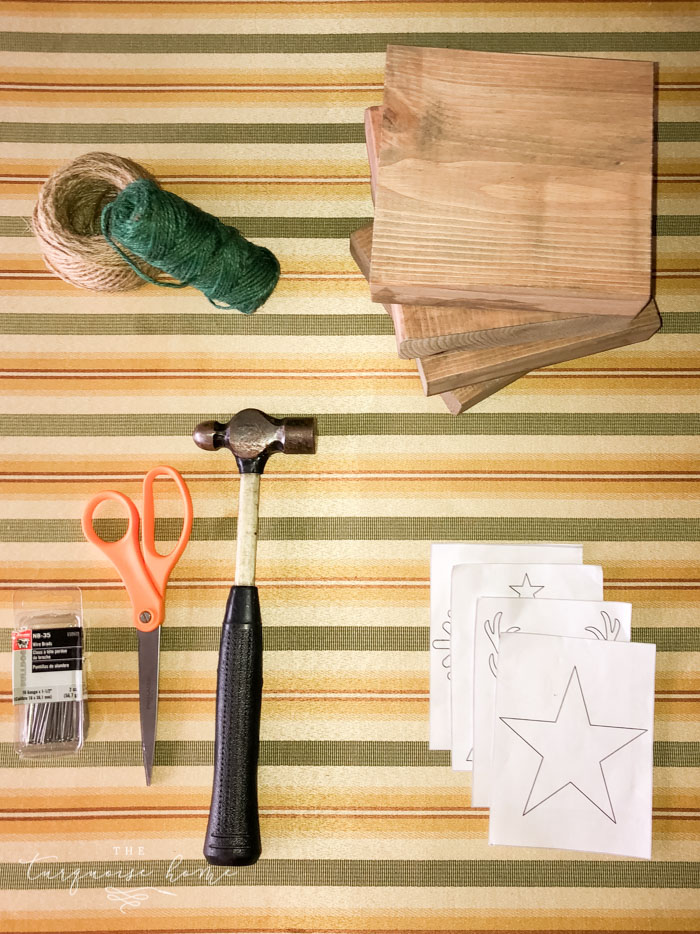
You will need just a few basic supplies:
- 2″ x 6″ pine board (cut into 5.75″ and 4″ pieces)
- Hooks
- Hammer
- Nails (about an inch long with a flattened head)
- String of your choice (Twine works well, too, for the farmhouse vibe!)
- Longer nails or brad nails (for attaching the bottom of the stocking holder)
- Nail gun, optional
- Circular Saw or Miter Saw, optional
- Stain or paint of your choice
- Paint or stain brush
- Hot glue or craft glue
How to Make a DIY String Art Christmas Stocking Holder
1. Cut your 2″ x 6″ board
Cut your 2″ x 6″ board into one (1) 5.75-inch piece and one (1) 4-inch piece for every stocking holder you will make. So, if you want to make 4 stocking holders you will need 4 pieces of each size.
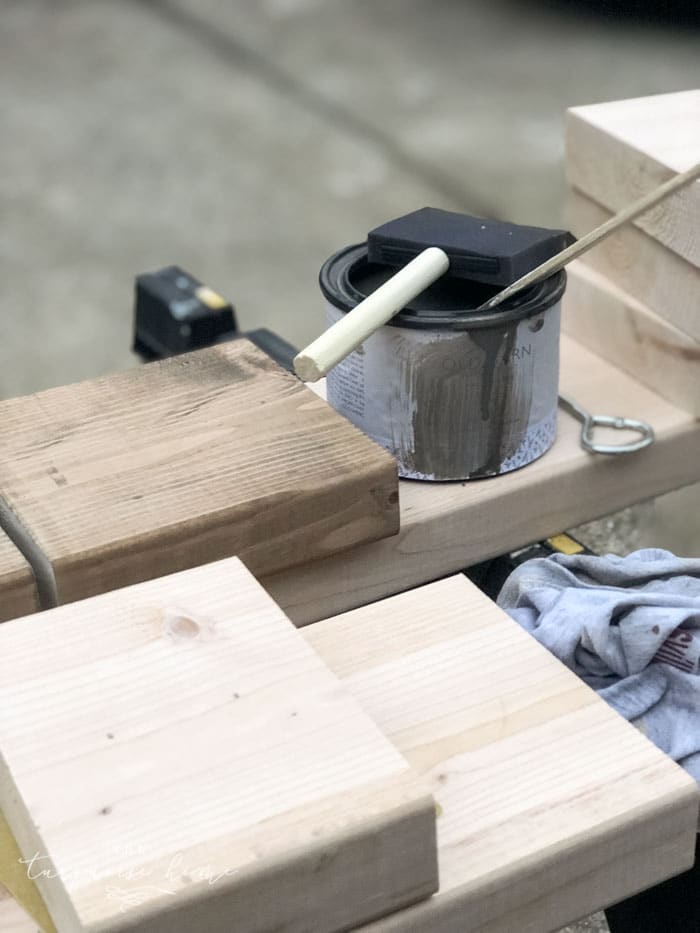
2. Stain or Paint the Blocks
Stain or paint your blocks the color you want. I used my favorite: Old Barn Milk Paint’s Stain in Weathered. I love it! It’s water-based, has no VOCs, and goes on like paint, but yet it’s a stain. LOVE the color, too.
3. Print out your Templates
I’ve included 4 templates for download: a star, tree, snowflake and deer head. I will say that I didn’t finish attempting the deer head because it was going to be too intricate. So, just ignore that one unless you’re up for a challenge. But you could also blow it up and use it on a larger project if you’re feeling extra creative.
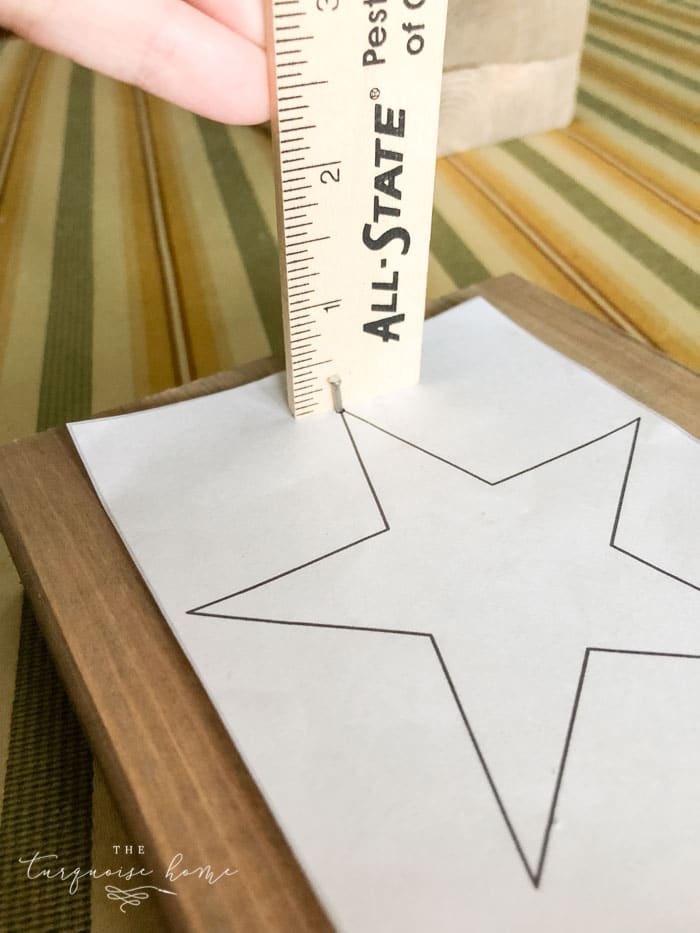
4. Nail the Templates to the Blocks
Center your template on the 5.75″ x 5.75″ block & start nailing. Nail the nails into the corners and edges of the template. For the star, you would start at all the corners and the points. Then fill in evenly along the outline.
Tip: For the snowflake, put your nails in the middle of the design instead of the outside! It’s much easier that way. 😉
5. Remove the Templates
Once you’ve finished all of your nails, remove the template.
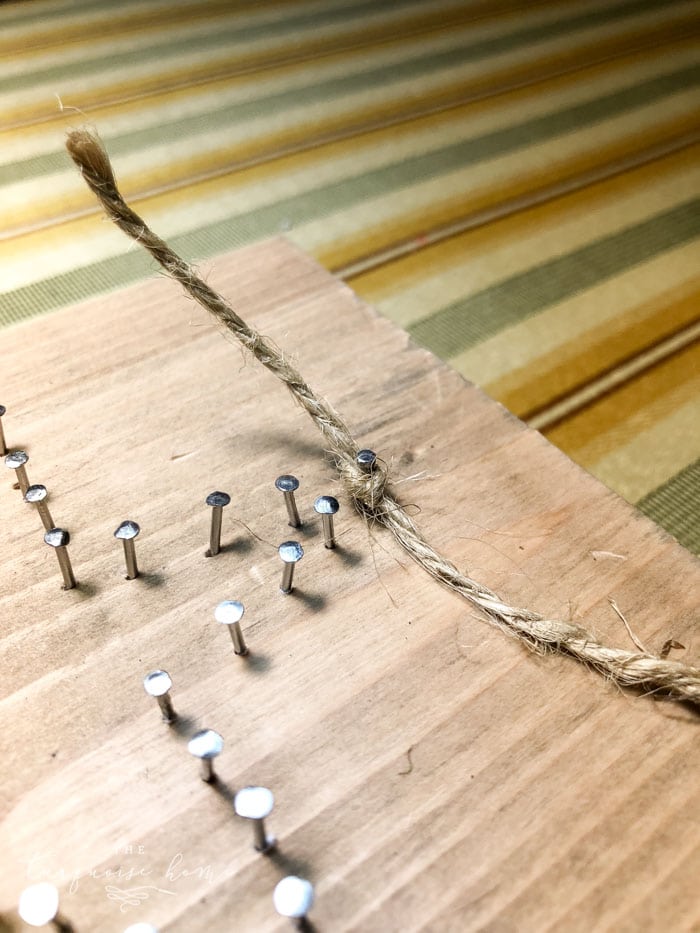
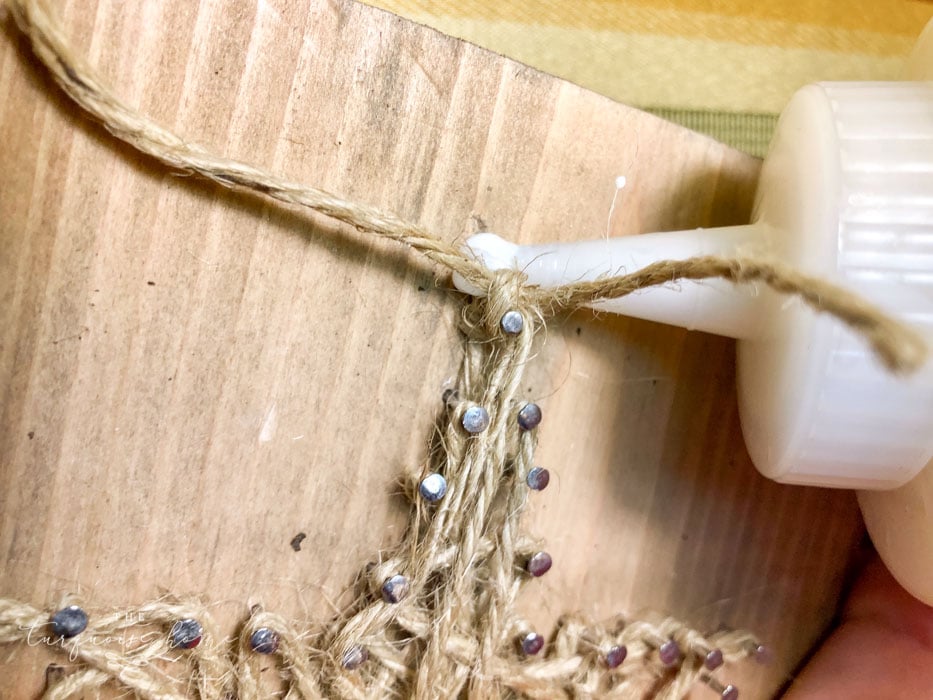
6. Add Twine to the Design
Tie your string (or twine) to the top nail and then zig-zag across the pattern randomly, yet evenly until you have it filled in the way you like.
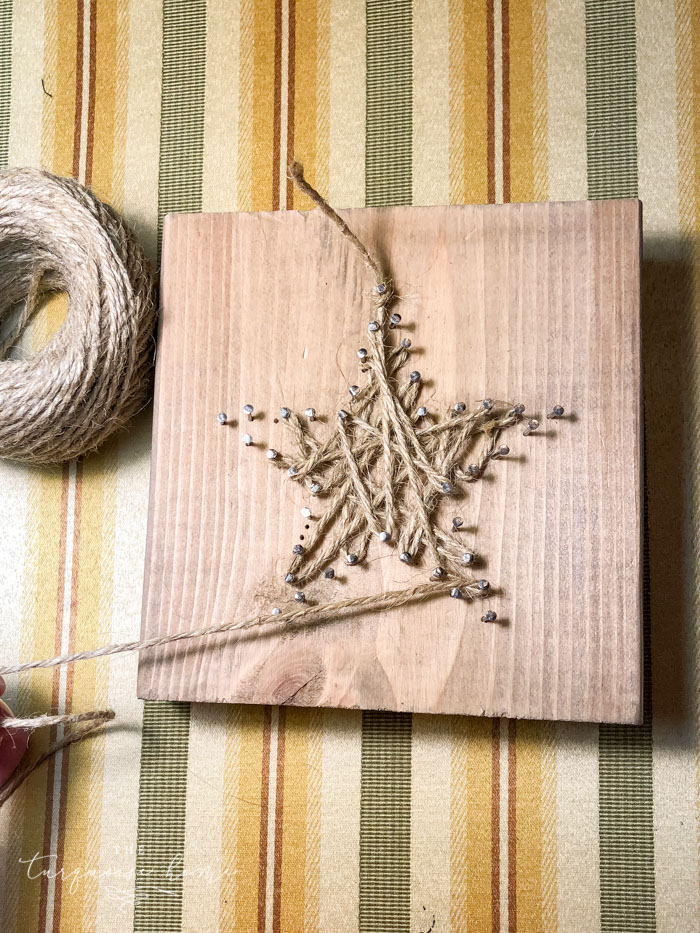
Once you’re finished zig-zagging inside the shape, make one last pass around the outside of the shape. This will make it look finished.
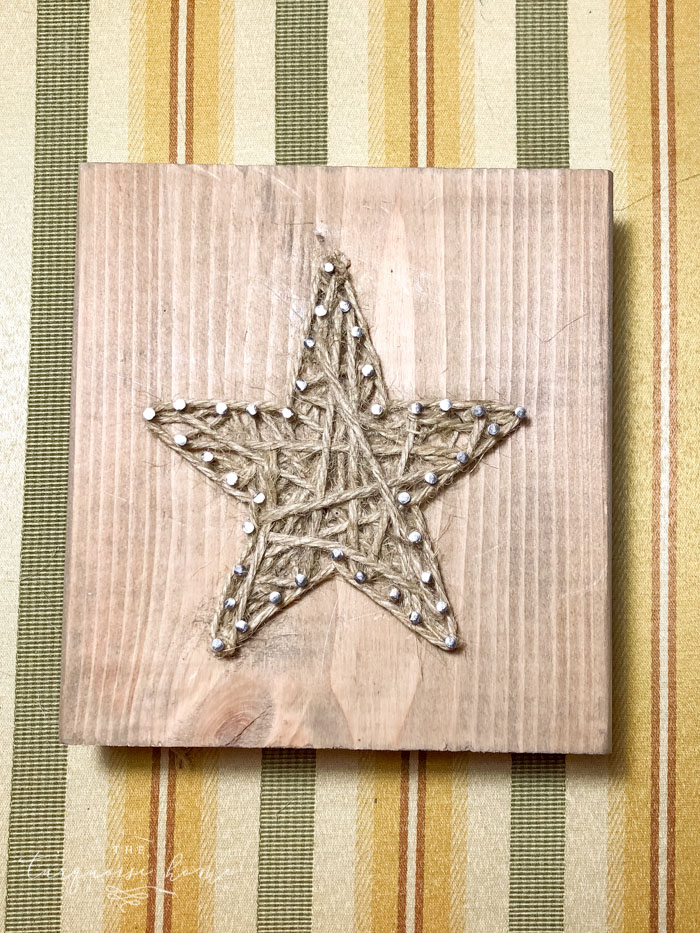
7. Finish the Twine with Glue
Tie the string or twine around the last nail and glue it into place with hot glue or craft glue.
Tuck any loose ends into the project with tweezers.
8. Repeat with as many blocks or shapes as you would like!
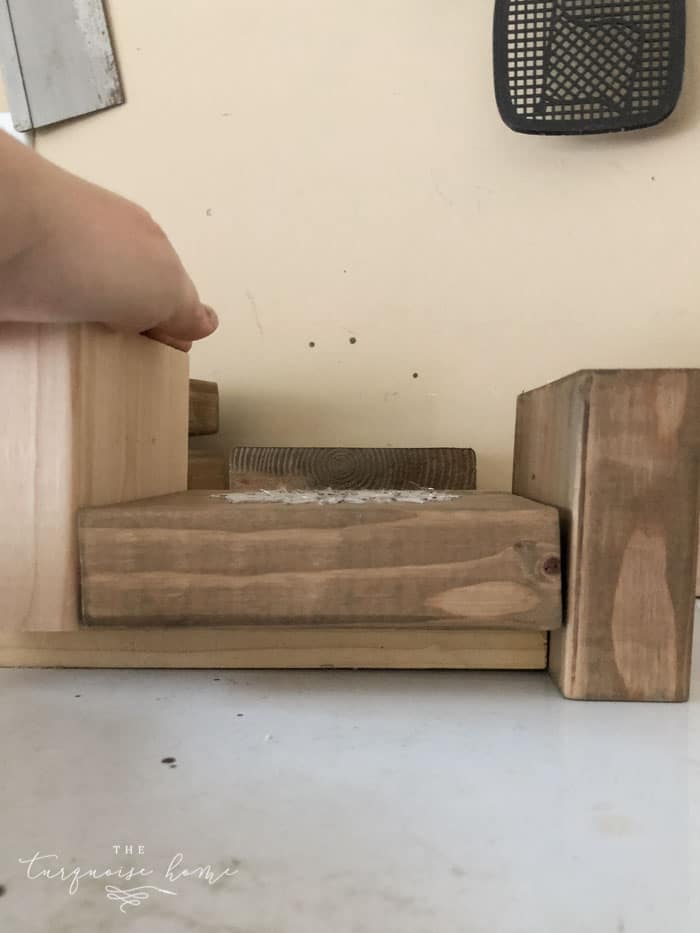
9. Nail the String Art Block to the Base Block.
Take your finished string art block and line it up with the base 4″ piece. I used a scrap 1″ piece of wood to place under the string art block to keep some distance between the back of the block.
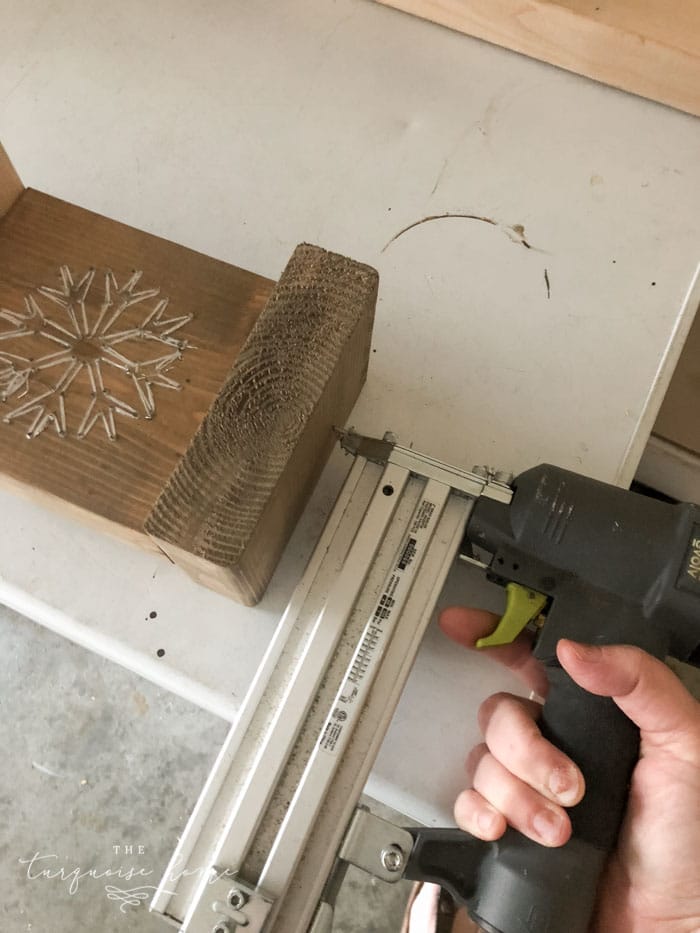
Using your nail gun, staple nails into the bottom of the base piece into the bottom of the string art block. You could use a regular hammer and nails, too. Or even just wood glue and a clamp would work!
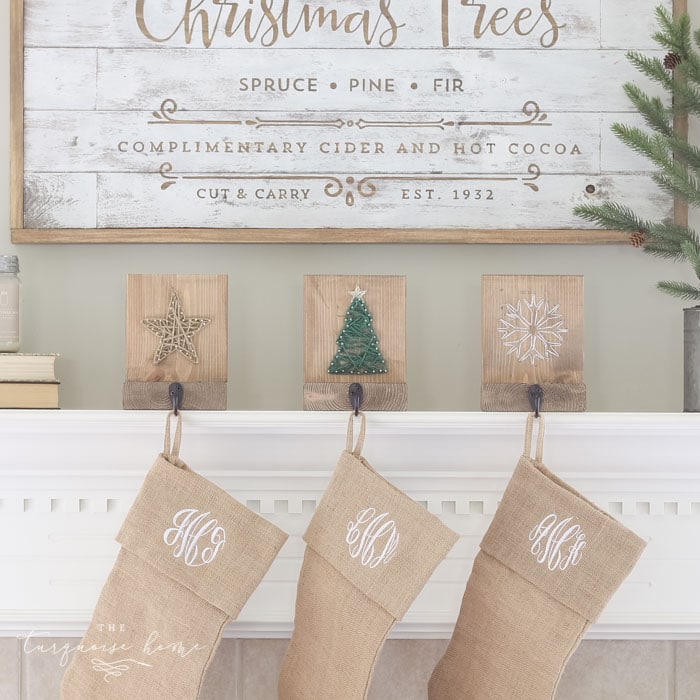
10. Add a Hook to the Front of the Base Block
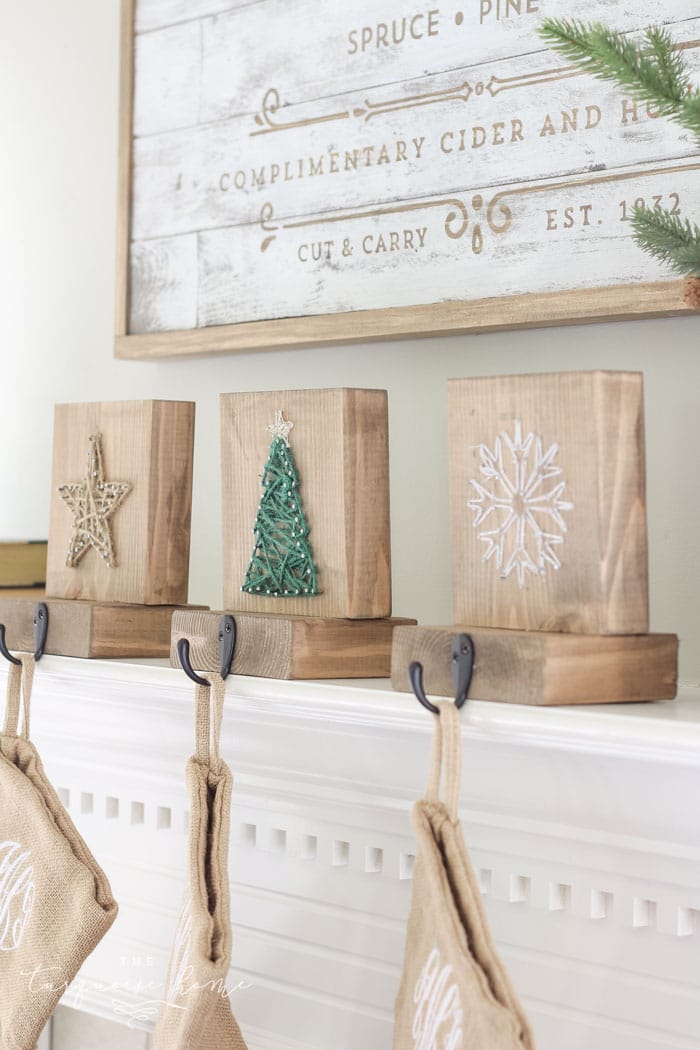
I bought these inexpensive oil-rubbed bronze hooks and love the simplicity of them!
Now simply hang your stockings! Look how cute these turned out. I love them!
I’d love to see what you do when you make these DIY stocking holders. If you share on social media, be sure to tag me @turquoisehome!
And let me know in the comments if you are planning to make these or not. Where do you find your favorite stocking holders?
More Christmas Posts You Will Love:

Thank you for sharing these! I know its been a few years but thanks! I was wondering if you’d share the size of the Christmas Tree Sign? I’m trying to make my own and yours looks perfect. Thank you!
Do these stay up when the stockings are full? I was planning on making them, but my husband said they would fall down. Thanks!
Hello Laura,
Thank you for your ideas. I tried it myself and then I decided to used it as a special project with some of my Grade 5 & 6 students. We loved it except for certains students that chose the deer head. I had bought twine and I think it is too thick for that intricate template. One out of five of those students did a good job, so tomorrow at noon we will try it again using some finer strings.
All in all it was fun and we enjoyed it very much.
Thank you
Hi, super cute idea. I was wondering when you say 2×6 wood and then cut, you are cutting them so they are 6 in wide, 5.75 in long, and 2 in deep?
These are adorable, Laura! Such a great idea!!
Hugs, Jamie
These are absolutely gorgeous!
Aww, thanks so much Kristin!
Such a cute idea! I especially love that snowflake. And your Christmas tree sign is pretty awesome too!
Thanks, Jen! I made that tree sign last year and love it so much I’m using it again this year. Ha! I used a different string for the snowflake because it had sparkles in it and it didn’t turn out quite the way I hoped, but standing back from it, it looks pretty cute! Thanks girl!
xo, Laura
These are such a good idea! Thanks for sharing Laura and being a part of the blog hop.
Thank you for hosting, girl! You are so good at it! xo, Laura
These are so cute – my kids would love making these too!
Yes! They are perfect for a kids craft! Thanks, Ashley!
Love these! Planning to do them with my granddaughter. I need some clarification on the snowflake – when you said put the nails in the middle of the design, do you mean just to the inside of the template and not try to place them all around the perimeter of the tiny “arms” of the snowflake? Thanks!
You can do it either way, but yes! I just put some inside the design instead of all along the outside of the snowflake. It seemed like it would take a really long time to place them all along the border! 🙂 Have fun making these with your granddaughter. That is a great idea! xo, Laura
OMG those are so fun! My kids would love to make them!!
Thanks for sharing! I pinned them to my holiday board 🙂
xoxo
Aww, thank you for much, Jennifer!!