• Home Decor
    • Paint Colors
    • Living Room
    • Dining Room
    • Kitchen
    • Bathroom
    • Entry way
    • Kids Room
    • Master Bedroom
    • Office
    • Home Tour
    • Summer
    • Fall
    • Winter
    • Spring
    • Christmas
  • DIY Projects
    • Project Gallery
    • Crafts
    • Tools & Tips
  • Organization
  • Printables
  • Shop
    • Shop My Products
    • Shop My Instagram
    • Shop My Home
  • Gift Guides
    • Stocking Stuffer Ideas for the Whole Family {Ultimate Stocking Stuffer Gift Guide}
    • Host and Hostess Gift Ideas
    • Top Favorite Gifts for Her
    • Best Gifts for Elementary-Aged Girls
    • Best Gifts for Elementary-Aged Boys (ages 6-12)
    • Top 15 Kitchen Turquoise Gifts for the Cook
    • Gift Ideas for the Busy Mom
    • My Favorite Gifts to Give (… or get, wink!)
    • 15+ Work-At-Home Mom Gift Ideas
    • The Best Gifts for the Farmhouse Decor Lover
    • Top Gifts for the Essential Oil Lover
    • Top 15 Gifts for the Beginner DIYer
    • Top 15 Gifts for the Inspirational Wall Art Lover
  • About
    • Contact
    • Policies
  • Email
  • Facebook
  • Instagram
  • Pinterest
↑
    • Email
    • Facebook
    • Instagram
    • Pinterest

The Turquoise Home

  • Home Decor
    • Paint Colors
    • Living Room
    • Dining Room
    • Kitchen
    • Bathroom
    • Entry way
    • Kids Room
    • Master Bedroom
    • Office
    • Home Tour
    • Summer
    • Fall
    • Winter
    • Spring
    • Christmas
  • DIY Projects
    • Project Gallery
    • Crafts
    • Tools & Tips
  • Organization
  • Printables
  • Shop
    • Shop My Products
    • Shop My Instagram
    • Shop My Home
  • Gift Guides
    • Stocking Stuffer Ideas for the Whole Family {Ultimate Stocking Stuffer Gift Guide}
    • Host and Hostess Gift Ideas
    • Top Favorite Gifts for Her
    • Best Gifts for Elementary-Aged Girls
    • Best Gifts for Elementary-Aged Boys (ages 6-12)
    • Top 15 Kitchen Turquoise Gifts for the Cook
    • Gift Ideas for the Busy Mom
    • My Favorite Gifts to Give (… or get, wink!)
    • 15+ Work-At-Home Mom Gift Ideas
    • The Best Gifts for the Farmhouse Decor Lover
    • Top Gifts for the Essential Oil Lover
    • Top 15 Gifts for the Beginner DIYer
    • Top 15 Gifts for the Inspirational Wall Art Lover
  • About
    • Contact
    • Policies

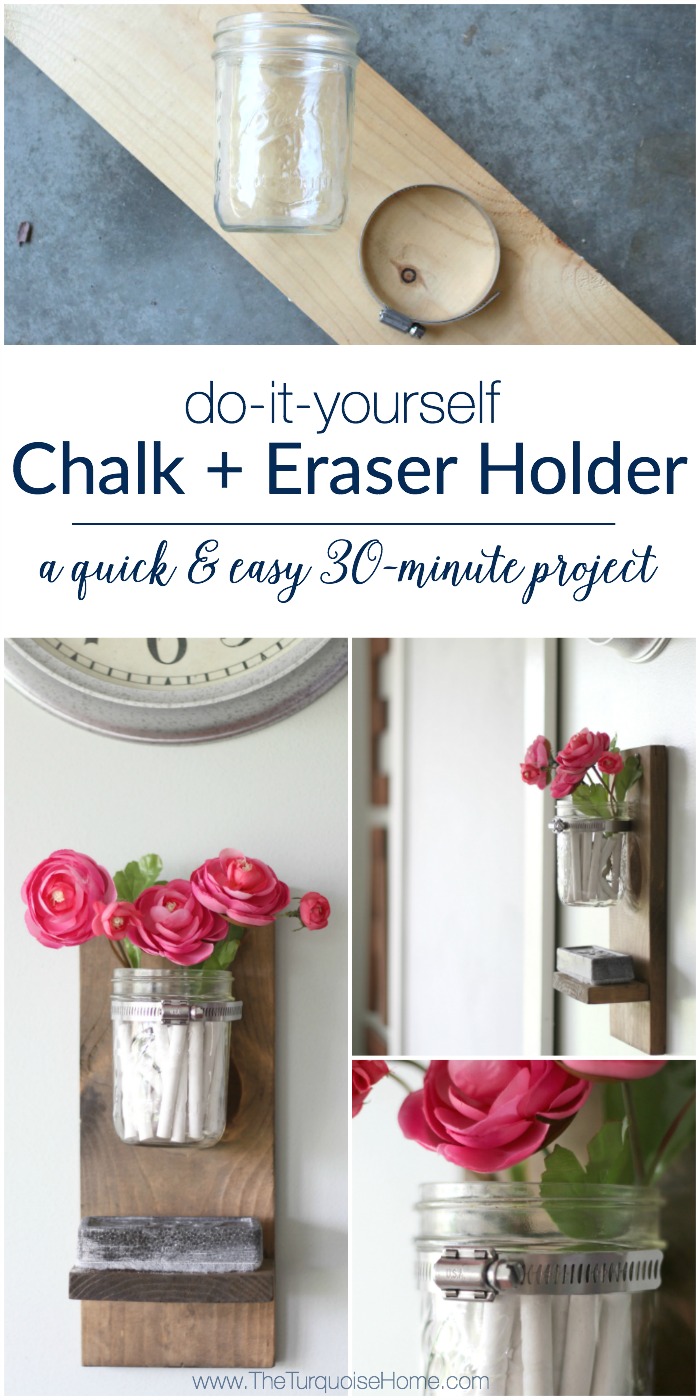
DIY Chalk and Eraser Holder {for a Chalkboard}

Last Updated: May 8, 2019 | By: Laura 9 Comments | Filed Under: DIY Projects, Kitchen, Tools & Tips This post may contain affiliate links.

Share

Share
Pin204
Tweet
Email
Print

I love a quick project that is not only pretty, but helps keep me organized. So, I whipped up this simple DIY chalk and eraser holder in about 30 minutes with 3 items, 2 of which I already had on hand. Whoop! This project literally cost me $1.50 out of pocket that day. What!? Isn’t is the cutest???

Wow! This is so cute and so easy!! DIY Chalk and Eraser Holder for a Chalkboard | DIY Tutorial | TheTurquoiseHome.com

OK, so a little back story. I’ve had my huge chalkboard in my kitchen for 3 years and ever since I put it up I’ve had to walk through the kitchen into my laundry room to get my chalk and eraser. So, it’s been on my wish list for a long time to create some chalk storage. I’ve seen other people mostly use hanging baskets or  or upside down drawer pulls, but I wanted something a little different.

10 Ways to Customize Your Home on a Budget Guide Button

I can also be incredibly indecisive. That may be why it took me 3 years to decide on a silly little chalk storage! 😉

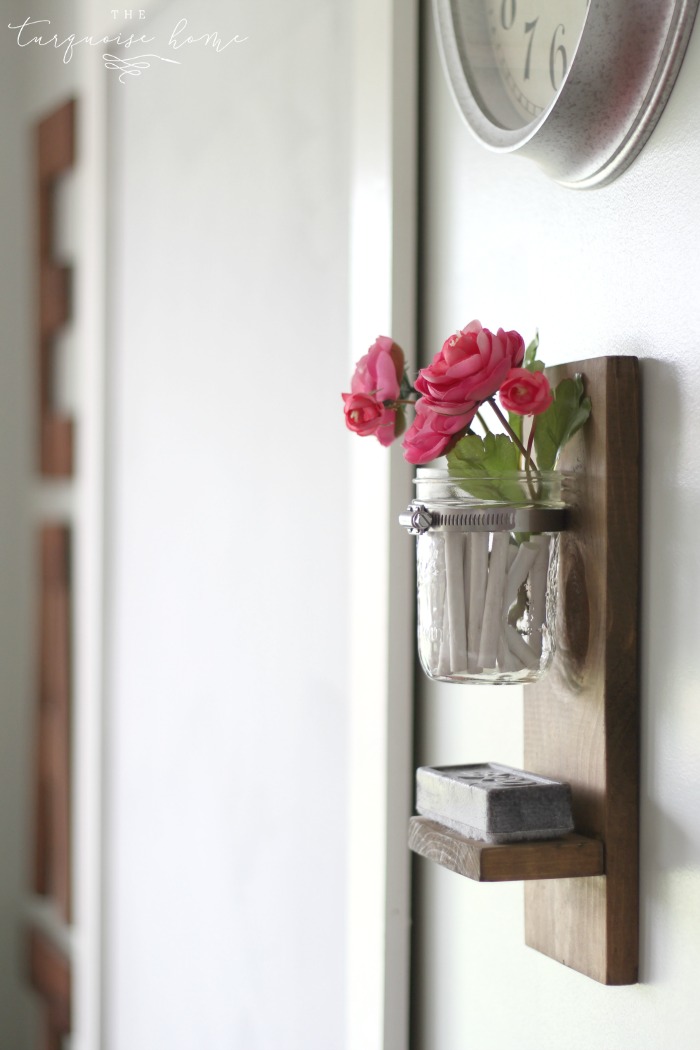
I’ve seen the mason jars and hose clamp systems all over the place, so I just decided to take a scrap piece of wood, fasten a hose clamp to it, slide in a mason jar and add a little shelf. And voila! I’ve got myself a holder for my chalk and eraser that is not only pretty, but functional and makes my life easier. Win, win, win!

Wow! This is so cute and so easy!! DIY Chalk and Eraser Holder for a Chalkboard | DIY Tutorial | TheTurquoiseHome.com

I also love the fact that since I’ve had chalk and eraser out, Miss A, who is going into kindergarten this fall, is now using the board to practice her ABC’s on it all of the time!

You see, the giant chalkboard (full tutorial here) sits right next to our kitchen table. I wanted it to be right there in the kitchen because I had a vision to use it as a teaching tool. At times I’ve used it for our weekly Bible verse or for pretty little sayings, but I really want it to be a learning tool for my children as they grow up. I absolutely LOVE that by having the chalk more accessible, she’s using it more often.

Tools you will need for a DIY Chalk and Eraser Holder

Wow! This is so cute and so easy!! DIY Chalk and Eraser Holder for a Chalkboard | DIY Tutorial | TheTurquoiseHome.com

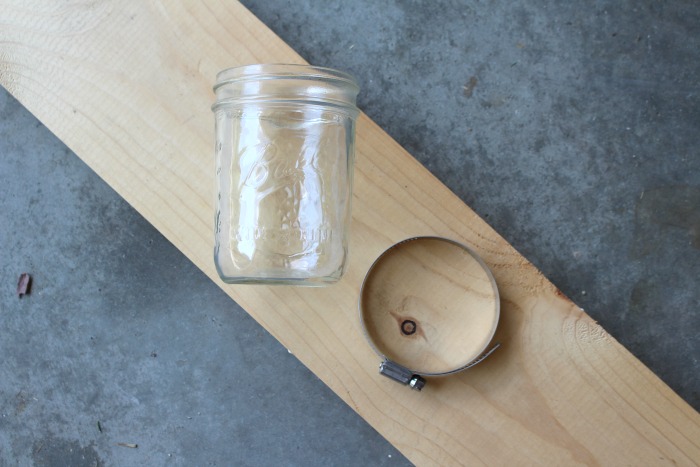
  • Wide mouth mason jar
  • Hose clamp that is large enough to go around your mason jar (can be found in the pipe section of your home improvement store)
  • 1 x 6 board at least 17 inches long (I grabbed this from my scrap pile.)
  • Saw (I use this miter saw. A simple circular saw or hand saw would work fine as well.)
  • Sander —>>> this is the one I have
  • Stain (I used a combination of Minwax’s weathered gray and dark walnut.)
  • Kreg Jig —>>> I couldn’t live without this tool!

Steps to Build a DIY Chalk and Eraser Holder

Wow! This is so cute and so easy!! DIY Chalk and Eraser Holder for a Chalkboard | DIY Tutorial | TheTurquoiseHome.com

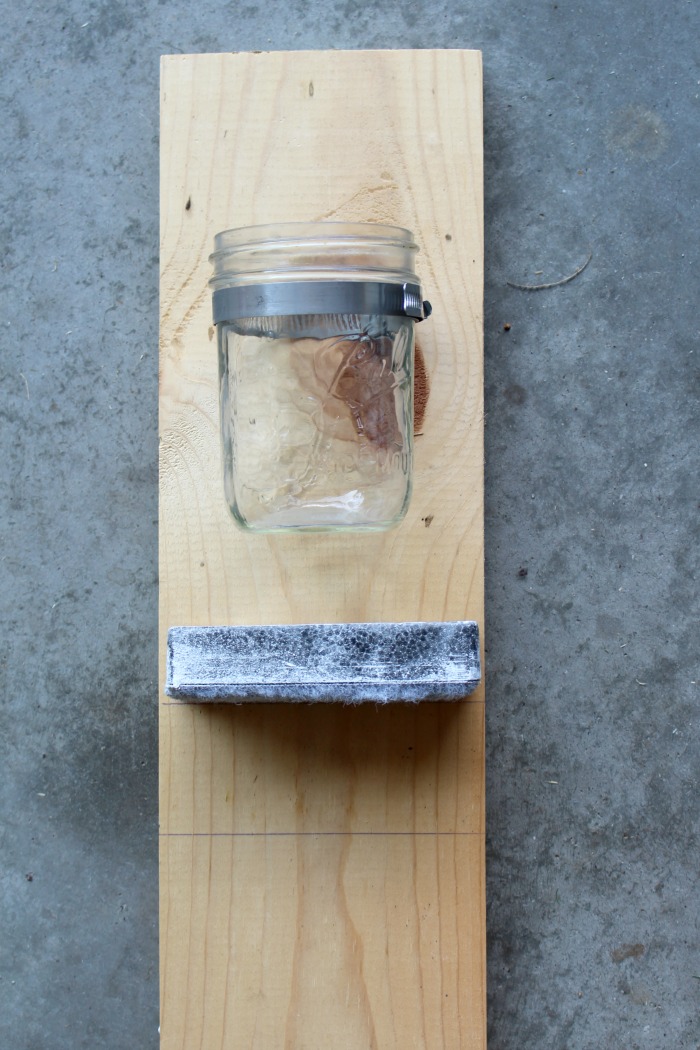
Step #1: Measure your board. I put my mason jar and eraser on the 1×6 board to see where I wanted to cut my boards for the back and the shelf. I cut one piece at 13.5 inches and the shelf piece was cut at 2.75 inches.

Step #2: Cut the board at the marked spots. Super simple! I used a miter saw, but you could use a circular saw. Or if you don’t already have a saw, a hand saw and miter box would be the cheapest option and totally could use one for this project!

Wow! This is so cute and so easy!! DIY Chalk and Eraser Holder for a Chalkboard | DIY Tutorial | TheTurquoiseHome.com

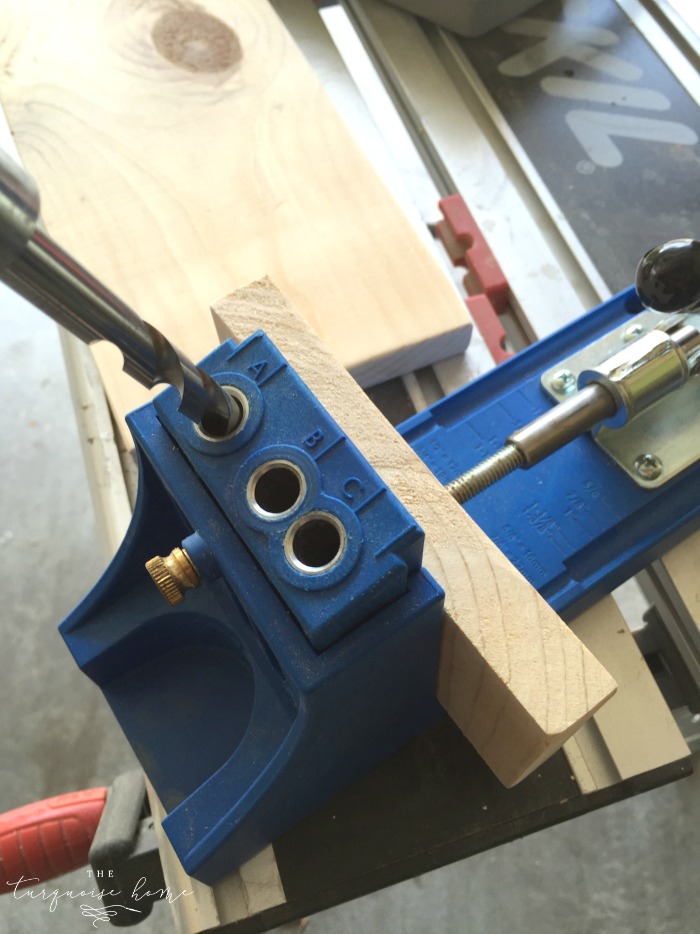
Step #3: Attach the little shelf using the Kreg Jig. I puffy heart LOVE my Kreg Jig. And if you are ever planning on building anything, you will need one of these. It attached this little shelf directly to the board and it’s so sturdy. That little shelf ain’t going anywhere!

Wow! This is so cute and so easy!! DIY Chalk and Eraser Holder for a Chalkboard | DIY Tutorial | TheTurquoiseHome.com

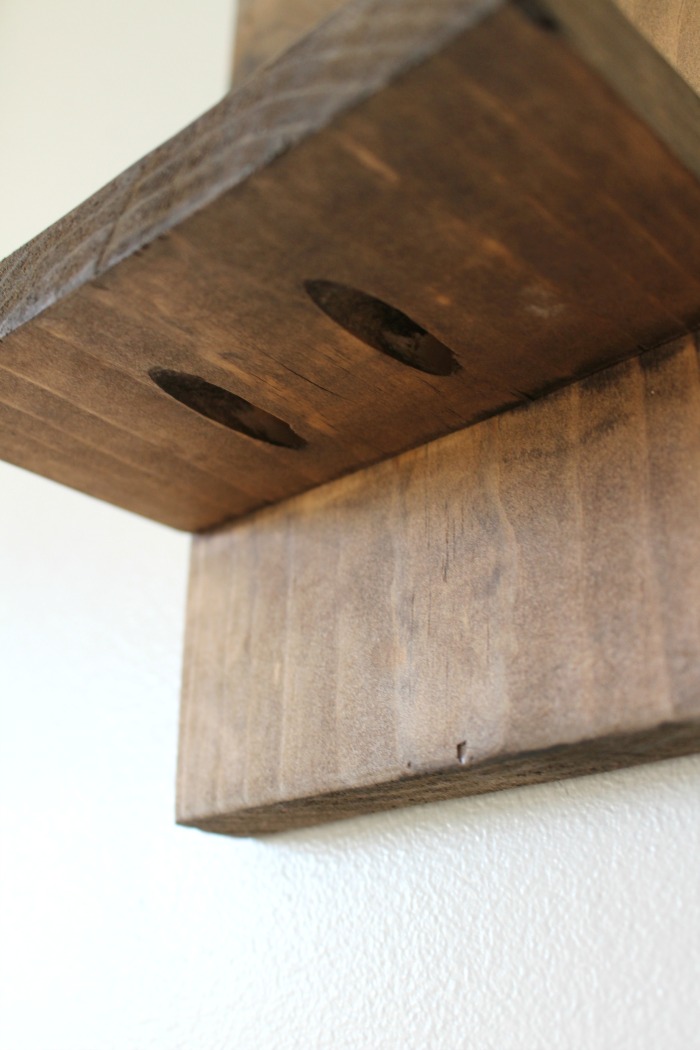
Here’s the underneath side of the shelf after it’s completed. The screws drill into those two holes underneath the shelf, directly into the back board. You can hardly see them and it’s very solid.

Step #4: Stain the boards. My new favorite stain combo is putting 1 coat of Minwax’s weathered oak stain on first. I normally let it dry the full time as directed on the can, but I was impatient this day and I put the second stain on right after the first. I don’t recommend doing that, but it worked out OK, I guess. 🙂 My second stain is Minwax’s dark walnut. I don’t leave in on there but for a few seconds and then wipe the stain off. I don’t want it to be too dark! You can add a top coat here, but I didn’t.

Wow! This is so cute and so easy!! DIY Chalk and Eraser Holder for a Chalkboard | DIY Tutorial | TheTurquoiseHome.com

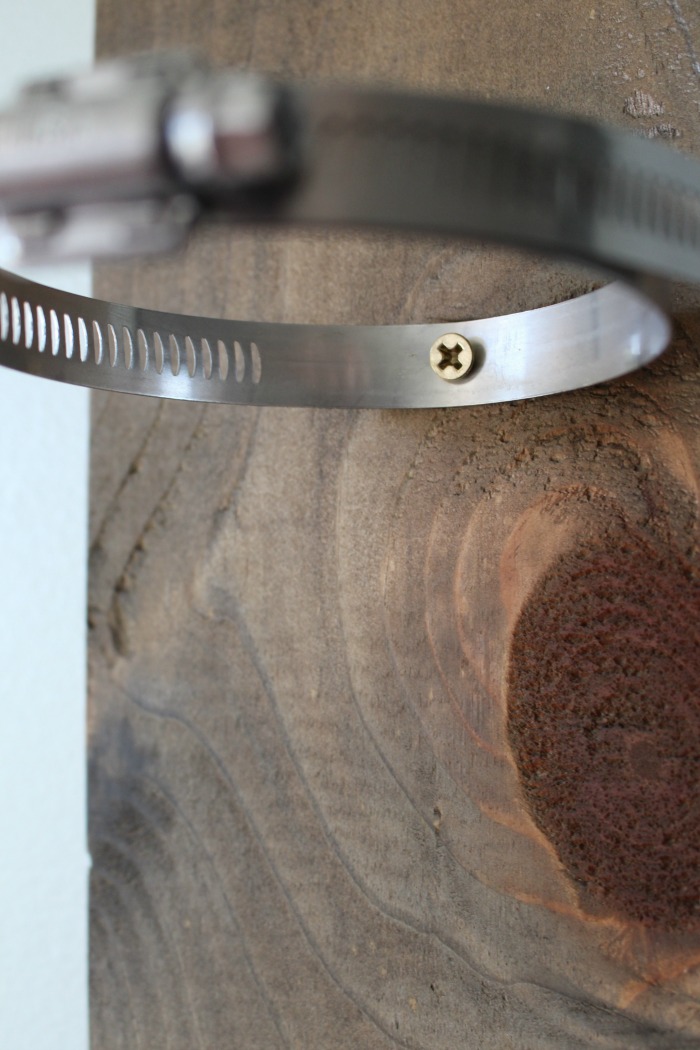
Step #5: Attach hose clamp to the board. Using your mason jar as a guide, figure out exactly where you want your hose clamp to go and mark the spot. Tighten the clamp down on the mason jar to where you can slide the mason jar out the top, but it will sit comfortably in the clamp without falling through. Then, using a drill bit, drill a hole through the back of the clamp. Screw the clamp to the board in the marked spot.

Step #6: Hang on the wall. I used a couple of small sawtooth picture hangers on the back and hung it up!

Wow! This is so cute and so easy!! DIY Chalk and Eraser Holder for a Chalkboard | DIY Tutorial | TheTurquoiseHome.com

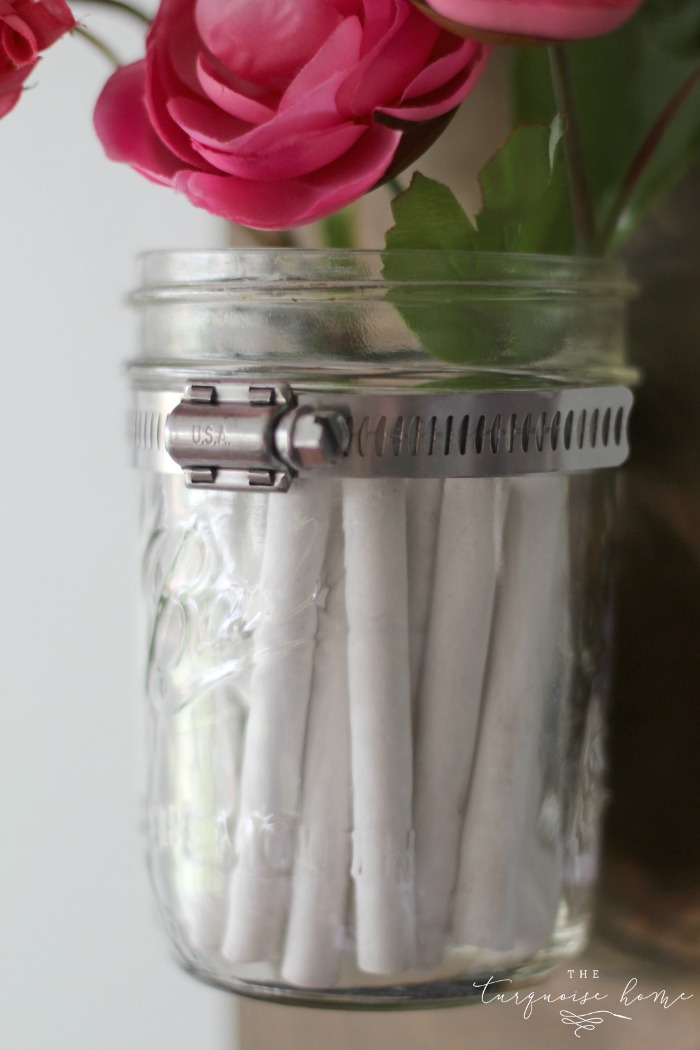
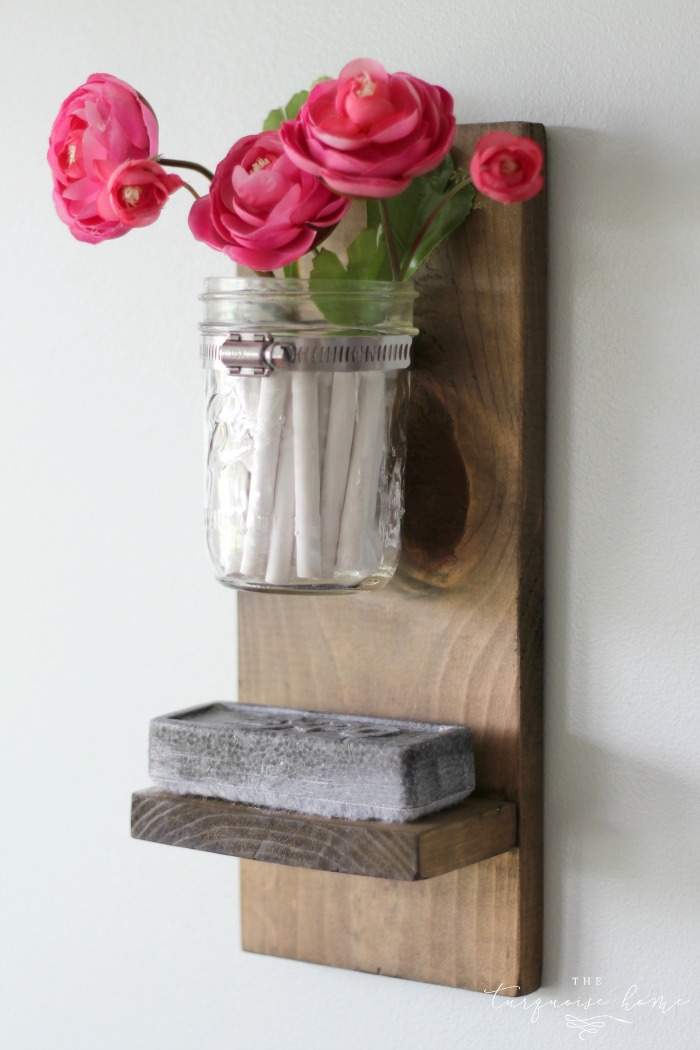
Step #7: Add your mason jar and chalk + eraser and you’re in business!

I added a few faux flowers to the jar because it needed a little pop of color. And I think it just makes it all the more adorable!

Wow! This is so cute and so easy!! DIY Chalk and Eraser Holder for a Chalkboard | DIY Tutorial | TheTurquoiseHome.com

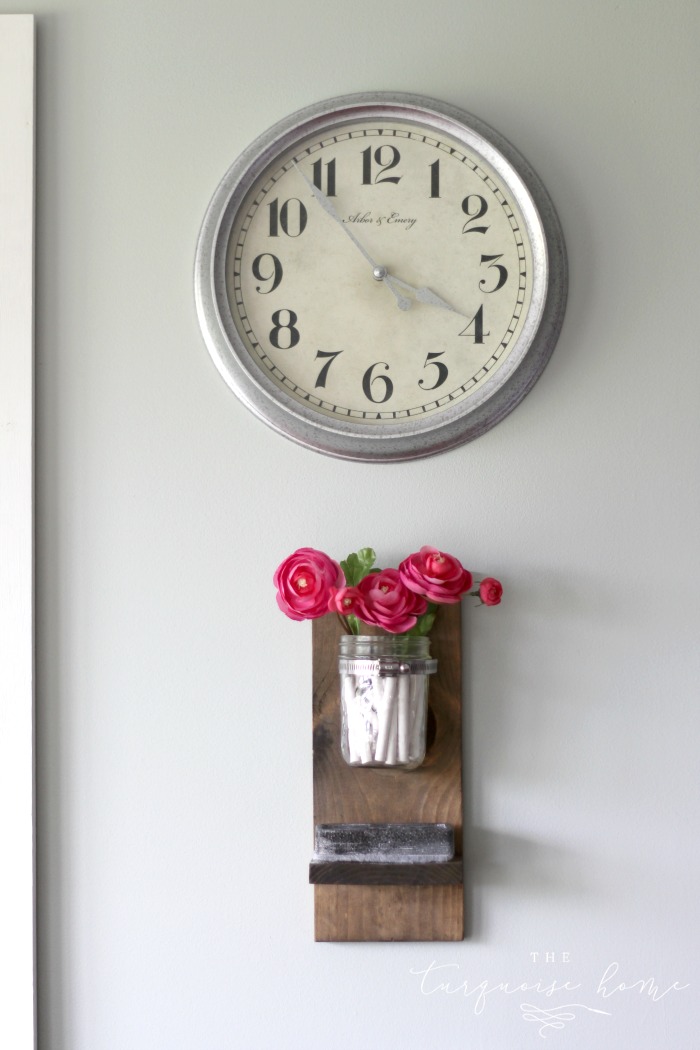
It’s the perfect little thing to fill this space on the wall under my new clock from Target. I had been trying to figure out what needed to go in that spot as well as some storage and I’m so glad I figured it out – finally!

Wow! This is so cute and so easy!! DIY Chalk and Eraser Holder for a Chalkboard | DIY Tutorial | TheTurquoiseHome.com

Now, I can finish a couple more details and reveal the new chalkboard wall! I switched things all around when I changed out my “EAT” letters and added my farmhouse shelves after I painted the kitchen Sea Salt. Ha!!

Decorating around here is like “when you give a mouse a cookie” or decorating dominos as I call it sometimes. One thing leads to another and someday, many years later, you look up and a space is finally done. Well, no space is ever completely done, but this one is getting very close to being done for now!

Have a wonderful day!!

pin-it-to-remember-it-small

Laura at The Turquoise Home

 
More Favorite DIY Posts You will LOVE!

Show more
DIY Wooden Finial Christmas Ornament

DIY Wood Finial Ornament

...
Read More
Show more
A DIY Winter Wreath - perfect for the holidays and then transitioning right into January!

DIY Winter Wreath with Bells

...
Read More
Show more
Simple DIY Fireplace

12 Gorgeous DIY Faux Fireplace Ideas

...
Read More
Show more
Full of Pumpkin Spice Fall Doormat

Fall Doormats You Will Love & How to Get the Layered Look!

...
Read More
Show more
10+ Essential Tools for a Beginner DIYer

10+ Essential Tools for a Beginner DIYer

...
Read More
Show more

Paint a Room Like a Pro in 5 Easy Steps

...
Read More
Show more
how to hang wallpaper

How to Hang Wallpaper (tutorial for beginners)

...
Read More
Show more
TV over mantel with hidden wires

How to Hide TV Cords Behind the Wall

...
Read More
Show more
Inexpensive long curtain rods cover wall of windows

How to Find and Hang an Extra Long Curtain Rod

...
Read More
Load More

Get Instant Access to my Guide to Customize Your Home on a Budget

Grab your FREE guide for 10 Ways to Customize Your Home on a Budget: simple projects to transform your home from builder beige to a home with character and charm!

Success! Now check your email to confirm your subscription.

There was an error submitting your subscription. Please try again.

Powered by ConvertKit
« How to Remove Sticker Residue from Clothing
The Keys to Decorating Your Home {when you move} »

Comments

  1. Jeri says

    July 25, 2016 at 9:33 pm

    This is super cute! For a pop of color I’m going to use a turquoise mason jar that I have!!

    Reply

Trackbacks

  1. Christmas Home Tour: Kitchen and Gallery Wall says:
    April 30, 2019 at 4:30 pm

    […] added a sprig of festive holiday cheer to my DIY chalk holder (tutorial here) and called it a day. I love that handy little […]

    Reply
  2. Top Favorite Updates for DIY Kitchen Makeovers | The Turquoise Home says:
    May 14, 2018 at 11:36 am

    […] Chalk & Chalkboard Eraser Holder […]

    Reply
  3. 10 Kreg Jig Projects You Will Love (amazingly easy!) says:
    May 7, 2018 at 4:35 pm

    […] chalk and chalk board eraser holder (tutorial here) is one of my most favorite projects. It’s so simple and keeps the chalk and eraser right next […]

    Reply
  4. Neutral Farmhouse Eat-In Kitchen Makeover Design Plans says:
    February 1, 2018 at 4:55 pm

    […] yours truly, except for the clock. You can find the DIY tutorials here: Giant Chalkboard, EAT Sign, Chalk & Eraser Holder. I’ve recently taken down the EAT sign, but don’t know what to put over there now, so […]

    Reply
  5. A Real Life Merry Farmhouse Christmas Kitchen | The Turquoise Home says:
    December 18, 2017 at 3:40 pm

    […] DIY Chalk and Chalk Eraser Holder […]

    Reply
  6. A Real Life Festive Farmhouse Christmas Kitchen | The Turquoise Home says:
    December 18, 2017 at 3:40 pm

    […] DIY Chalk and Chalk Eraser Holder […]

    Reply
  7. Top 15 Gifts for the Beginner DIYer | The Turquoise Home says:
    October 30, 2017 at 10:18 pm

    […] I’ve used it in big projects, like my dining room table, to small projects like my chalk holder in my kitchen. It’s amazing! The picture above shows the master system. I don’t have this one, but if […]

    Reply
  8. 5 Ways to Add Summer Decor to Your Home says:
    June 17, 2016 at 2:25 am

    […] “EAT” sign tutorial // giant chalkboard tutorial // chalk & eraser holder tutorial […]

    Reply

Leave a Reply Cancel reply

Your email address will not be published. Required fields are marked *

Recipe Rating


About Laura Nickelson, the author and creator of The Turquoise Home

Search

Shop My Instagram

Categories

Archives

Let’s Connect

  • Email
  • Facebook
  • Instagram
  • Pinterest

The Turquoise Home is a participant in the Amazon Services LLC Associates Program, an affiliate advertising program designed to provide a means for sites to earn advertising fees by advertising and linking to Amazon.com.

PRIVACY POLICY

Follow along on Instagram …

Follow along on Instagram …

Copyright © 2021 · Captivating Theme On Genesis Framework · WordPress · Log in