How to Make a Giant Magnetic Chalkboard
Make this Easy DIY giant magnetic chalkboard with just a few tools and a little bit of time. Perfect for writing inspirational or seasonal messages!

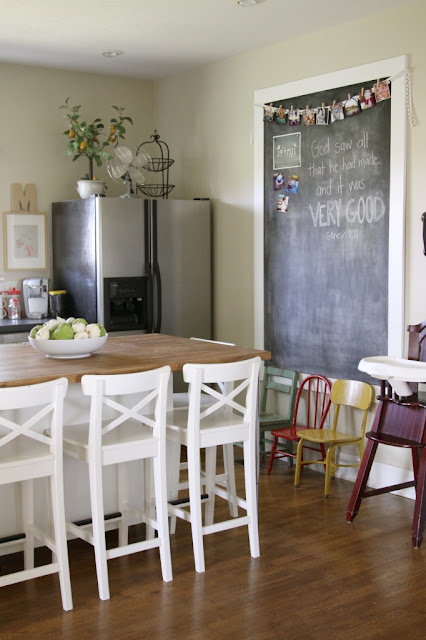
I am so excited about this project because I’ve been wanting one of these since I saw in Jess’s kitchen over on The Macs back in October. I love her huge chalkboard and have wanted one ever since. Isn’t her house the cutest thing??
Well, fast forward to later on in the fall when a friend and I were out shopping at the neighborhood-wide yard sale and I bought a can of chalkboard paint for $2. Yay!
I then got semi-serious about my project and went hunting for a tutorial. I found this one.
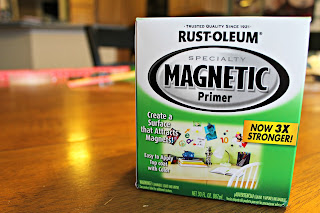
If I hadn’t read really carefully, I would have missed that Jess’s chalkboard is actually magnetic, too! What an awesome idea. And did you know they sell magnetic primer at your local hardware store? Well, they do and you just paint it under the chalk board paint and it will be magnetic.
This was an awesome discovery for me because I don’t have a magnetic refrigerator. So, I thought this would be the perfect solution for Miss A’s magnetic letters and numbers without a home. It didn’t quite work out as I’d planned though. Keep reading …
Want to Save This?
Enter your email below and I’ll send it directly to your inbox!
This post contains affiliate links for your convenience. See my full disclosure policy.
Supplies to Make a DIY Giant Magnetic Chalkboard
OK, these are the supplies I used:
- 4 x 6 Masonite/hardboard in 1/8 inch thickness (I had them cut two feet off of a 4 x 8 board. The hardware store did this for free.)
- Rustoleum magnetic primer paint (or any other primer if you don’t want it to be magnetic)
- Chalk Board Paint
- 1 – 1×4 at 8 feet long (I had the hardware store cut this into two 4 foot pieces so it would fit in my van easier.)
- 2 – 1×4 at 6 feet long (or you can use any type of moulding for the frame)
- Chalk
- 2 D-ring hangers
- 1/2 inch screws
- Nails
- Level
- Circular Saw – This is the one I have and it’s small and great for little projects!
- Paint for the frame
- Wall Anchors
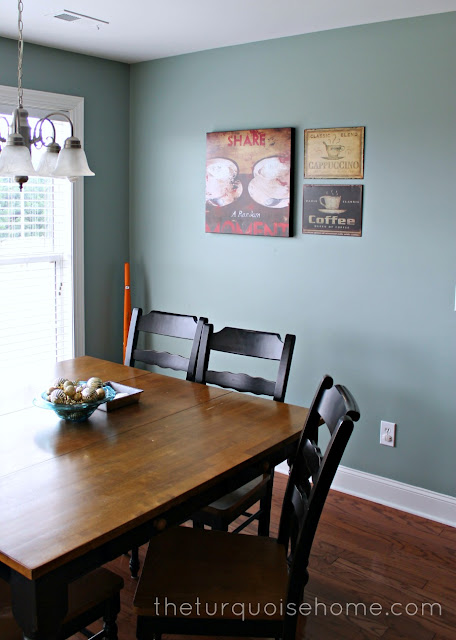
This is the way I had the wall decorated before. It’s just screaming for a huge piece of art or a chalkboard, don’t ya think? I wouldn’t want to let a huge wall like that go to waste.
Steps for Making a Giant Magnetic Chalkboard
1. Paint the Masonite or Hardboard with Magnetic Paint Primer
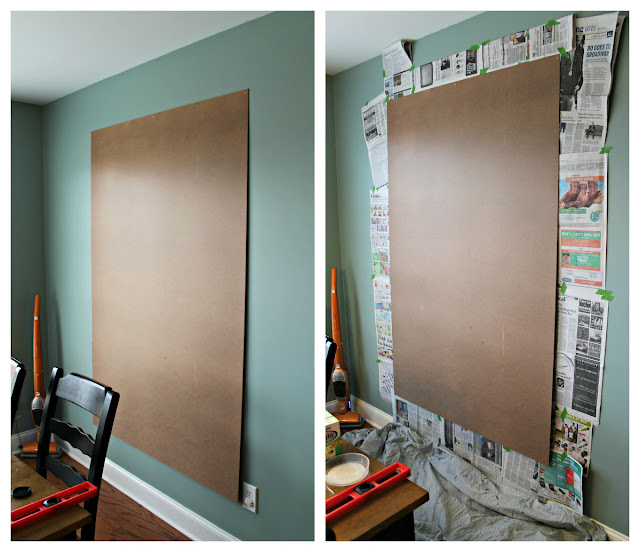
I brought the hardboard in and nailed it to the wall. I thought it would be easier to paint it on the wall than crawling around on the floor.
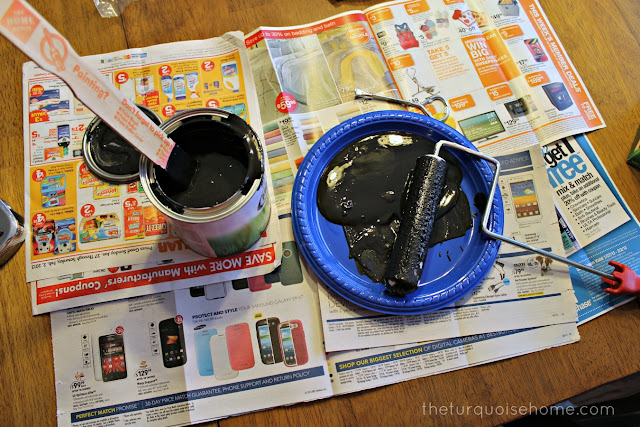
And I just taped newspaper behind the board to protect the wall.
I was super excited about the magnetic paint primer. I had read online reviews that said to stir it really well before and during painting. This will make sure the magnetic qualities are mixed throughout the paint.
So I stirred it very well, and painted four thin coats. I used every last drop of this paint in hopes that the magnets would stick well.
But when it was dry, my smaller magnets did not stick at all. They just slid down the board. Boo. But it does hold larger magnets. I’ll have to buy some pretty large magnets if I want to hold anything on the board. Bummer. So, unless you really, really want a somewhat magnetic board, then I’d skip it and just use regular primer.
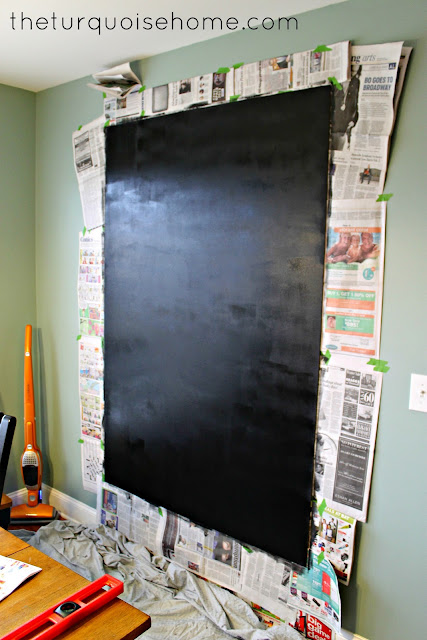
2. Paint the Board with Chalk Paint
Once the primer dried, I waited four hours and then painted two coats of chalk paint.

3. Season the Chalkboard
I had to wait 24 more hours before I could season the chalkboard.
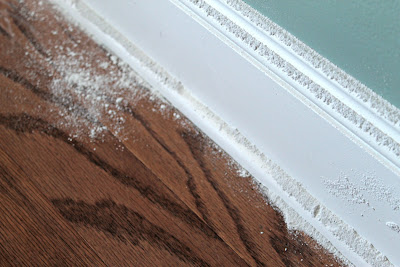
To season or cure the chalkboard, you’ll need to rub the side of a piece of chalk all over the board the first time you use it. Otherwise the first thing you write on the board will stay permanently. Trust me … it’s a messy job. I think everything in my kitchen was covered in a fine layer of dust.
4. Cut the Boards for the Chalkboard Frame
Once I’d finished seasoning the chalkboard, I pulled it off the wall. I laid it on the garage floor to measure the trim. The 6 foot pieces worked perfectly on the long sides.
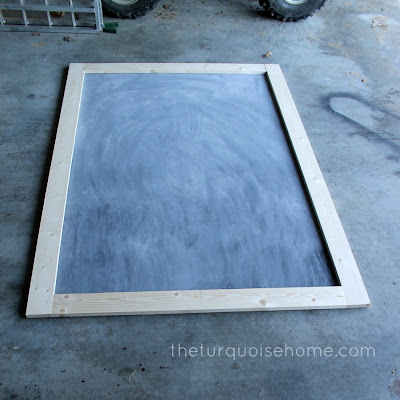
And I just had to cut a few inches off of the 4 foot pieces for the top and bottom using my circular saw. I didn’t do miter cuts since my saw is still out of commission.
5. Paint or Stain the Frame Pieces
Once I had the frame cut to the right size, I brought the four pieces into the house and painted them with some old white trim paint I had on hand.
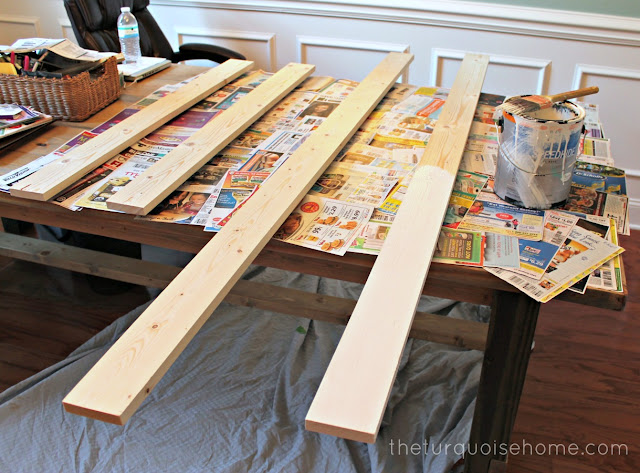
I used push pins to hold the boards off of the table a little bit. It kept them from sticking to the paper while the paint dried.
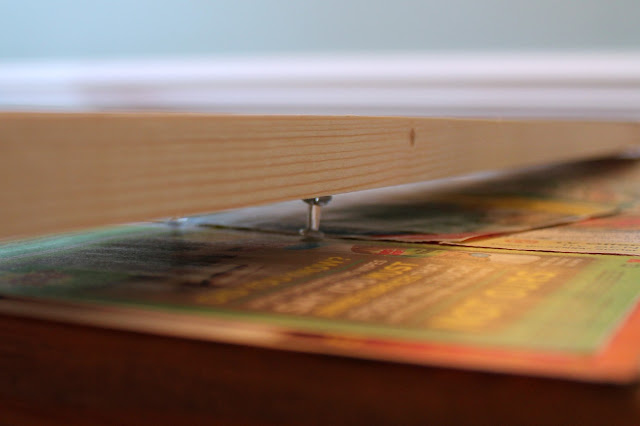
6. Attach the Frame to the Chalkboard with Screws
Once the boards were dried, I placed the un-painted side up on the floor.
And I put the chalkboard on top. I used screws to screw the chalkboard into the frame.
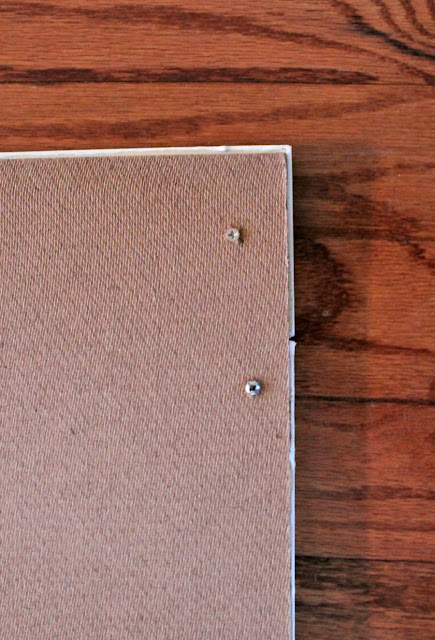
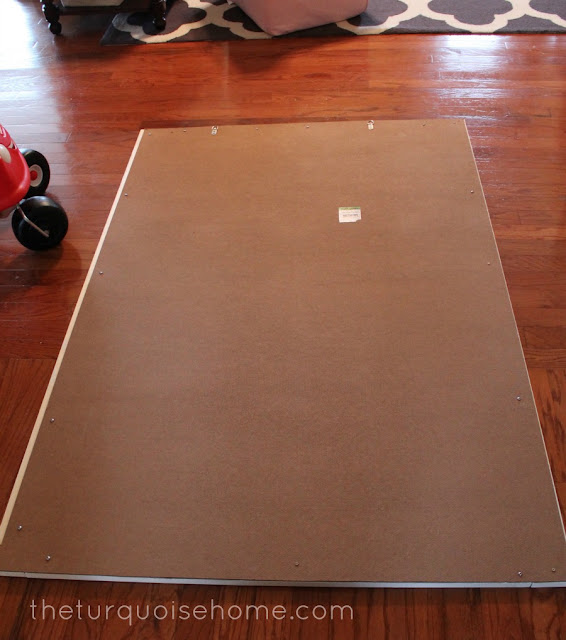
7. Attach Hangers to the Back of the Chalkboard and Hang it Up
And I screwed two D-ring hangers into the back in order to hang it on the wall.
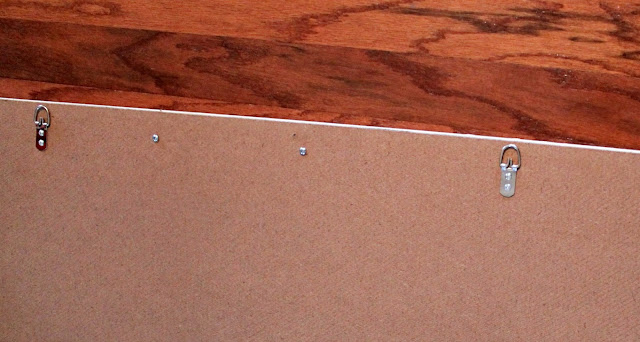
I used these heavy duty drywall anchors to hang the chalkboard on the wall!
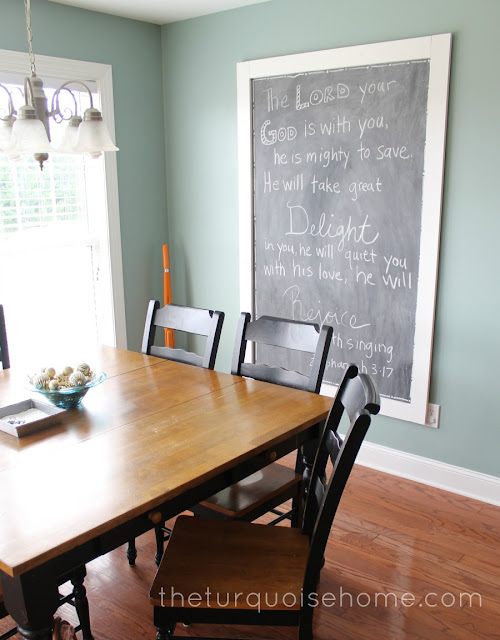
And there you have it, folks! My very own, giant magnetic chalkboard. I’m so glad it’s finally done.
It cost me about $50 for everything. (The magnetic primer was $20, so if you don’t use that, it brings the price down quite a bit. And I only paid $2 for the chalk board paint at a yard sale.)
I quickly wrote one of my favorite verses on the board. I need to work on my handwriting and I plan to change it up quite a bit with some prettier writing.
I’ll have to spend some time learning chalk board calligraphy. 🙂 The possibilities are limitless and I can’t wait to use it in so many different ways.
More Posts You Will Love:


You did a great job! This post sound extremely good.
I love you chalkboard, you did a fabulous job creating it. I love tge end results. What a wonderful scripture to.
I have noticed you don’t monetize your blog,
don’t waste your traffic, you can earn extra cash every month
because you’ve got high quality content. If you want to know how to make extra $$$, search for: Ercannou’s essential tools best adsense alternative
I need a giant chalkboard!
Years and years ago(when I was in high school) I painted a wall in my room with magnetic primer. What I did was just get a big spool of magnet tape and I would cut little squares and stick them on the back of all my drawings and paintings. One tiny piece on each corner made everything stick up just fine and avoided any sagging, it also cuts out the problem of having a magnet trying to stick through the paper. It made for a nice moveable art gallery wall.
Such a great idea!!
This is just amazing!!! We will be featuring this on Craft Frenzy Friday tonight at 7PM central!! Thanks for linking up with us!
I emailed my weight loss buddy Elizabeth and she sent me your link. I was looking for an idea of what to do with a 28″ x 30″ wooden window frame that I have been keeping in storage for over 20 years. I dragged it out and have been thinking about what to create with it and asked her and she gave me your link. I love the verse, and have a wall in a spare bedroom above the headboard of a bed. I am considering doing a project like yours, but may add some grapevine or some flower decor to the side and corner to enhance with colors. I’m debating on doing a chalkboard or puzzle or poster behind the frame, and maybe put knicknacks on the lower part of the frame. The ideas can be endless. Thanks for the verse too, cause if I go with a verse, this would fit the room perfectly! I simply love the idea and it would fit into the country theme that I have in the old farm house that we remodeled!
Oh awesome, Donna!! I bet it will be amazing!
I had NO idea about magnetic primer! Very cool project and love how you went BIG!
Umm, yeah. It’s HUGE!
Love your blog and this project is great. I also had problems with the magnetic primer. I was totally bummed too. 🙁 I tried to make magnetic chalkboard pantry doors. But they’re pretty much just a chalkboard now. Oh well! Thanks for sharing! Stop by my Friday’s Five Features this week and link up this post (and others)!
What a great feature to have in the kitchen. Love that in encourages everyone to scribble and doodle whenever the urge hits. I also love how you changed up your font and writing in the verse. Looks fab! But then again, I get excited about anything remotely related to stationery and the lost art of letter writing. You may enjoy Rite While You Can where I tend to hang my hat. Visiting via ‘InspireMe Elizabeth and Co’ link up.
This looks so good in your kitchen! I have a big wall I could put one on, so this may have to happen!!
Your giant chalkboard is GREAT Laura and the verses lift my spirit today. Thank you! Love your sweet angel’s happy face and love your turquoise home. My colors too! Big blessings to you this week,
Patti
Thank you, Patti! I’m so glad the Scripture blessed you. It’s one of my favorites! I’m planning to stencil it on to a pallet board at some point. 🙂 Have a wonderful week!
Amazing and a faulous tutorial too. Love it. Thanks tons for linking to Inspire Me. Hugs, Marty
Hi…I’m just about to do this project. I’m glad I know now that I need to rub the whole chalkboard with chalk before I use it. Do I leave the chalk on it or wash it off?
You can wipe it off. Just want to cover the whole thing in chalk first, so that one image doesn’t permanently stay there. 🙂 Once I rubbed down the whole thing, I just wiped it off with a damp cloth and started writing. 🙂
I have tried this 4 times now (both sides of my 2 4×4 hard boards) and I can’t seem to get the paint smooth! I have used foam rollers, sanded between coats, etc.
What did you use to paint? A roller, brush? Am I using too much paint? To little? To the average eye it’s smooth, but when you paint a chalkboard you want is as smooth as paper 🙂 any tips would be appreciated!
Hey Steph, I used a foam roller. And honestly, my chalkboard isn’t that smooth. I’m not sure that you can get it totally smooth with the chalk paint, but it works just fine!! 🙂 I’d say just leave it the way you have it.
I love this, a nd really want to make one, a quick question though, how did you attach the frame to the board? Did you glue it or nail it?
Thanks for sharing
I LOVE how big it is!! So so cute!
Super cute~ I love big oversized chalkboards too!! Sharing at the party tomorrow~ thanks for linking up at Feathered Nest Friday!
Love your chalkboard! I too have not had any luck with the magnetic paint. As I was reading your post, about stirring, I was so hopeful it worked for you.
catching you!
gail
Awesome! I love big giant chalkboards!
Hi, I’m a new follower from Get Crafty Fridays. This post is so timely because we’re getting ready to paint our family room and I’ve been thinking about making part of one wall a blackboard for my kids to use. You have a great tutorial and I’ll be referring to this often, I think. 🙂
Jennifer
I am in LOVE with this chalkboard! I’m working on one for my kitchen as we speak! Bummer that the magnetic paint didn’t turn out, but it looks amazing! Thanks so much for sharing at Time to Sparkle ; )
Liz
Can’t wait to see yours!
I love it! I chuckled when I saw your before wall. I have that same large Random Moment art that I need to find a place for. I love it, but haven’t hung it up since we moved in to our new place. Almost two years ago. Happens when you have a baby, I guess.
The giant chalkboard turned out great!
I love that random moment art! I just moved it across to the other side of the room. It looks much less lonely over there!
I wish I had a big open wall in my kitchen to fit one of these! My kids would have a ball with it. I especially live your clever tips like hanging it on the wall to paint- hello ingenious! (I would have been all over the floor!) and using pushpins to elevate the trim…so clever!!
XO,
Christy
Super cute….I have a huge wall in need of something like this! Stopping by from live.laugh.rowe linky party…
katie
This turned out so cute! I love how big it is! And thanks for the heads up on the magnetic primer. Have a great day!
I Love this chalkboard. I think it would be perfect in the playroom!
Love the chalkboard – love the scripture message!
Rhonda
It looks fantastic! 🙂
Love this!
It looks fabulous! Such an amazing large dramatic piece!!
Krista
This is over the top amazing!!!! Thanks for sharing at Project Inspire{d} ~ pinning to my party board ~ and I love that Bible verse!
Big hugs, Mary Beth
OOh I love it, you did a great job! Your chalk board looks great and it really doesn’t need to be magnetic anyway 🙂
Susan
This is awesome! You did a great job 😉
Jamie @ somuchbetterwithage.com
I read on thrifty decor chick that she has it shaken at the store and then busts a move home and uses it right away- just an FYI for later. I didn’t have any luck when I just mixed mine and haven’t tried it since. Regardless, your project turned out so well!
Nice! I’ve heard that a few places about the magnetic primer–that it doesn’t work very well. It’s too bad, since it’d be such a cool product if it did work. But your chalkboard is great anyway 🙂
I absolutely ADORE the chalkboard!!!
Thanks so much for sharing this at The DIY Dreamer… From Dream To Reality last week!!!