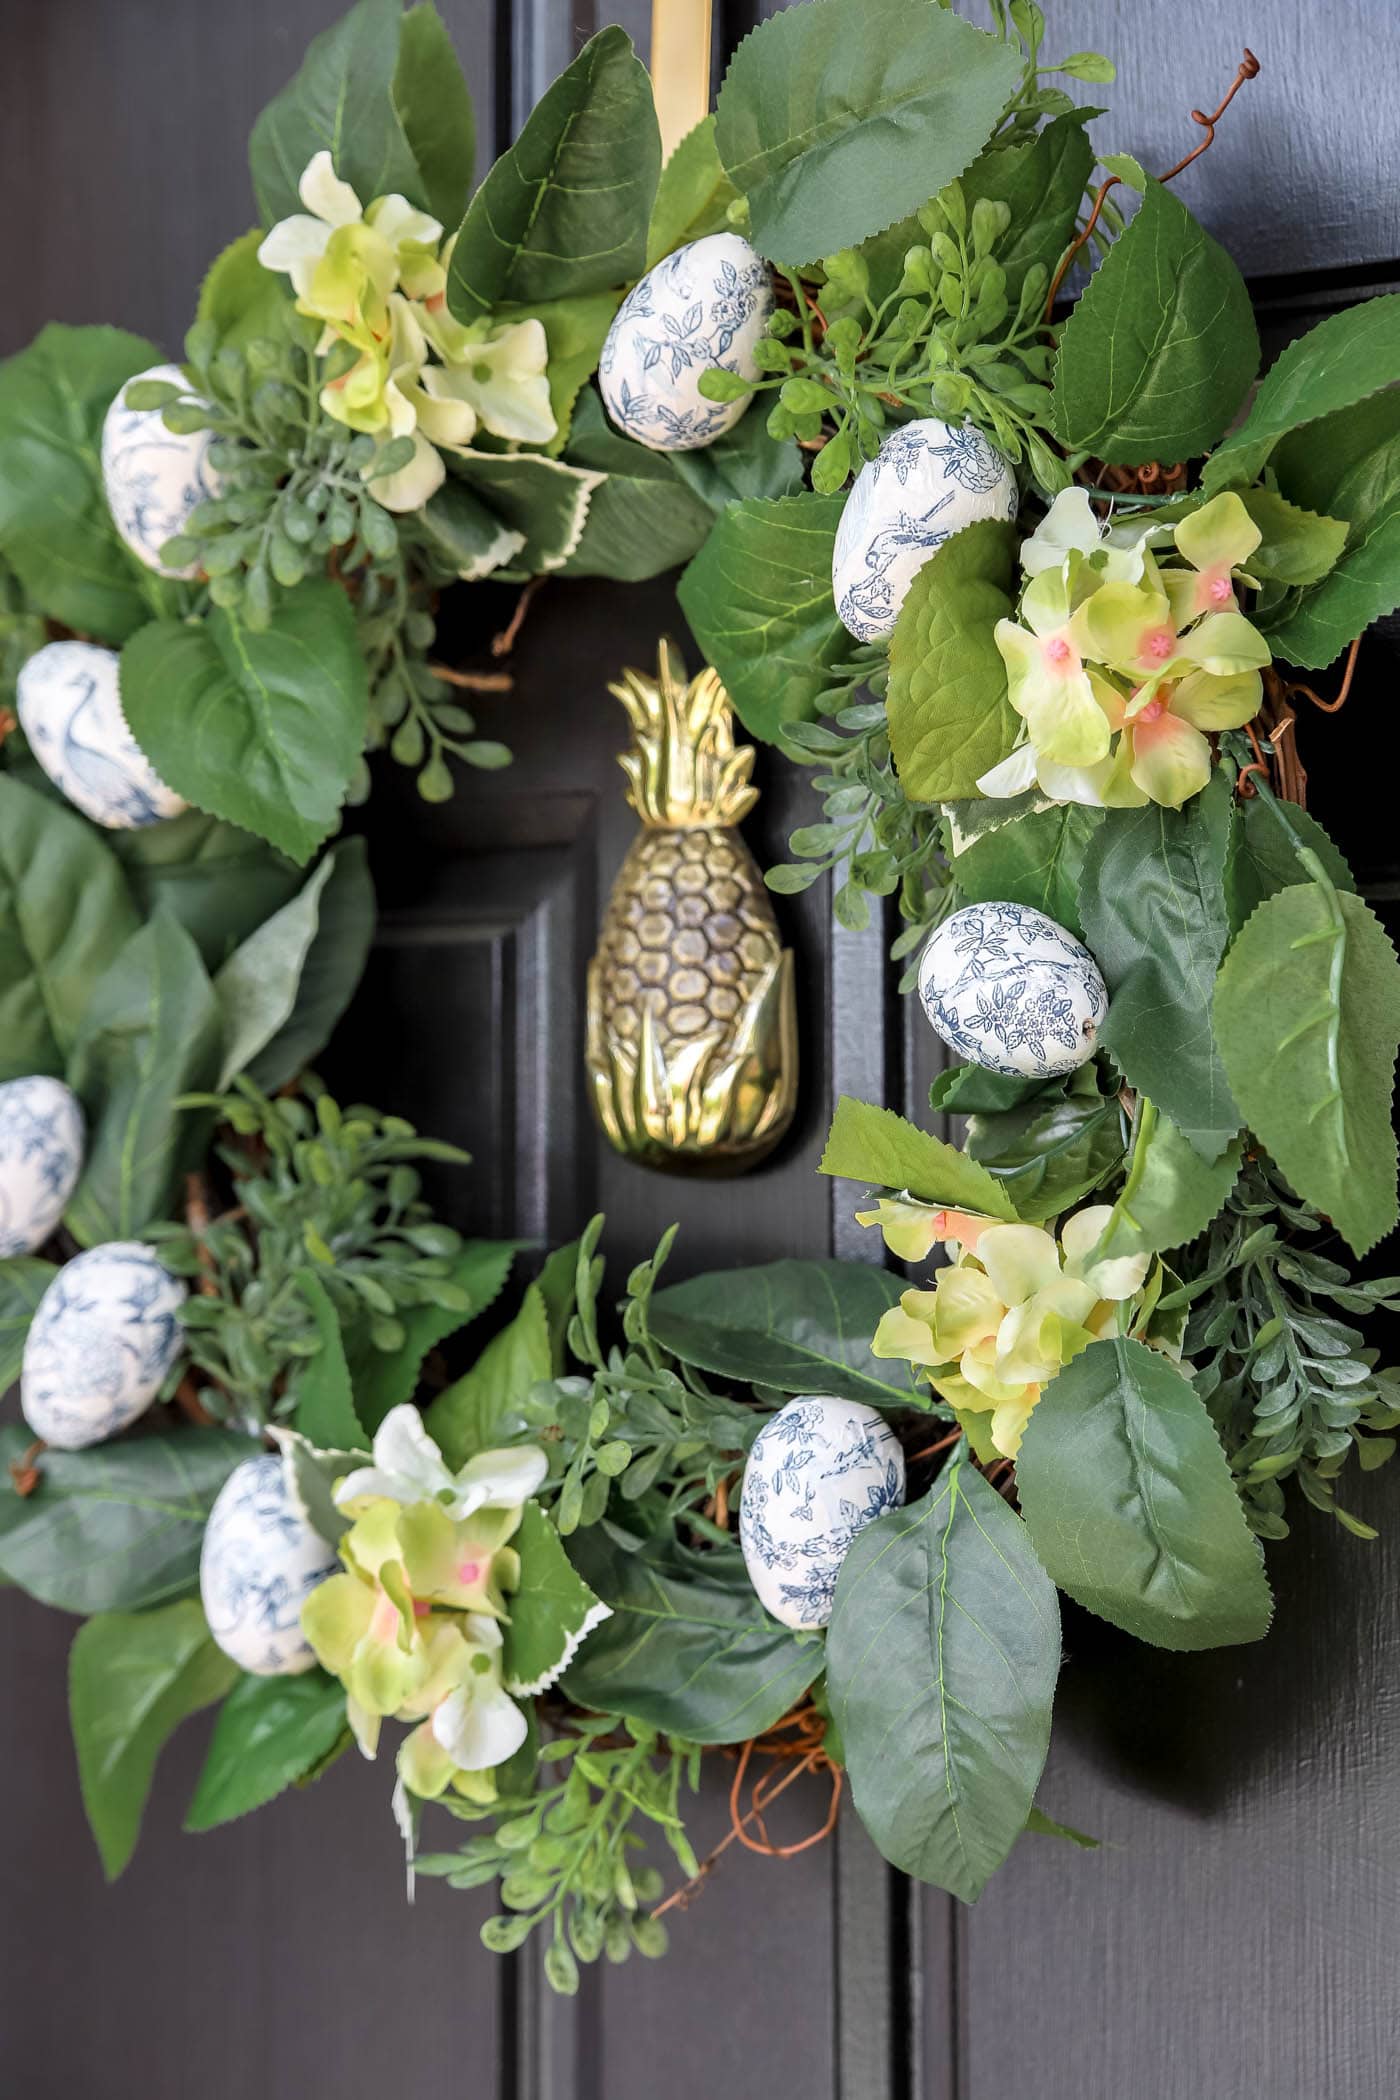
DIY Chinoiserie Egg Wreath

This wreath a twist on the typical Easter egg wreath with decoupaged chinoiserie eggs! This blue and white wreath is perfect for all of spring!
I’ve seen some really cute plastic Easter egg wreaths for spring, but wanted to put my own twist on it with some pretty blue and white eggs that were so easy to make! It’s perfect for an Easter wreath, or anytime between March and May!

After pulling my spring decor out of my decor closet this year, I wanted to make a new Easter decoration with items I already had. I had an old lemon wreath that I hadn’t used in a while, plus some wooden eggs that had been laying around for years.
I was inspired by the chinoiserie pumpkins I made back in the fall and wanted to use the leftover blue & white napkins I had from that project, too!
So, I got to thinking. I would decoupage the wooden eggs with the napkins and then pull the lemons off the wreath and put the eggs on!
Sounded good to me! And would be a fun way to spruce up my front door.
Want to Save This?
Enter your email below and I’ll send it directly to your inbox!
This post contains affiliate links for your convenience. See my full disclosure policy.
What You’ll Need to Make DIY Easter Egg Wreath
- 9 Wooden Eggs (Most any faux eggs would work, too!)
- Blue & White Paper Napkins
- Drill Bit – longer than the eggs
- Drill
- Light or White Paint
- Small Craft Paint Brush
- Hot Glue Gun
- Hot Glue Sticks
- Mod Podge
- Floral Wire
- 18-inch Grapevine Wreath Form
- Faux Greenery Stems for Wreath Filler
- Faux Flowers for Wreath Filler
How to Make an Easter Egg Wreath
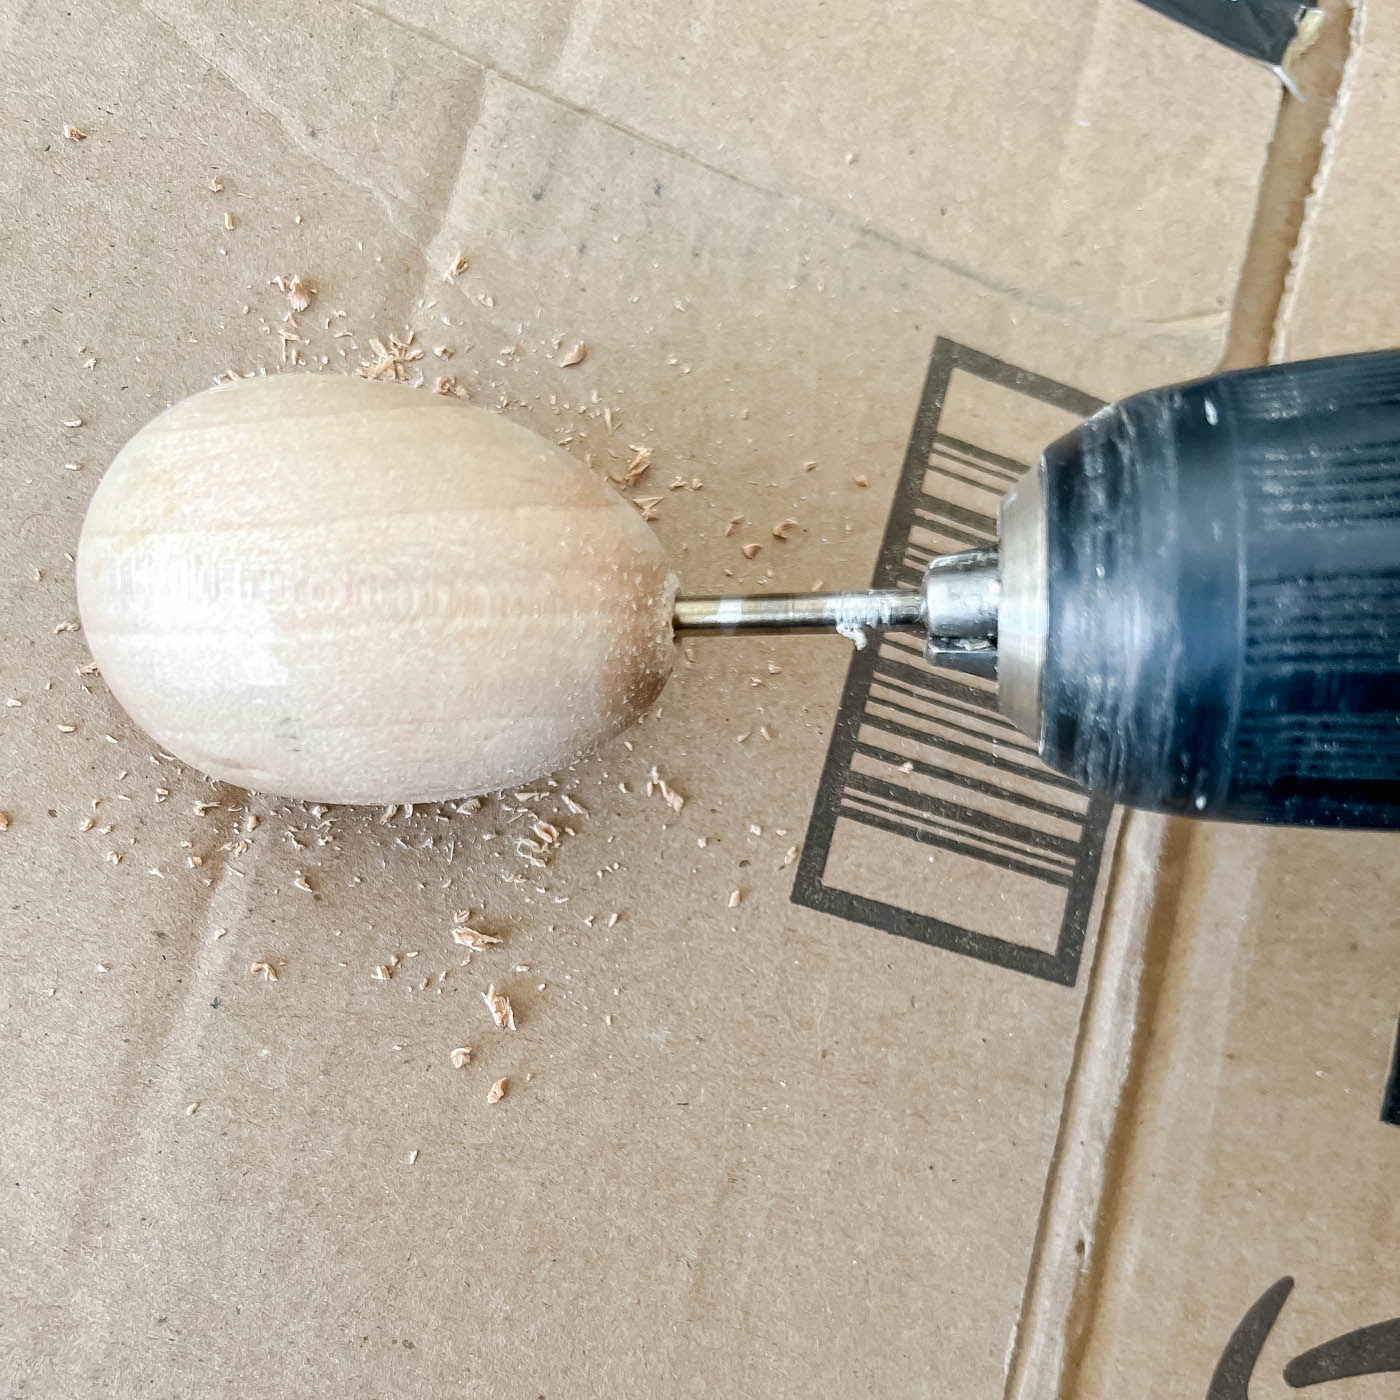
1. Drill a Hole through the Middle of the Eggs
First thing you’ll want to do it drill a hole in the wooden eggs. I tried using a smaller, shorter drill bit and drilling from both ends to meet in the middle, but I couldn’t get them to meet. So, you’ll want to use a drill bit longer than the egg and drill all the way through.
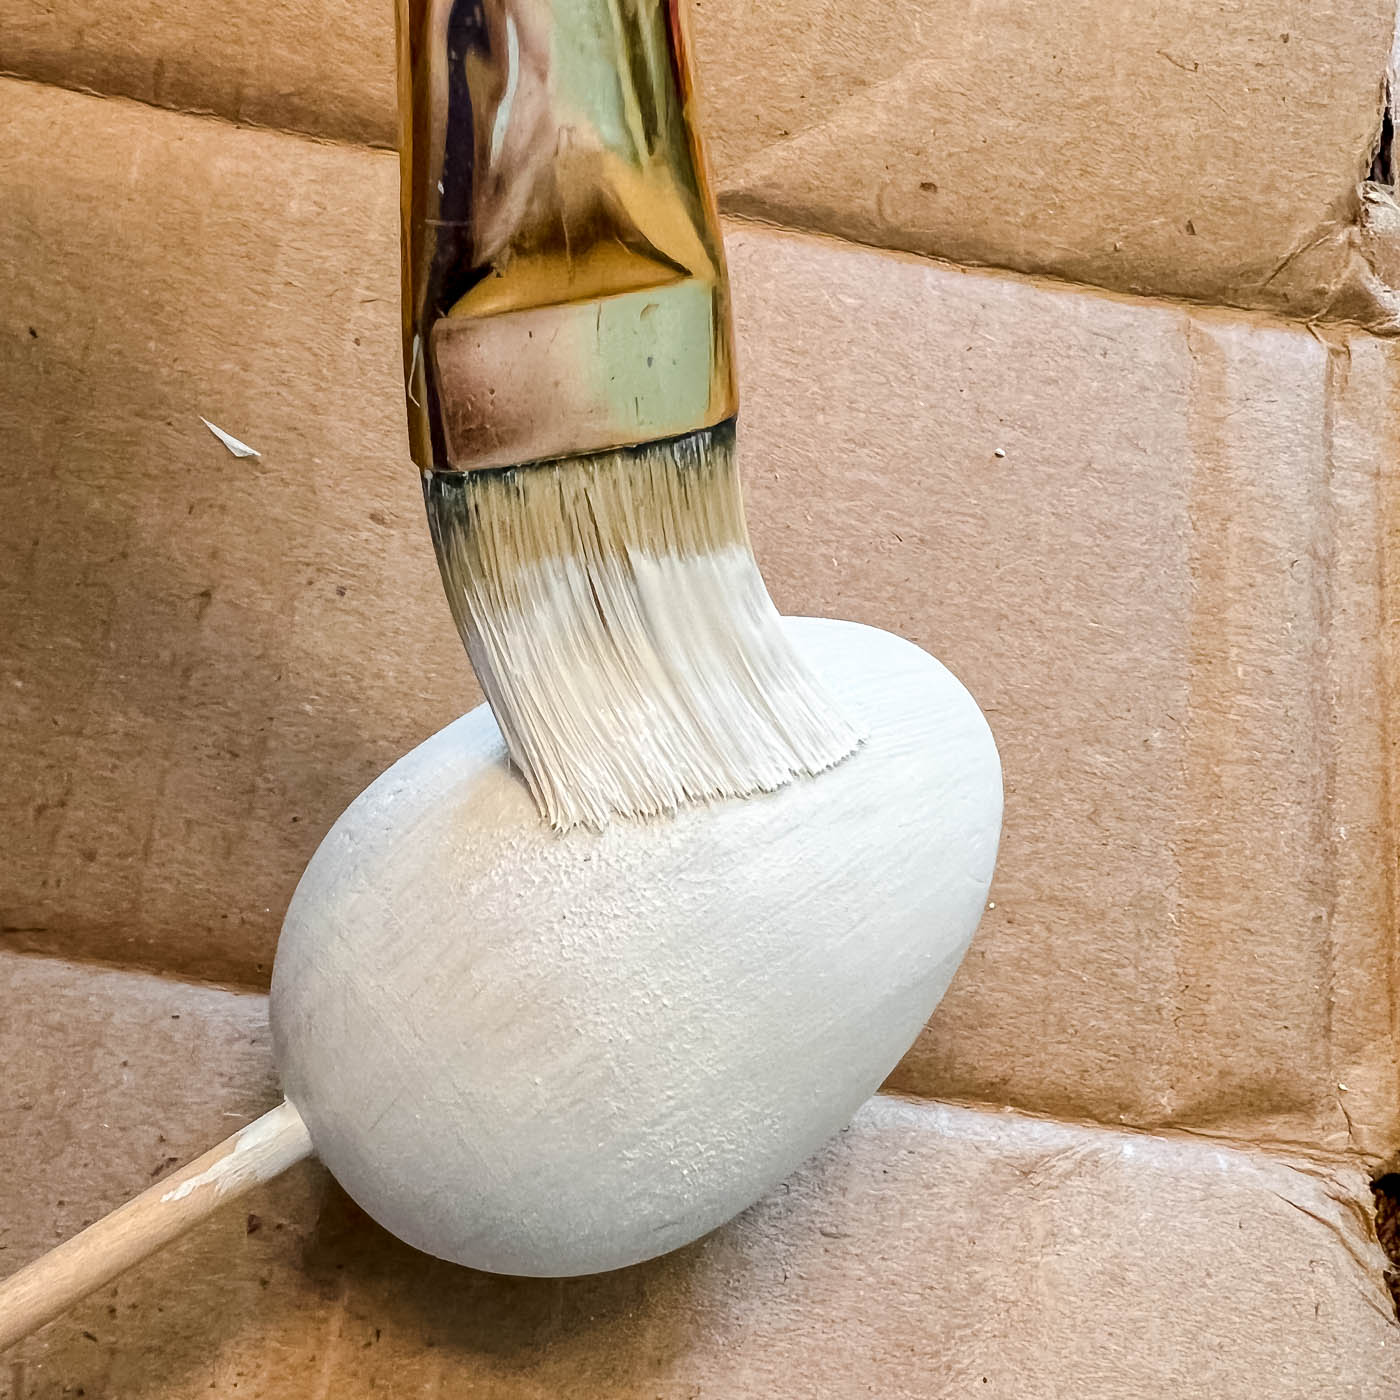
2. Paint the Eggs a Light, Neutral Color
I tried to decoupage the eggs without painting them first, but the wood color was too dark. So, I grabbed the closest pot of white sample paint and painted them with one coat. I had skewers that fit into the drilled hole perfectly, so it made painting the eggs very easy.
Let the eggs dry completely before moving on to the next step.
3. Decoupage the Eggs with a Napkin
If you want to watch a video of how to decoupage with napkins, check out my video over on the chinoiserie pumpkin post. But I’ll type out what I do here, too.
If the napkins are 2-ply napkins, you’ll want to separate the layers to get down to 1-ply. Then cut out the shapes that you want to use on your eggs. If you keep the napkin whole it’ll be too bunchy to work with.
Apply Mod Podge to the entire egg first, then start applying pieces of the napkins to the egg with Mod Podge over the napkin as well.
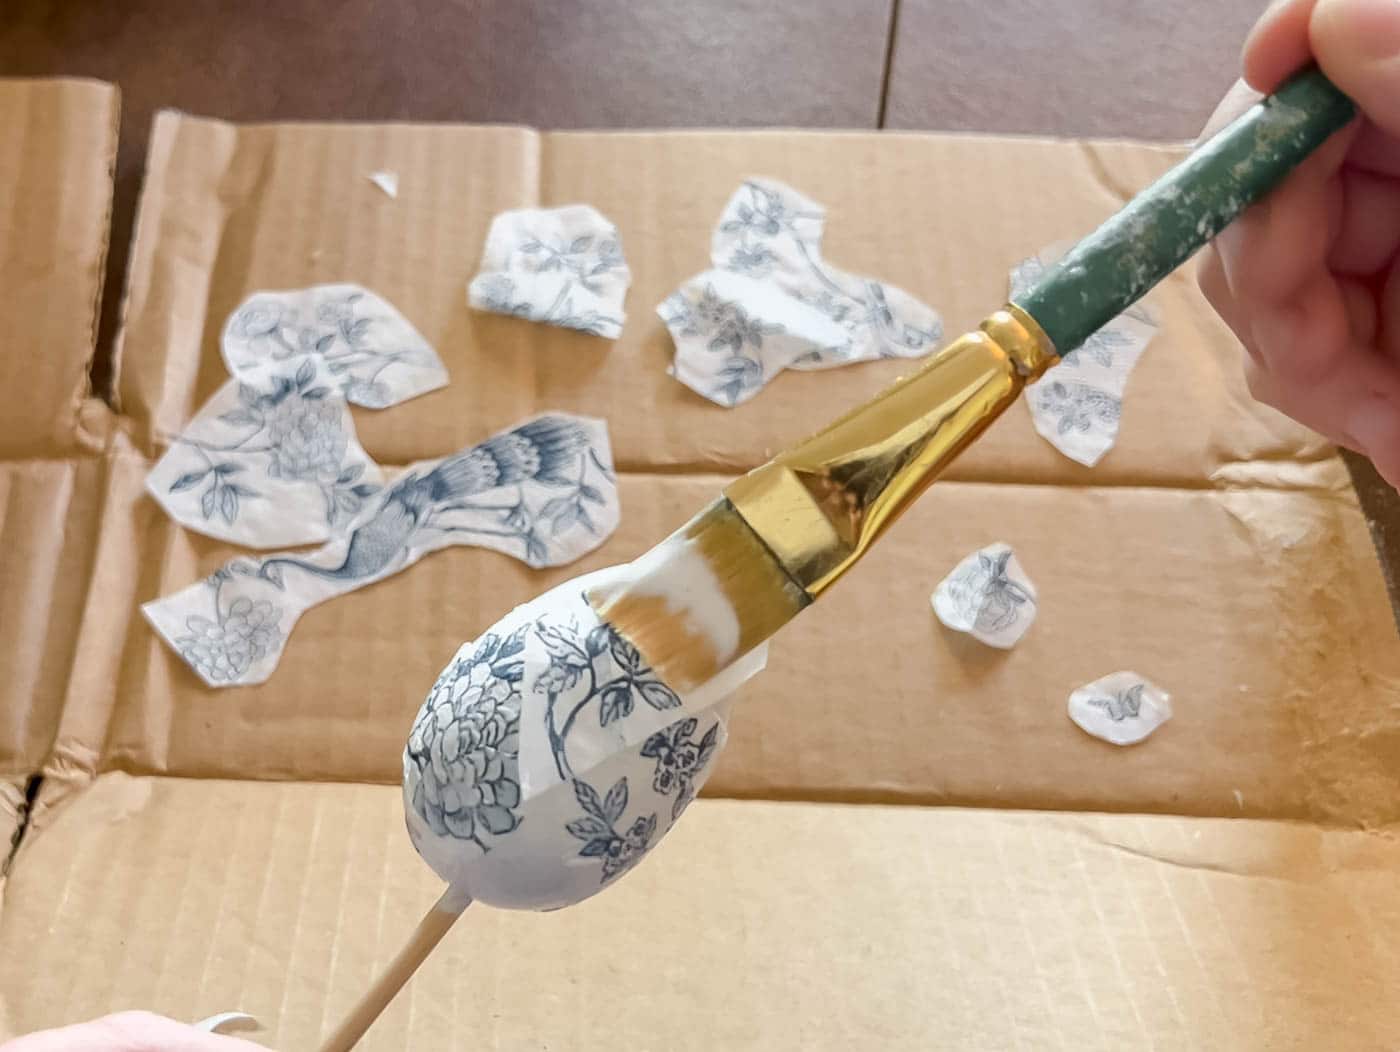
Piece together the napkin over the egg until it covers the eggs entirely.
Let the eggs dry completely before moving on to the next step.
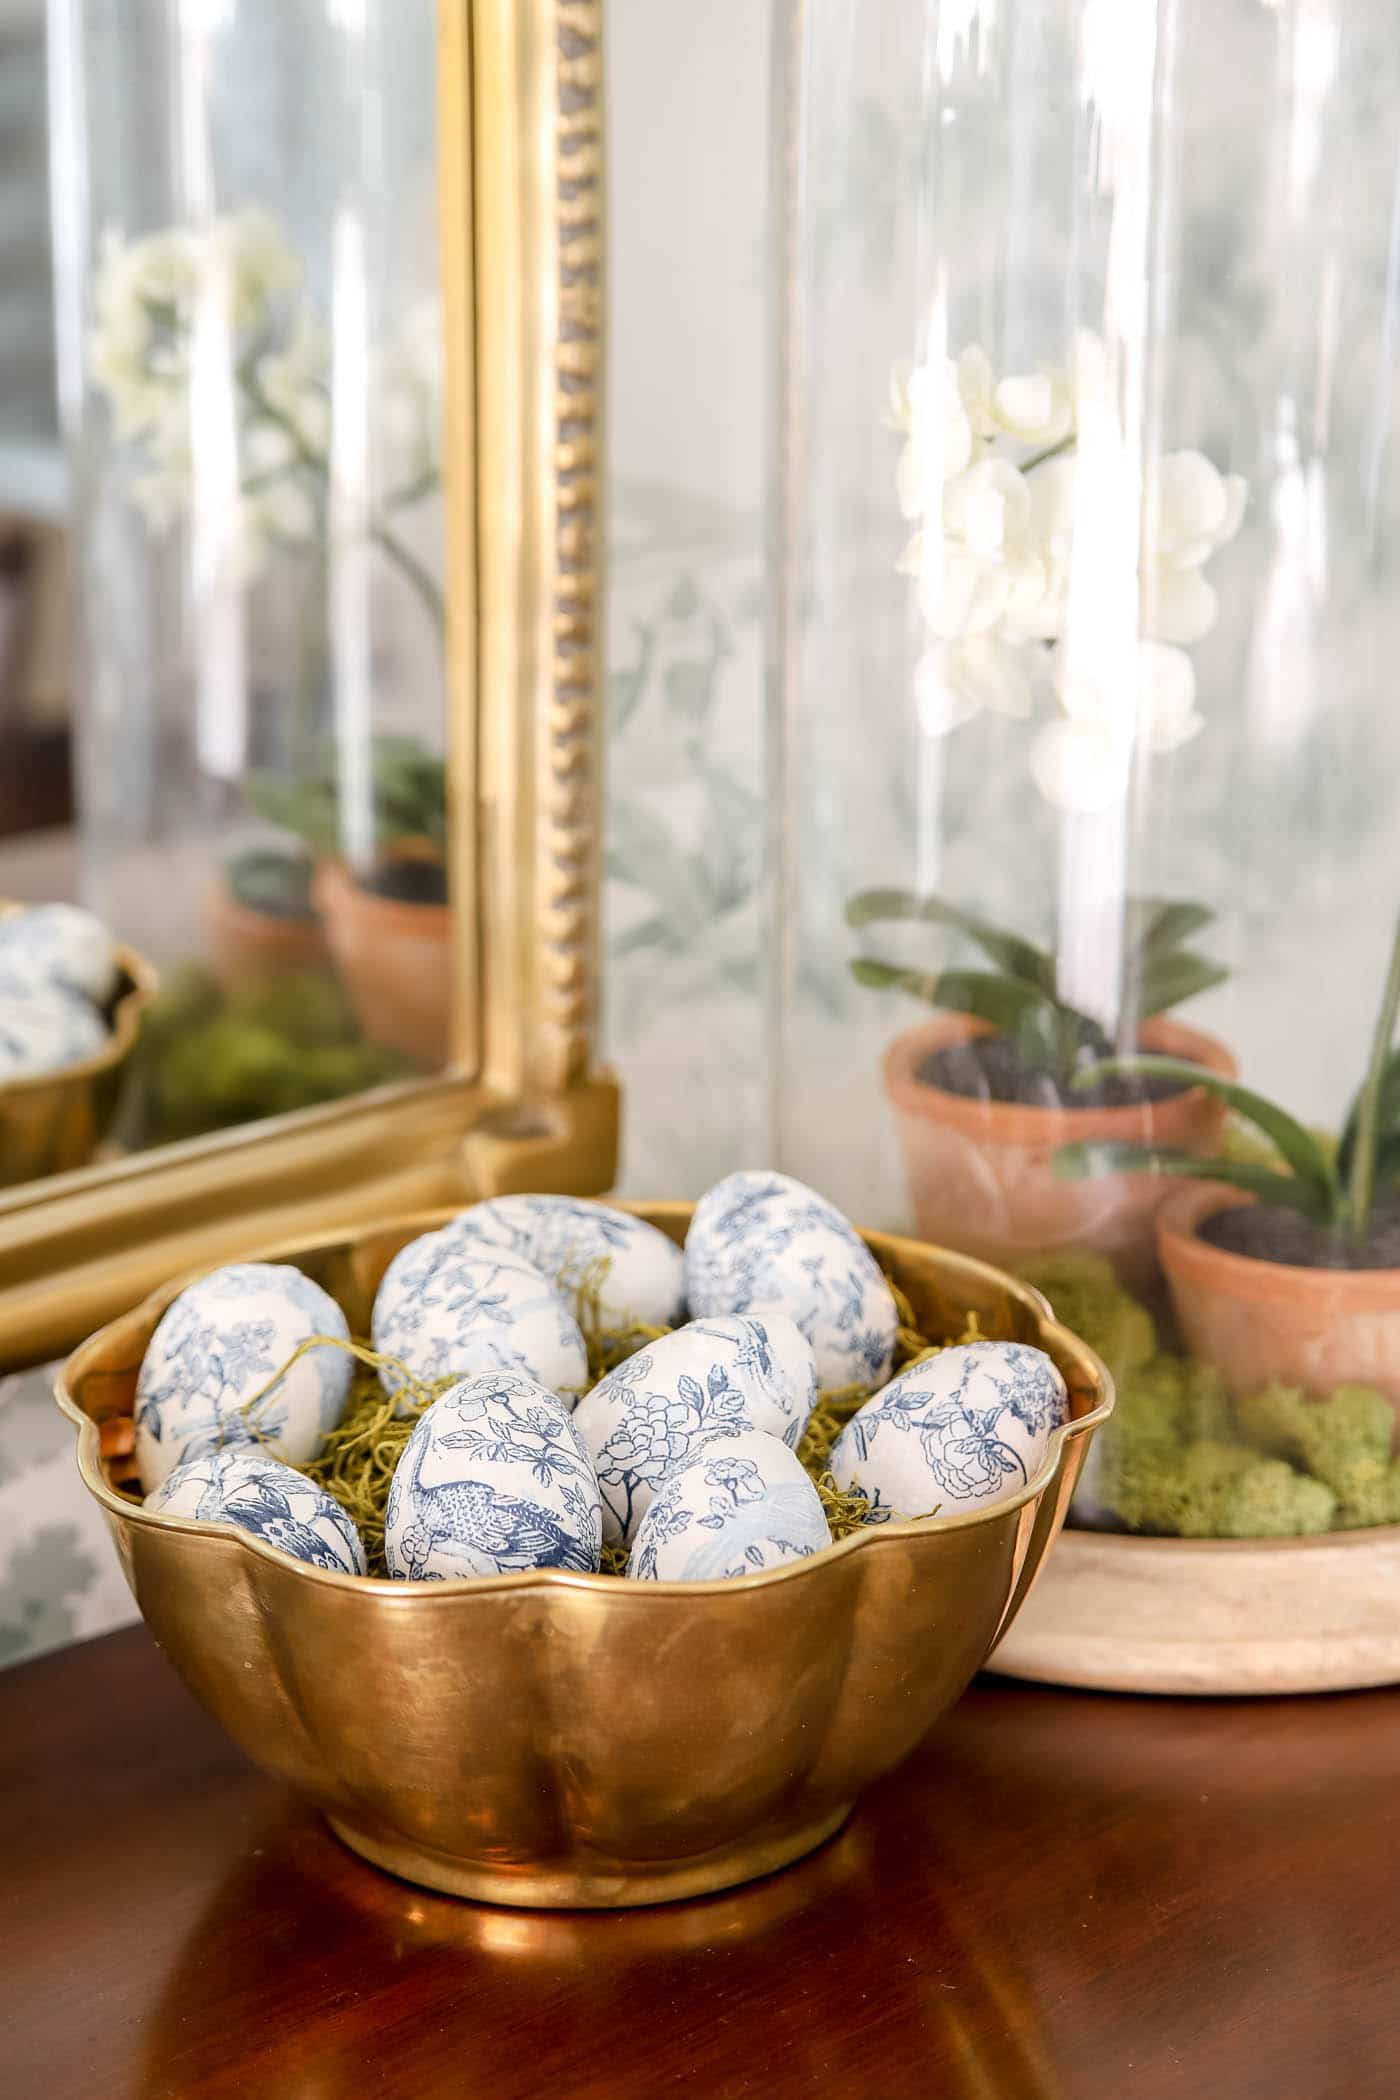
At this point you could collect the cute eggs in a bowl and call it a day. I think they are so cute!
4. Add Greenery and Faux Flowers to the wreath form.
I’ve made so many wreaths over the years, but if you’ve never done it before, watch the video from my Spring Wreath with Peonies Tutorial.
But basically you will cover the wreath form in greenery and flowers until you like how it looks. I usually attach everything with hot glue once it’s all in place!
5. Attach the Eggs to the Wreath
Thread some floral wire through the hole in the middle of the egg and attach them to the wreaths! At this point you could add a ribbon or any other embellishments you want!
Hang it up, step back and admire your pretty work!
I love how cute this wreath turned out and will be using these blue and white eggs in my spring decor for years.

More Posts You Will Love:


This looks awesome – I definitely want to make this
Thank you, Lynn!
Gorgeous project! Can’t wait to try this!
Thanks so much Tanya! It’s so easy!!