DIY Chinoiserie Pumpkins {with video tutorial}
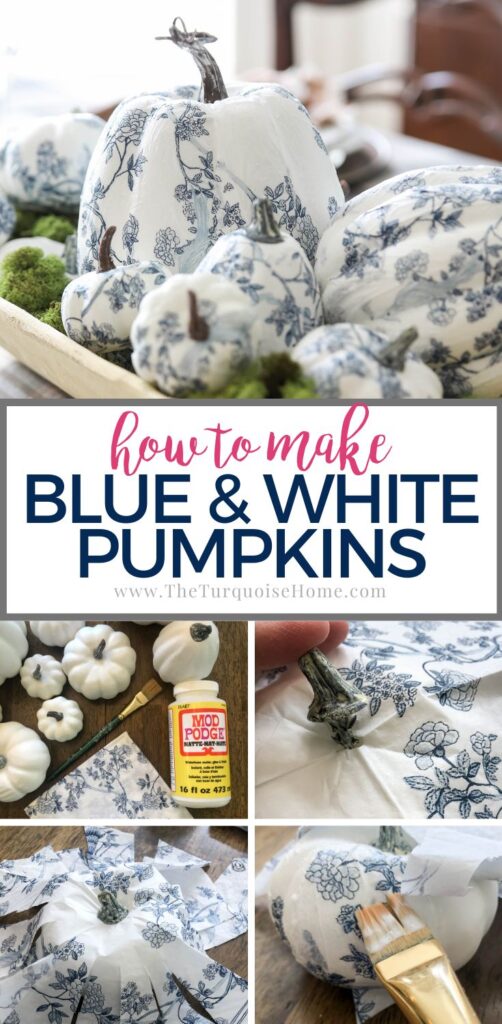
Learn how to make beautiful blue and white chinoiserie pumpkins with 3 supplies and a few hours of time. It’s the perfect, easy fall craft.
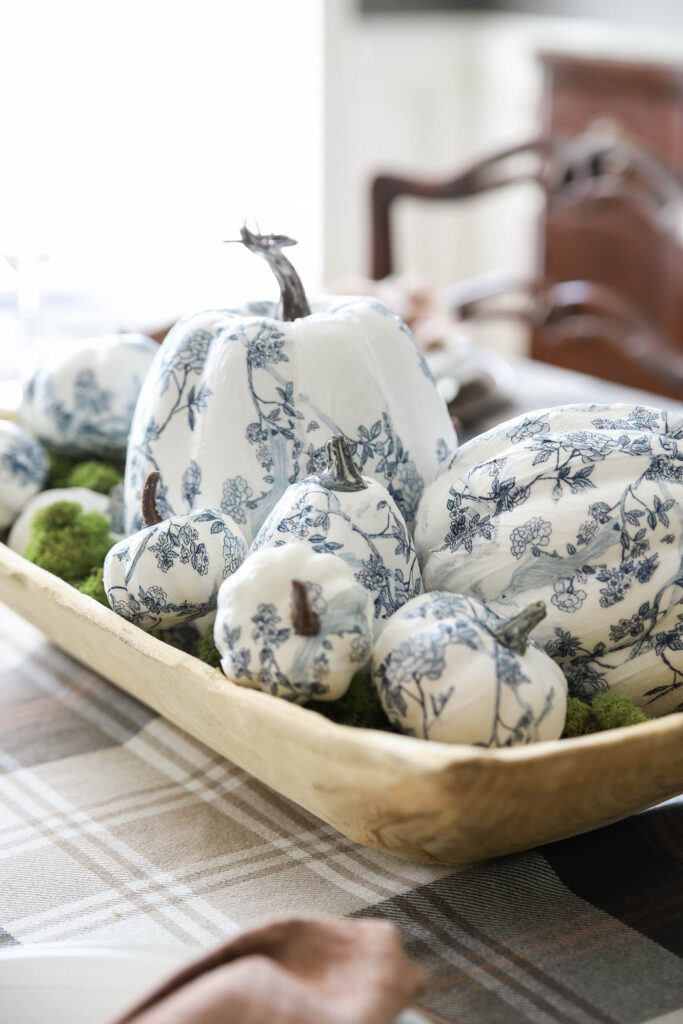
I’ve long time admired pretty blue and white chinoiserie pumpkins. Sometime years ago I saw someone (can’t remember who) share a wooden bowl layered with moss and a pile of chinoiserie pumpkins and I thought it was so cute. So, today I’m going to try my hand a recreating that look for my dining room table!
And I’m always looking for a way to add a fun new element to my seasonal decor. So, instead of buying some, I thought I’d try to DIY some of these cute pumpkins.
And let me tell you, it’s sooooo easy to do! If you can use a paint brush and cut paper, it’ll be the perfect afternoon craft while catching up on your favorite show!
Watch the Video Tutorial:
This post contains affiliate links for your convenience. See my full disclosure policy.
Want to Save This?
Enter your email below and I’ll send it directly to your inbox!
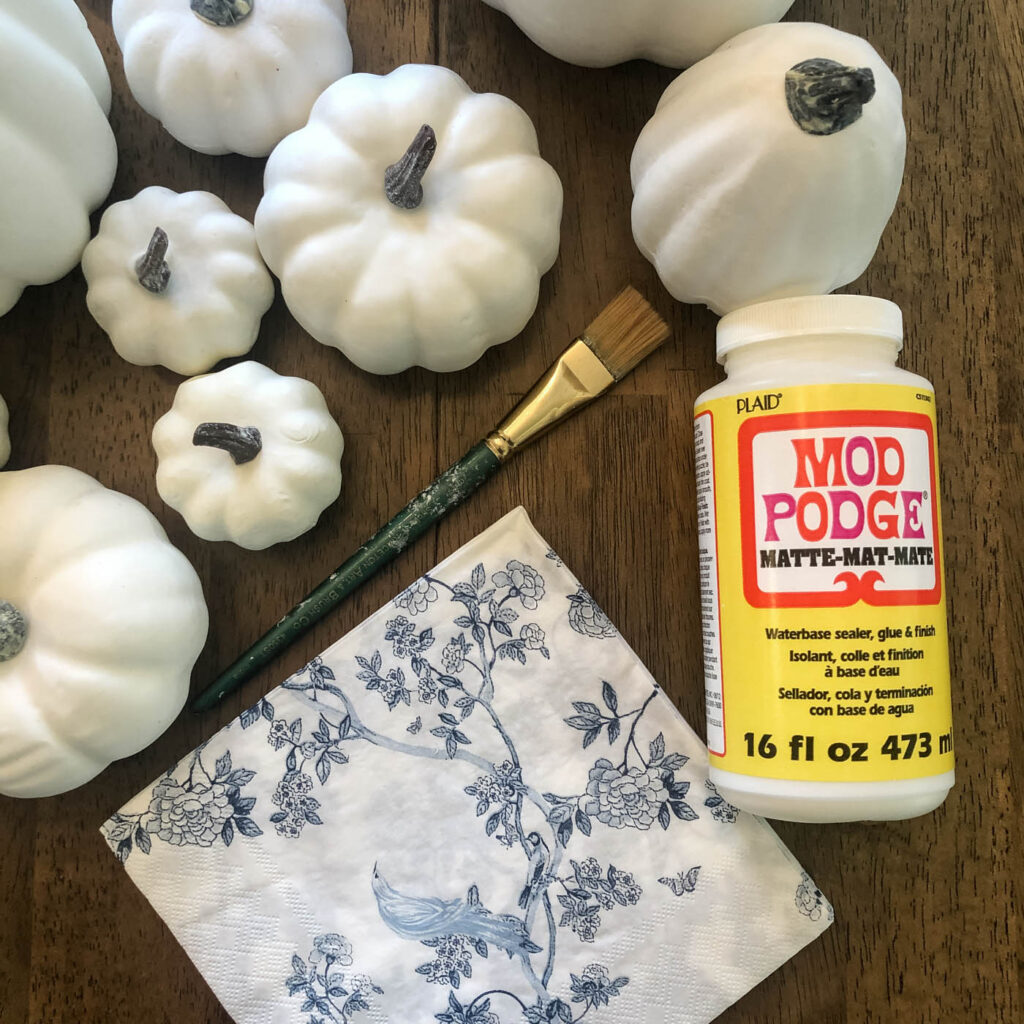
Supplies You’ll Need to Make the Chinoiserie Pumpkins
- White foam craft pumpkins
- Patterned paper napkins – I used these chinoiserie napkins, but you could use any kind you want!
- Mod Podge
- Small craft paint brush
- Scissors
How to Make Chinoiserie Pumpkins
This is so easy that I hesitate to make a tutorial. But there are a couple things that make this a little bit easier, so I’ll share all of my napkin and Mod Podge tips and tricks here!
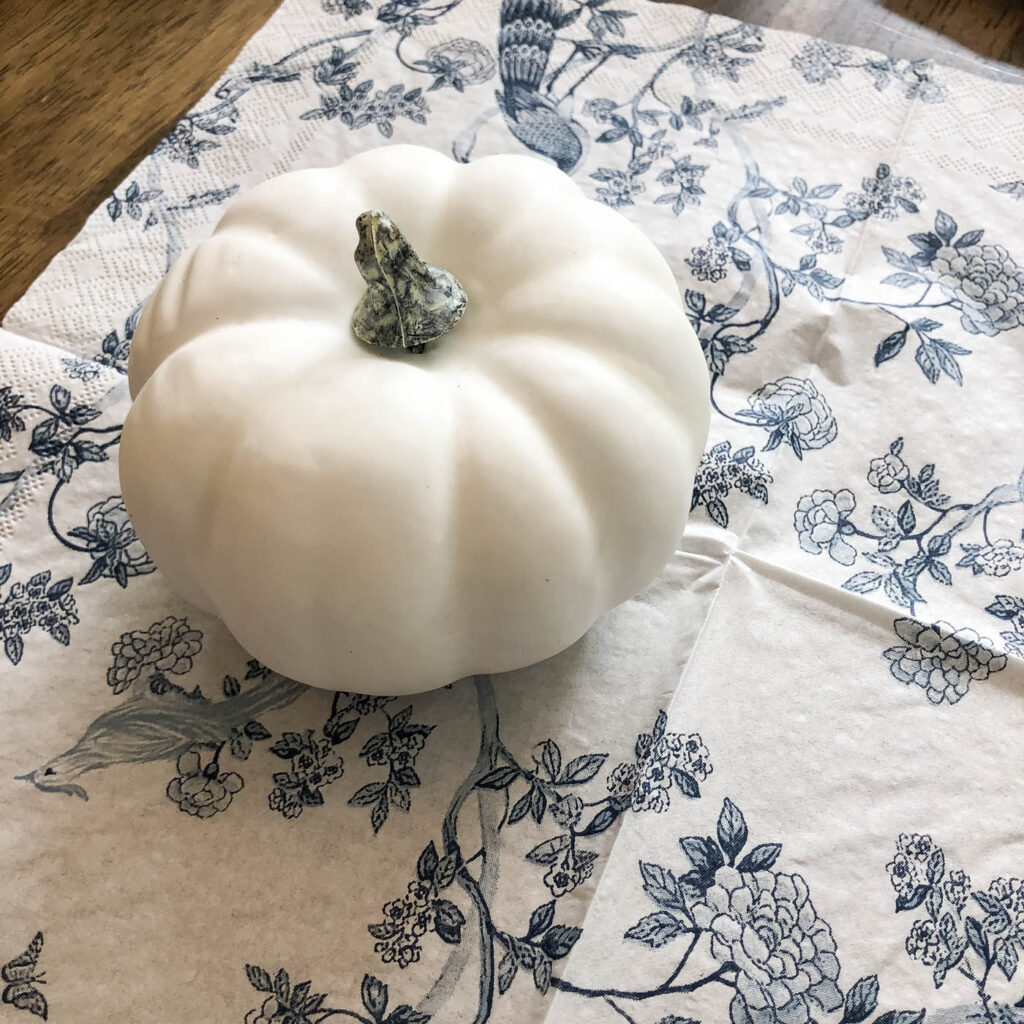
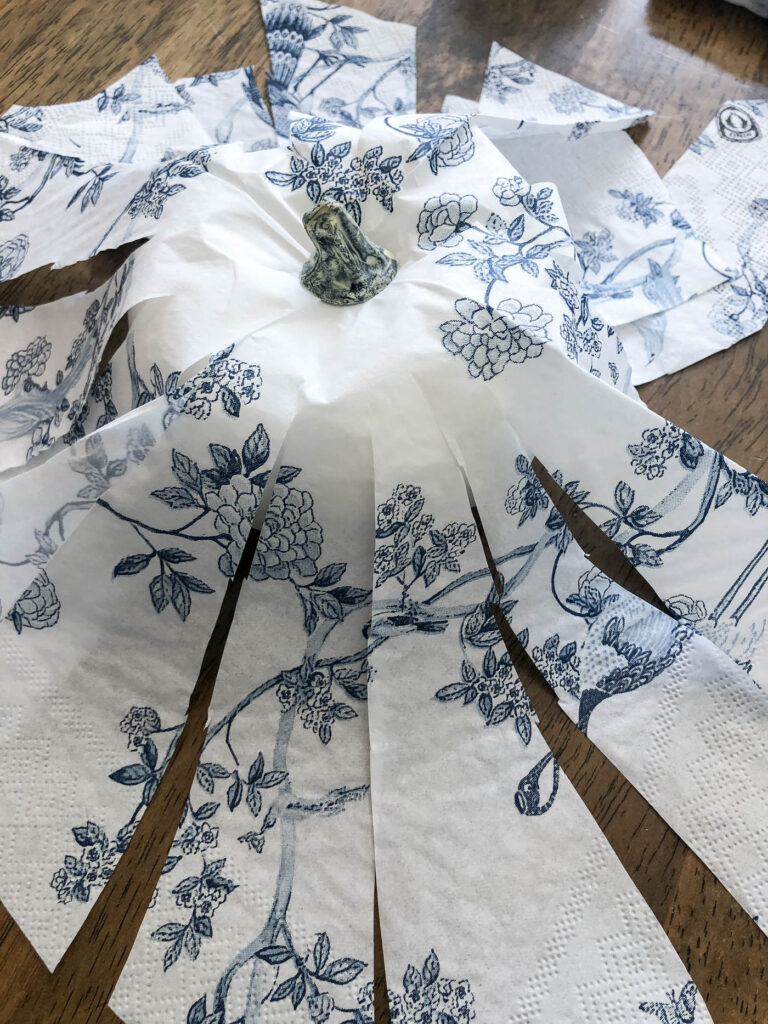
1. Place the Pumpkin on the Napkin and Cut a wide circle around it.
Cut a wide enough circle that the napkin will drape down to the bottom of the pumpkin.
The napkins I used were 2-ply napkins. You can use them just as they come. But if you want a really thin paper layer on your pumpkin, separate the underneath piece of paper from the pumpkin. Watch the tutorial video to see how I did that part!
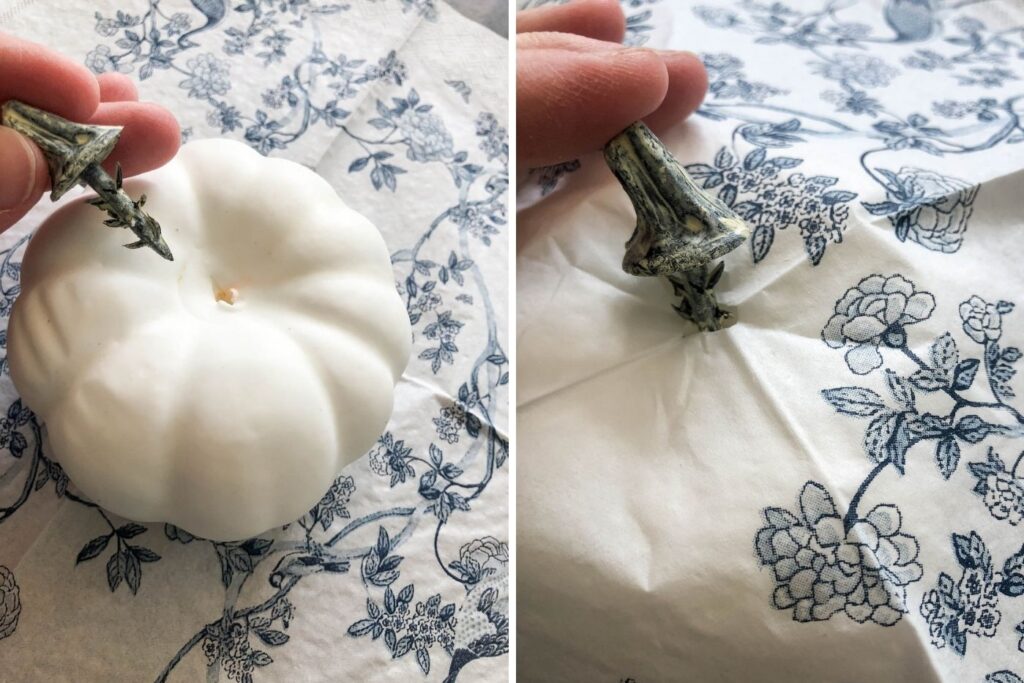
2. Remove the stem of the Faux Foam Pumpkin
Then snip a tiny hole in the middle of the napkin circle and place on top of the pumpkin. Reinsert the stem into the hole in the napkin. This will keep the napkin nice and secure on the pumpkin as you work.
3. Cut long vertical sections of the pumpkin that kind of line up with the grooves on the side of the pumpkin.
This will make the napkin much more manageable to glue down to the pumpkin.
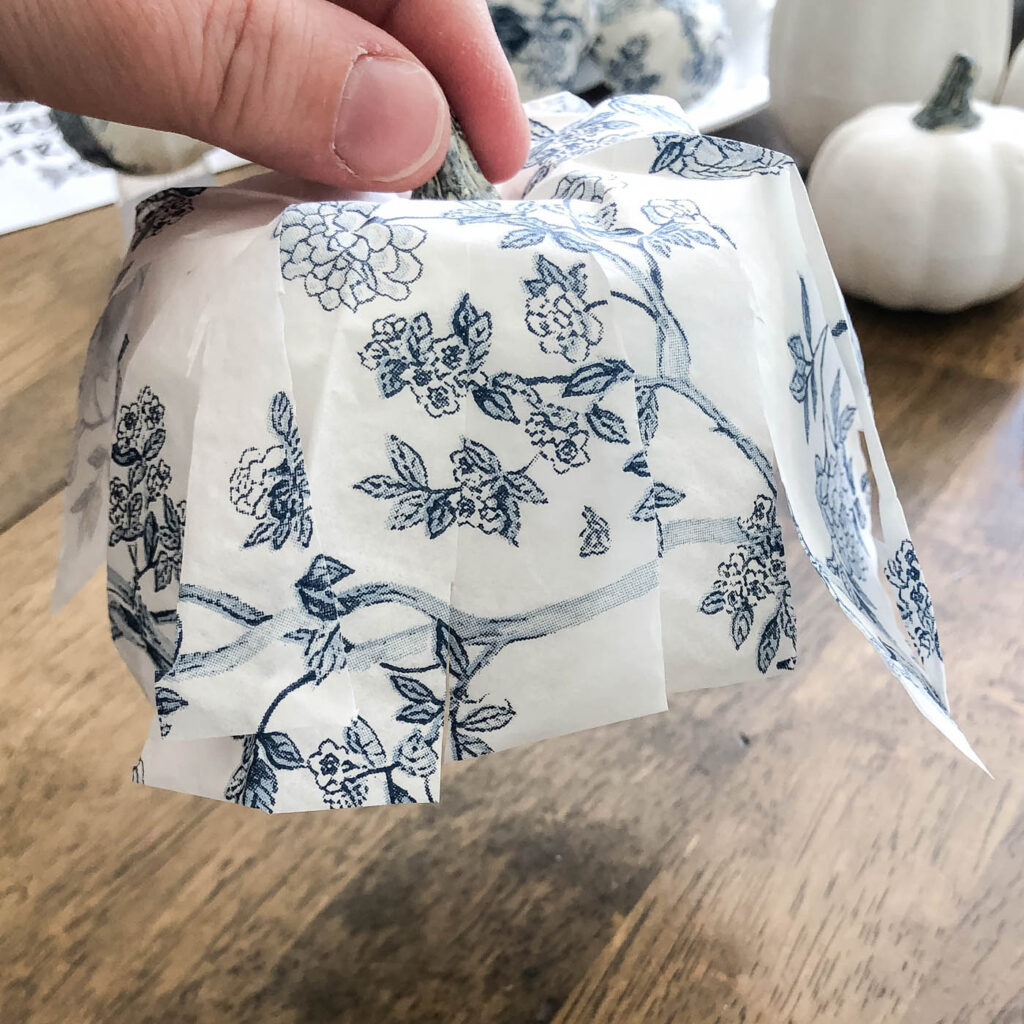
4. Cut the bottoms off the long strips of the napkin so that they just reach under the bottom of the pumpkin.
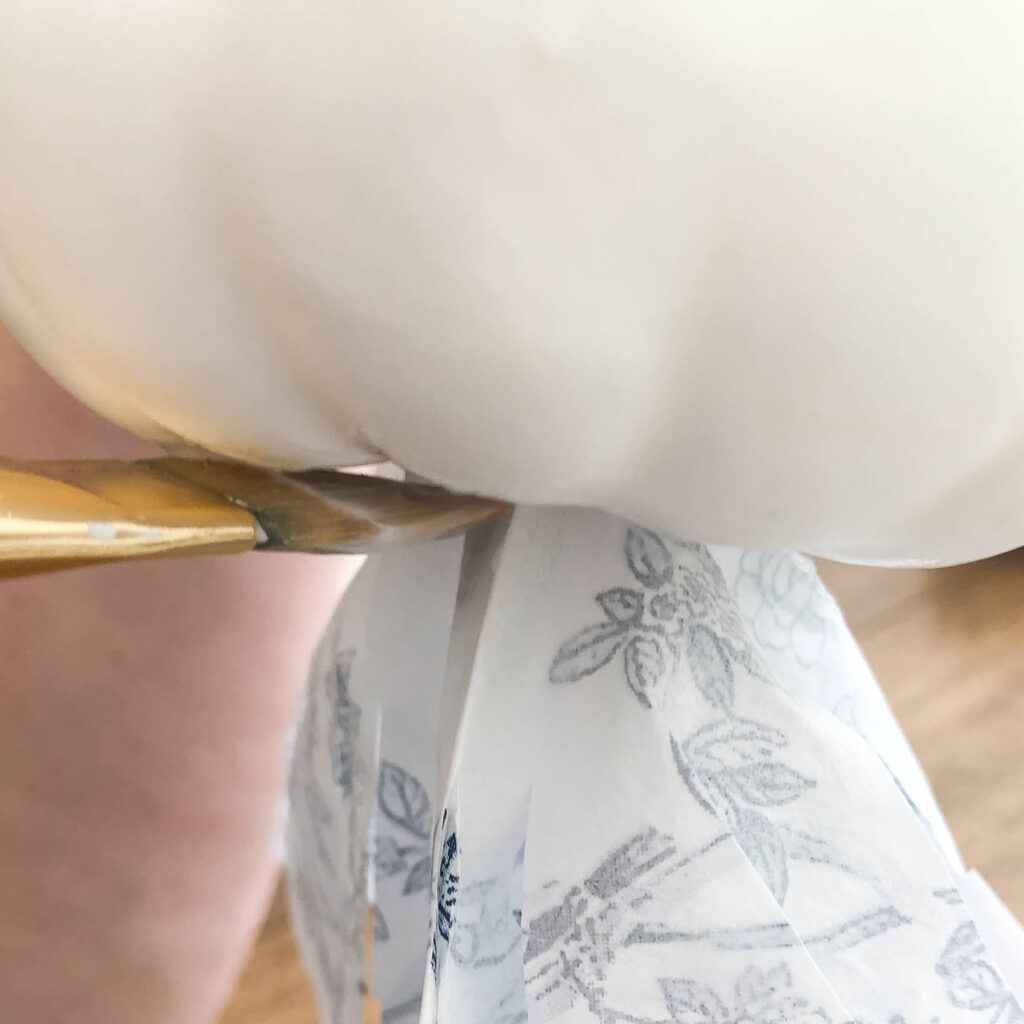
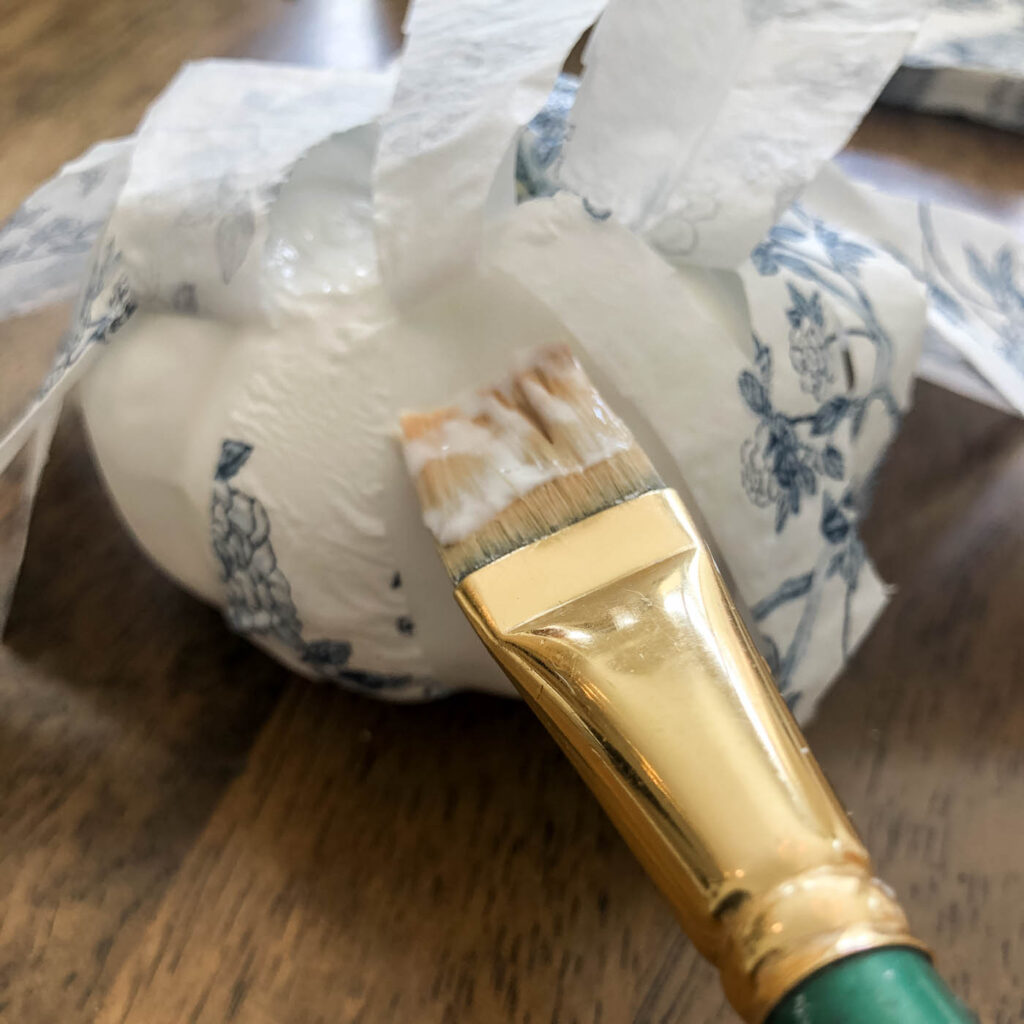
5. Now, turn the pumpkin upside down, holding the stem with your fingers, and paint Mod Podge on the top part of the pumpkin between the pumpkin and paper.
Then flip the pumpkin back over and glue the top of the napkin to the top of the pumpkin with some more Mod Podge.
6. Start painting sections of the side of the pumpkin with Mod Podge and use the paint brush to “paint” the napkin pieces in place.
Do one piece at a time as you work your way around the pumpkin. If the pieces start to overlap too much, cut them more narrow as needed.
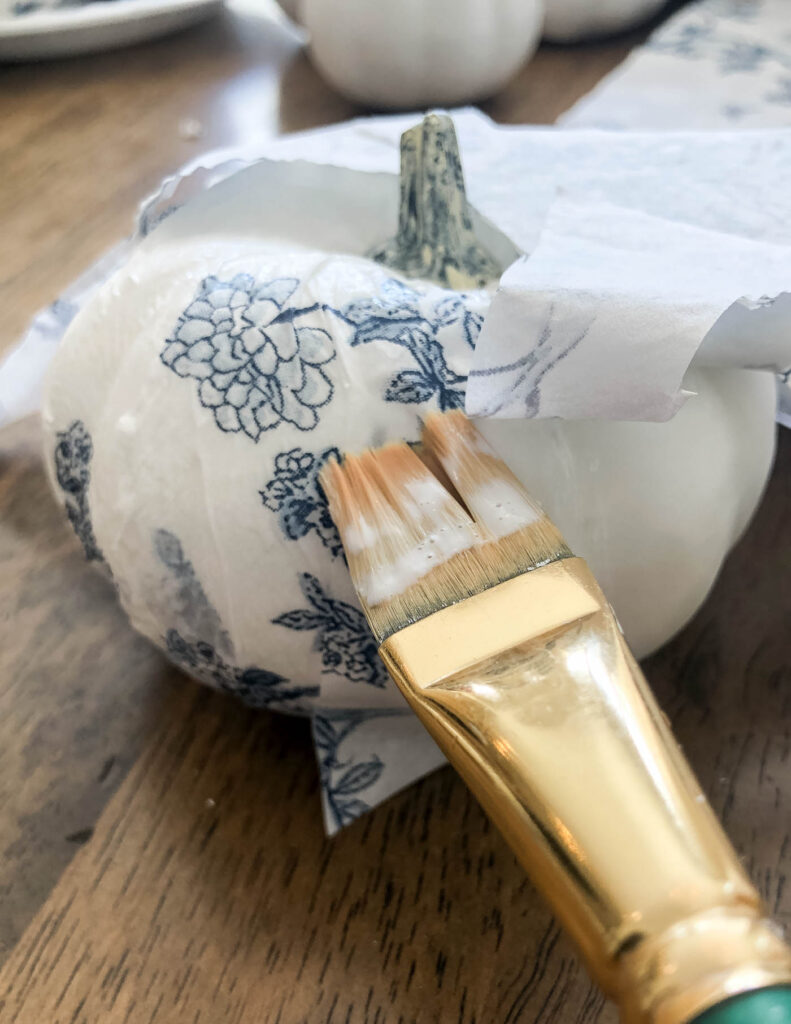
7. Once every piece is glued down, let the Mod Podge dry for an hour or so until it feels dry to the touch.
8. Optional, cut a small circle of the napkin paper and glue it to the bottom of the pumpkin to cover the bottom side. Let this sit until it’s dry.
That’s it! You’ve now got a gorgeous bowl of chinoiserie pumpkins that you made and are so cute for fall!
More Posts You Will Love:

Your method of making these seems so much easier than the way I tried it last year on my own. (I cut out my favorite parts of the napkin.) Thanks for your tutorial! I can now make more!
Oh yay! I’m so glad to hear it! xo, Laura
Try using a water pen or a paintbrush to “cut out” your designs. The water pen or a very small paintbrush dipped in water cuts out the designs instantaneously. ( this technique is on many YouTube channels.)
These are gorgeous and so brilliant!
Aww, thank you Julie!! I’ve got to put the pumpkins back out this year ASAP!
So cute! Thanks for sharing.
These are so pretty! I love a good Mod Podge project!