{DIY} No-Sew Bunting Tutorial
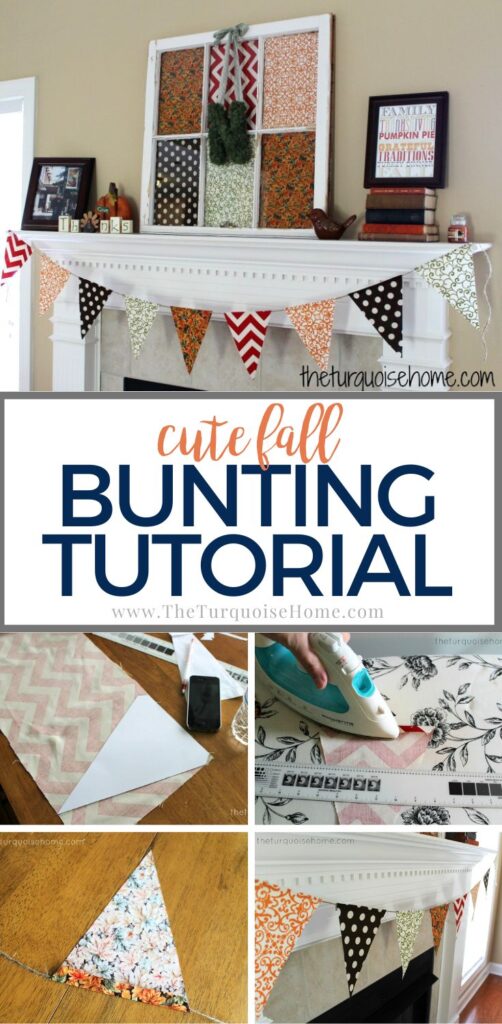
Learn how to make a simple DIY bunting with just a few craft supplies! It’s an easy way to use up old fabric scraps and make it cute!
I promised to share my bunting tutorial from my Fall mantel last week. It’s really very simple, but if you’re like me, you like a little instruction before making something for the first time. I did look around the blogosphere before tackling this. And I got an idea of how to start, but this is how I did it. I didn’t follow any tutorial really, just winged it.

Supplies Needed to Make Bunting:
- Jute, string or ribbon – long enough to span across the space you need
- Fabric pieces
- Graph paper (optional)
- Card stock or cardboard
- Hot glue gun
- Ruler
- Iron
Want to Save This?
Enter your email below and I’ll send it directly to your inbox!
Instructions for Making DIY Bunting Decor
1. Make a Template
First, I grabbed a piece of graph paper. You can print graph paper online if you don’t have any laying around the house.
I measured 7 inches across. And then from the middle of my 7 inches, I measured 9 inches down and then created a triangle.

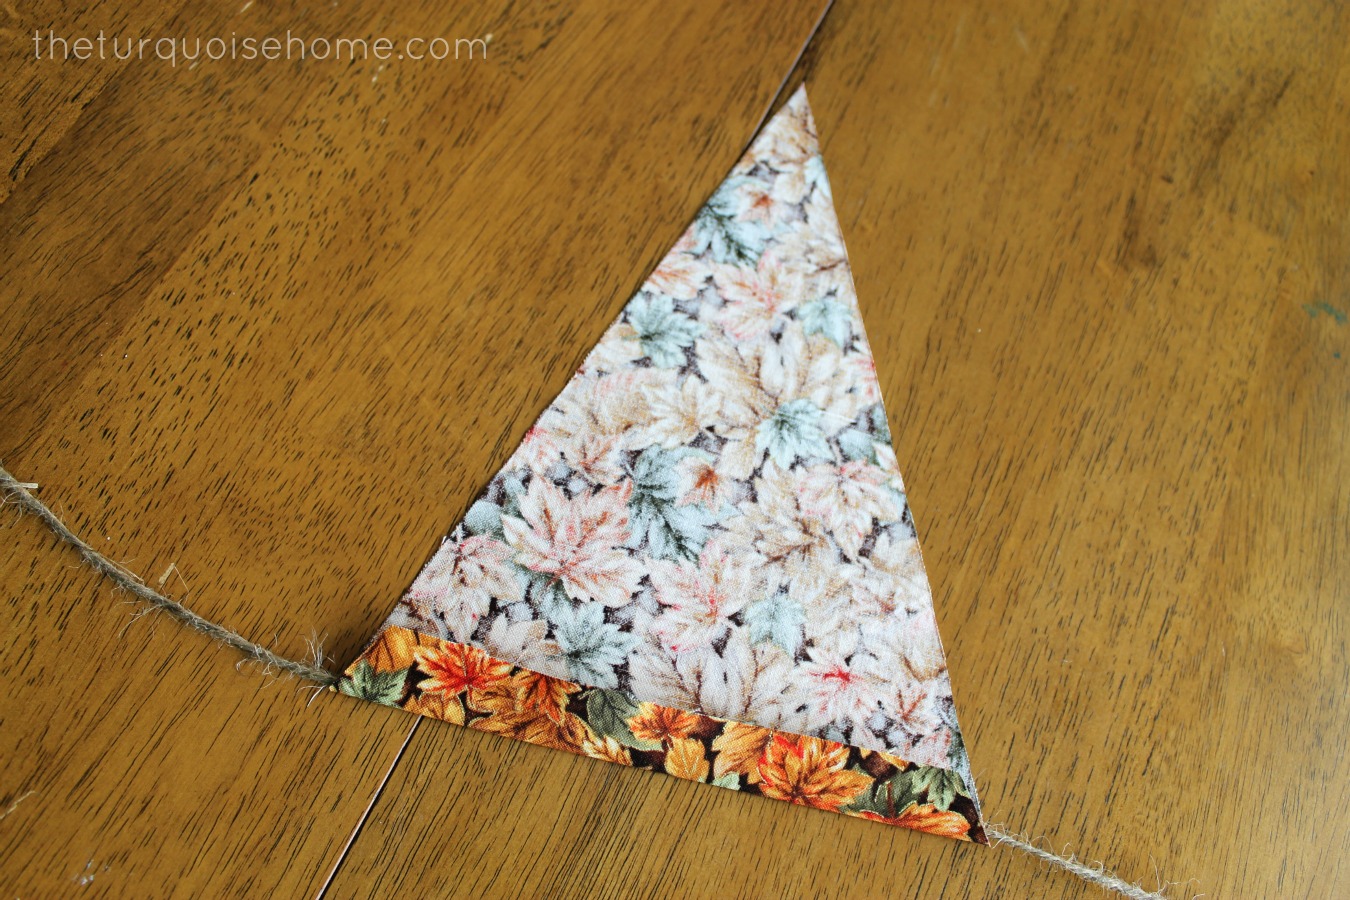
At the top of the triangle, I added an inch or so of extra space and made it a little shorter than 7 inches wide to create a flap at the top to fold over my jute.

I then cut out my shape and traced it on to card stock and then cut it out. I didn’t want my pattern to be too flimsy when I was tracing it on to the fabric.
2. Cut Out Fabric with the Template

I then traced it on all my fabrics and cut them out.

3. Iron Down Top Flap
Next, I ironed them. My fabric was a little wrinkled, but I also wanted to iron down the flaps.

I used my ruler to crease the fabric, then then pulled the ruler away as I ironed it.

4. Use Hot Glue to Attach the Bunting Piece to the String or Jute
I took my jute and placed it in the flap and hot glued it down. Easy peasy!
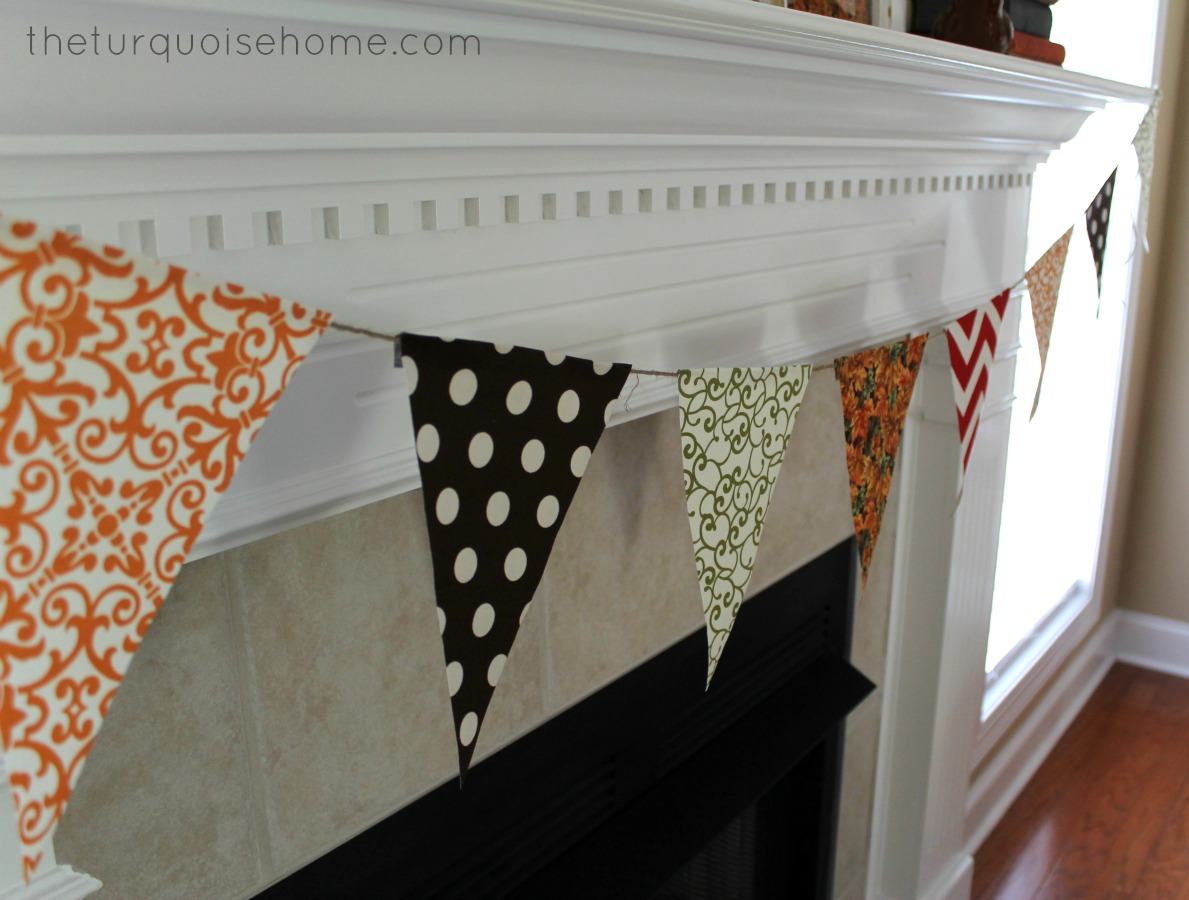
And then I hung it up on my mantel for the Fall! I think it’s so cute. I’m going to do one for Miss A’s room, too!
More Posts You Will Love:

Seriously…you are amazing. Every single time I come to pinterest to search for a project I’m doing, it leads me to YOU! I just love you!! Now off to get some fabric for this bunting for this crazy new art wall I’m creating in our house!
Thank you for being you!!
xo
I spy with my little eye that great orange fabric you used for your pumpkin! Thanks for sharing it at the Pinworthy Project Party.
Yes! You have a good eye, PJ. That’s where my scraps came from! 🙂
so adorable, I love it!!
super cute! I found your blog through the link up!!
Thanks Christina!!
I love this. Thank you for sharing! I’m always a fan of anything that says “no-sew”. I’m not exactly gifted in that area 😉 If you get the chance, I’m co-hosting a link party this week and I’d love for you to link this up over at Tell Me Tuesday.
“No-sew” is like my middle name. Love everything about not using a sewing machine. 🙂
Your bunting is lovely. I have always wanted to make one, but I have a dark toned stone fireplace and the burlap ones I have seen will get lost. Yours is pretty and I think that using color will really pop! Thanks!
Oh you have so many options besides burlap. You should definitely make one!! 🙂
This is too cute! I’d love it if you’d link this up to my blog hop party, DIY Weekend.
Thank you!
Miranda @ Mr. and Mrs. Winslett
This is just adorable, and looks so simple to do! Really jazzes up your mantel. And, might I just add – you have the nicest looking ironing board cover….makes me realize how ratty-tatty mine is getting. 🙂
Really?!? I never expected the ironing board cover comment. I think it’s so ratty because it’s turned yellow where I iron the most. I’ve been on the lookout for a replacement and can’t seem to find one I like. 🙂 Maybe I’ll keep it since you think it’s nice. I wonder if I could wash it and it’d look better? Hmmm, things to ponder. Ha!
Thanks for stopping by!!
Great tutorial! I am so glad I found it. This has been pinned so I can finally make a bunting.
Oh yay! Buntings are so fun!
I love this and it looks so easy! It’s a great idea for using different color fabrics to coordinate with each holiday. I’d love for you to link up at my craft party this week! It’s running all week and featured projects are also featured on F and in our Newsletter! 🙂
Marti
Love this – pinned it! I will make one of these for sure!
Sam
Thanks so much, Sam!
I love your fireplace bunting flag banner – the fabrics are perfect together!
I love the patterns you chose! Don’t forget to link up to The DIY’ers!
This is a great tutorial! I might use this idea to create a bunting to help with decorating for a bridal shower I am throwing. Love the colors of your bunting; perfect for this time of year,
It’s so super easy and festive. I hope you’re having a good week, Nicole!
Very cute!
This is really good to know how to do. We don’t really have a place to hang one of these, but I think I’m going to put a shelf in our den to create a “mantel”. Can’t wait to try this!