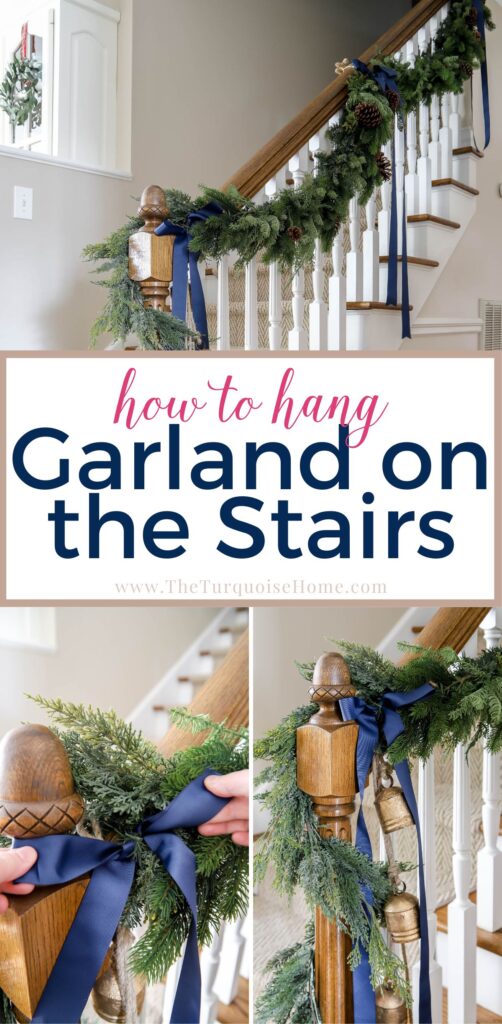
How To Hang Garland On the Stairs
Get ready to decorate for the holidays with this simple and creative guide to hanging garland on the stairs. Create a show-stopping aesthetic with faux greenery, ribbon, pine cones and more!
When we moved into our home a few years ago, I was so excited about the staircase because I never had stairs to decorate before. They can be such a beautiful architectural element in the home. Learn how we added the stair runner last year.
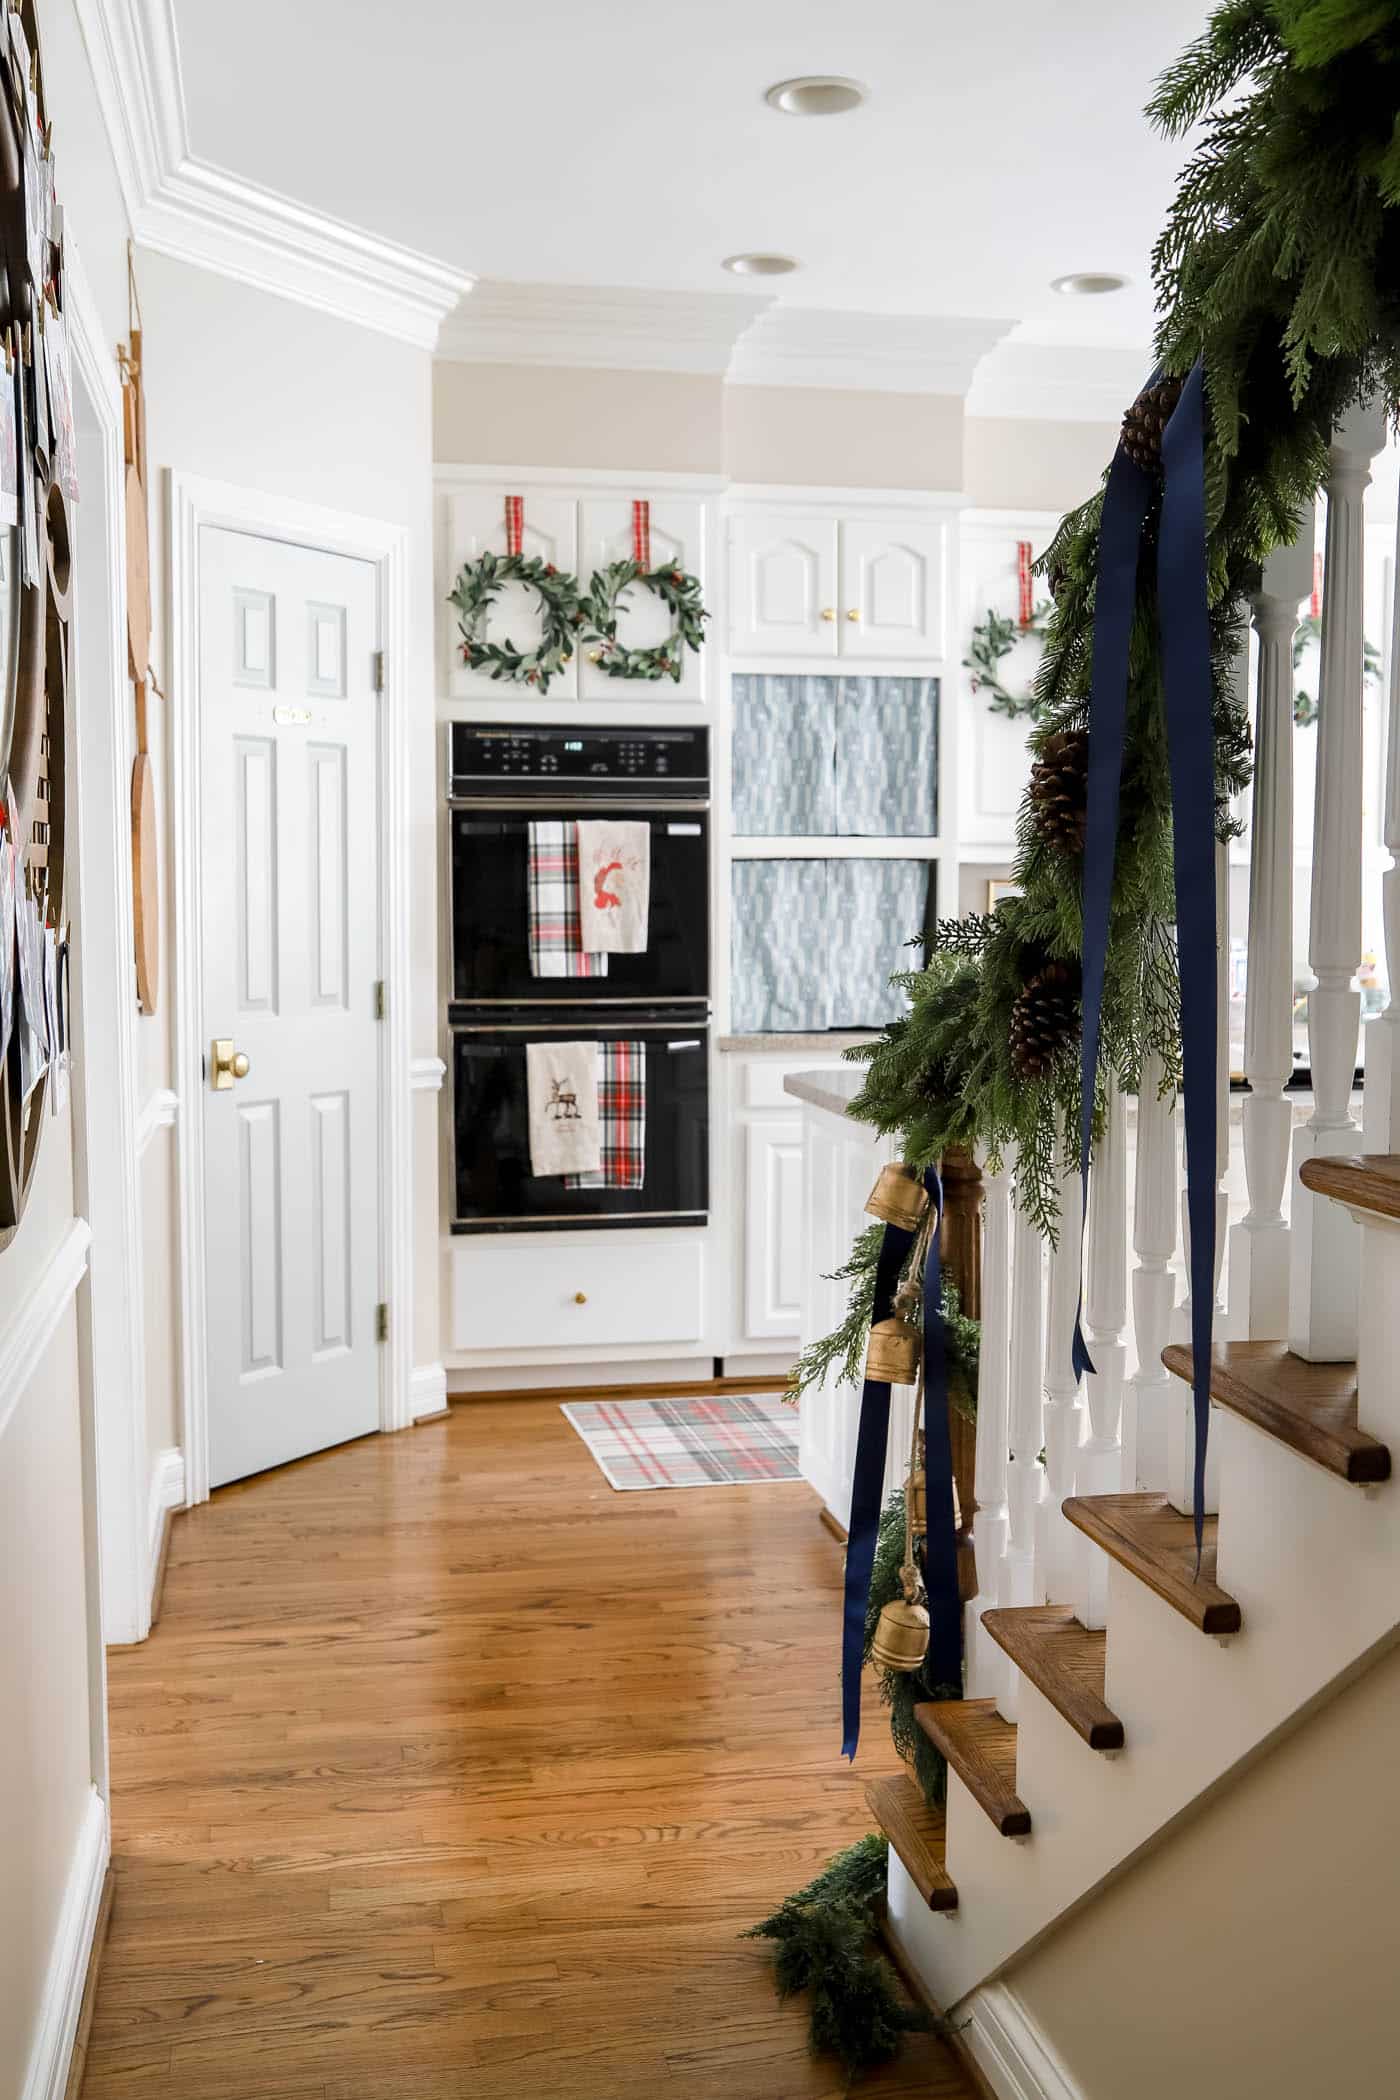
In many homes, the staircase is the first thing someone sees when entering. So, naturally, you’ll want to make it a welcoming and beautiful space for the holidays! It can also connect the Christmas decor on each floor of your home.
And it’s so easy to make a beautifully stunning garland to hang on your stairs. All you need is a few pieces of greenery, something to attach it with and some accessories.
I love decorating my home for Christmas. This includes adding festive decor to the kitchen, the living room and even our bedrooms. My hope is that these posts will inspire you to create a home you love!
You can navigate this post by using the drop down Table of Contents menu below. And be sure to save this tutorial to Pinterest in order to reference back each holiday season!
This post contains affiliate links for your convenience. See my full disclosure policy.
Before You Hang the Garland
Now that I’ve decorated my stairs for several years, I have learned a few things along the ways. And I’m excited to share my tips and tricks with you! But before we dive into exactly how I hang my stair garland, I have some things to consider before you start.
When is Best Time to Buy Artificial Garland?
The best time to buy faux garland is before the season even starts, so early-October. The best garlands are usually sold out by November 1. So, if you missed that cut off this year, set an alert to remind yourself next year to grab the best garlands in October!
Can I use Real Garland or Artificial Garland?
You can use either artificial garland or real greenery to decorate your stairs. Just know that real garland will dry out quickly, and will only last 2-4 weeks before the needles fall off.
There are tips for making real greenery last longer, but I would use faux greenery inside, and leave the real stuff outside! Or simply layer in the real garland over the artificial to make it look more authentic and give the fresh greenery scent. Even better, use faux and do like I do: burn a Tree Farm candle!
Can I Layer More Than One Garland?
Yes! For a full look, I layer 3 different garlands on my stairs. It’s the same way I do with the garland on my fireplace mantel.
I attach the first, cheaper garland to the stairs, then layer the next one on top of the first garland by “grabbing” it with the first garland. I’ll share my step-by-step process below.
Beautiful Evergreen Garlands (You can’t go wrong with any of them!)
- Long Needle Pine Garland
- Magnolia Leaf Garland
- Real Touch Cedar
- Faux Spruce Garland
- White Berry Garland
- Faux Cedar Garland
- Lamb’s Ear Garland
- Silver Dollar Eucalyptus Garland
Shop the Garlands

How to Attach the Garland to the Staircase?
There are several options for attaching the garlands to the stairs. Most of these can be found in craft stores or online at major retailers.
- Zip Ties
- Floral Wire
- Medium Clear Command Hooks
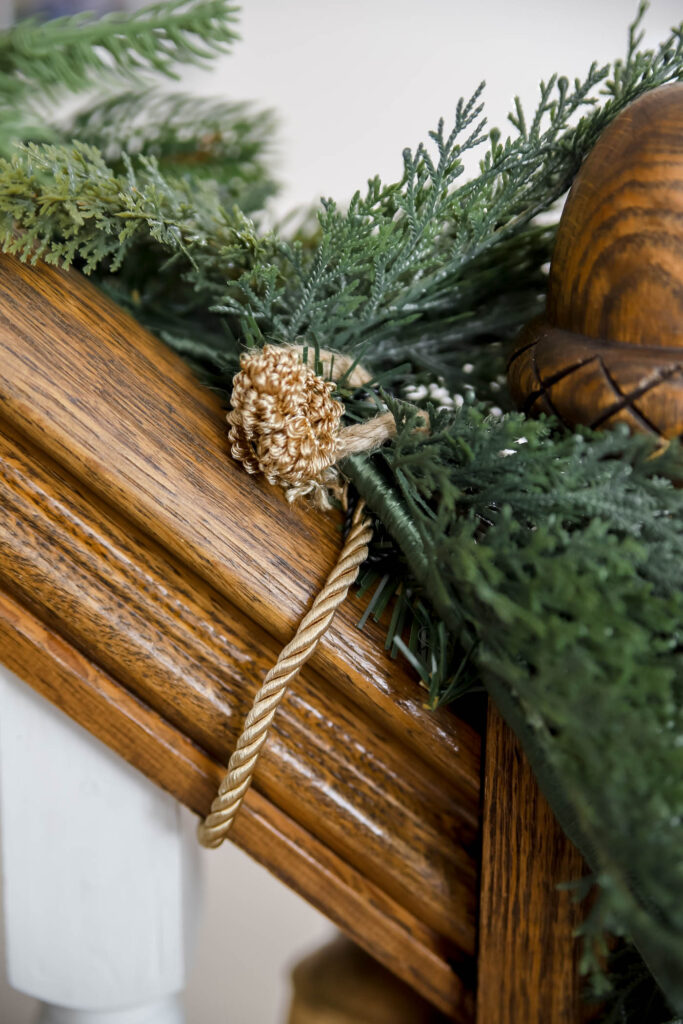
- Decorative Twist Ties – my personal favorite!
- Artificial Garland Ties
What Decorative Accents to Add to the Christmas Garland?
Once you’ve chosen your garland and method of attaching the garland, it’s time to pick some decorative accents. These are some favorite decor items to add to your holiday decor.
- Ribbon (add bows or entwine in the garland)
- Greenery Sprigs
- Bells
- Twinkle/Fairy Lights
- Berry Picks
- Ornaments
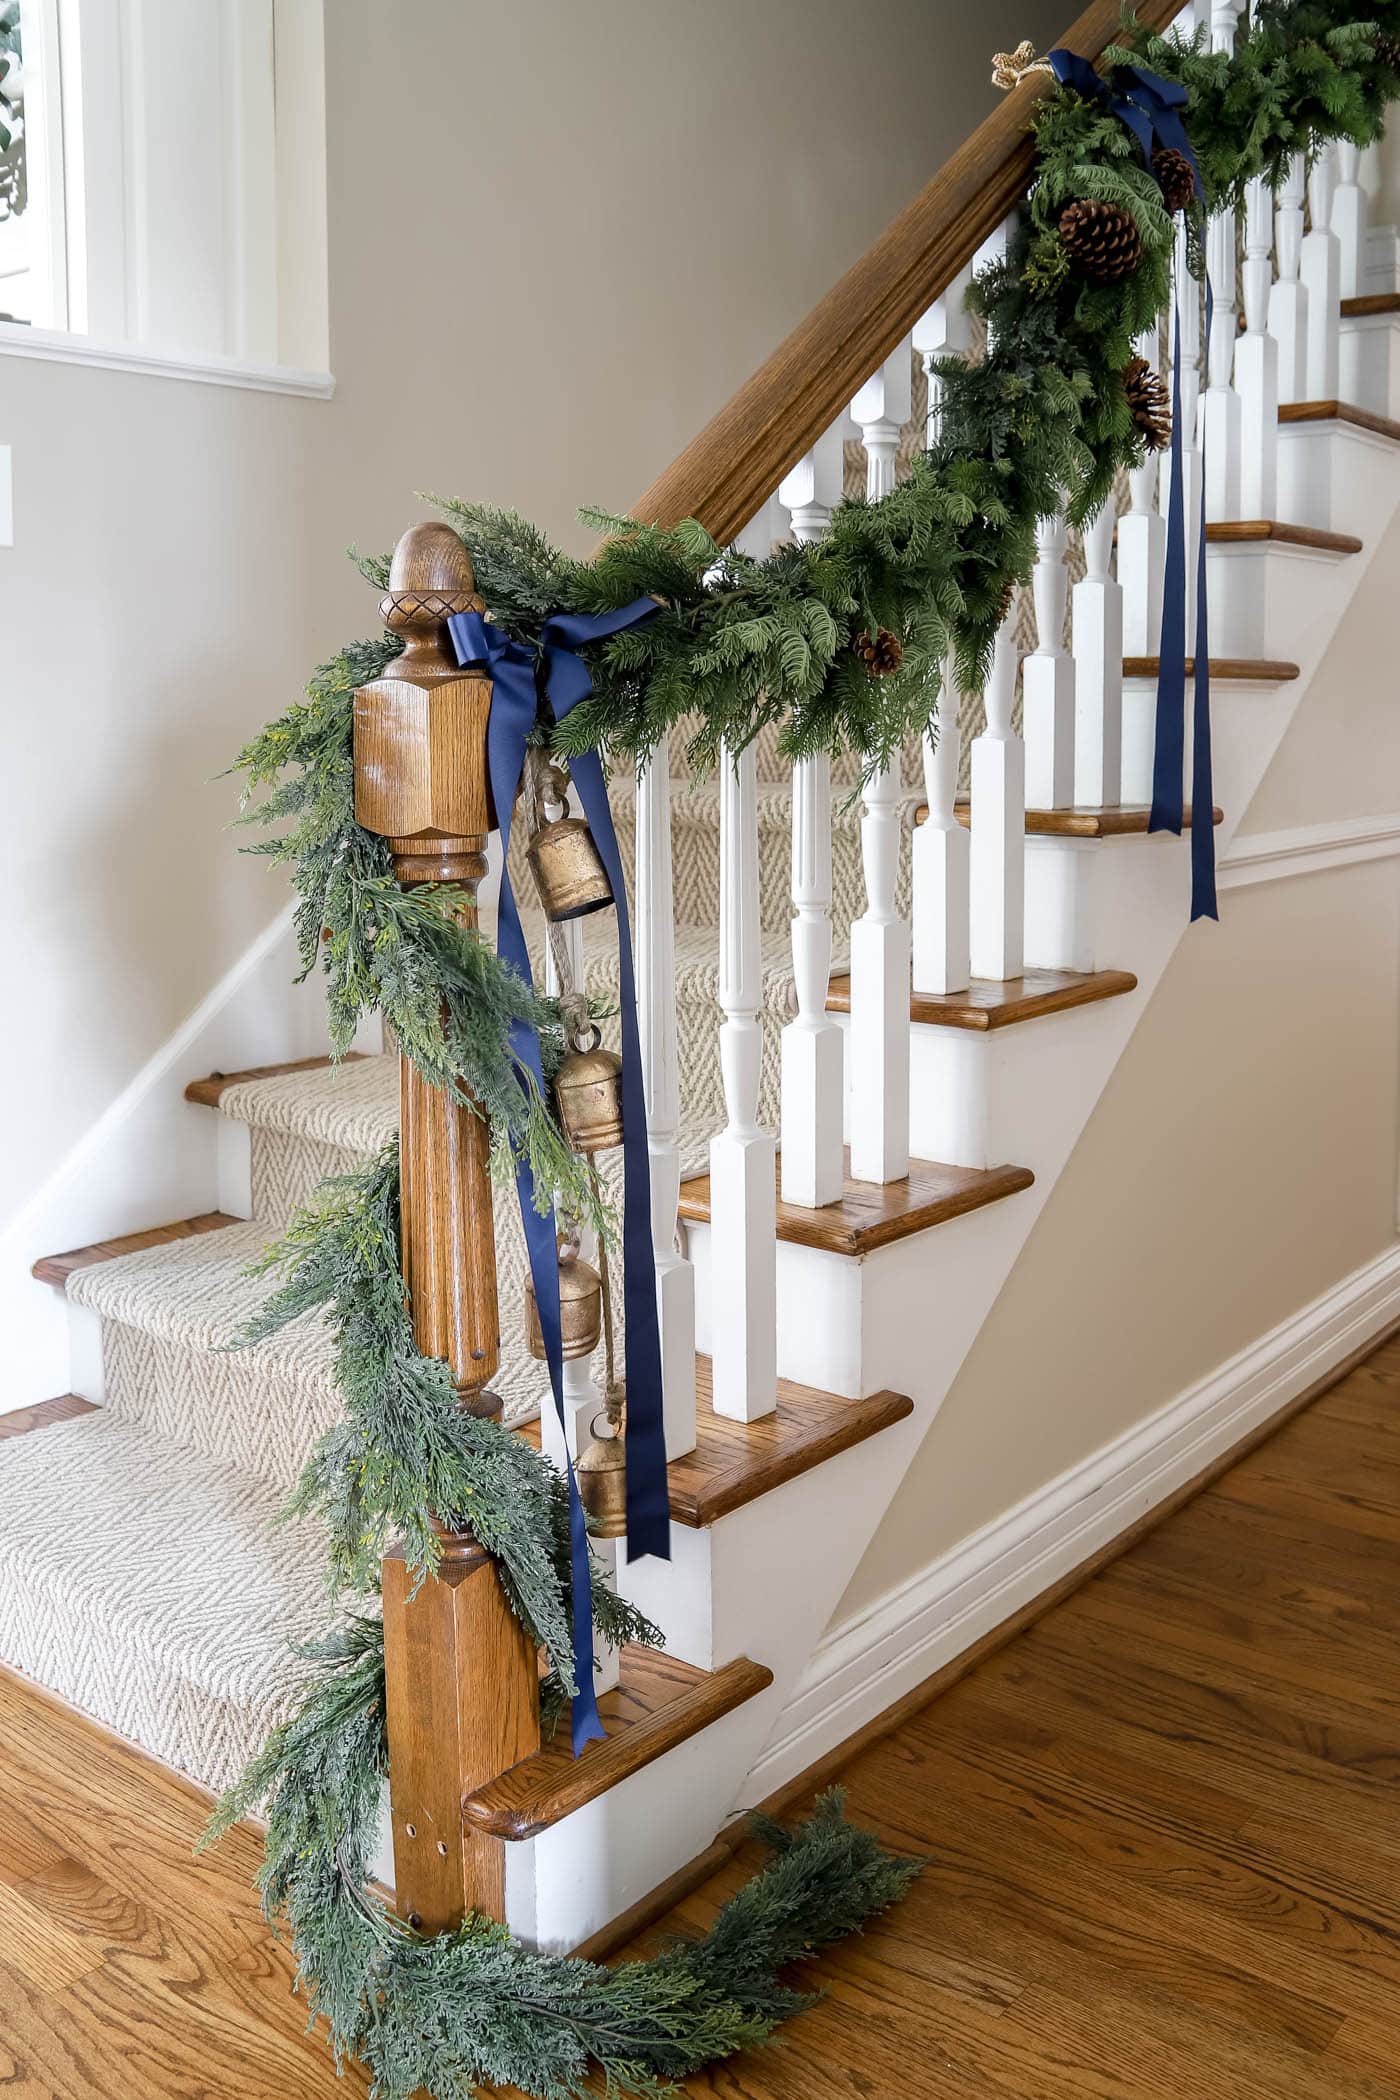
How To Hang Garland On A Staircase: Easy Step By Step Guide
1. Measure your Staircase Railing
You will want to purchase enough garland to extend the length of your staircase, and then some. Decide if you’re going to have the garland swoop or cascade down the starting newel post. Then you’ll need to add 1-2 feet for each swoop and some extra for cascading.
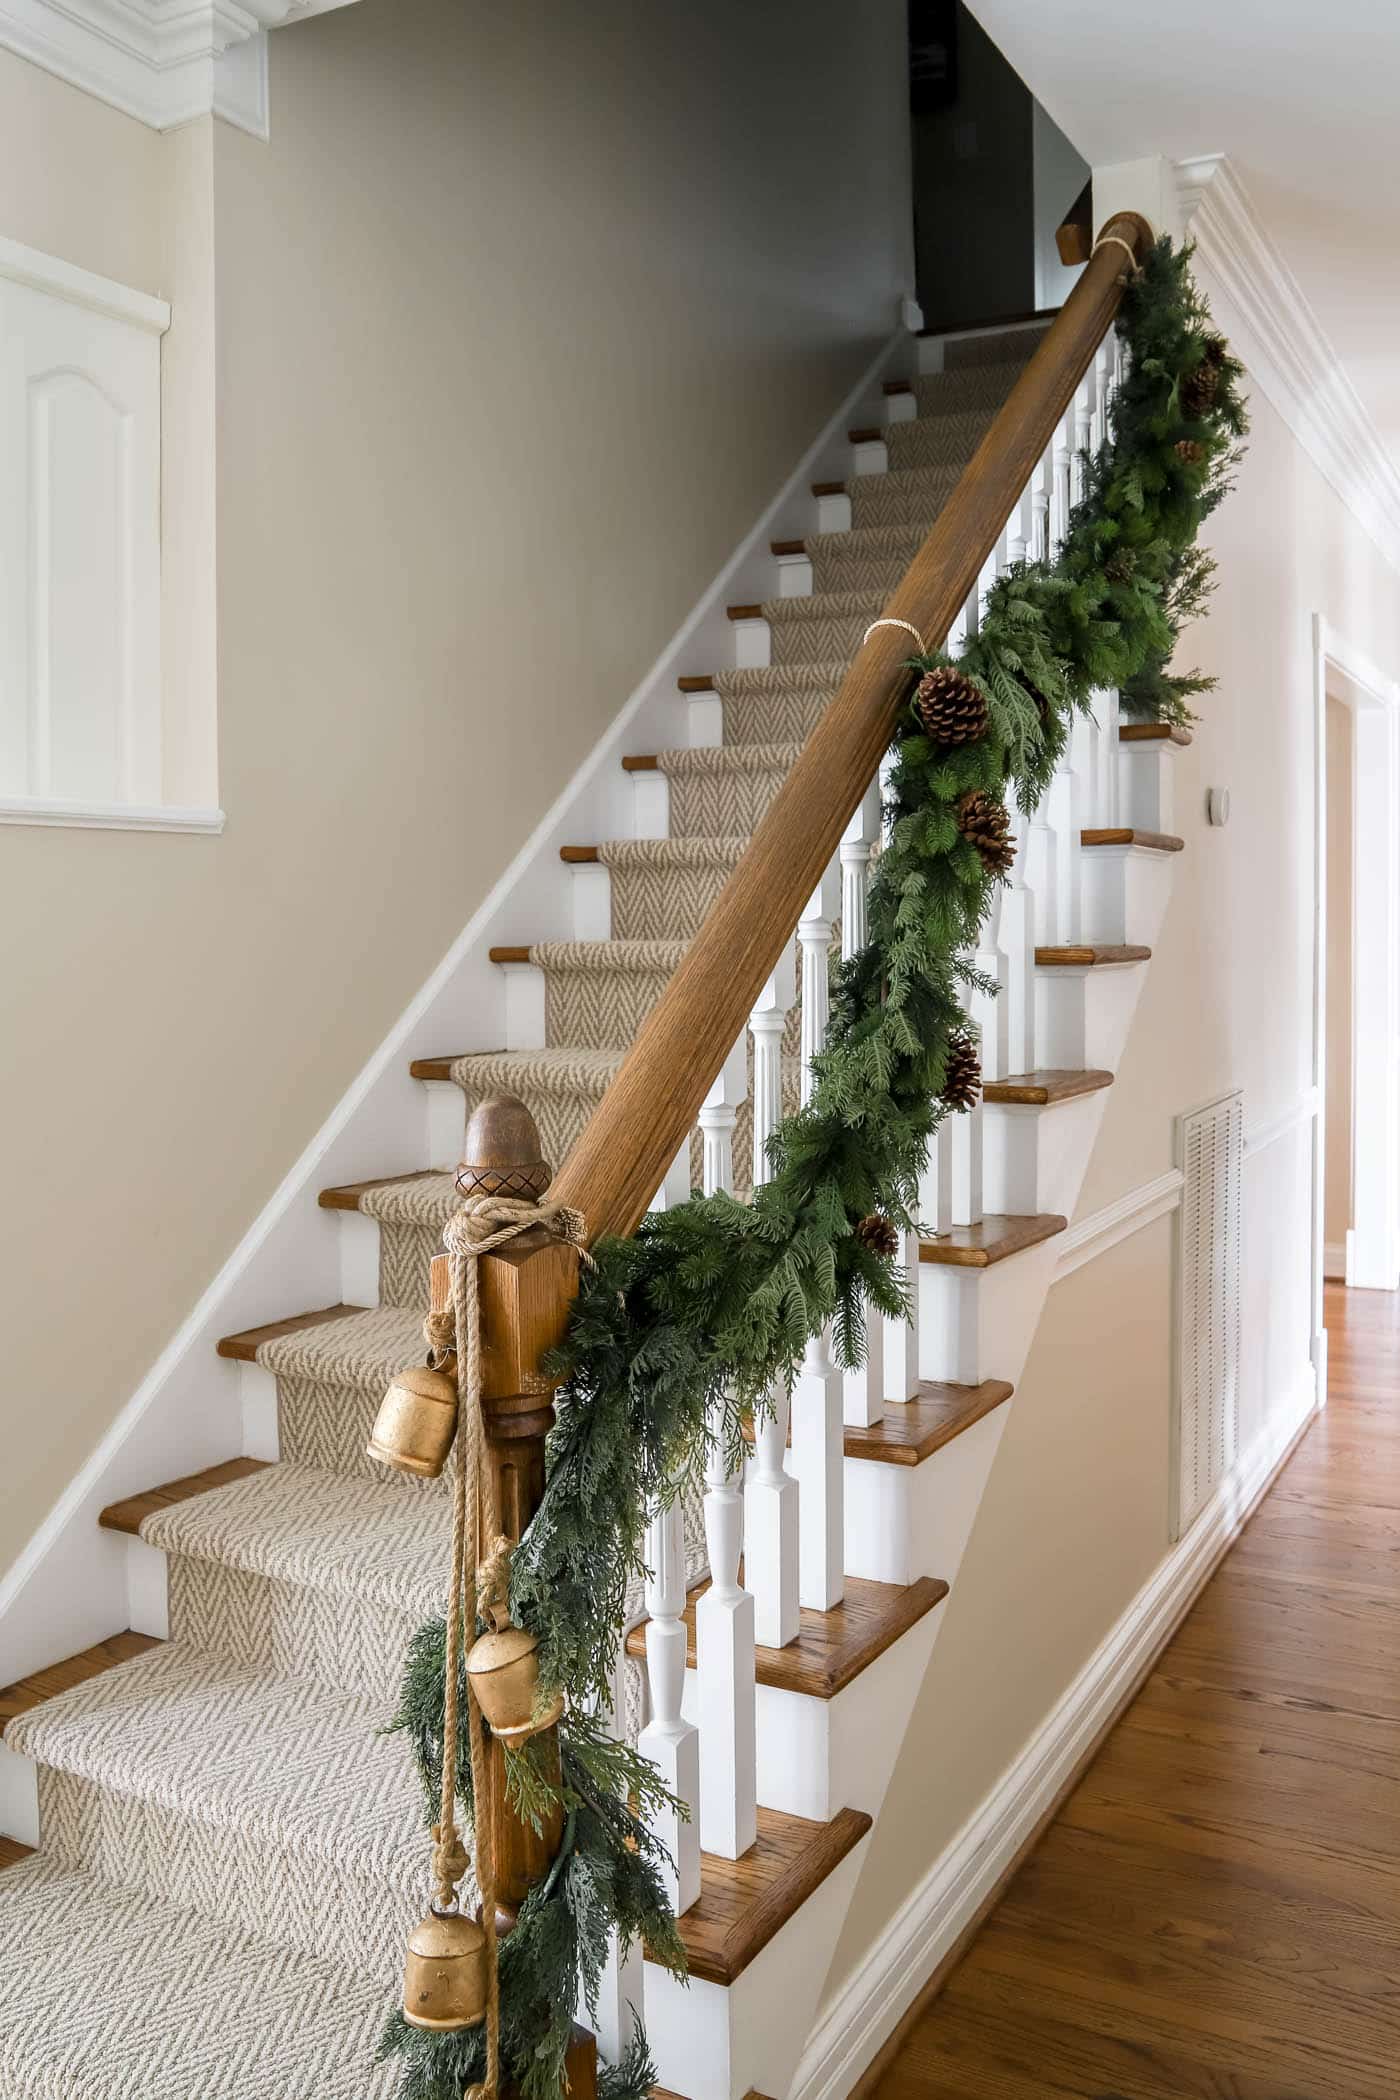
My staircase is 8 feet long and I use both 9-foot or 12-foot garlands, because I like swoops and cascading.
2. Attach the Garland to the Handrail
My method is a full garland look with 3 different strands of garland layered over each other. I start with a cheap garland, then add in more expensive garlands on top. If you want a simpler look, you can do 1-2 garlands.
Attach the first, cheaper garland. I use this garland with the wired branches so that I can easily layer more on top of it. It honestly doesn’t matter where you start, so just pick the top or bottom and go from there. I like to start at the top and work my way down.
Attach the garland to the stair rail with one of your attachment methods, like decorative twist ties or zip ties. Some people hang the garland on the outside of the stair rail with command hooks. So, do whatever works for you!
I prefer these decorative twist ties. They don’t damage my stair rail, they’re easy to use and they look pretty!
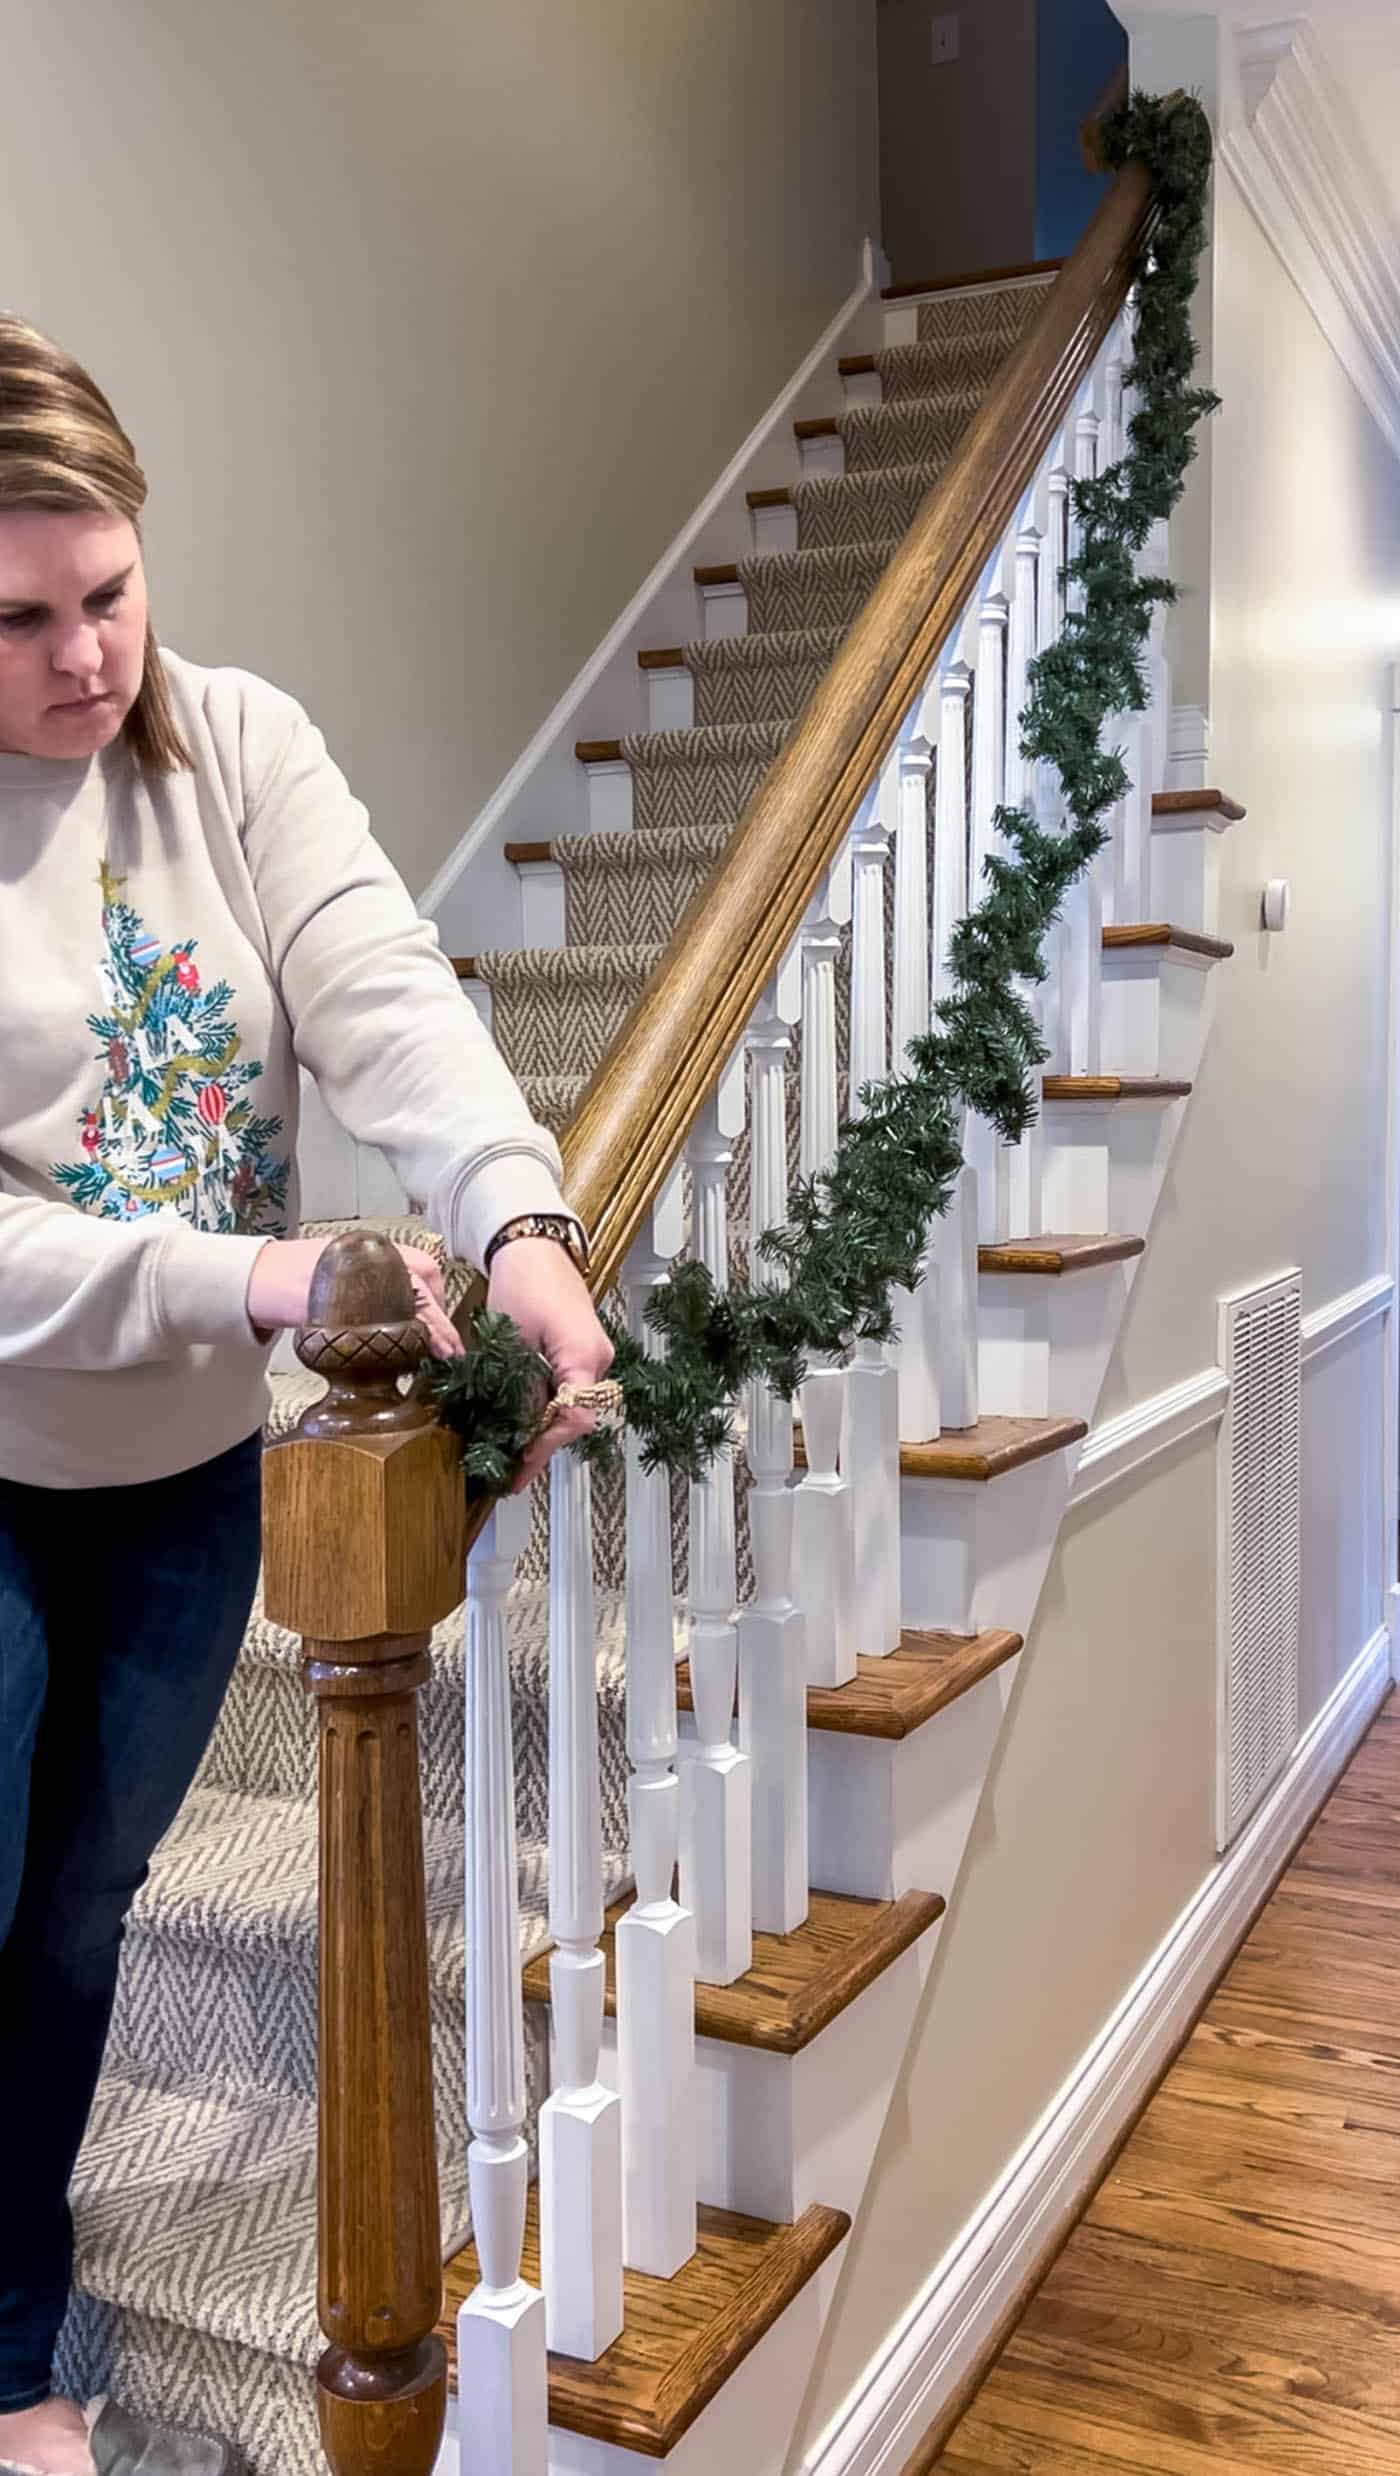
3. Attach, Swoop, Repeat
Continue along the stair rail, attaching the garland as you go. I do two swoops on my 8-foot long stair rail, so I find the middle spindle and attach the garland to the stairwell there, then keep going to the bottom.
At the end, my second garland is long enough to cascading down the newel post, so I wrap it around the post.
4. Layer on Additional Garlands
If you want the full garland look that I like, layer on one or two more fuller garlands on top of the inexpensive garland.
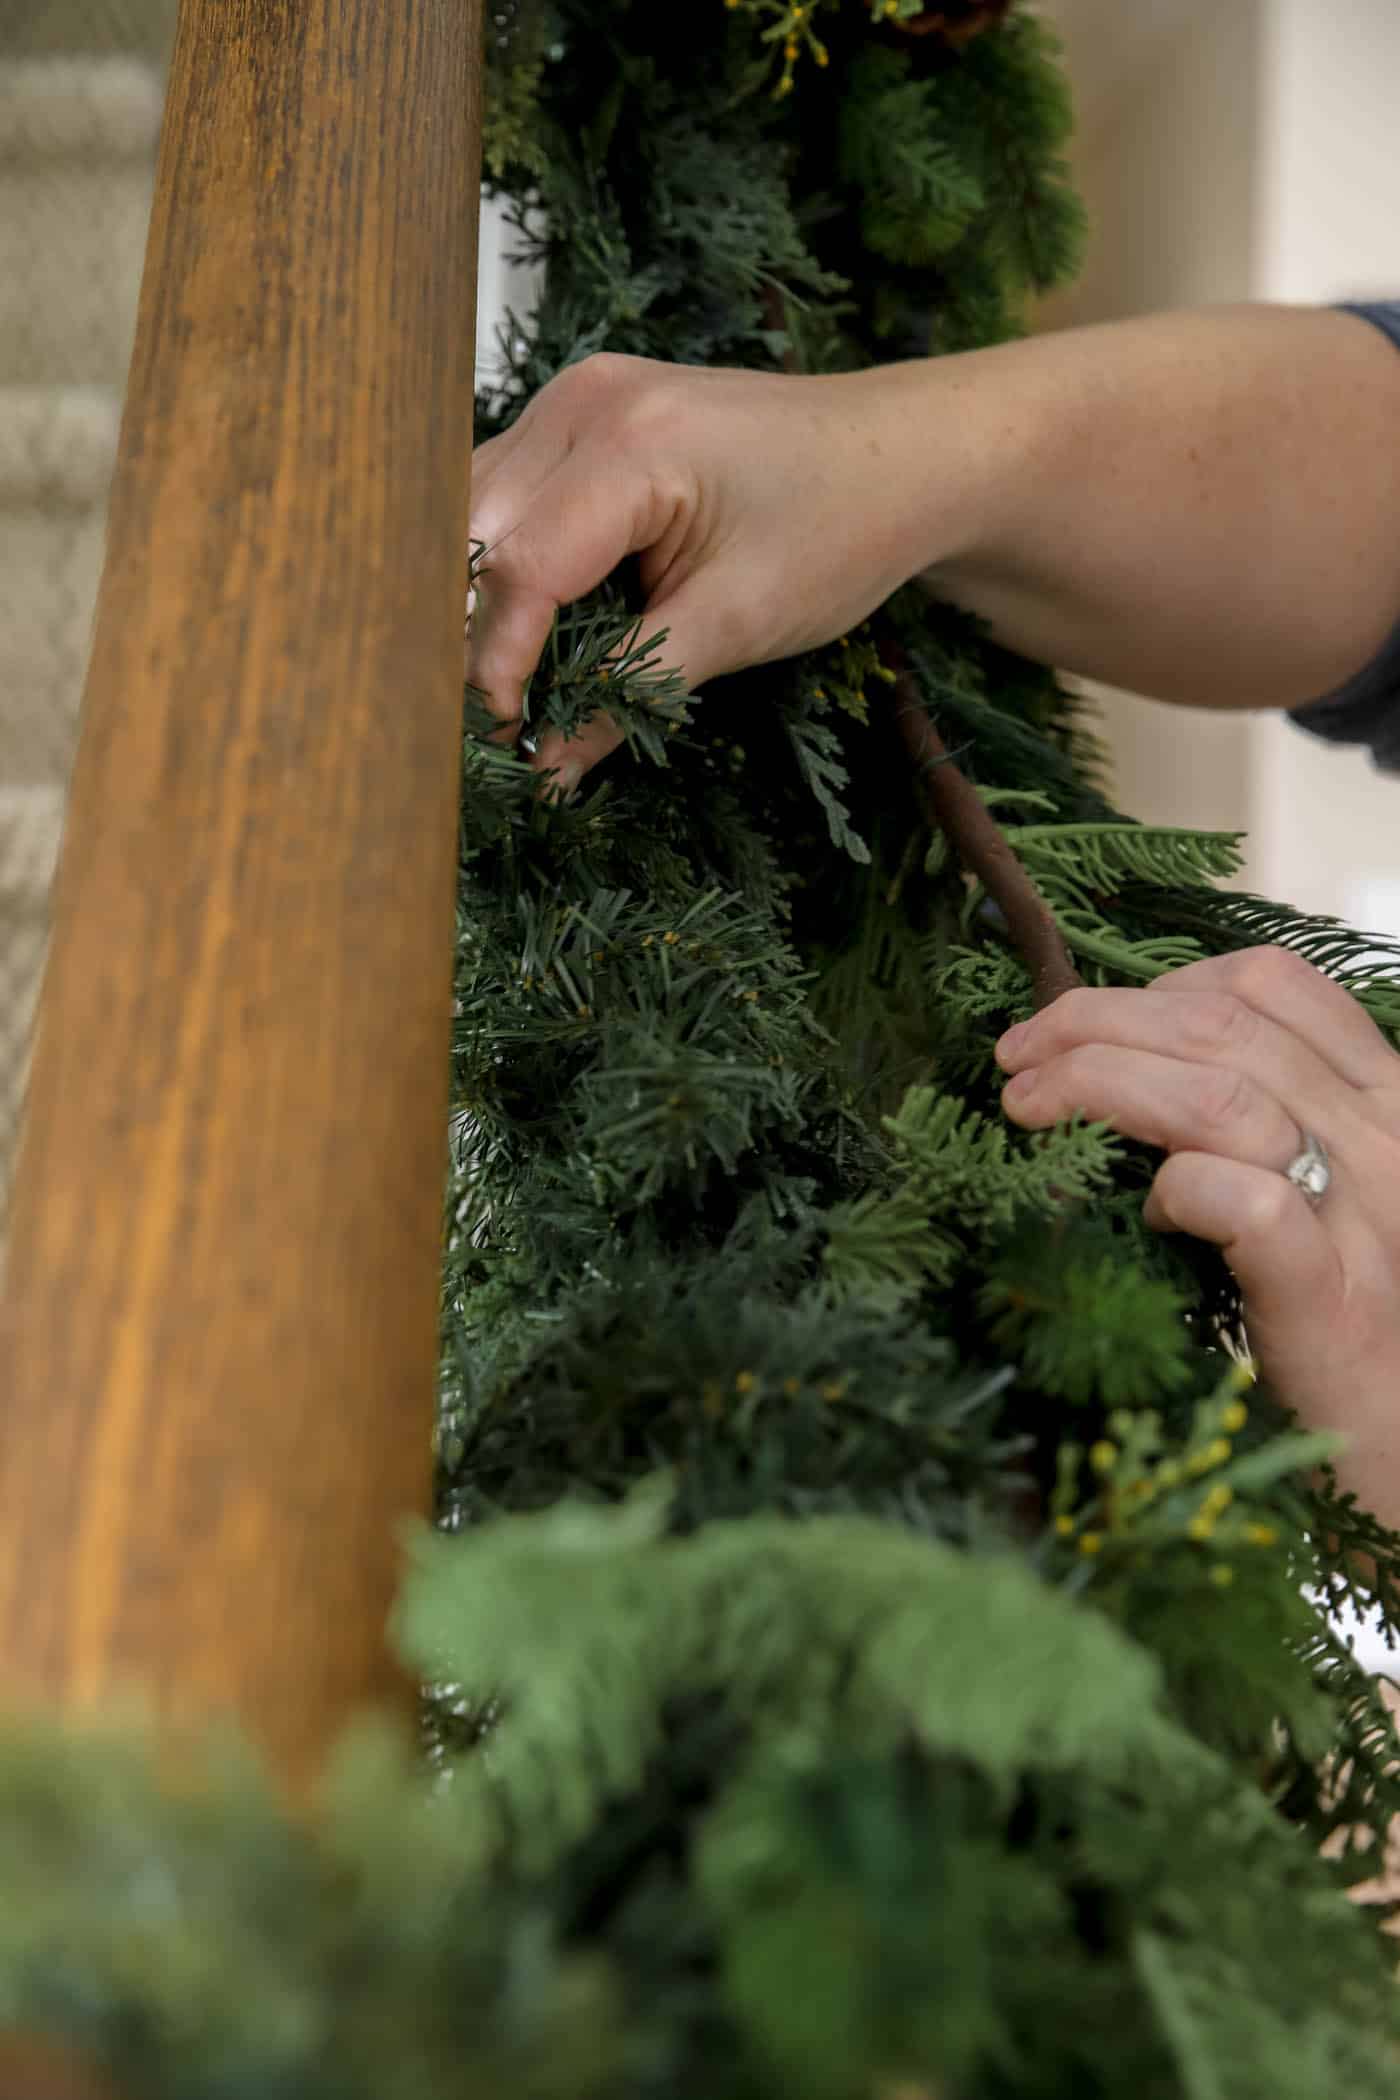
Since the first garland is attached to the stairs, I will use the wired branches of it to “grab” the next garland.
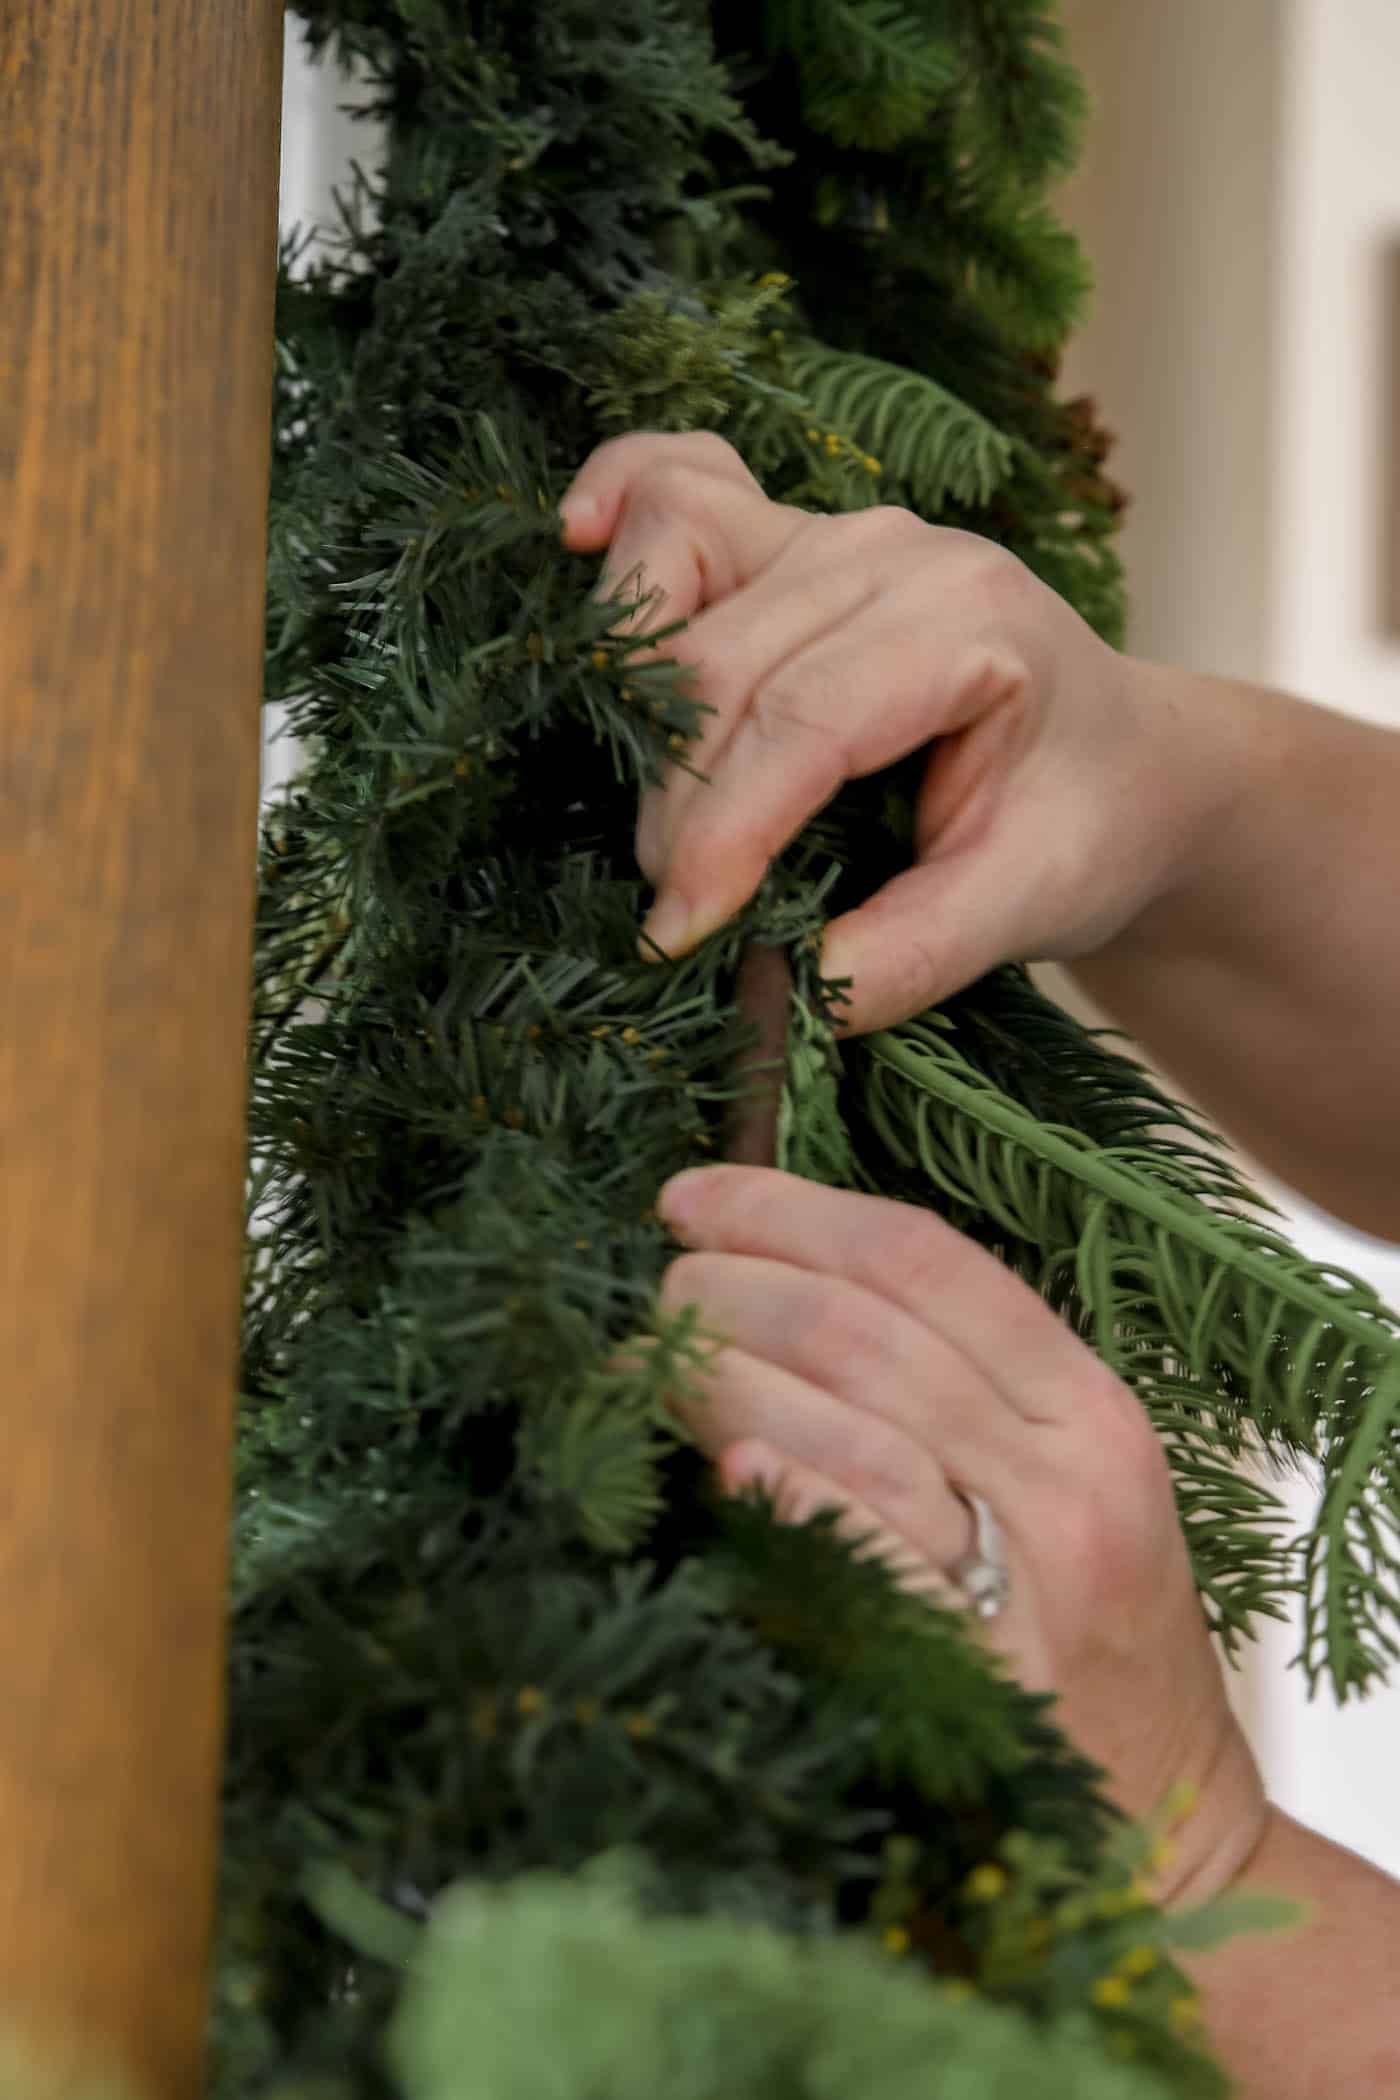
Continue to use the branches of the first garland to connect the two together along the whole stair rail.
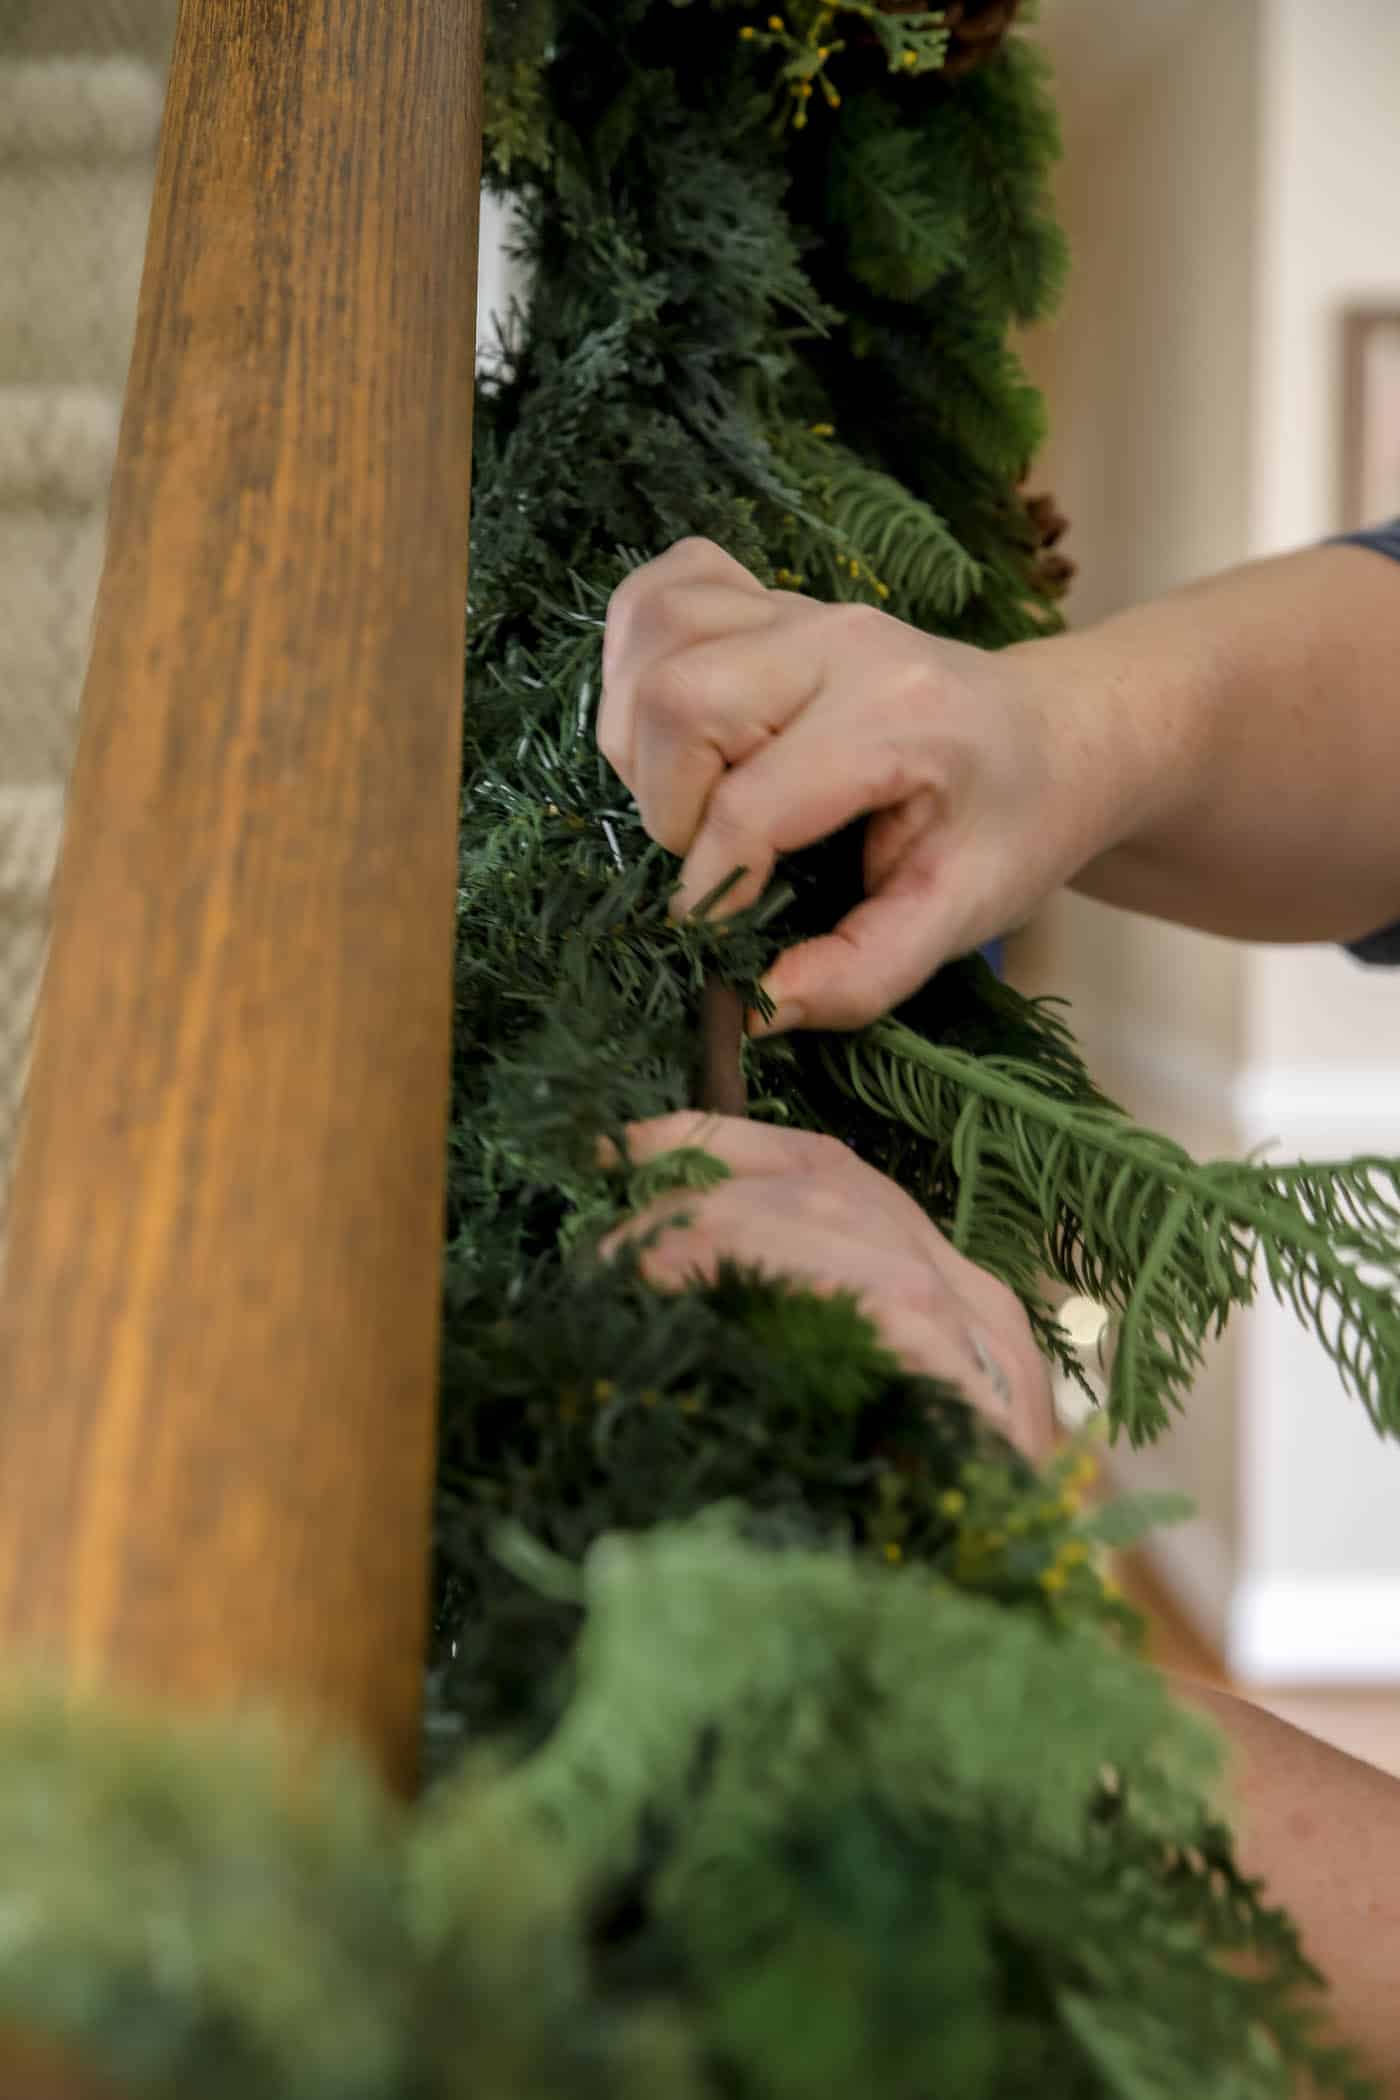
Then repeat with the next garland until they look like one full piece together.
5. Fluff the Garland
Take a step back and see if there are any sparse or wonky spots and fluff the garland accordingly!
6. Add Accent Pieces
This is the fun part! Layer in bells, large bows, ribbons or picks. Really any accent piece is beautiful, so do whatever works with your decor!
I’ve left mine mostly empty with just some bells hanging off the newel post. And other times I’ve added bows where the garland is attached to the railing.
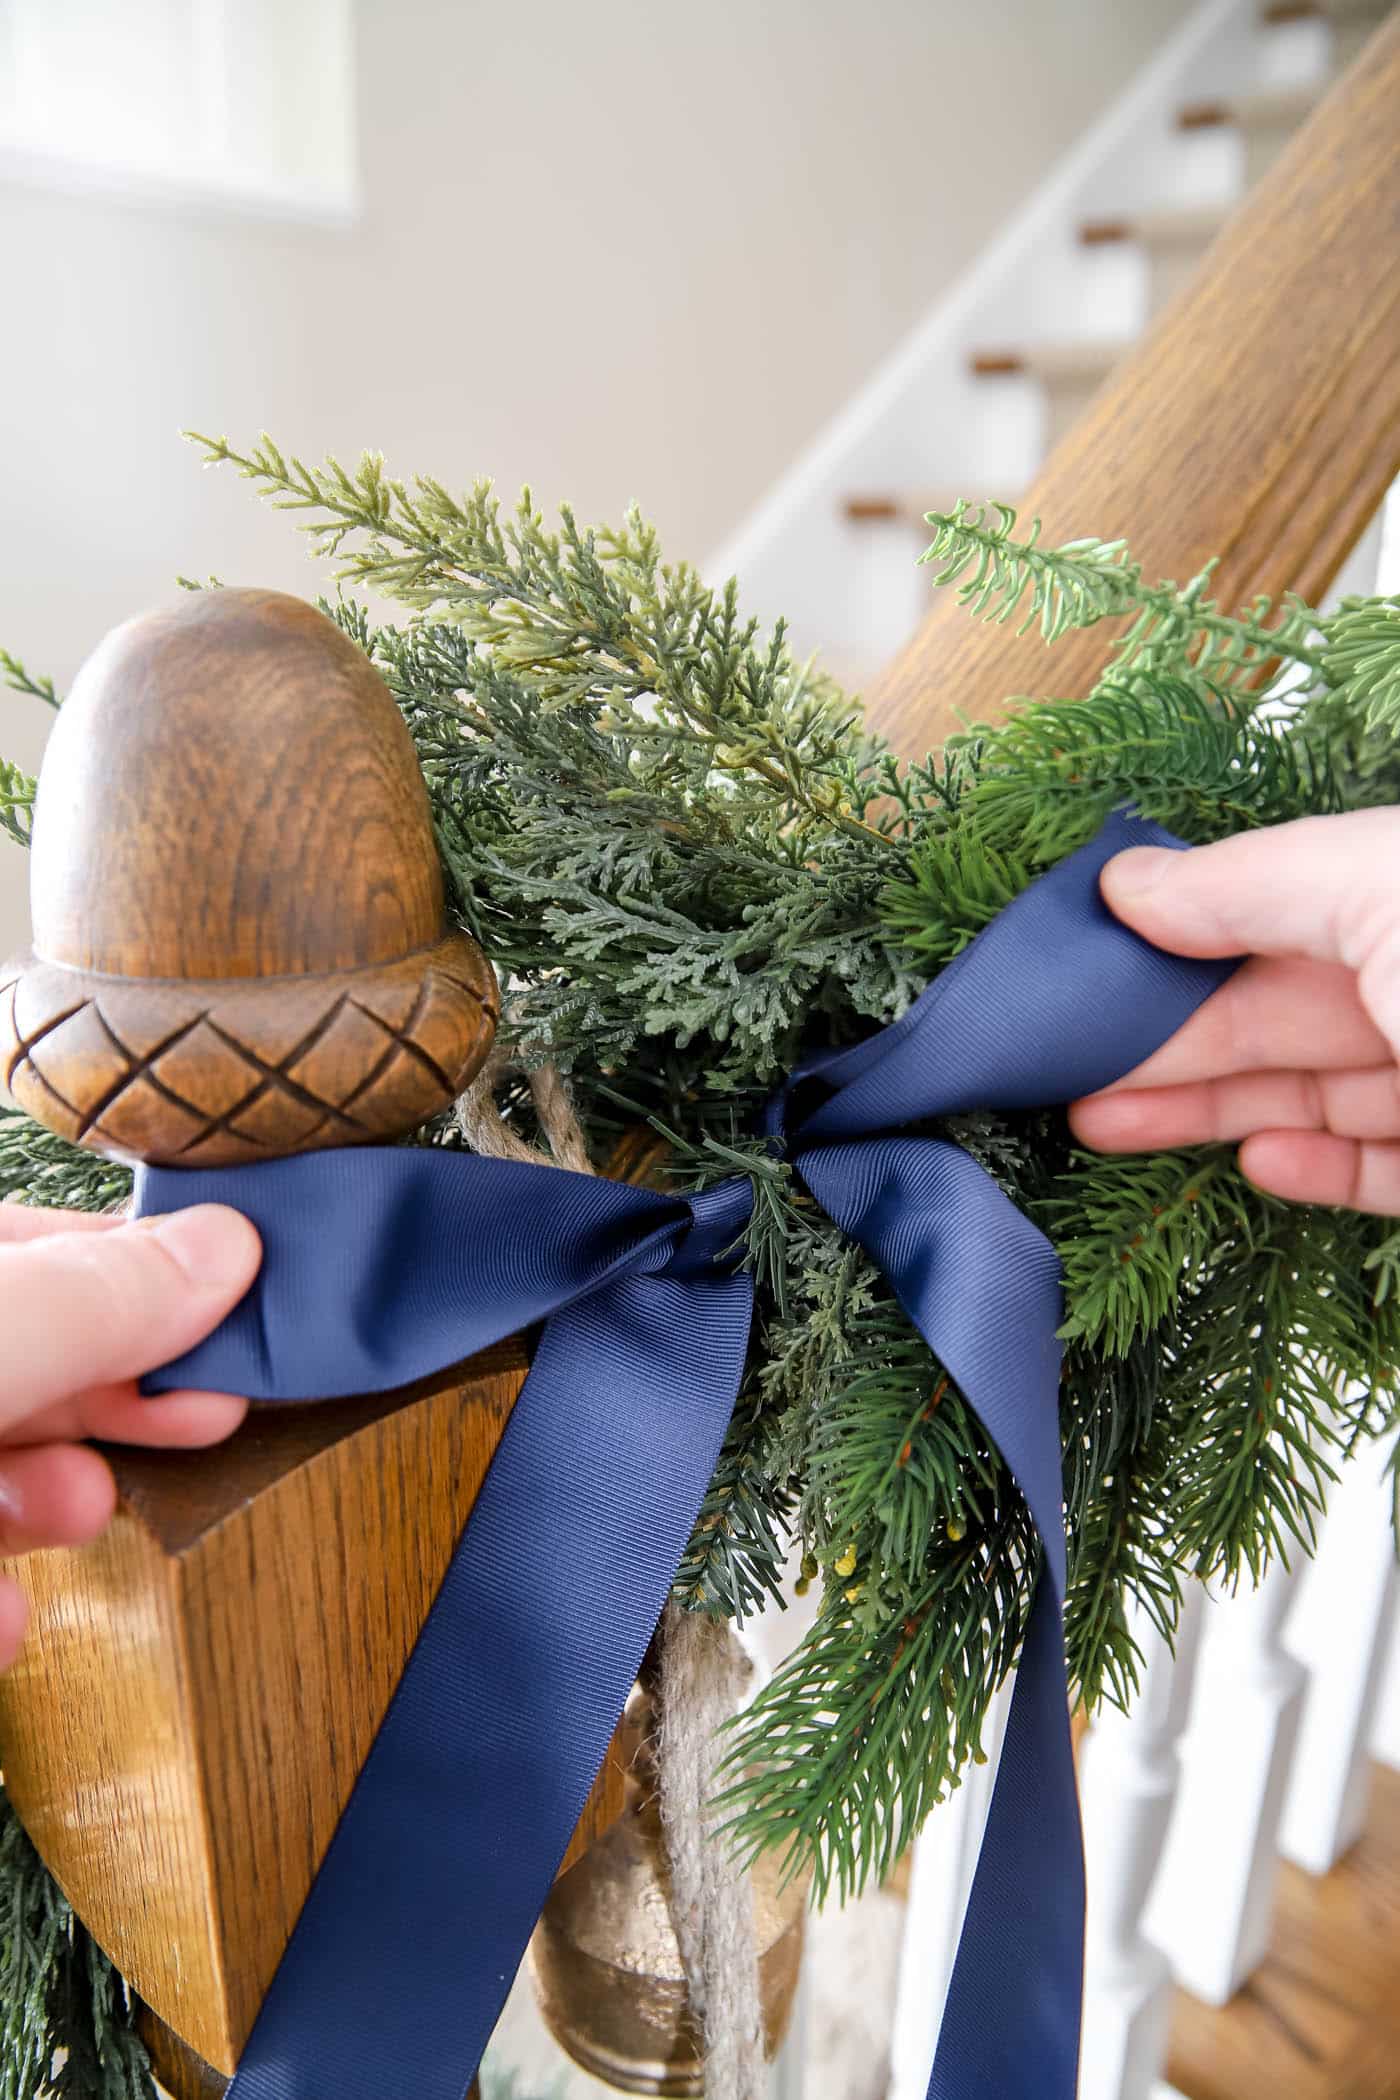
If you used zip ties or floral wire to attach your garland, then you’ll probably want to add ribbon or bows to cover those up.
7. Add Lights
If your garland isn’t pre-lit, and you have access to an electrical outlet nearby, add some twinkle lights! Or you can use a battery powdered pack of fairy lights.
Final Thoughts
I hope this simple tutorial and tips help you create a beautiful, classic staircase this holiday season. I hope your beautiful staircase banister makes you smile every time you walk by it, like mine does for me!
Frequently Asked Questions
Your garland should be the length of your stair railing with an additional foot per swag. Also take into account if you want it to cascade down the newel post.
There are so many ways to secure a garland to the stairs without using nails. Command hooks, decorative twist ties or zip ties are a few options.
Use items that are soft or easily removable, like command hooks or decorative twist ties. Stay away from zip ties or floral wire if you don’t want to damage your stairs at all.
More Posts You Will Love: