DIY Fire Pit Area with Pea Gravel
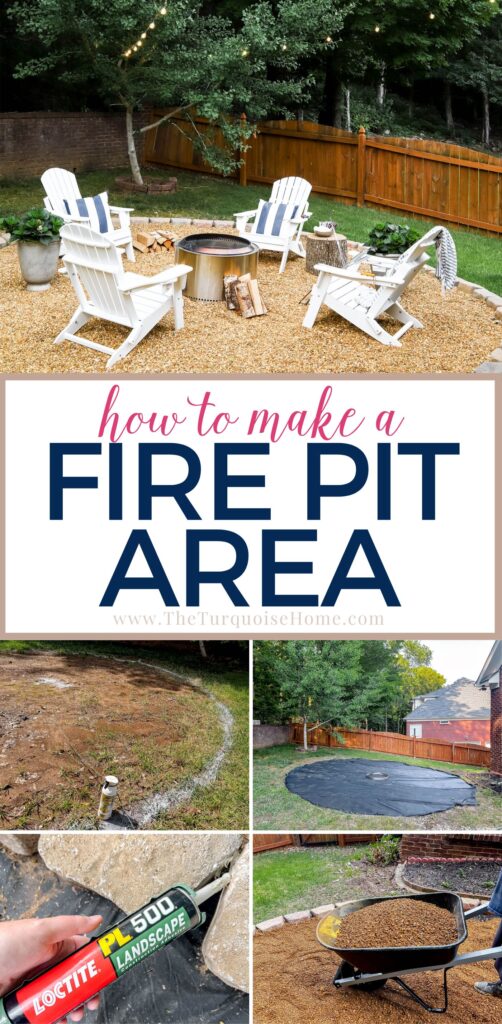
A DIY fire pit area is a great way to add a cozy and inviting outdoor space to your home. Follow this easy tutorial to get you started!
A few years ago, I gave multiple examples of how to make your own DIY fire pit, but now that we have more space, I’m going to share the steps for making the fire pit area around the actual fire pit!

This post contains affiliate links for your convenience. See my full disclosure policy.
We didn’t end up making a fire pit that year. But we fell in love with the best smokeless fire pit: The Solo Stove. We placed it in our backyard and just got out our camping chairs when we wanted to have a fire.
Want to Save This?
Enter your email below and I’ll send it directly to your inbox!
We’ve owned the Yukon-size Solo Stove for several years and love how we don’t smell like smoke after a night of making s’mores around the fire! (They have special technology in the design to limit the smoke coming off the fire.)
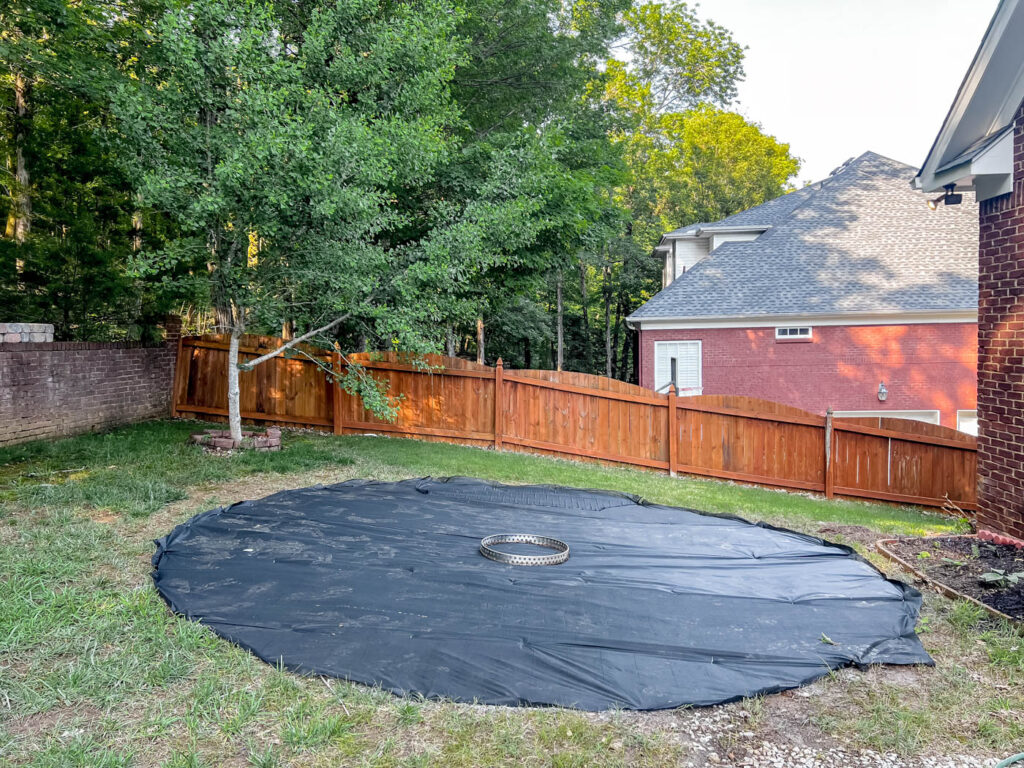
When we moved into this home, we gave up a huge backyard for a smaller, half-wooded, private backyard. While we have a small, flat-ish green space, we tried to cram all of our old yard toys into a much smaller space. The trampoline was the biggest eye-sore, but it was so handy during the quarantine times. So, fair trade.
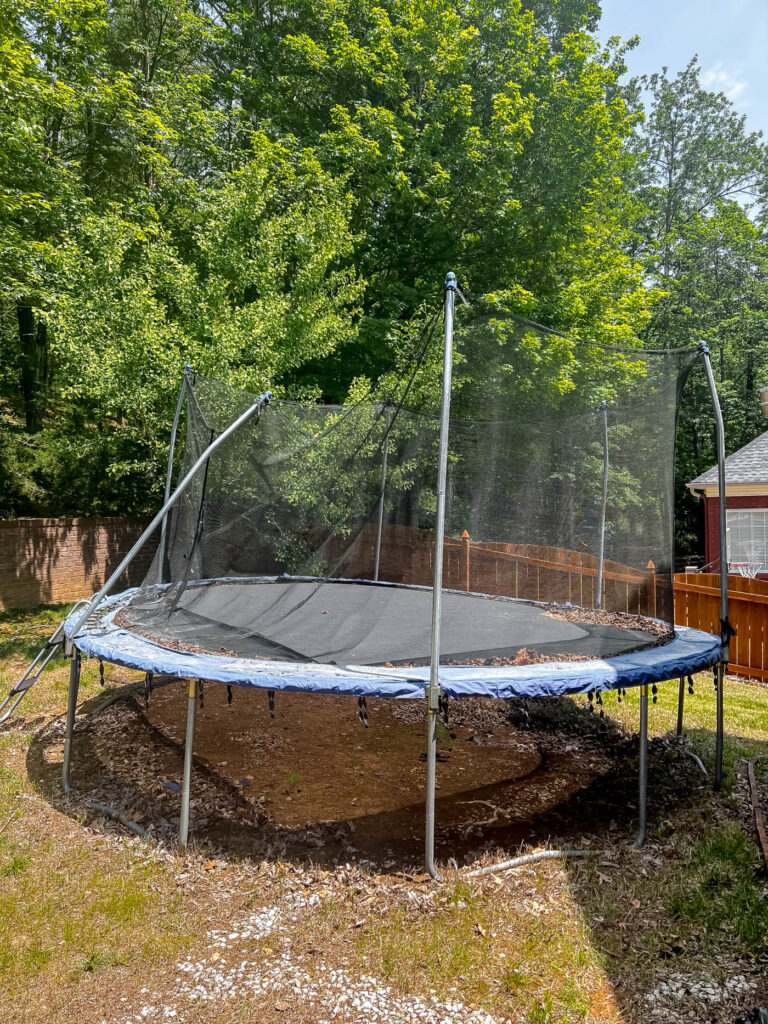
We recently got a dog and now that we are out in the yard more often, we not only wanted it to be prettier, but wanted to make it work better for our family. Since the new puppy arrived, it was easy to talk our girls into letting go of the trampoline. Yay!
For years, we’ve said that once the trampoline was gone, we would sod the yard and make the grass really nice and lush.
But, as soon as we hauled off the trampoline we realized it gave us the perfect spot for a fire pit area!! We were already using our Solo Stove in the yard, so why not make it a true fire pit space for our family to enjoy?
Here’s how we created the perfect s’more-making space in our backyard. This is such an easy DIY project with such a huge benefit for family enjoyment!
Supplies You’ll Need for a Fire Pit Area
- Weed eater & weed killer
- Landscaping fabric and stakes
- Stake and string
- Spray paint (in a light color)
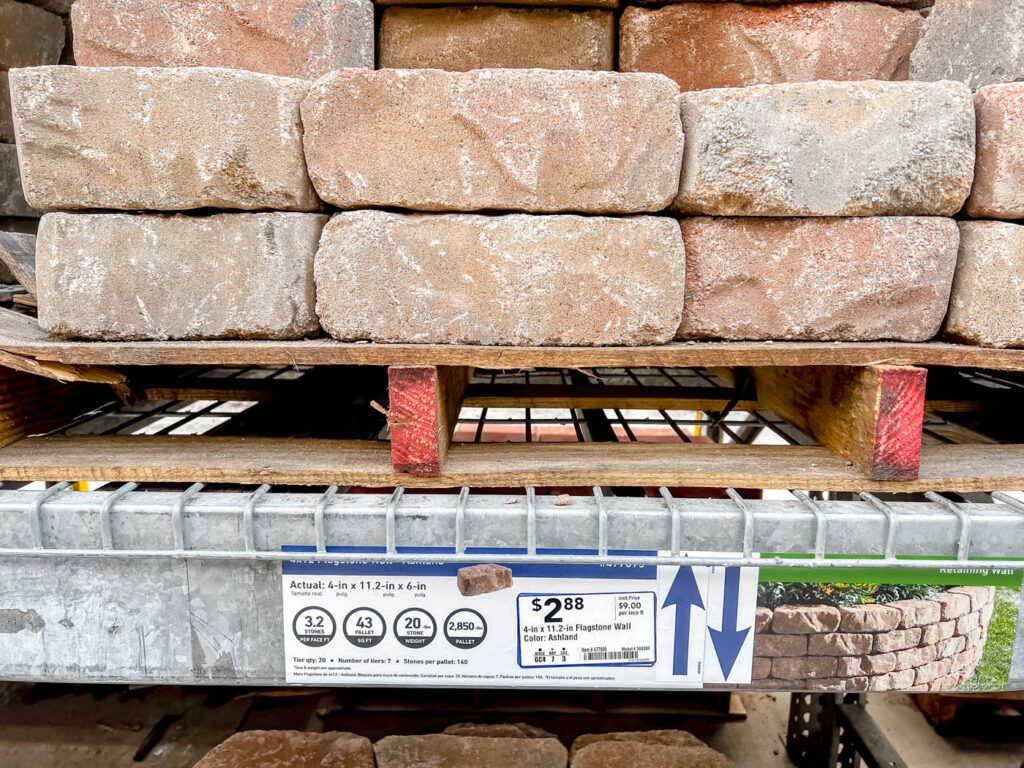
- Pavers or other border material for the exterior edge. (We used these flagstone blocks.)
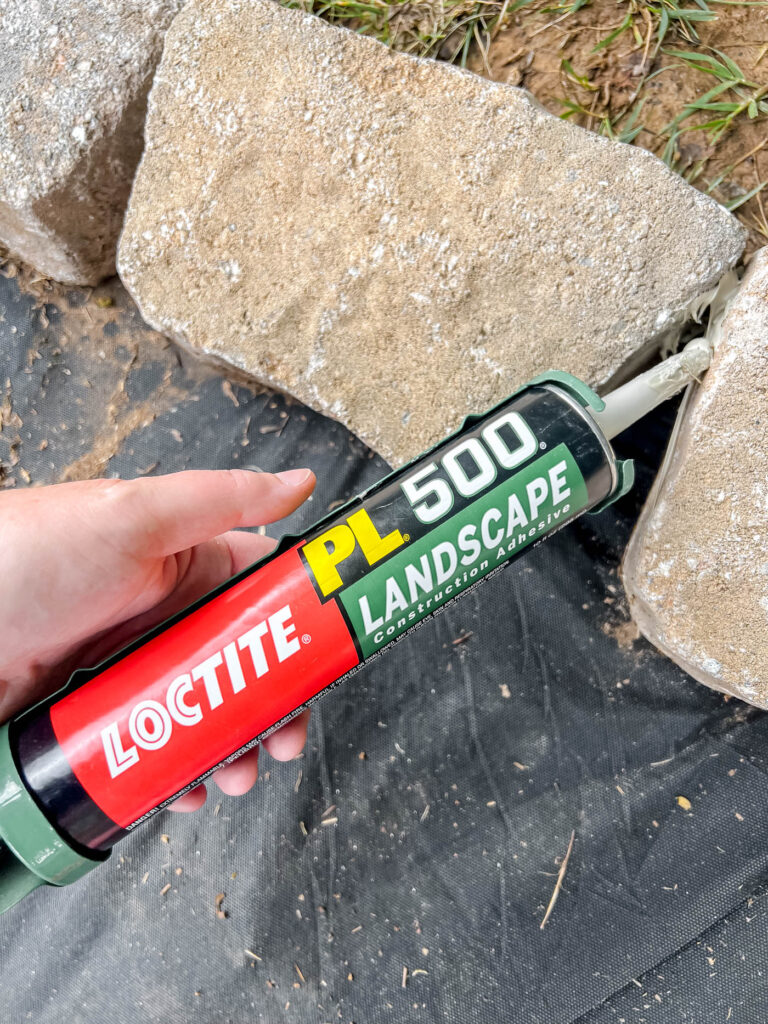
- Construction adhesive
- Pea Gravel
- Rake or shovel
- Wheelbarrow, optional, but nice to have
- Fire Pit – either a Solo Stove, portable fire pit, or fire pit kit
- Adirondack Chairs
- Optional: string lights and other decor!
Things to Consider Before Starting the Project
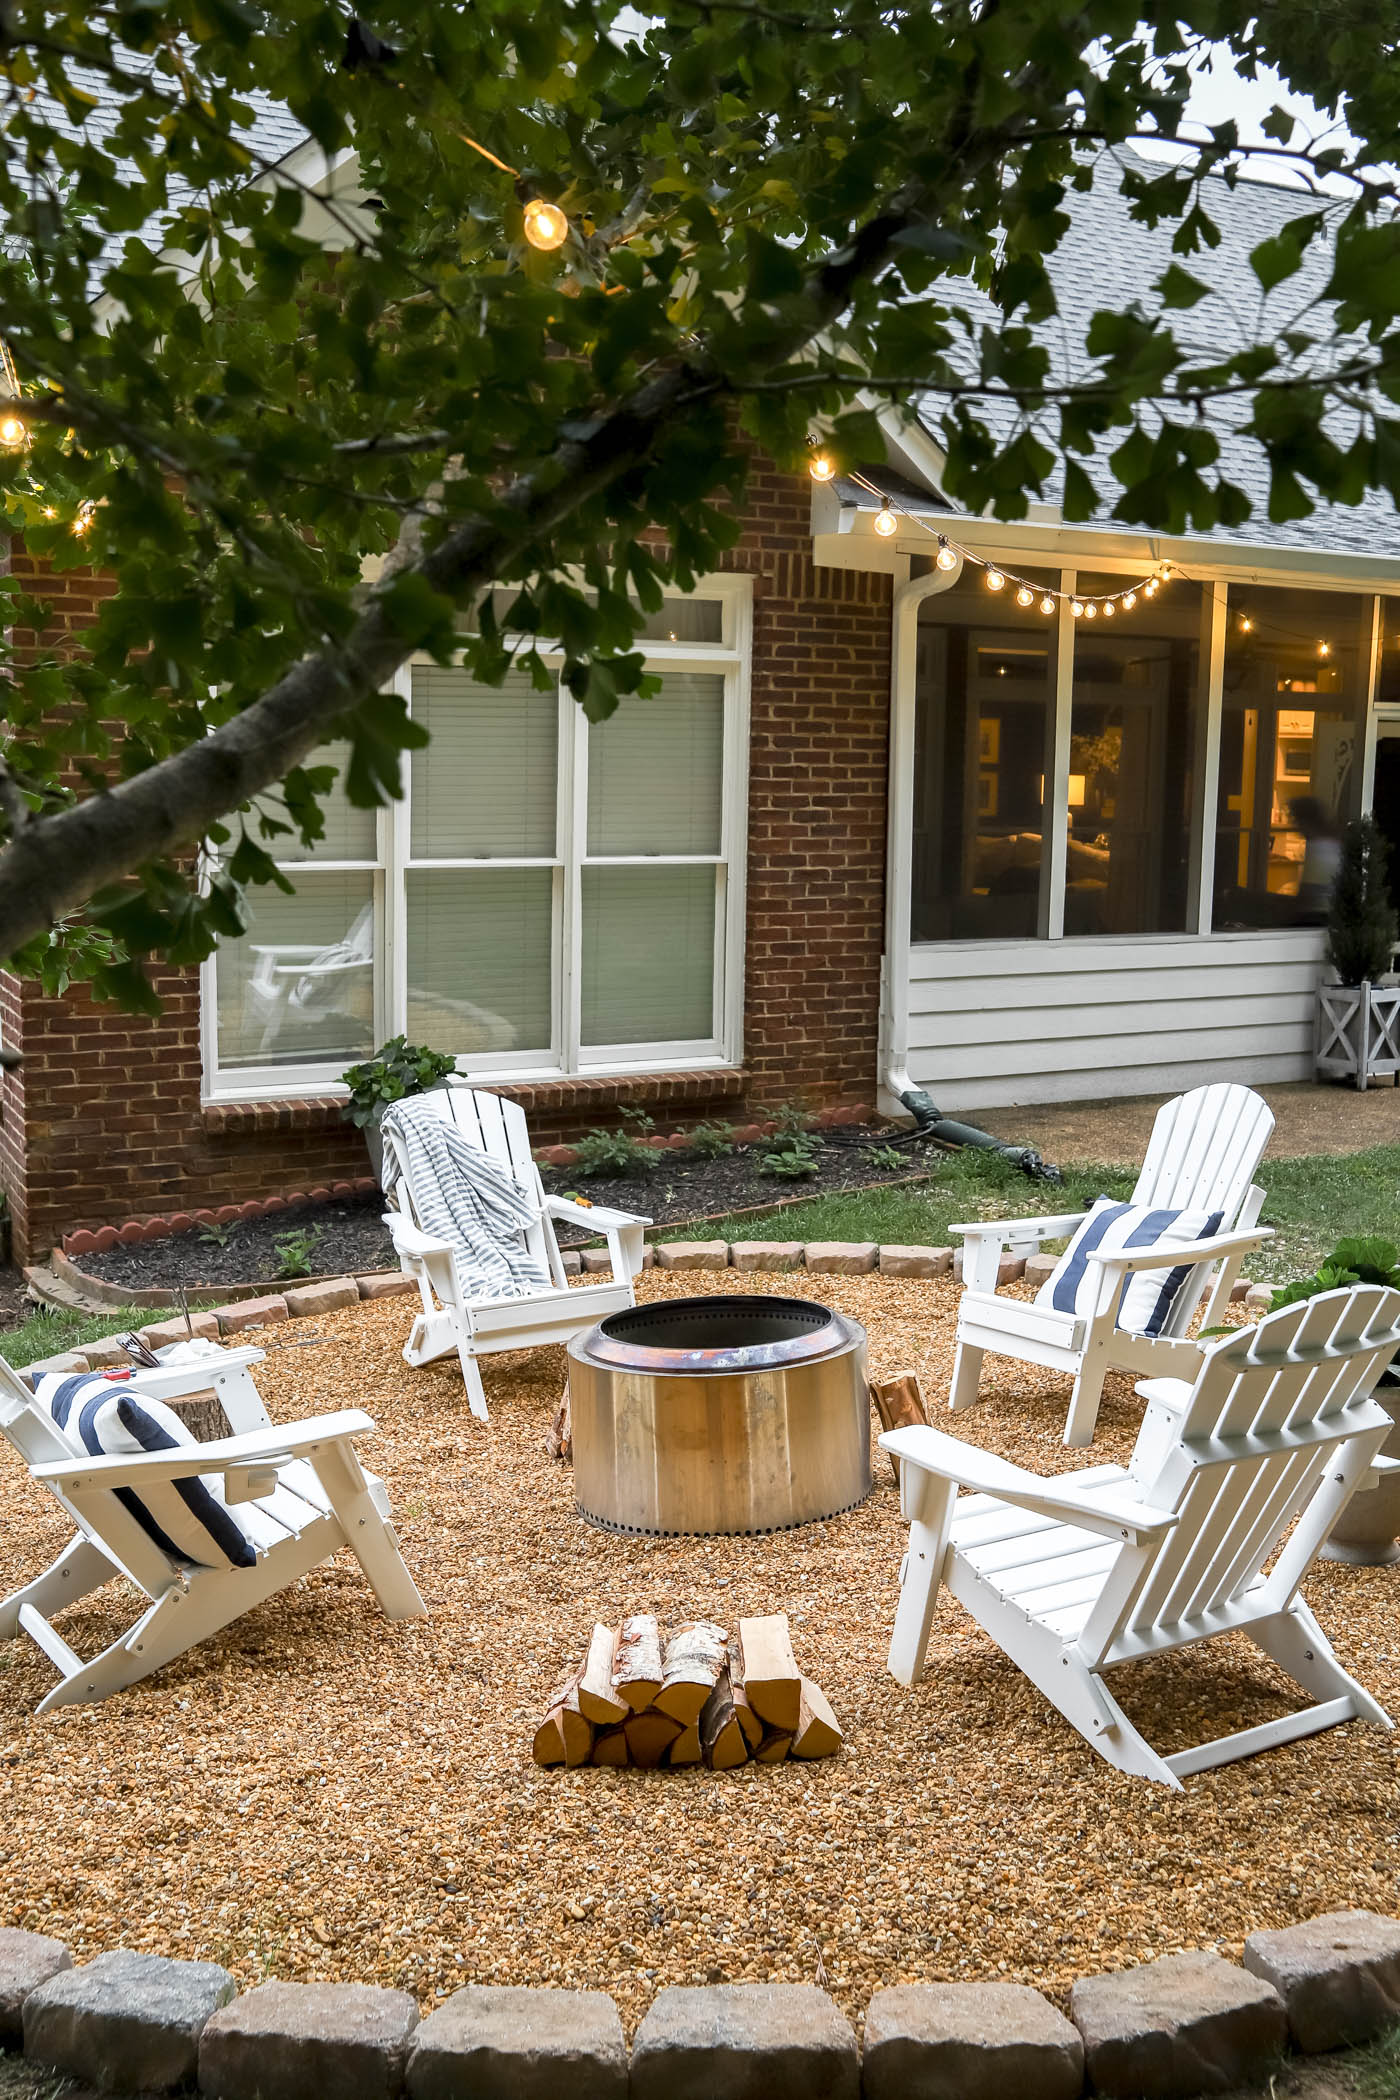
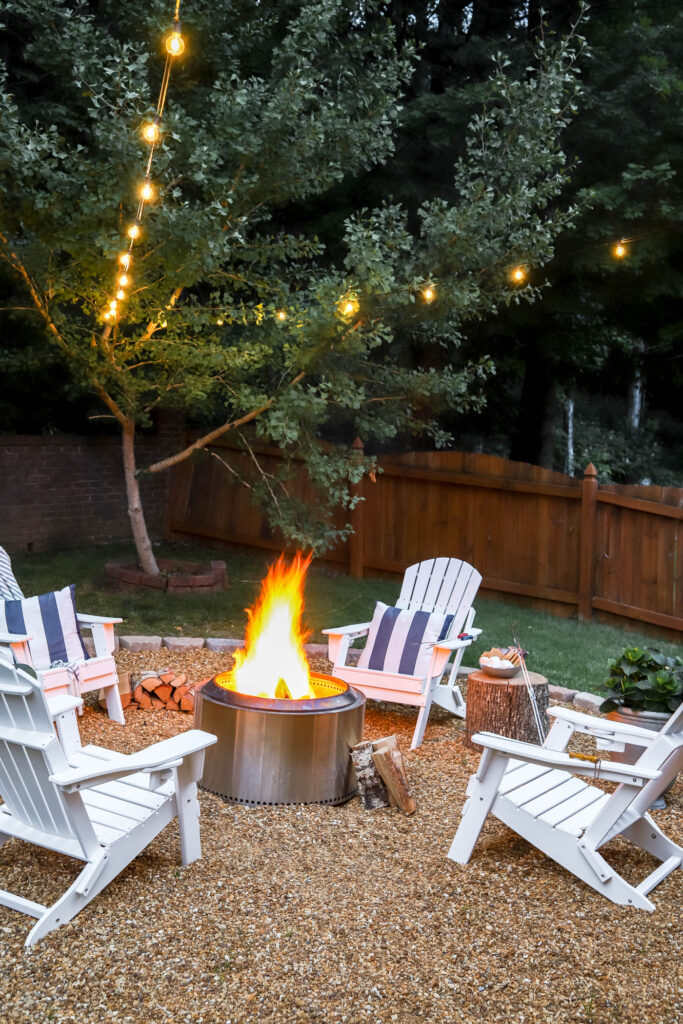
- Decide how large the area will be and what kind of seating you want. Our fire pit area is 16 feet in diameter and perfect for 6-8 Adirondack chairs. I like that it’s plenty big, because there’s plenty of room to move the chairs around.
- Decide on the type of fire pit you will have. Do you need to purchase a ready-made fire pit or will you build one yourself? You can also build your own using bricks, stones or concrete blocks.
- Make sure the fire pit will be at least 10 feet from the house, for your safety and home insurance requirements. Check with your home insurance company, just to be safe!
- Pay attention to trees overhead and other overhanging obstacles.
- Choose a flat or nearly flat surface, or consider having the area leveled.
- Research your materials, like your border stones and gravel. We found a local gardening center that sold pea gravel by the ton for much cheaper than buying it from a big box store.
RELATED: Solo Stove Review: The Smokeless Fire Pit Solution
How to Make a Fire Pit Area
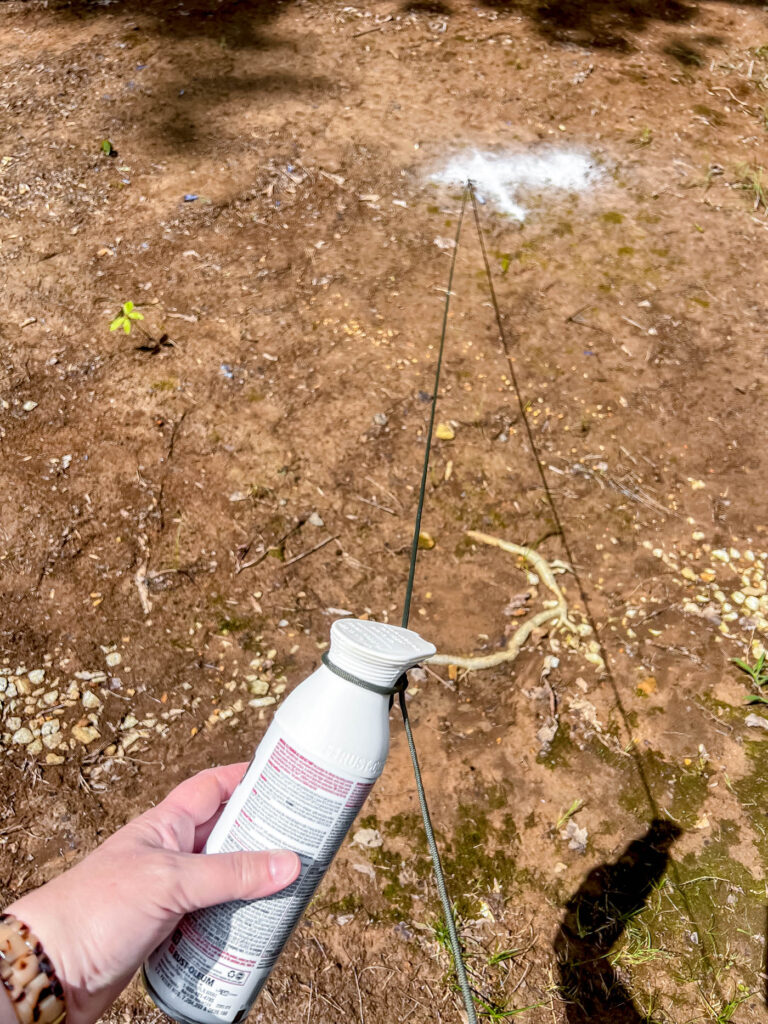
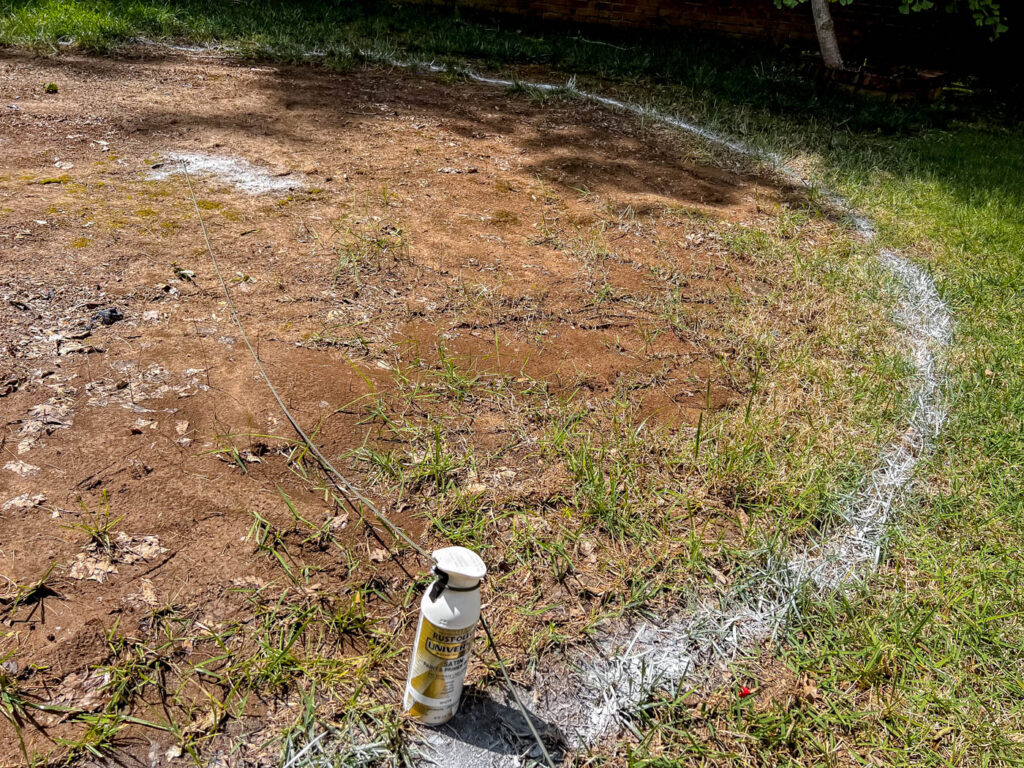
1. Choose & Mark the Location
Pick a spot in your yard that is flat, level and away from any structures or trees. Make sure it’s large enough to accommodate the size of your fire pit and seating area.
Mark the area by placing a stake in the middle, tie a string that is half the distance of your circumference to the stake. Then tie the string to a can of spray paint. Spray paint a ring around your perimeter to create a perfect circle.
2. Remove Grass, Weeds, Plants or Large Rocks
If you have any grass or weeds in the area, you’ll need to remove them either by scalping the ground or using a tiller. This will help keep grass from growing in your fire pit area.
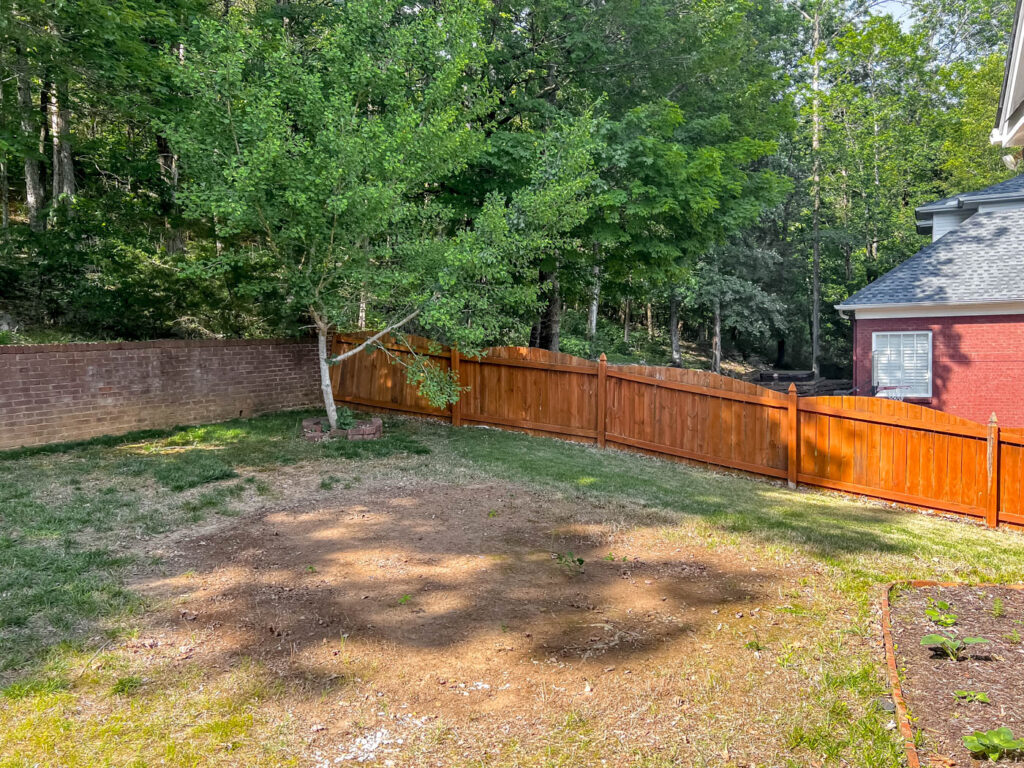
We did not have to do much for this since we had a bald spot in our yard from the trampoline. But we did kill some of the grass around the edges.
3. Level the Ground
You’ll want to make sure your area is mostly level, or else it will be difficult to enjoy sitting around the fire.
We didn’t change our space, even though it isn’t perfectly level because we don’t want to mess with the drainage scope of our yard. But it is level enough for us, and we tested it before continuing the project.
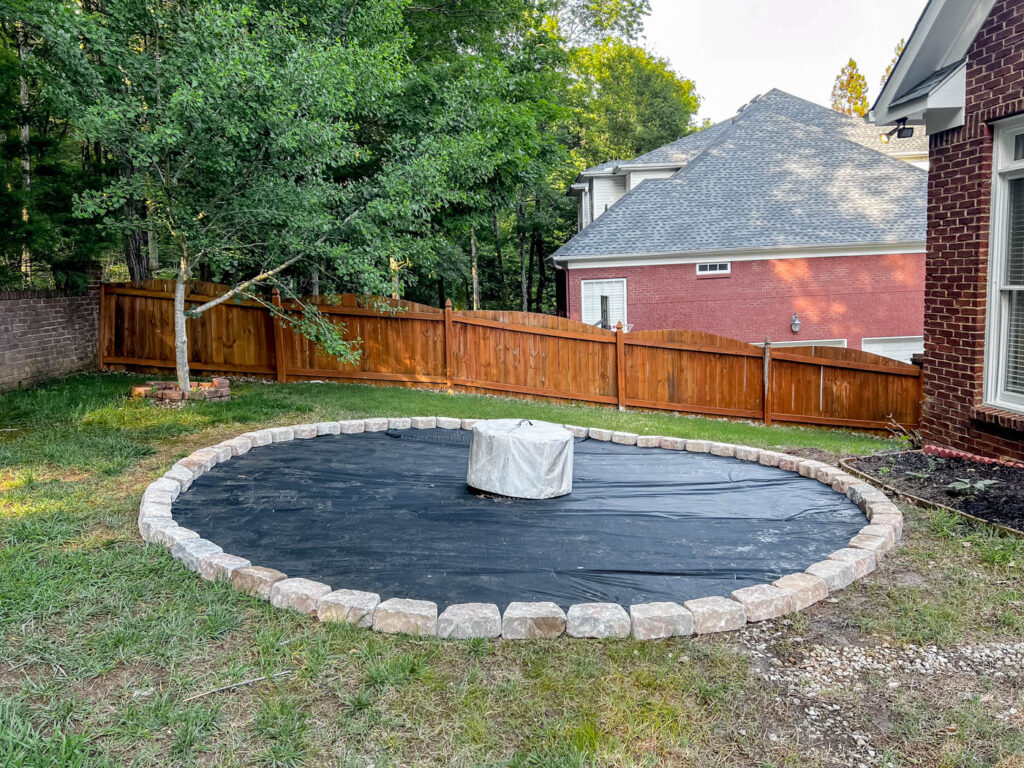
4. Install Landscaping Fabric
Add a protective barrier between the ground and the fire pit area by installing landscaping fabric. Use small landscaping stakes to secure the landscaping fabric to the ground.
5. Add the Fire Pit to the Middle of the Pit Area or Patio
Either build a fire pit or place the Solo Stove in the middle of the circle.
Follow all of the instructions for making a fire pit, including if you need to place gravel or sand down under or inside the fire pit. Please follow all safety requirements.
6. Create a Raised Border around the Perimeter
You will need some type of raised border around the outside odge of the fire pit curcle. This will keep your pea gravel contained. We used these flagstone rocks to create a border and used construction adhesive in a caulk gun to keep them together.
You could use any type of stone you like, or metal landscaping edge.
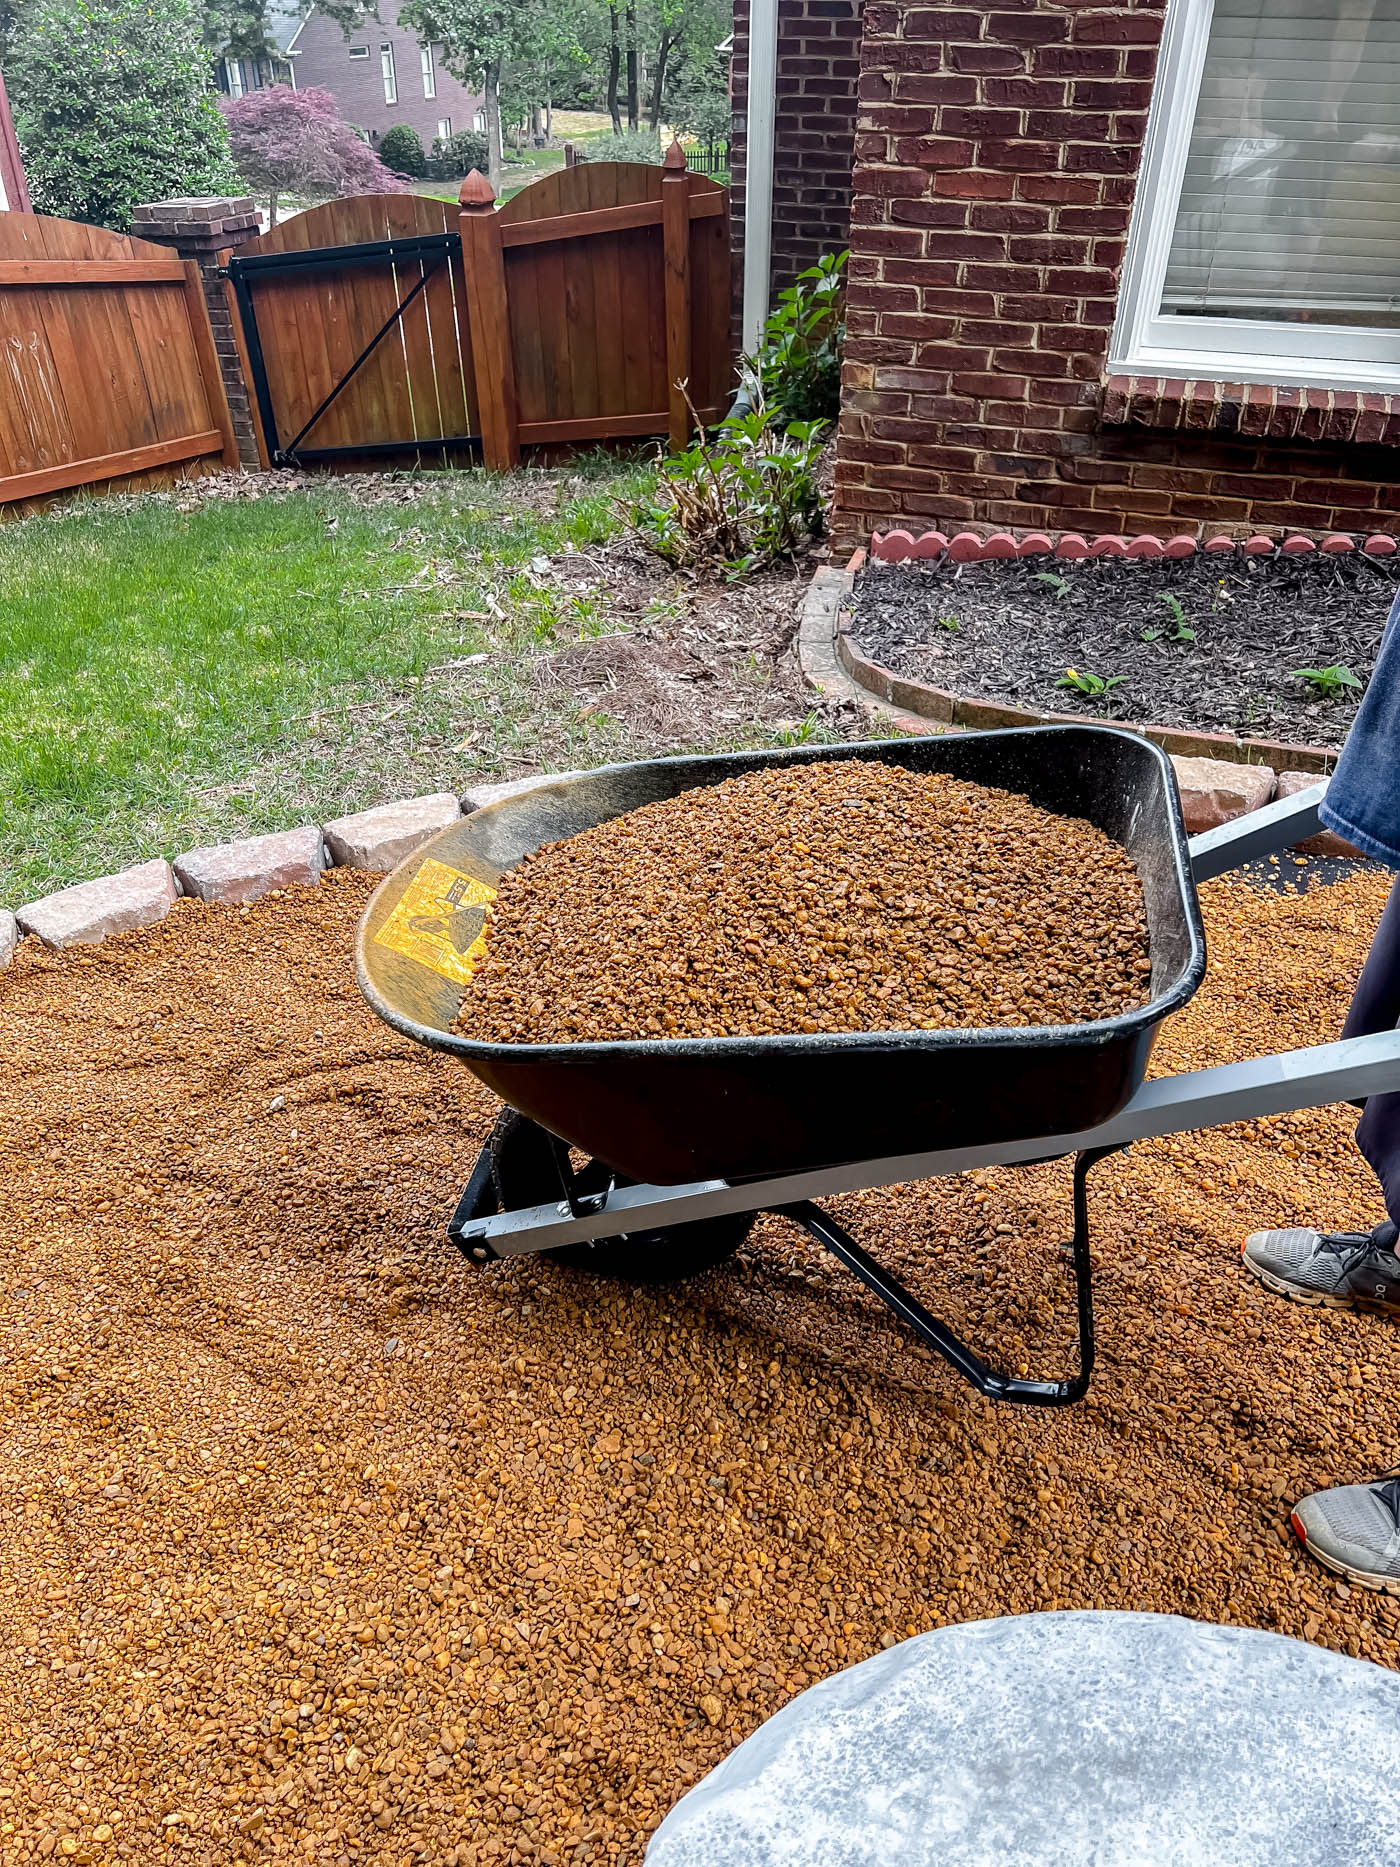
7. Fill in the fire pit with pea gravel, or other rock
We bought a ton of pea gravel from the local garden center and wheeled it in and raked it around the fire pit area. It’s about 3 inches deep.
I love the look of pea gravel and how it coordinates well with our fence and brick house.
8. Add Seating and Decorate the Area
You could use a variety of seating options, but I prefer an Adirondack chair. If you’re on a tight budget, you could make a bench or two. We added 4 Adirondack chairs, but will be adding at least 2 more very soon!
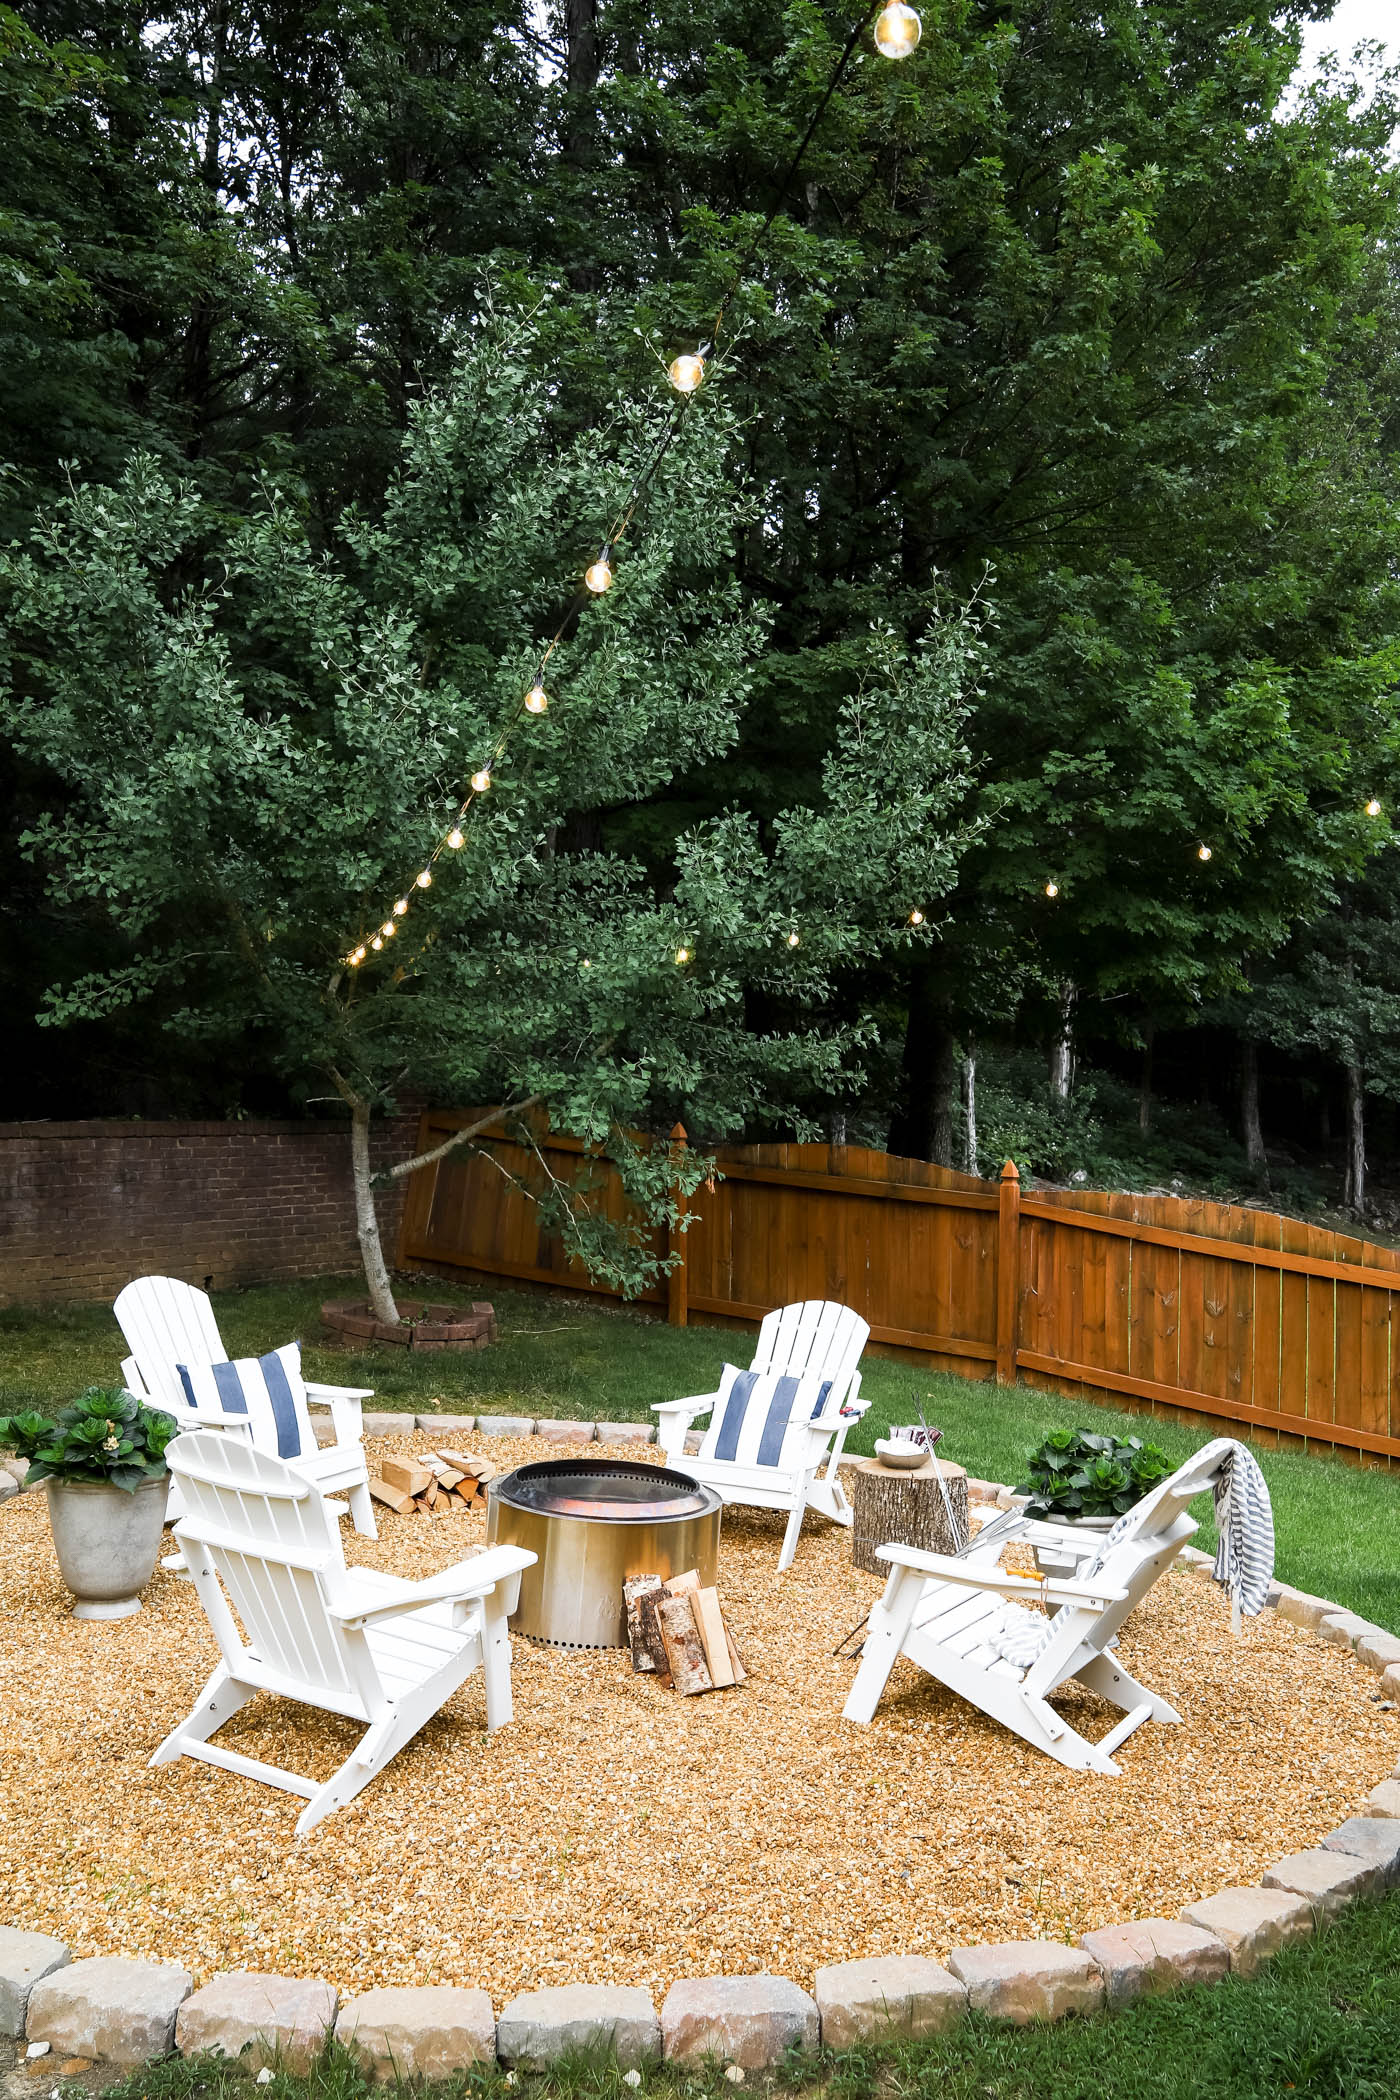
We also added string lights above the space and it adds so much to the ambiance at night! Just make sure you don’t have them directly over the fire.
Add outdoor pillows, potted plants and side table to make it feel even more comfortable!

Final Thoughts
We absolutely LOVE how the space turned out. We sit out there while we’re spending time with the dog. Just to have another place to hang out and chat outside has been such a good thing! We say it feels like we’ve gained another room at our house.
It’s going to be so fun to use it this fall and winter! Not to mention it’s fun to host friends around the fire and cook s’mores any time of the year.
Do you have a backyard fire pit area at your home? If not, would you create one for your space?
More Posts You Will Love:


Do you know how much pea gravel you bought? I’m finding it hard to estimate.
Hi Rachel, I don’t remember exactly how much we bought, but I remember having to calculate it out. I talked with the local supplier to find out how much area the pea gravel would cover and then I figured out my area with the 16 foot circle and then multiplied it by the depth of 3 inches to find the total volume. And then I gave that to the supplier and they told me how many tons to get. It’s going to be different for every fire pit, but that’s how we figured it out. Hope this helps! 🙂 xo, Laura
What size pea gravel did you get? My local place seems to have much larger stones than it looks in your pictures. Thanks!
Do you know how many of the flagstone pavers you used? I think I counted 57 but I’m not sure!
I love the fire pit area! Such a great way to replace the trampoline. I am so excited you got a dog. Maybe I missed it but do you have a picture of said puppy? If so please direct me to where I can see him/her.
Hi Laura! You can see our new puppy in this post… https://theturquoisehome.com/dog-crate-furniture-ideas/ She’s the best! xo, Laura