DIY Window Cornice Board with Fabric
Do you want to dress up your windows on a budget? Window cornices are an easy way to customize your room with added texture and interest in just a few hours!
Are you tired of looking at bare, boring windows? Cornice boards can add a touch of elegance and style to your decor. These boards are the perfect finishing touch for any room, and they can be surprisingly easy to make. In fact, with a little bit of time and effort, you can create your own DIY cornice boards right at home.
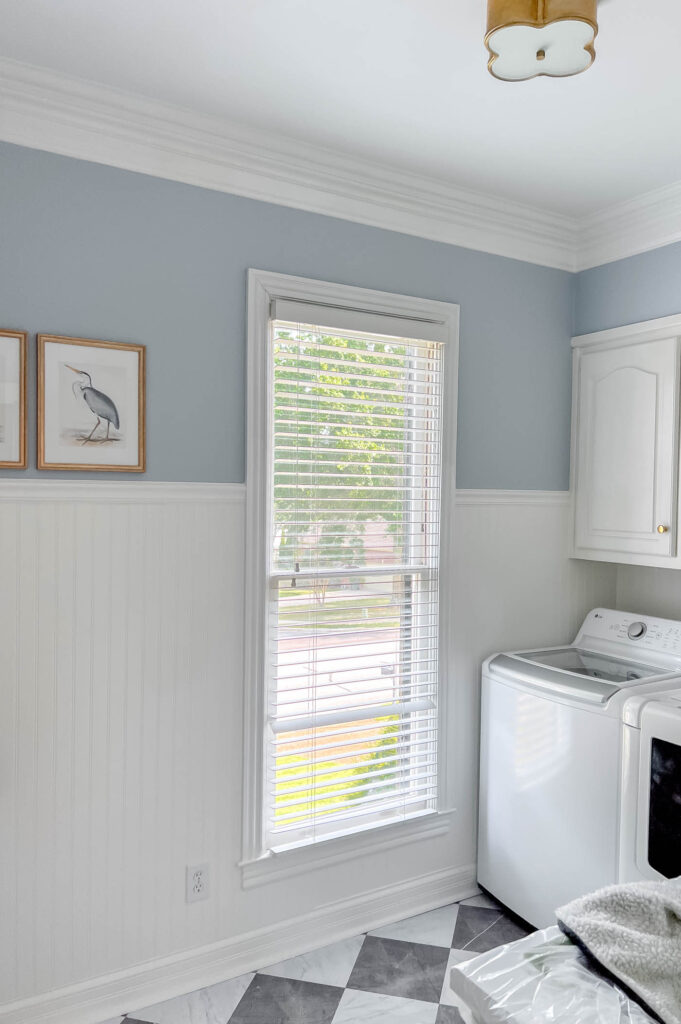
I’ve been working on making over my 1990’s basic laundry room for more than a year now and I’ve finally finished the next piece of the makeover! I’m almost to the finish line, and it’s come together so well!
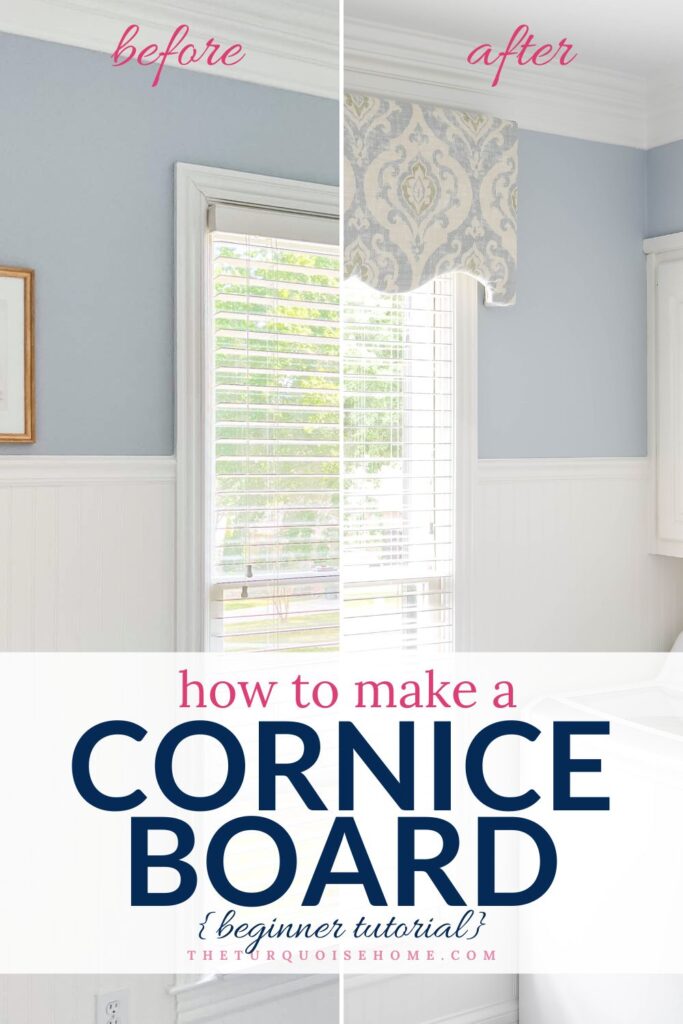
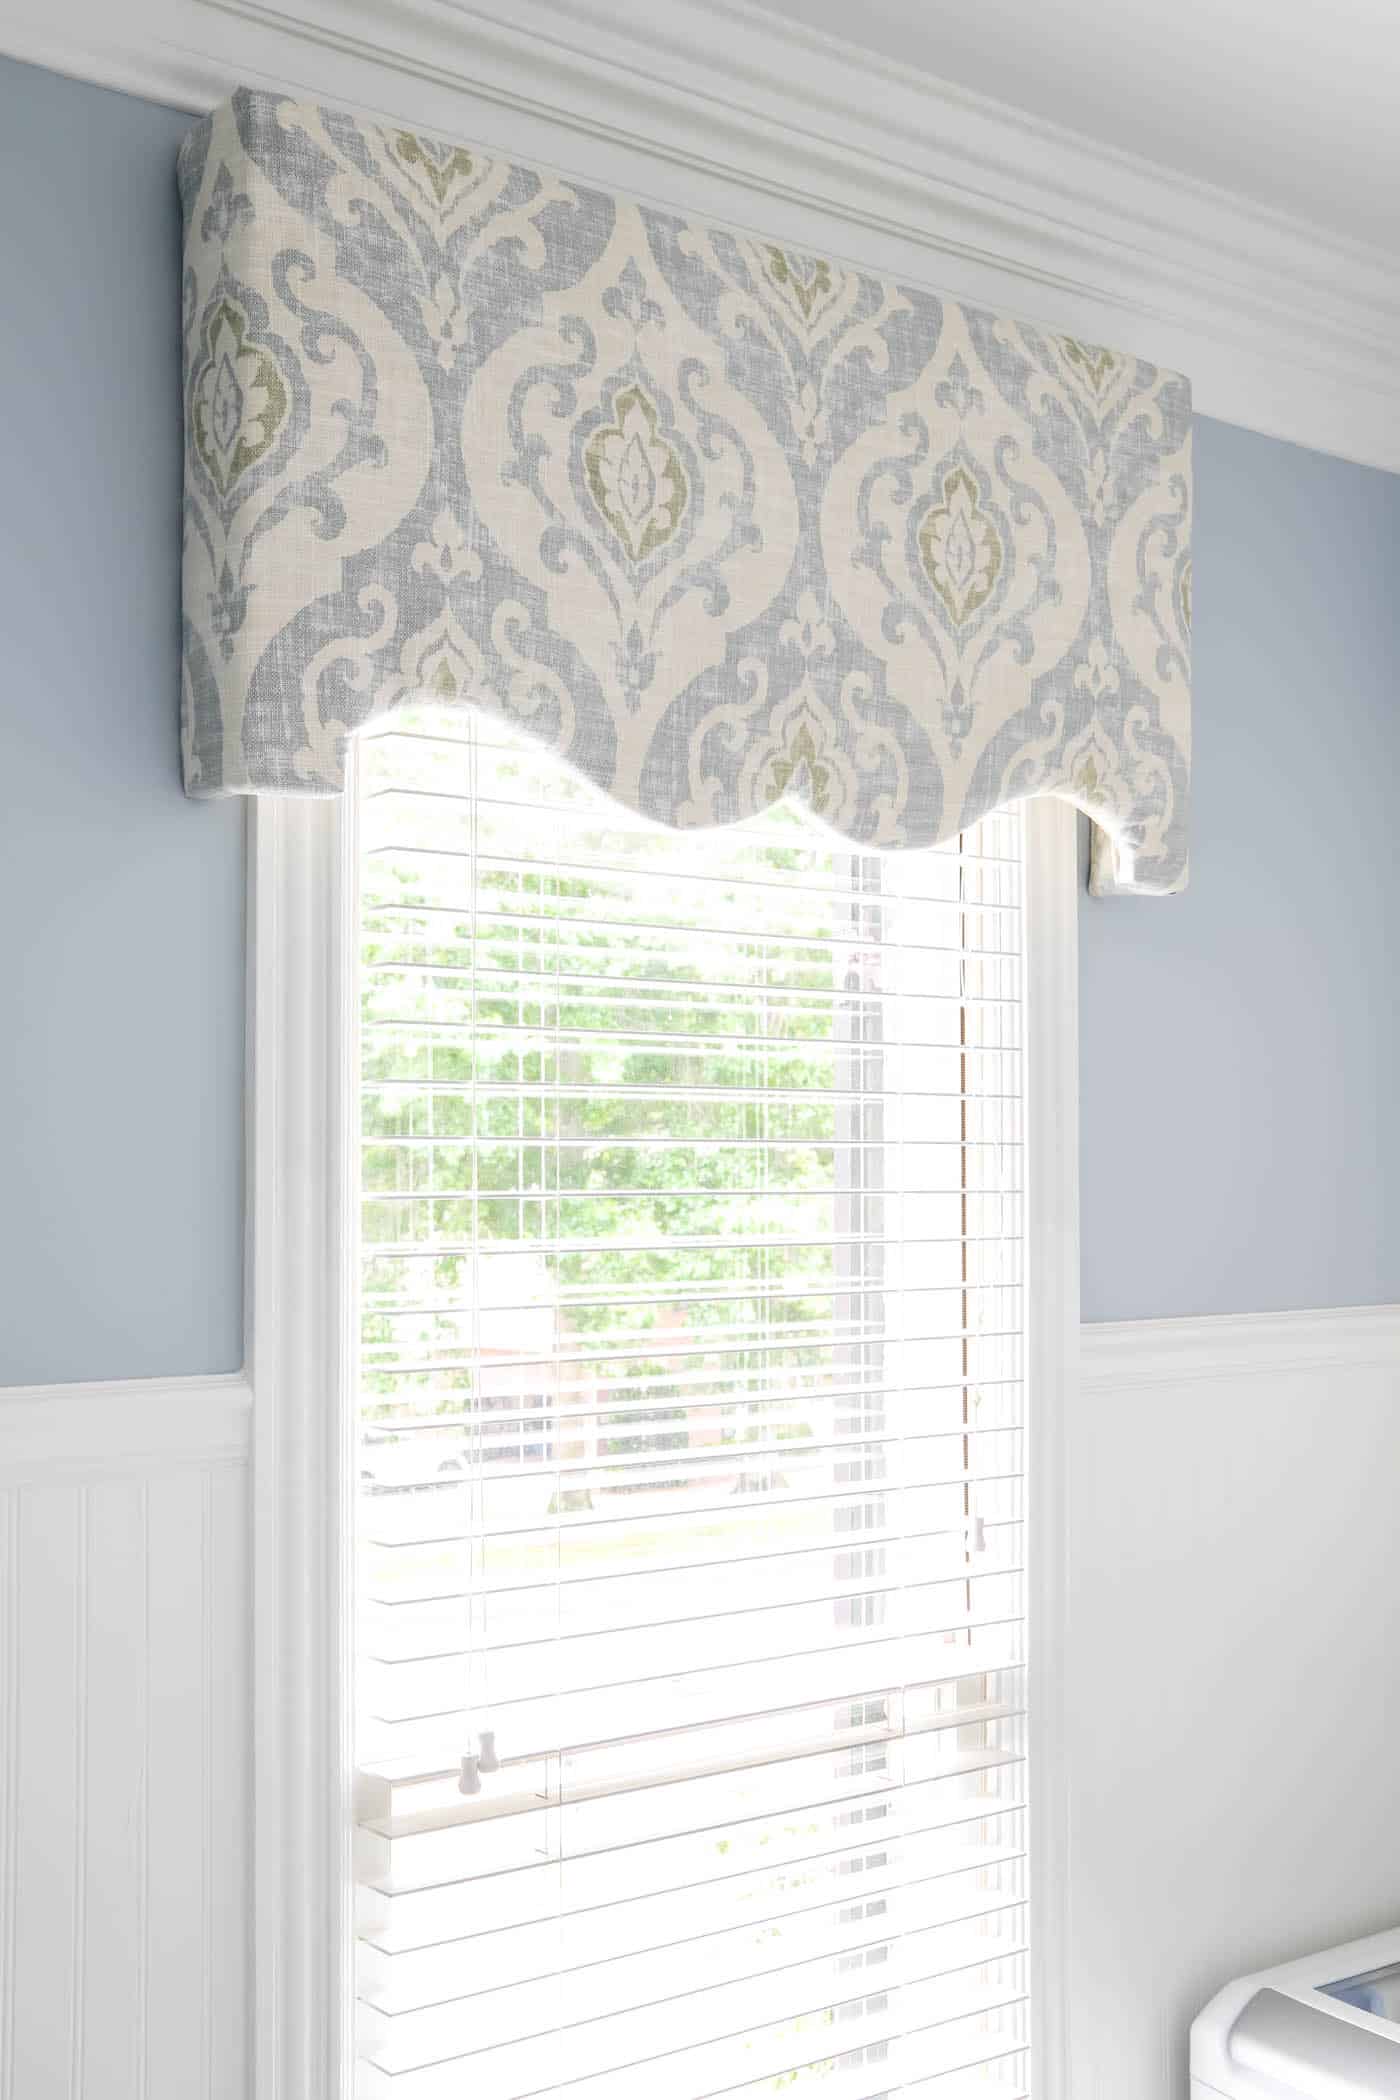
The room has some color in the walls and the art, but it needed some pattern and I’m happy that this fabric-covered window treatment was the perfect addition! Drapes would have gotten in the way of work in the laundry room, so a cornice board was the perfect option.
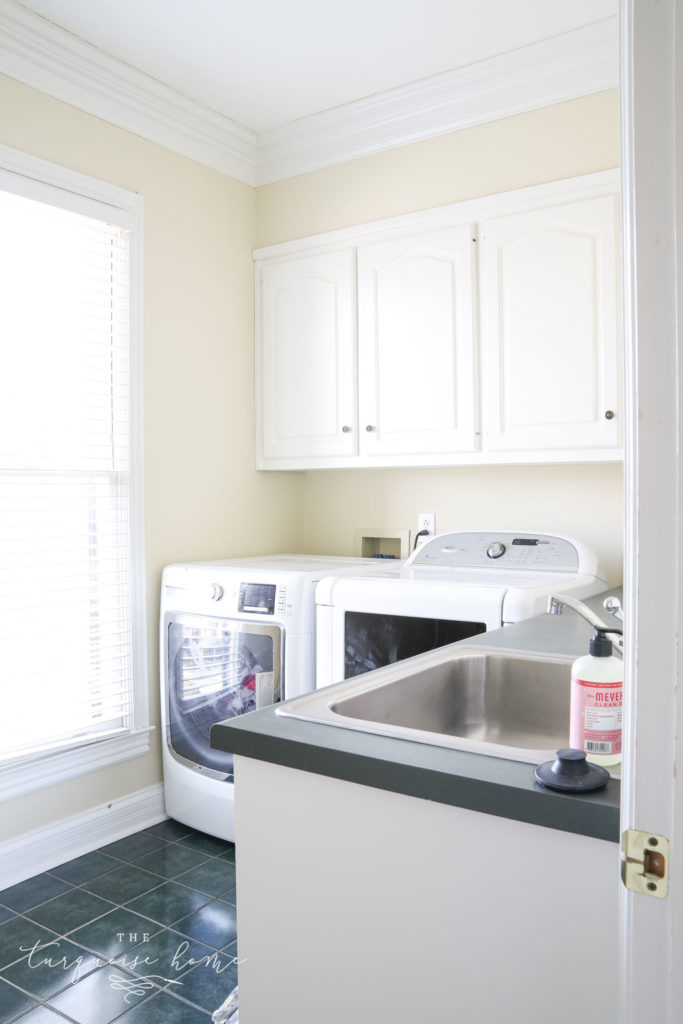
This is how the laundry room looked when we moved in.
And the below picture is how it looked right before I started this project. You’ll have to scroll to the end to see the final picture!
I’ve already:
- Covered the flooring with peel-and-stick vinyl tiles
- Installed bead board and a chair rail
- Painted the walls Simply White and Heather Blue
- Moved the drying rack to a different wall
- Moved the mops and brooms behind the door
- Added art
- Changed the light fixture to this beautiful flush mount light
- And now finished the cornice board!!
I still am working on the countertops, but everything else is done!
Want to Save This?
Enter your email below and I’ll send it directly to your inbox!
What are cornice boards?
Cornice boards are decorative, immobile window treatments that are placed at the top of a window. They can be made from wood, fabric, or a combination of both. They can be shaped differently depending on the room you are decorating and your style.
Cornice boards are typically used to hide window treatment hardware and add an elegant finish to a room. Any novice DIYer can make one for the cost of supplies and just a few short hours. It’s a great beginner DIY project!
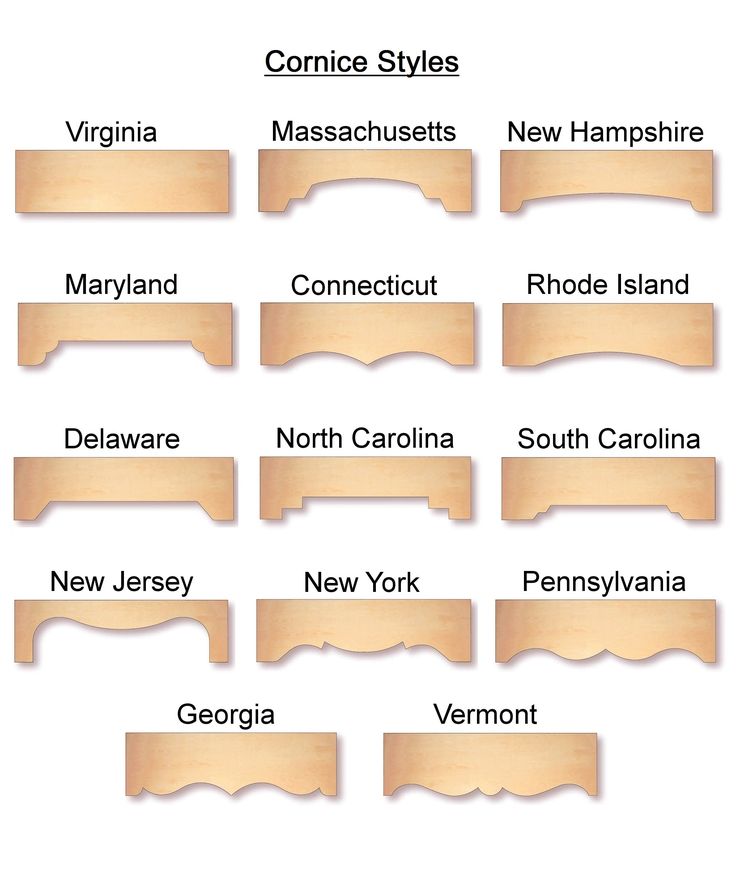
Cornice Board Window Treatment Styles
You can make a cornice board as simple or elaborate as you’d like! It’s only as easy as making a template for your board. Choose from one of these styles for a polished look, or create your own! I chose the Pennsylvania style below.
This post contains affiliate links for your convenience. See my full disclosure policy.
Supplies Needed to Create a DIY Cornice Board
Creating your own cornice board requires a few basic tools and materials. Here is a list of what you will need:
- Poster board for a template
- Pencil
- Scissors
- ~ 3/4″ thick Plywood or wood boards to build the cornice
- 2 x 4 x 8 lumber for sides and top, or cut these pieces from the plywood
- Fabric (enough to cover the cornice), usually 1 yard of fabric will cover it.
- Poly-fil cushion padding (enough to cover the cornice)
- Staple gun and staples
- Drill
- Saws – a circular saw, miter saw and jig saw, or a miter box and hand saw
- Wood glue
- 3-5 “L” brackets and screws
- 2 corner braces and screws
- Additional corner braces, optional
- Embellishments, like corded trim or fringe (optional)
- Additional plain fabric for the backing (optional)
Before You Start
1. Measure Your Window
You’ll need to know the width of your window including the casing, and then add 4-6 inches to your measurements. Your cornice board will need to extend 2-3 inches past your window on either side of the frame.
Then decide how tall you want your cornice to be. I wanted mine to cover the window hardware at the top, and extend to just below the crown molding. It ended up being 19 inches tall.
These measurements will determine the size board you need to buy. I bought a large piece of plywood that was 23/32 inches thick. This gives plenty of depth for screwing in the brackets to the wood.
2. Choose Your Fabric
You’ll want to choose a medium-weight fabric, not too heavy or light. These are linen, canvas, polyester or cotton/polyester blend.
A medium-weight fabric will allow you to fold it over the board without pulling or wrinkling, but won’t be too bulky, either. I chose this beautiful blue and green damask fabric.
Here are some fabric ideas to get your wheels turning…
SHOP FOR FABRIC

Now that you have your measurements and fabric selected, it’s time to gather your supplies and start the project!
How to Build a Window Cornice Board with Fabric
Here are the basic steps you need to follow to create your own cornice board.
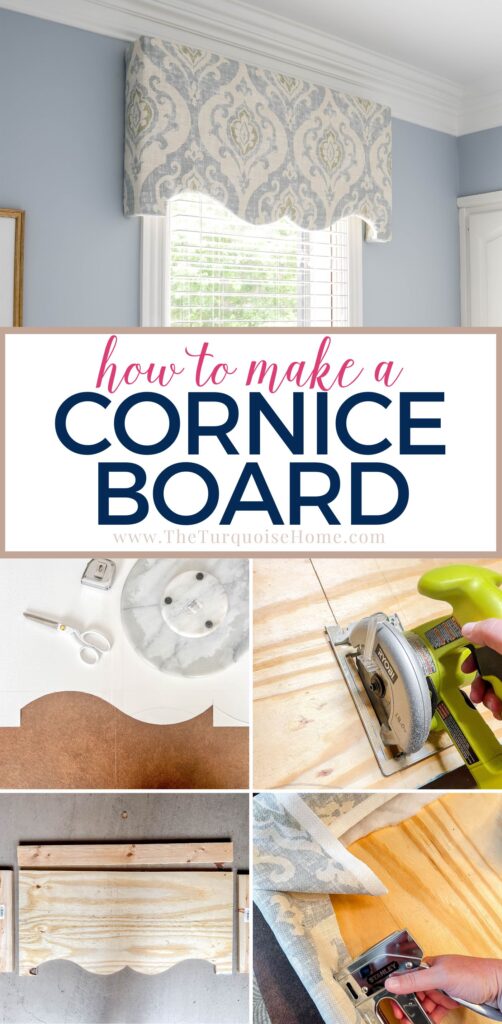
1. Create a template
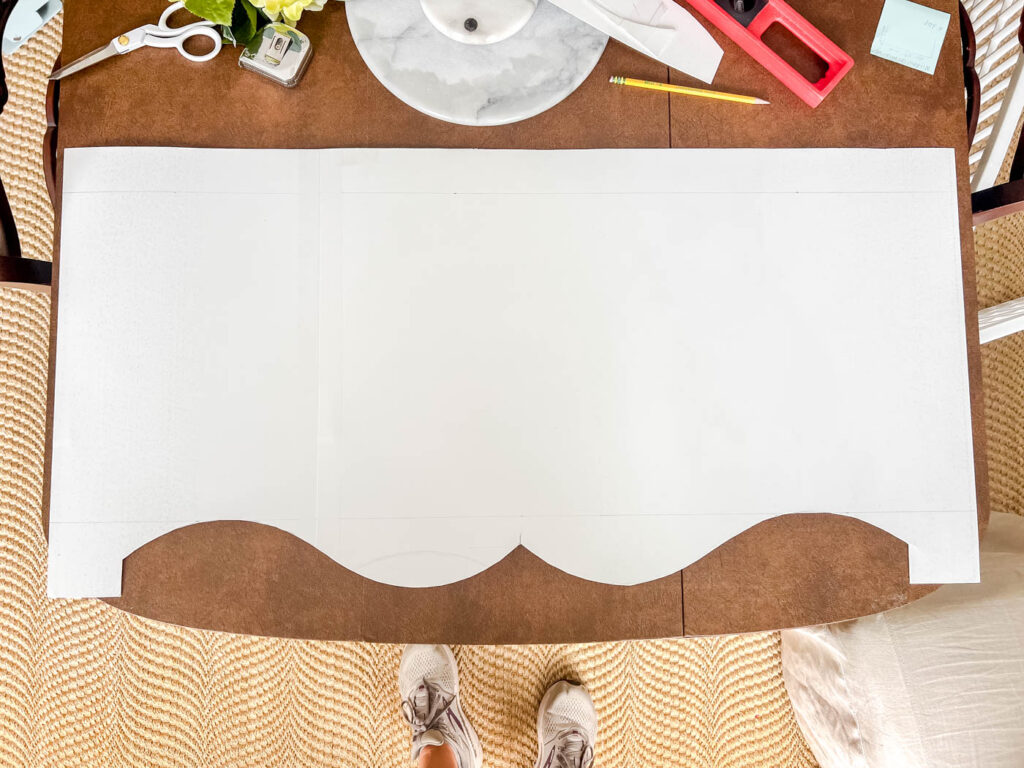
Unless you are doing a simple, straight cornice, you’ll need to make a template. Use the shapes I’ve shared above to get ideas. I used two pieces of cardboard taped together to make the size I needed. And then I traced a lazy susan I had to create the “Pennsylvania” shape.
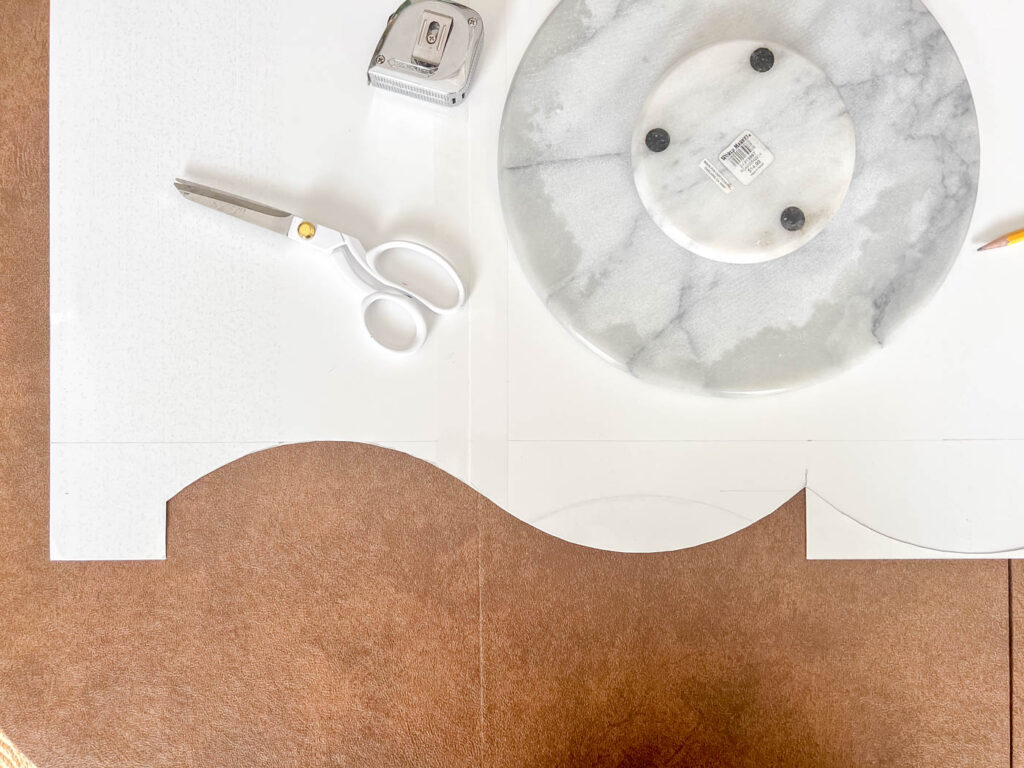
Once you have the template drawn just right, cut it out.
2. Cut the wood board to the desired size and shape
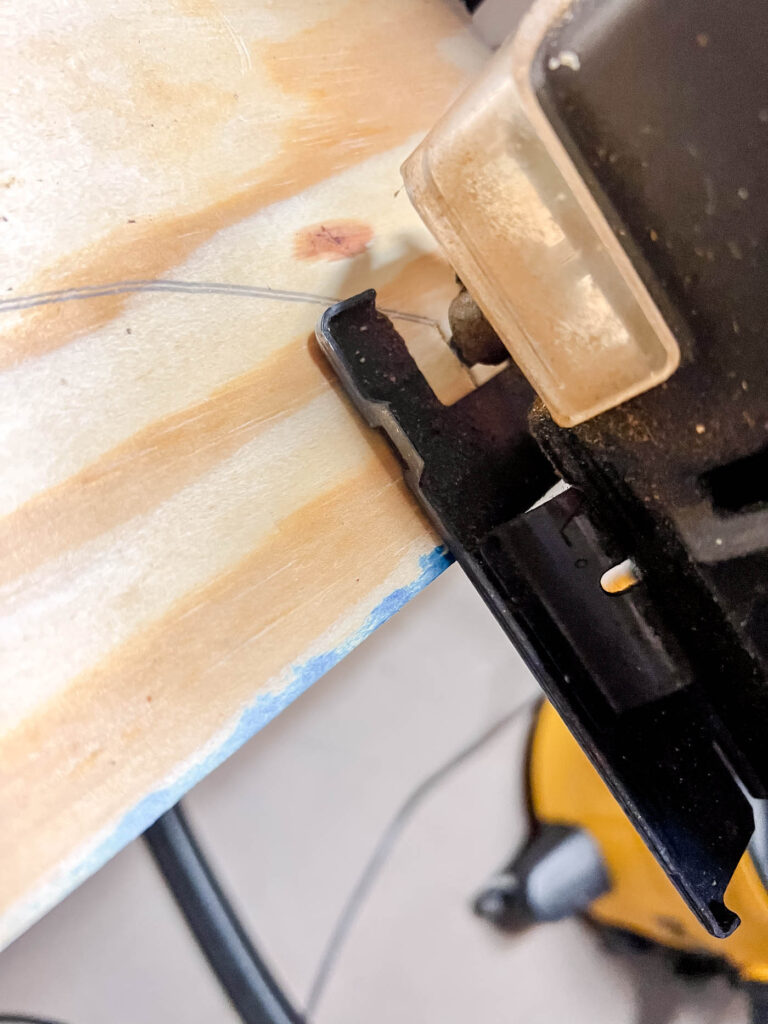
Using the template, trace the pattern on the piece of wood. Cut it out with a circular saw and jig saw. I cut the straight edges with my Ryobi circular saw, which is small and easy to handle.
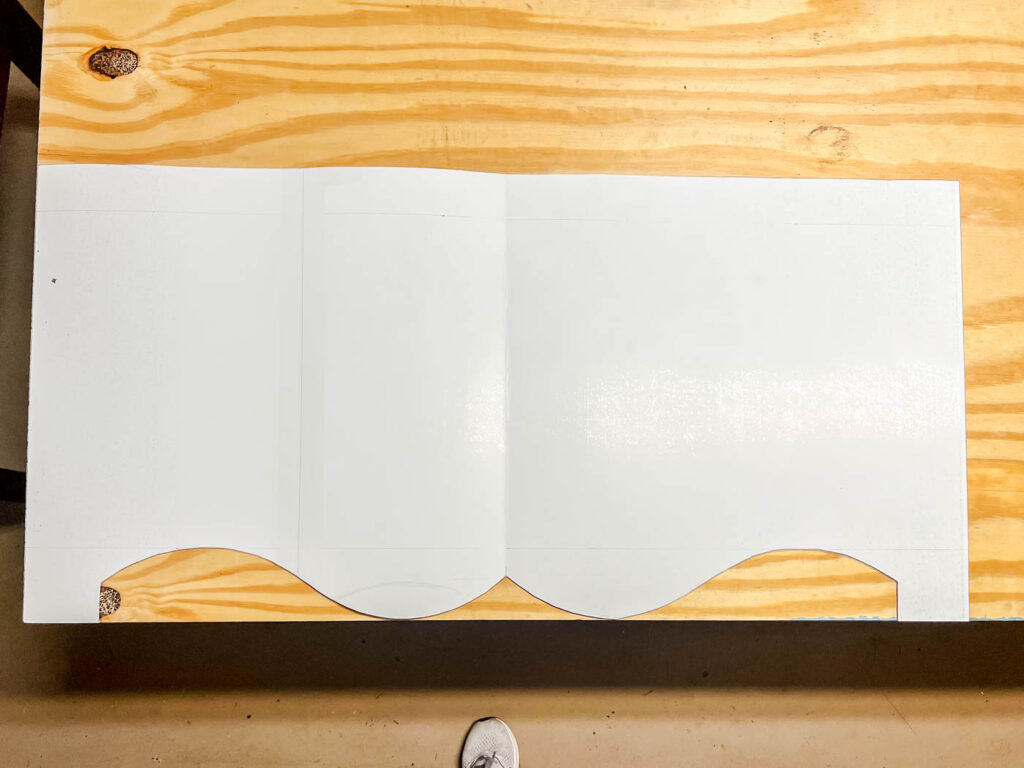
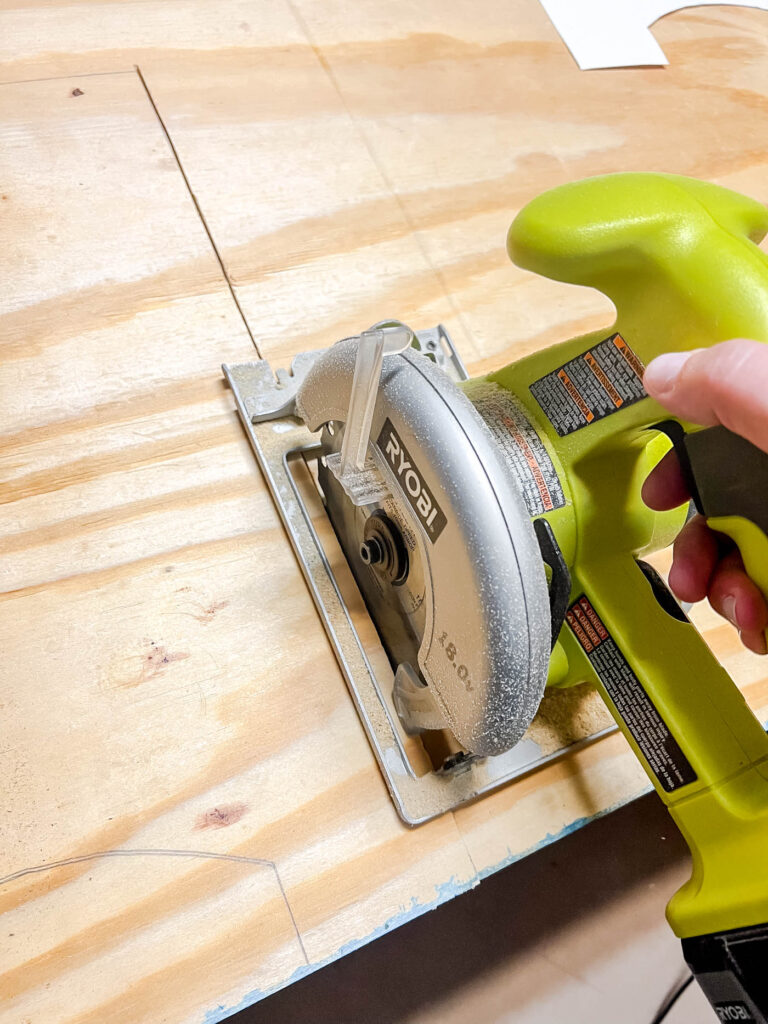
I used my jigsaw to cut the wavy pattern at the bottom. You will have to use a jigsaw for this part! I have an old one that my husband came with, but I’d get the Ryobi one if I didn’t have one already.
3. Cut the side and top pieces
Then cut the side and top pieces to the height and width of the board. See the diagram below.
The width of your top and wide pieces will determine how far from the wall the cornice will stick out. So, you will need to decide how far you want your cornice board to stick out from the wall before choosing and cutting the boards.
I had some leftover 2 x 4 boards laying around, so I used those. That meant my cornice board would stick out from the wall 3.5 inches, because a 4″ board is actually 3.5″.
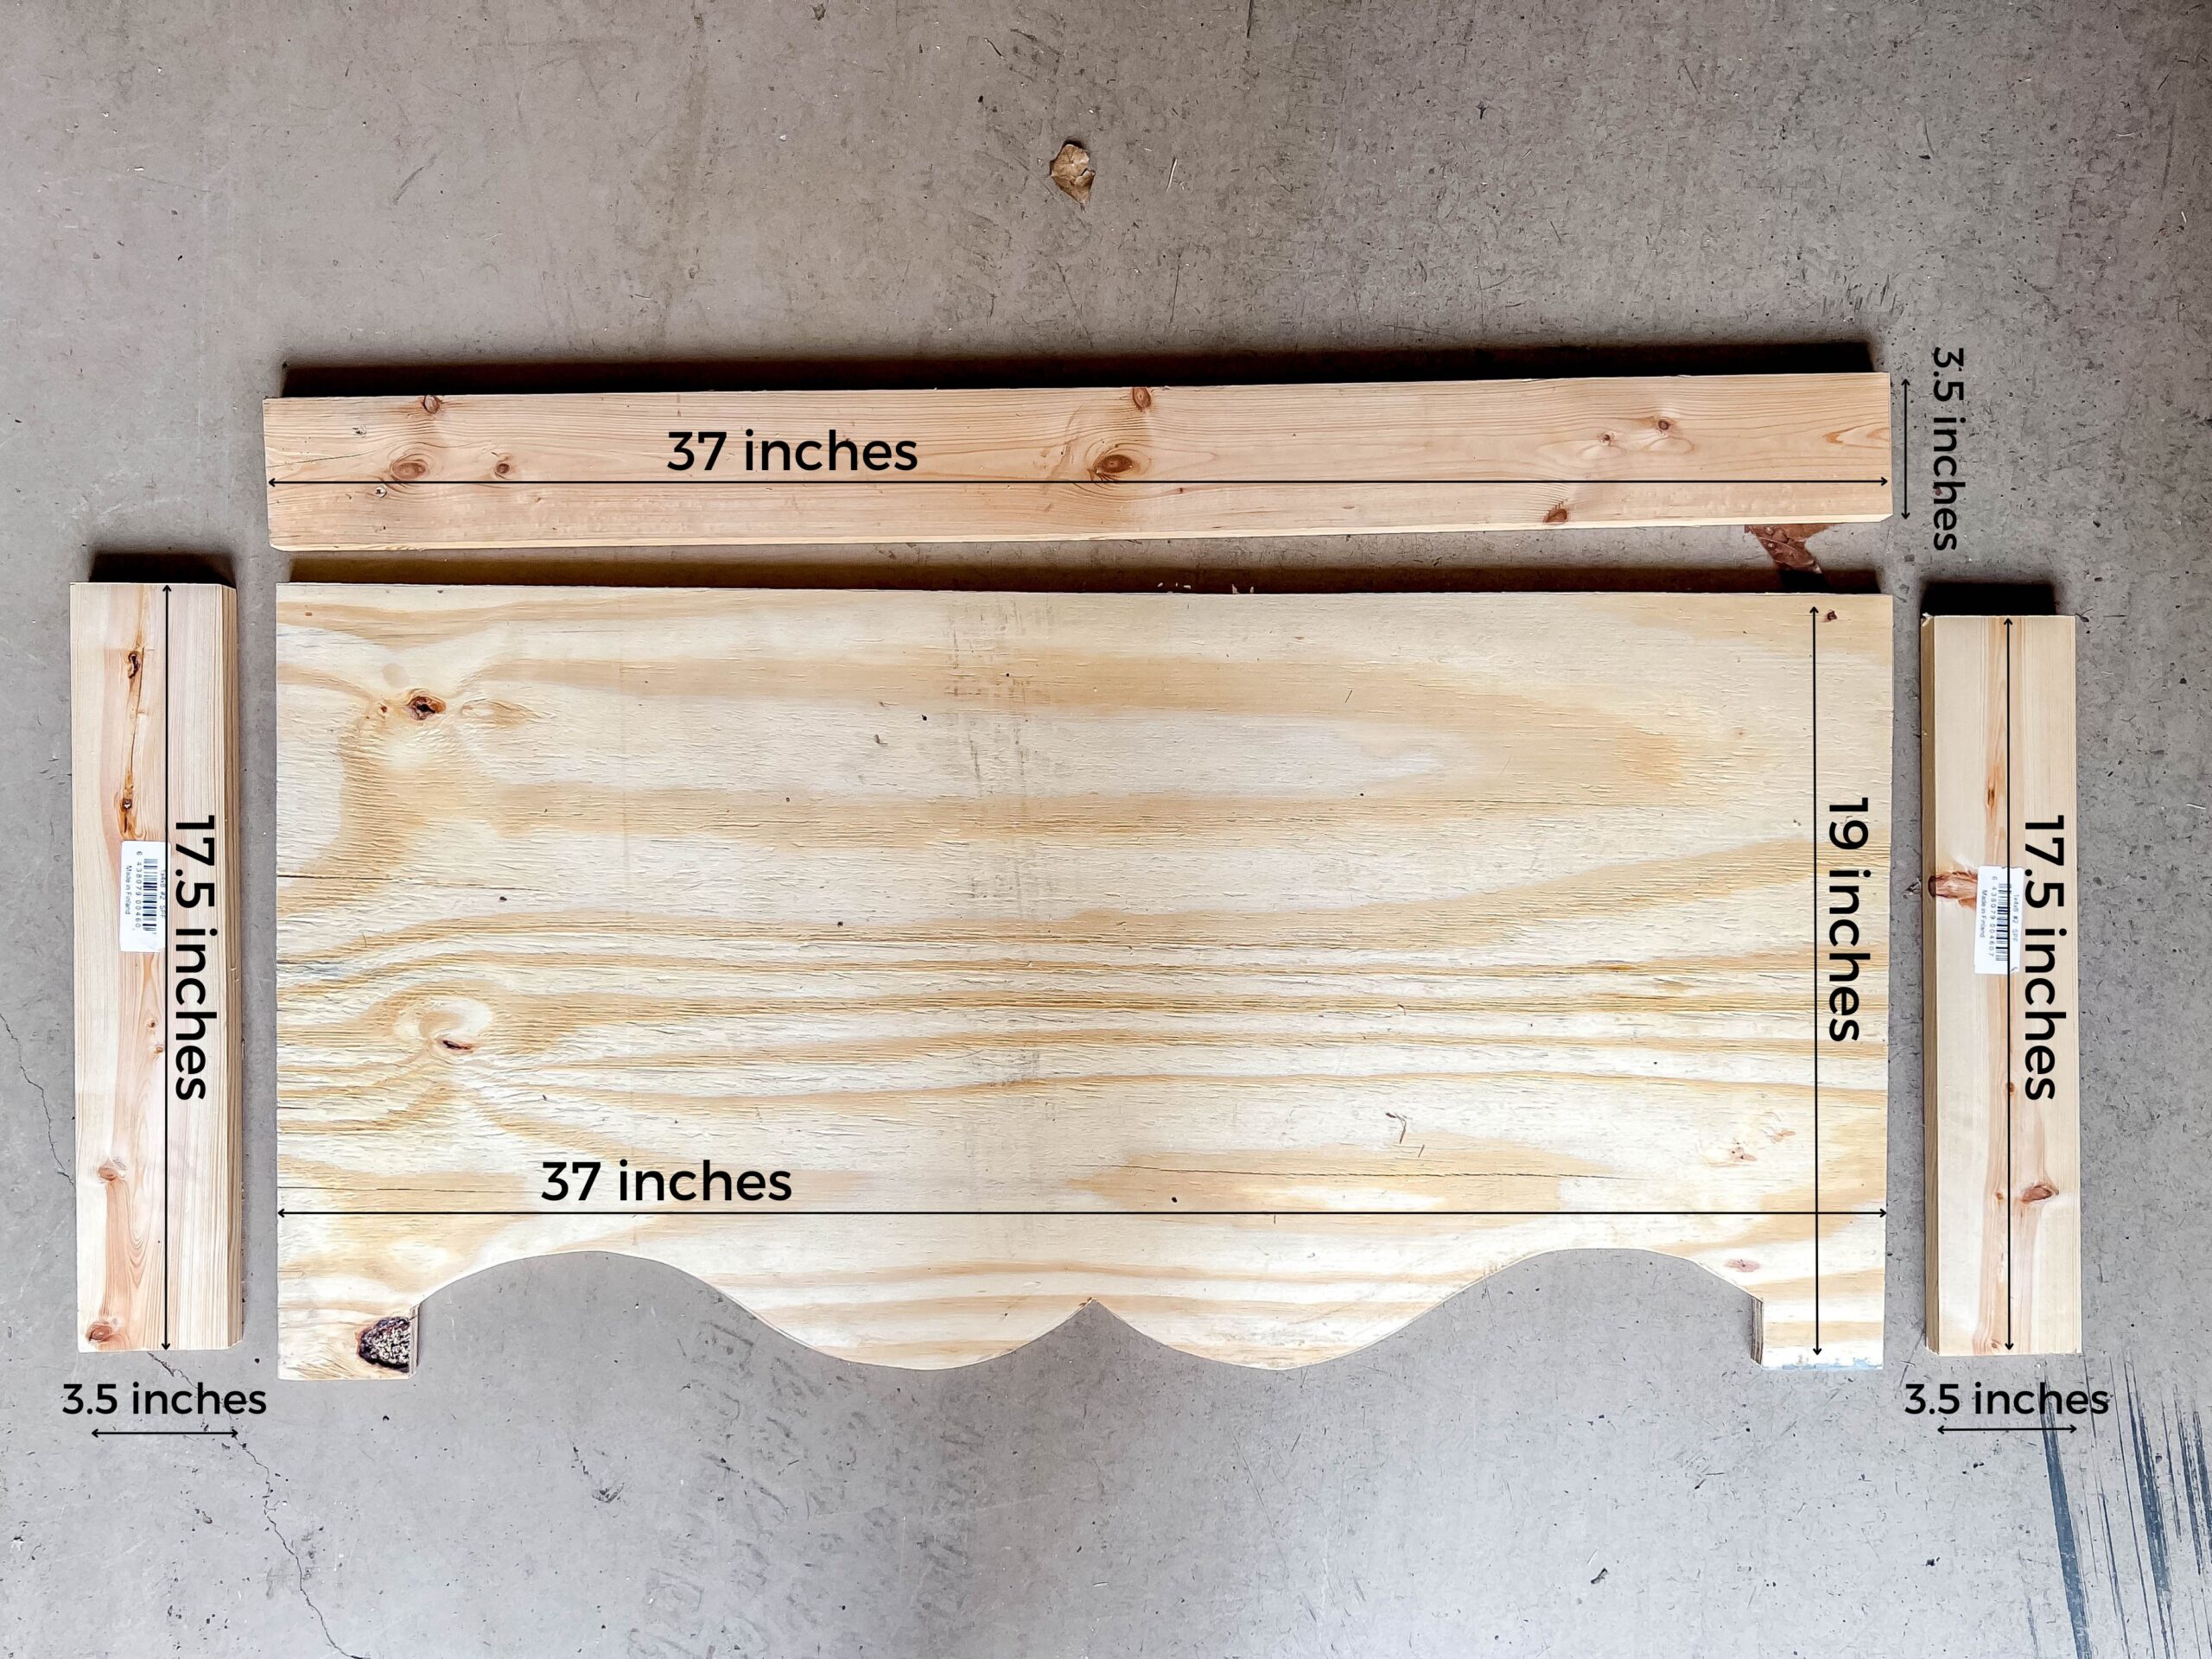
While it was deep enough to clear the blinds and window casing, it was almost too narrow for me to fit my hand and drill under the cornice to screw it in place. But, if I had been thinking, I could have just hung d-rings on the back of the board and hung it that way. In the end, it all worked out.
The top piece is the same width as the front of my board. But the side pieces were the same height as my front board, minus the depth of the top piece, which was 1.5 inches.
At this point, you can sand the edges smooth with sandpaper, but you don’t have to. Any rough edges will be covered with filler and fabric.
4. Attach the boards with braces
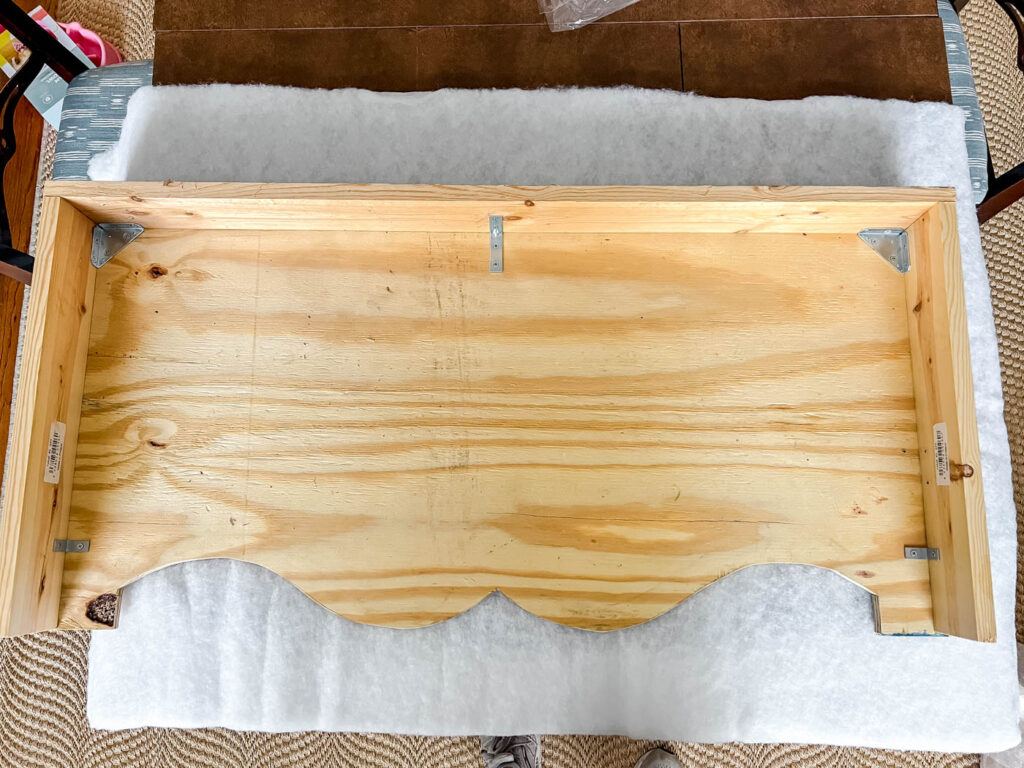
Use a corner brace in each corner to connect all of the pieces. And add some “L” brackets to the sides and top for additional support.
5. Attach filler padding to the cornice board
Cut the poly-fill cushion filler to the size of the board, allowing extra for wrapping around the board and stapling to the back. This will keep the edges of the board soft so that the end result looks better.
Make sure to smooth out any wrinkles and pull the filler tight before stapling.

Start at the top and fold the filler over the side and staple each section with your stapler, pulling the filler tight as you go. Fold the corners neatly, like you are wrapping a gift.
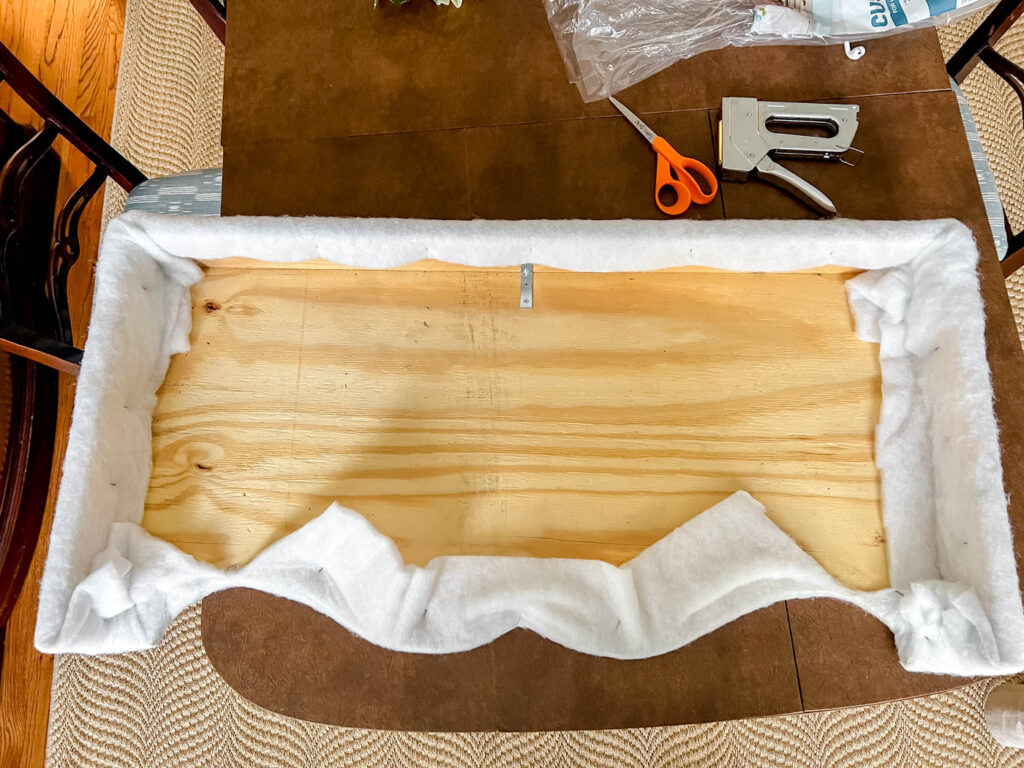
After I took the above photo, I cut away more of the excess filler so that it wouldn’t be too bulky under the fabric.
6. Center the fabric on the front of the board
Flip the board over to the front and make sure the pattern on the fabric is lined up exactly how you want it. It was helpful that my design made the middle of the board really easy to find.
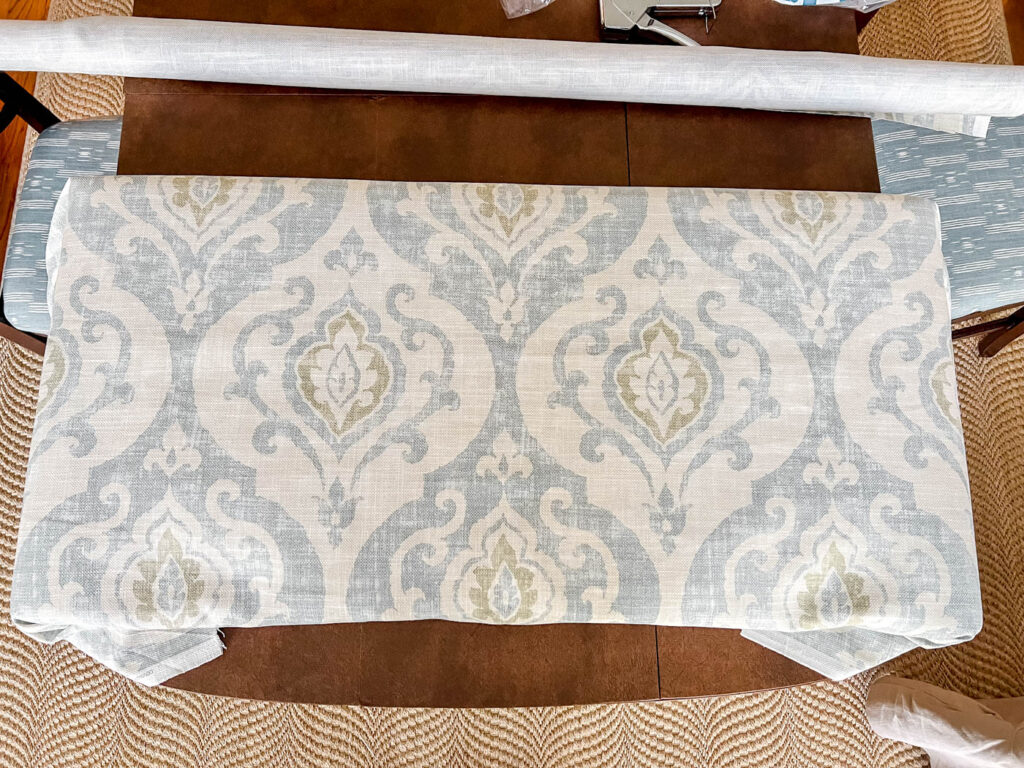
Carefully flip it back over, keeping the fabric in place.
7. Attach the fabric to the board using a staple gun
Starting at the middle top, again, start stapling the fabric to the back inside of the board. Pull it tight as you go. Make relief cuts, if needed when the board dips inward.
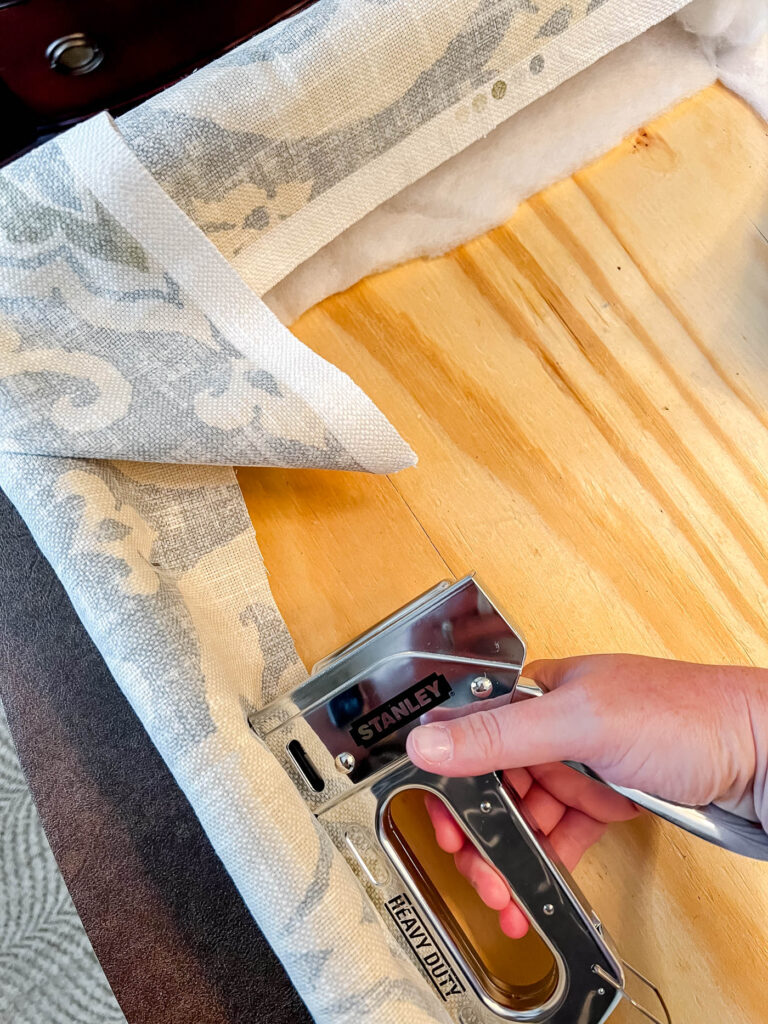
Wrap the corners neatly, like you would a wrapped gift.
8. Add a liner to the back, optional
If your window faces the street and you’re concerned about the back of the cornice board looking bad on the outside, you can make a liner. I used the poster board template, cut down the outside edge, wrapped it in a neutral fabric and hot glued it into the back.
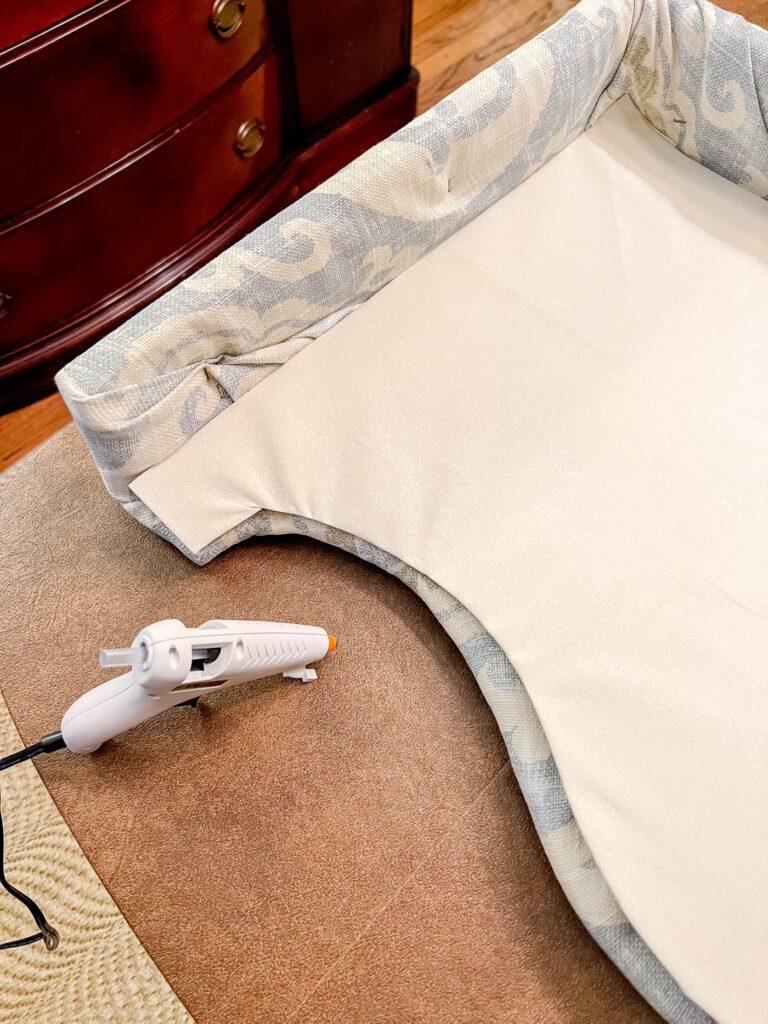
You can honestly hardly see if from the outside. But since my window faces the street, I wanted to make sure it didn’t look bad!
If you choose to, you can add other embellishments to the bottom, front or sides of your board. But I chose to keep mine plain with just the pattern to give it some extra character.
9. Attach the hardware and mount the cornice to the wall
In my opinion, you have two options here to mount the cornice board.
The first option is to mount two “L” brackets to the wall and set the cornice board on top of the “L” brackets. Then use screws from underneath the top of the cornice board to attach it to the brackets. I chose this option.
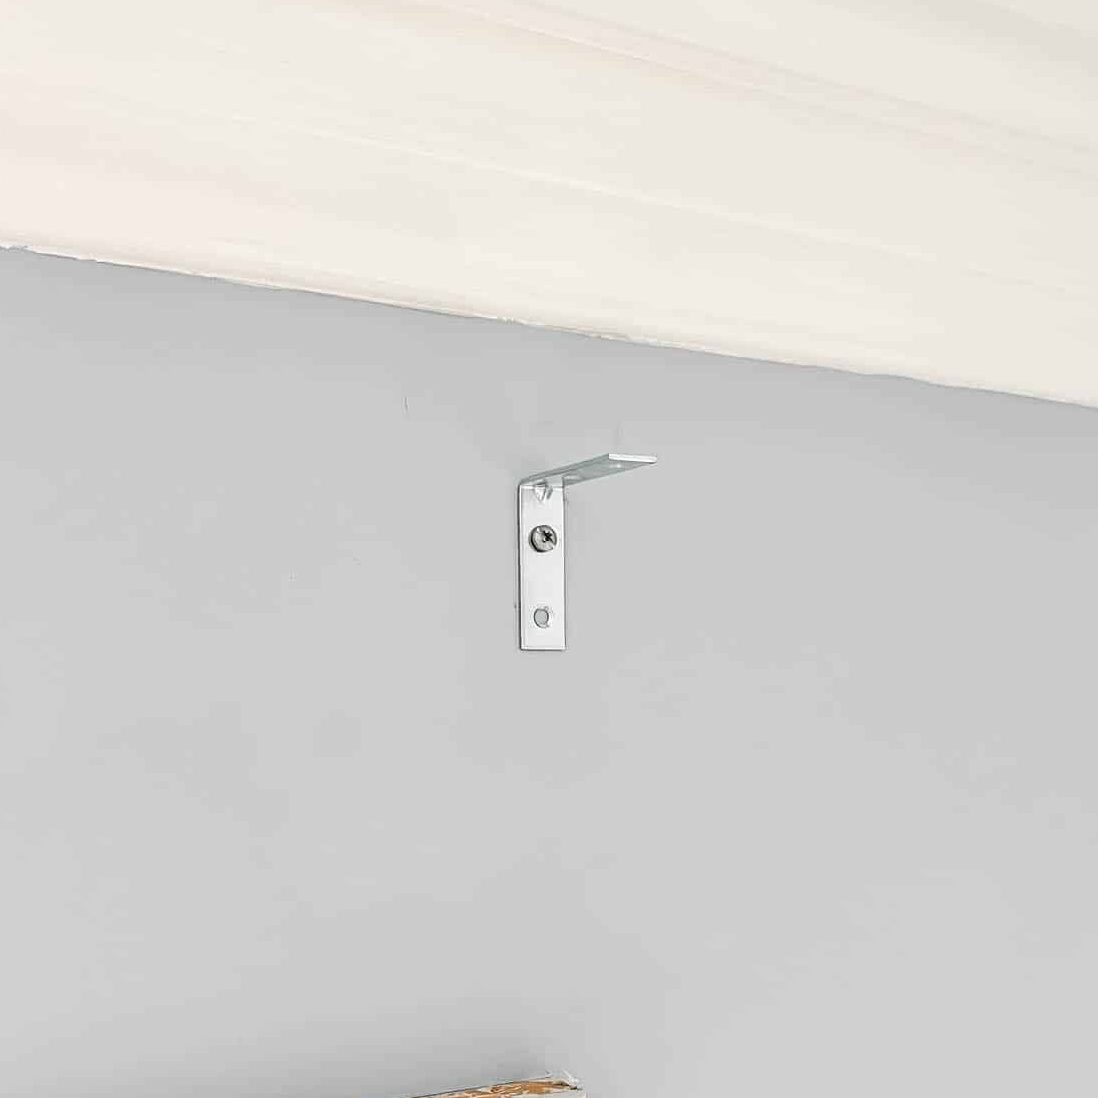

The second option would be to add D-rings to the back of the cornice board. Then add screws to the wall and hang the cornice board like you would any other picture or piece of art on the wall.
I should have done this because as I mentioned before, the opening between the cornice board and the wall was almost too small for me to fit my hand and drill into.
So, now I know! I’ll choose option 2, the next time I make one of these!
But, isn’t she a beauty?? I just love how it turned out!
Now that your cornice board is complete, you can sit back and enjoy your work. Or walk by the room every chance you get to steal another glimpse of it like I do!

Final Thoughts
And I will most definitely be making another cornice board! It was so easy, makes a huge statement, is not expensive and I LOVE how it turned out!!
I want to make them for both of my girls’ rooms because they both have single, small windows in their rooms, but they need something fun to accent them. It’s such an easy way to dress up a window when curtains don’t make sense.
Not only are they a great way to add a personal touch to your decor, but they are also cost-effective and can be made to fit any window size or shape. With the right tools and materials, you can create a beautiful and elegant cornice board and nobody will suspect you whipped it up in your garage one afternoon. Who knew that making your own window treatments could be so easy?
Thanks for this article. It will help me get going on some cornice boards for our kitchen and family room. could help notice that you had leftover 2x4s to use but then looks like you used 1 bys.
Very pretty. I made cornice boards for the windows in my daughter’s room in the late 1970s. We had similar windows to yours, but ours were over a hundred years old! Good traditional design just needs an updated fabric to work in an updated home!
I’m going to try this in August! I’ve been looking for these instructions all over the place. Thank you for making it so clear!
Oh yay!! I’m so glad it’s helpful! It’s really so doable and makes such a difference! I need to make two more for my girls’ rooms! xo, Laura
Looks great – nicely explained too 🙂 did you ever do the countertops? (you mention this isn’t done yet in your list of things you’ve completed). I’d love to see that video 😀
Hi,
Yes! Here is a link to the post about it: https://theturquoisehome.com/how-to-paint-diy-marble-countertops/
It looks beautiful!
Thank you, Amber!