DIY Concrete Tray with Dock Cleat Handles
Make a coastal concrete serving tray with dock cleats and an easy-to-make mold. Love this DIY concrete tray for summer hosting and parties!
I’ve said it before, but I’ll just keep on saying it – easy projects that are functional and pretty are my jam. I get such a DIY high when I can run to the hardware store and pick up a few items, then use them to decorate my house.
Like my jewelry organizer I made last month, or my chalk holder that can be found next to my chalkboard. Or even my farmhouse shelves in my kitchen. These are all examples of quick and easy project that are functional and cute! Oh and super budget friendly, too!
How to Make a Concrete Tray with Cleat Handles
Today I’m sharing my latest little project – my DIY Concrete Tray with Dock Cleat Handles!
I’ll be honest. I was super nervous about using concrete for the first time. I don’t know what I was worried about, though! It was so easy to use when I just followed the instructions!
I wanted to keep this project simple since this was my first time using concrete, but I gave mine a coastal vibe with dock cleat handles. This is how mine turned out!
This post contains affiliate links for your convenience. See my full disclosure policy.
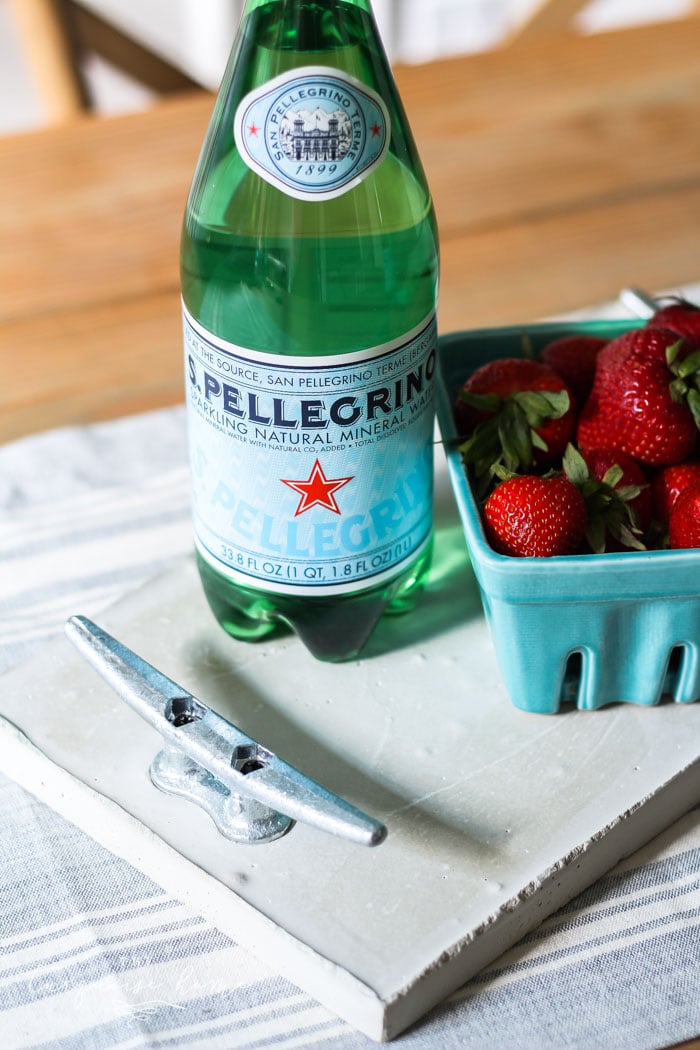
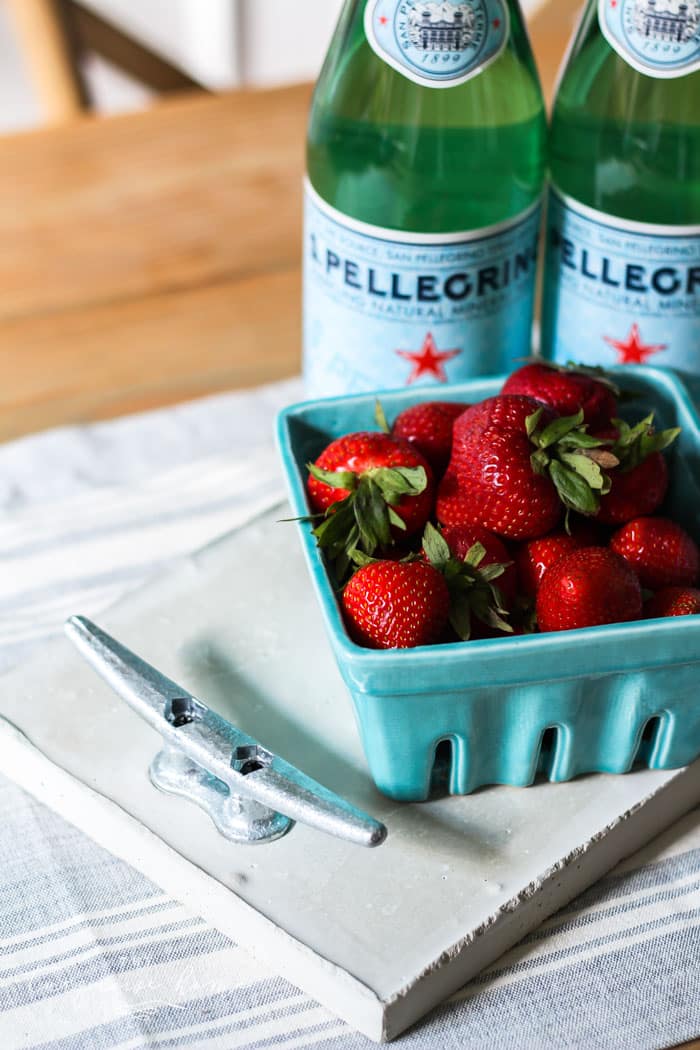
Don’t you just love those dock cleats for handles? I adore the subtle summery, coastal vibe. The tray is a little heavy – duh! – so I think it’s cute just sitting on the table showing off some pretty strawberries and would be cute for a fruit tray.
Supplies Needed for a DIY Concrete Tray
Tools:
- Drill
- Circular Saw
- 1 Small Bucket
- Measuring Cup
- Paint Stirrer
- Sand paper
- Painter’s Tape
- Measuring Tape
- Pencil
- Trowel
Materials:
- 1 – 1/2 inch plywood sheet
- 1 x 4 x 6 Common Board
- Multi-purpose Concrete
- 2 – Dock Cleats
- 1 1/2 inch Wood Screws
DIY Concrete Tray Step-by-Step Instructions
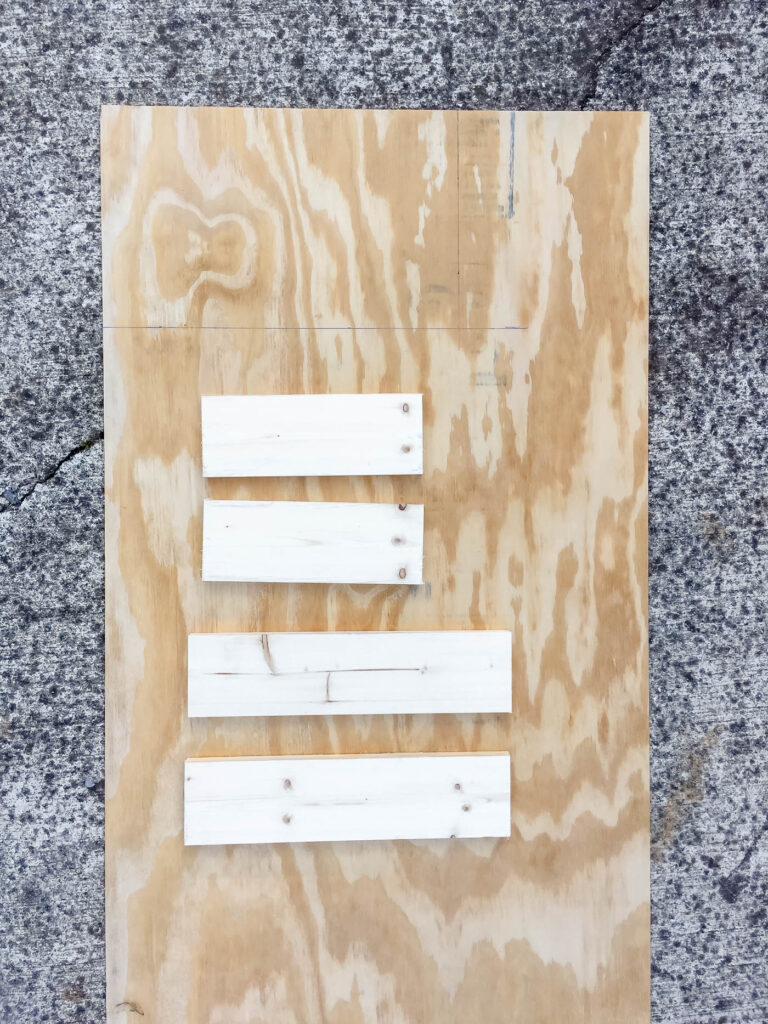
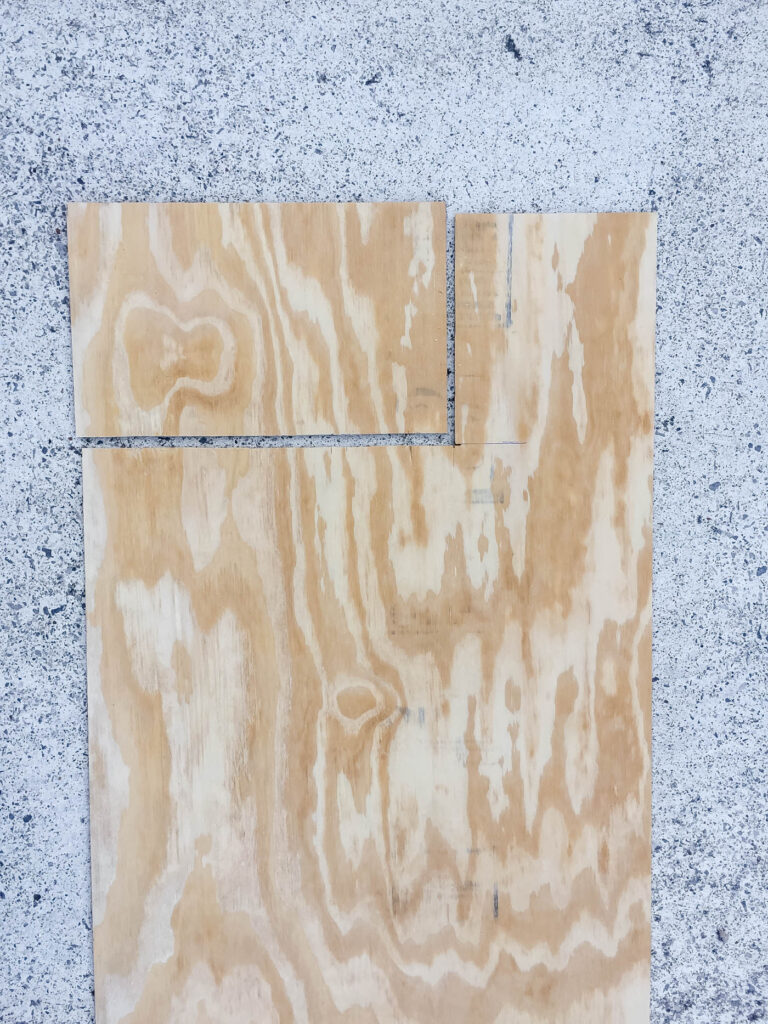
1. Cut the Pieces for the Tray Mold
You will need to cut the following pieces from the common board and the plywood:
- Two 1 x 4 x 14 inch long piece for the frame
- Two 1 x 4 x 9 1/2 inch short pieces for the frame
- One 15 1/2 inch x 9 1/2 inch plywood for the backing
2. Make a Box with the Frame Pieces
Screw the long and short frame pieces together with the wood screws to form a box.
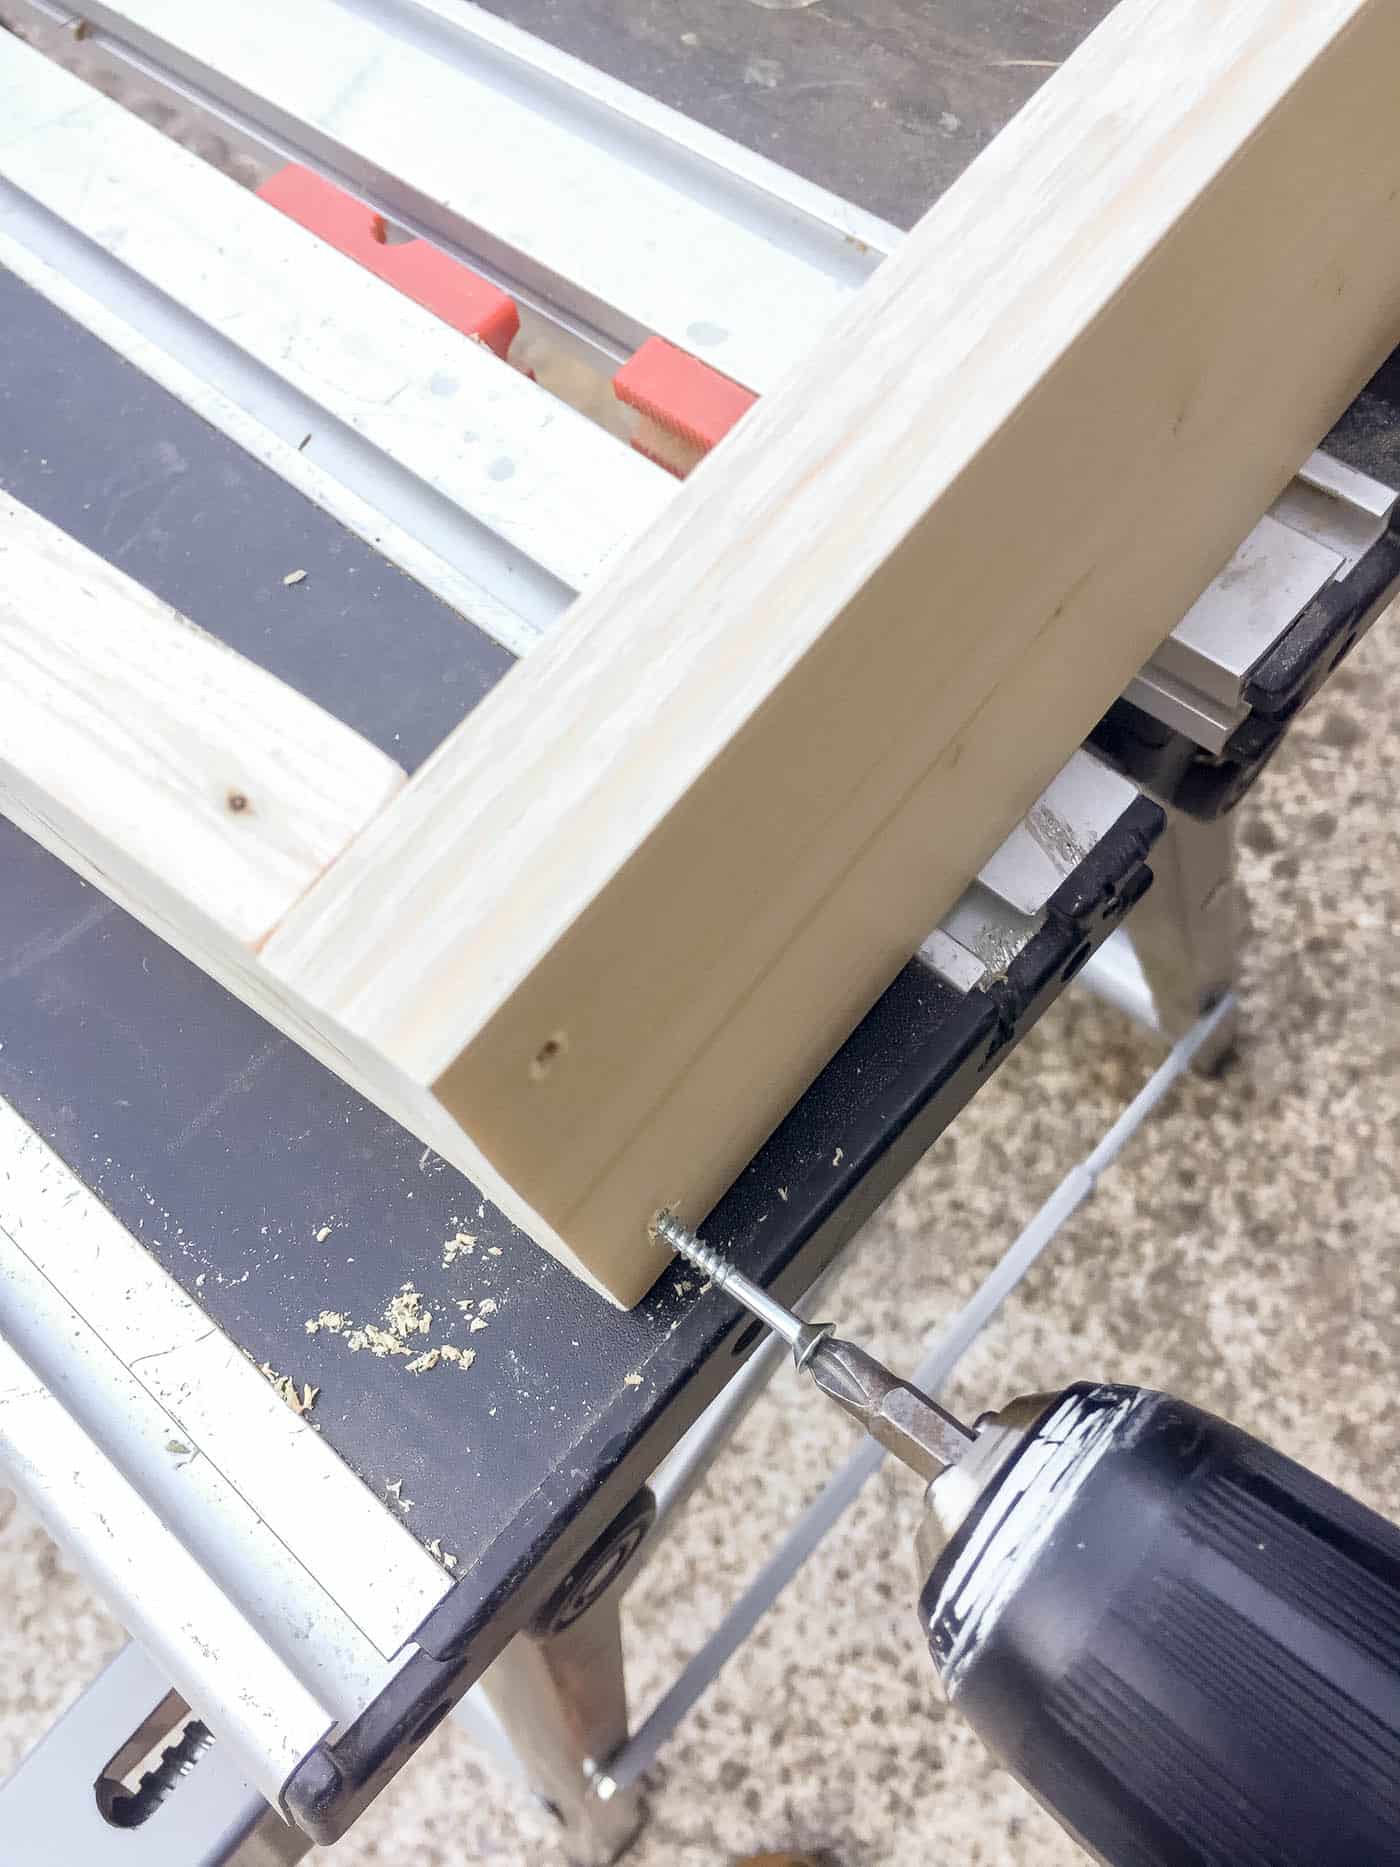
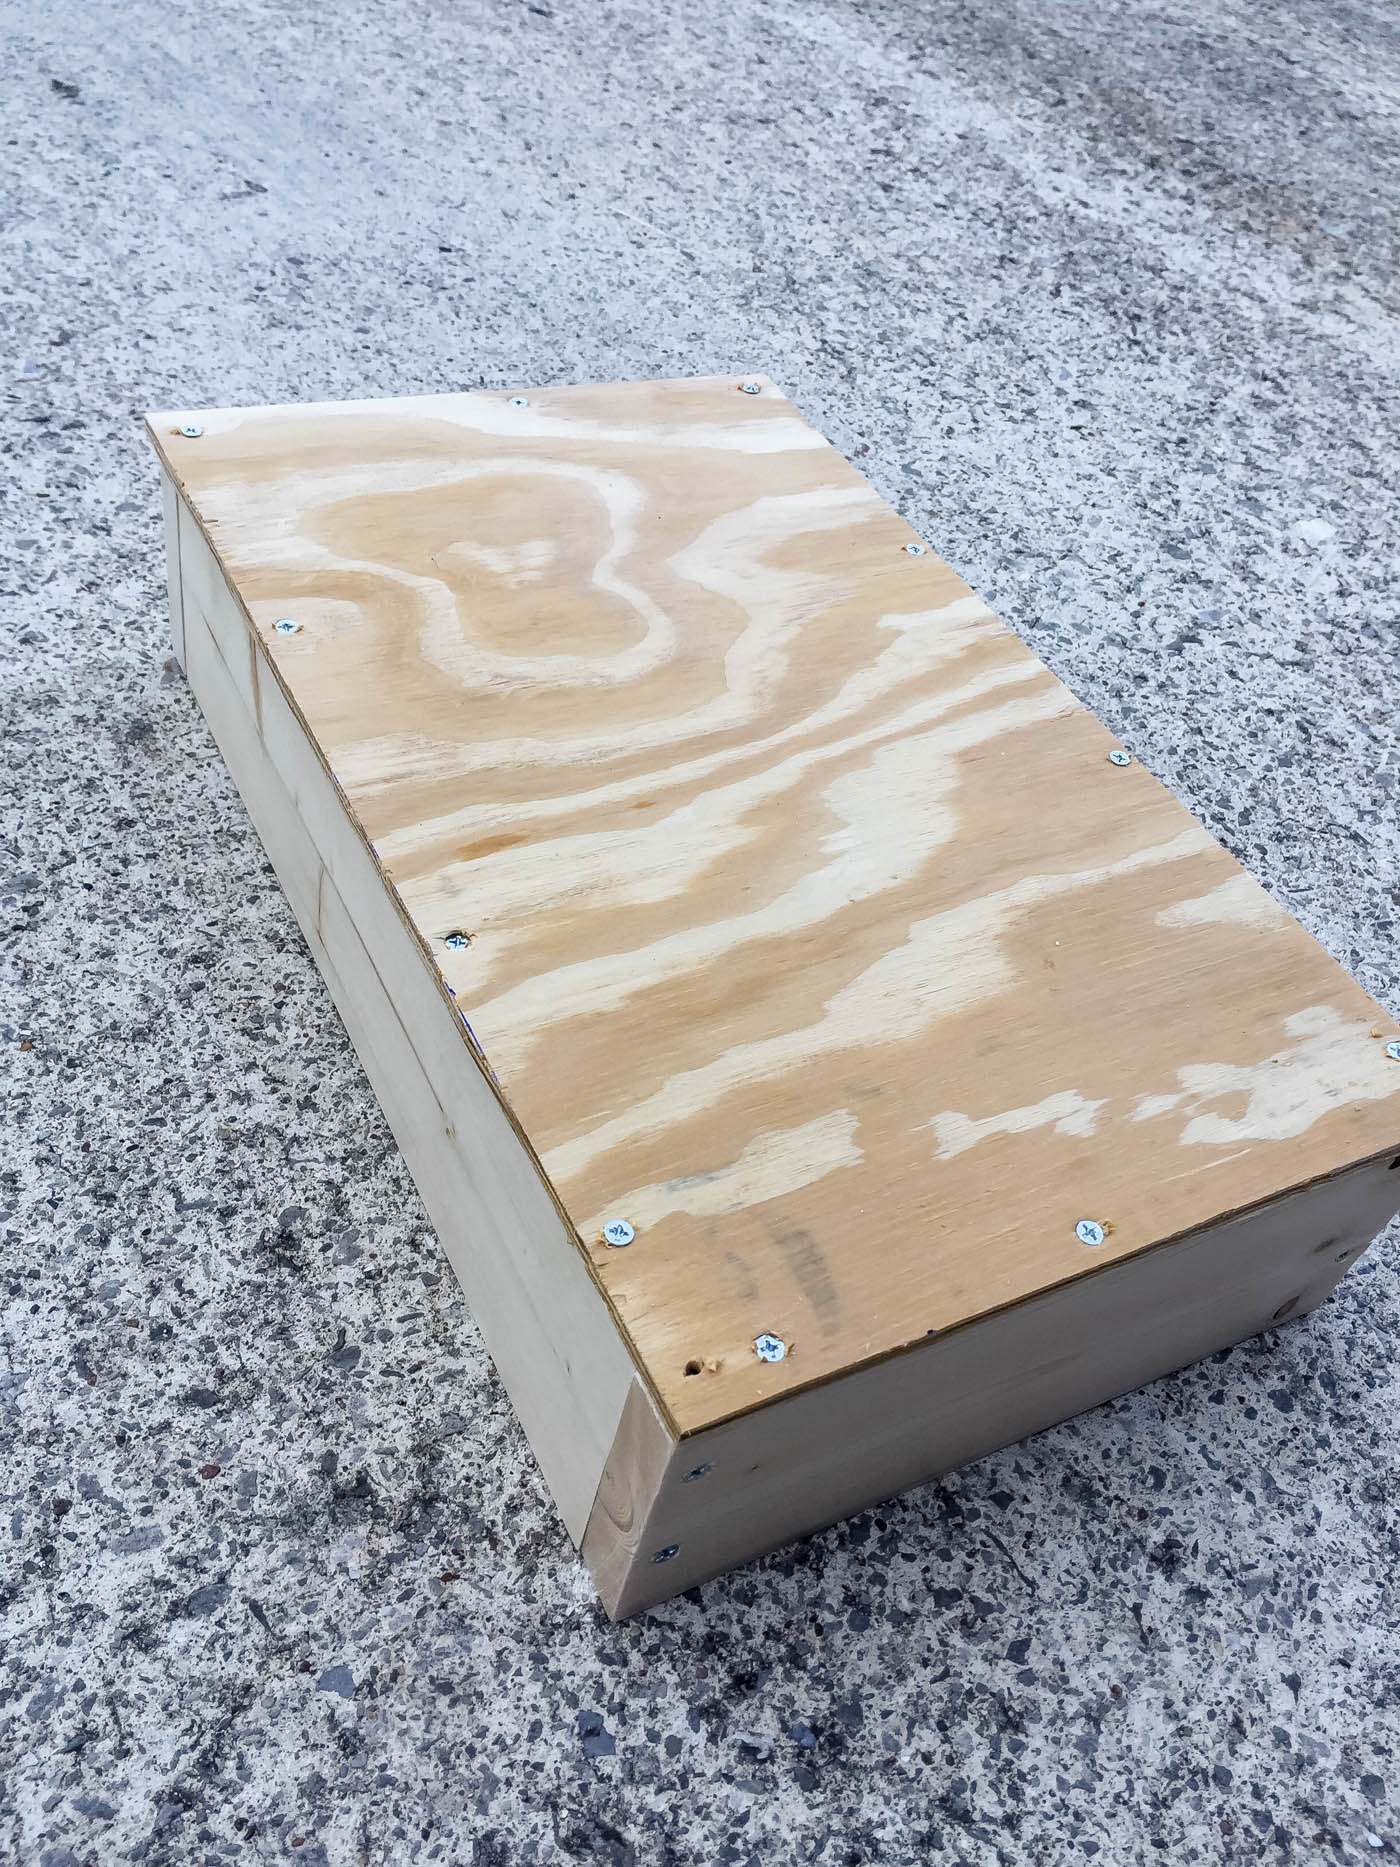
3. Attach the Plywood to the Bottom of the Box
Use more wood screws to tightly attach the plywood piece to the bottom of the box.
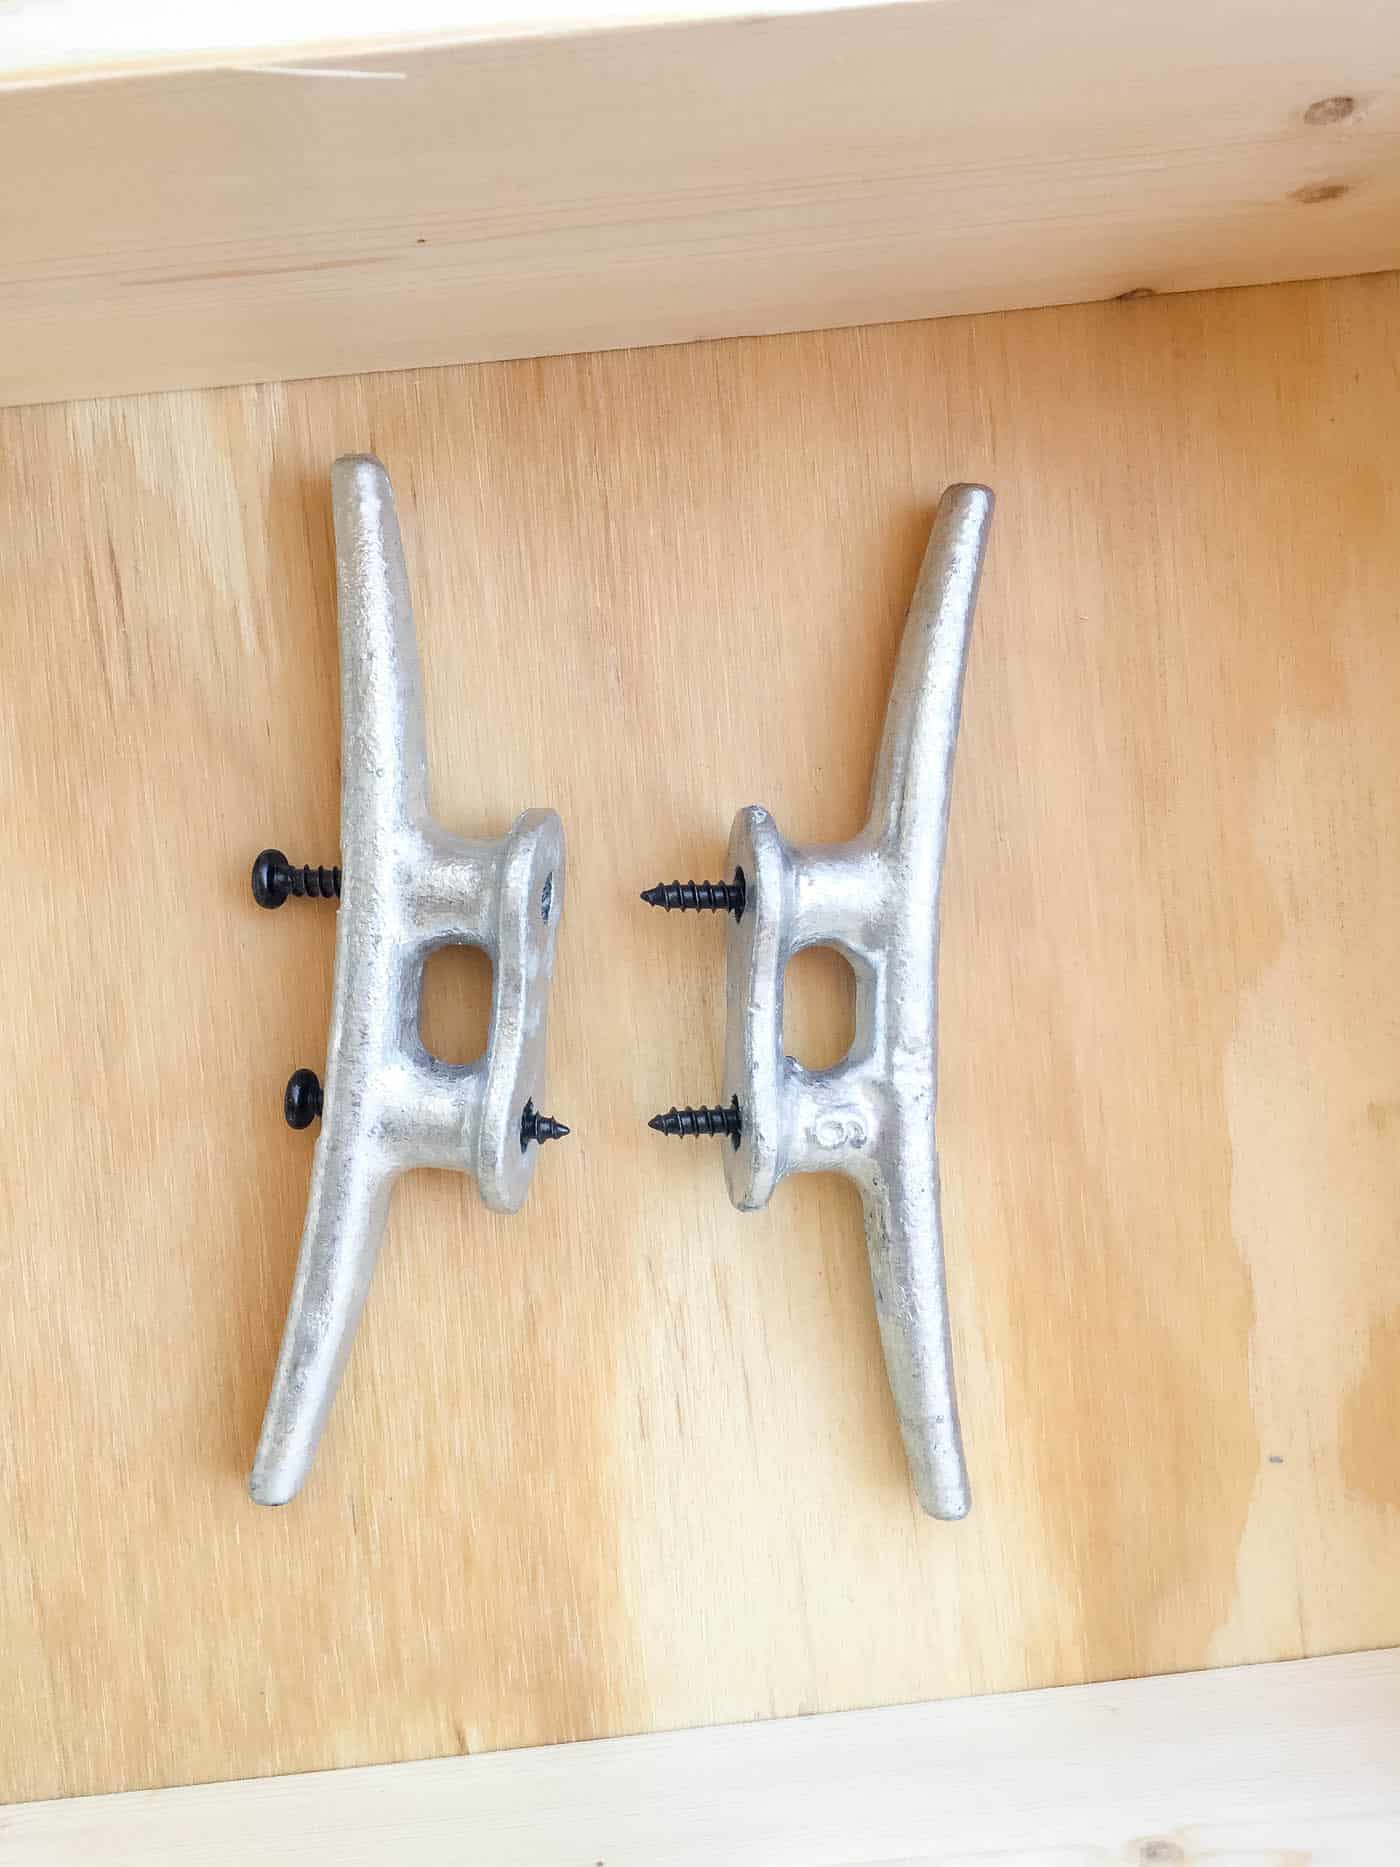
4. Affix the screws to the Dock Cleats
You will need to attach the smallest screws that came with the dock cleats. I recommend putting the screws in the handles so that the screws are set in the concrete. Otherwise the handles will just pop right off when you go to pick up your tray.
5. Mix the Concrete per the Instructions
Follow the directions exactly. You’ll want to mix it right before you pour it into the mold, so have everything ready to go before pouring.
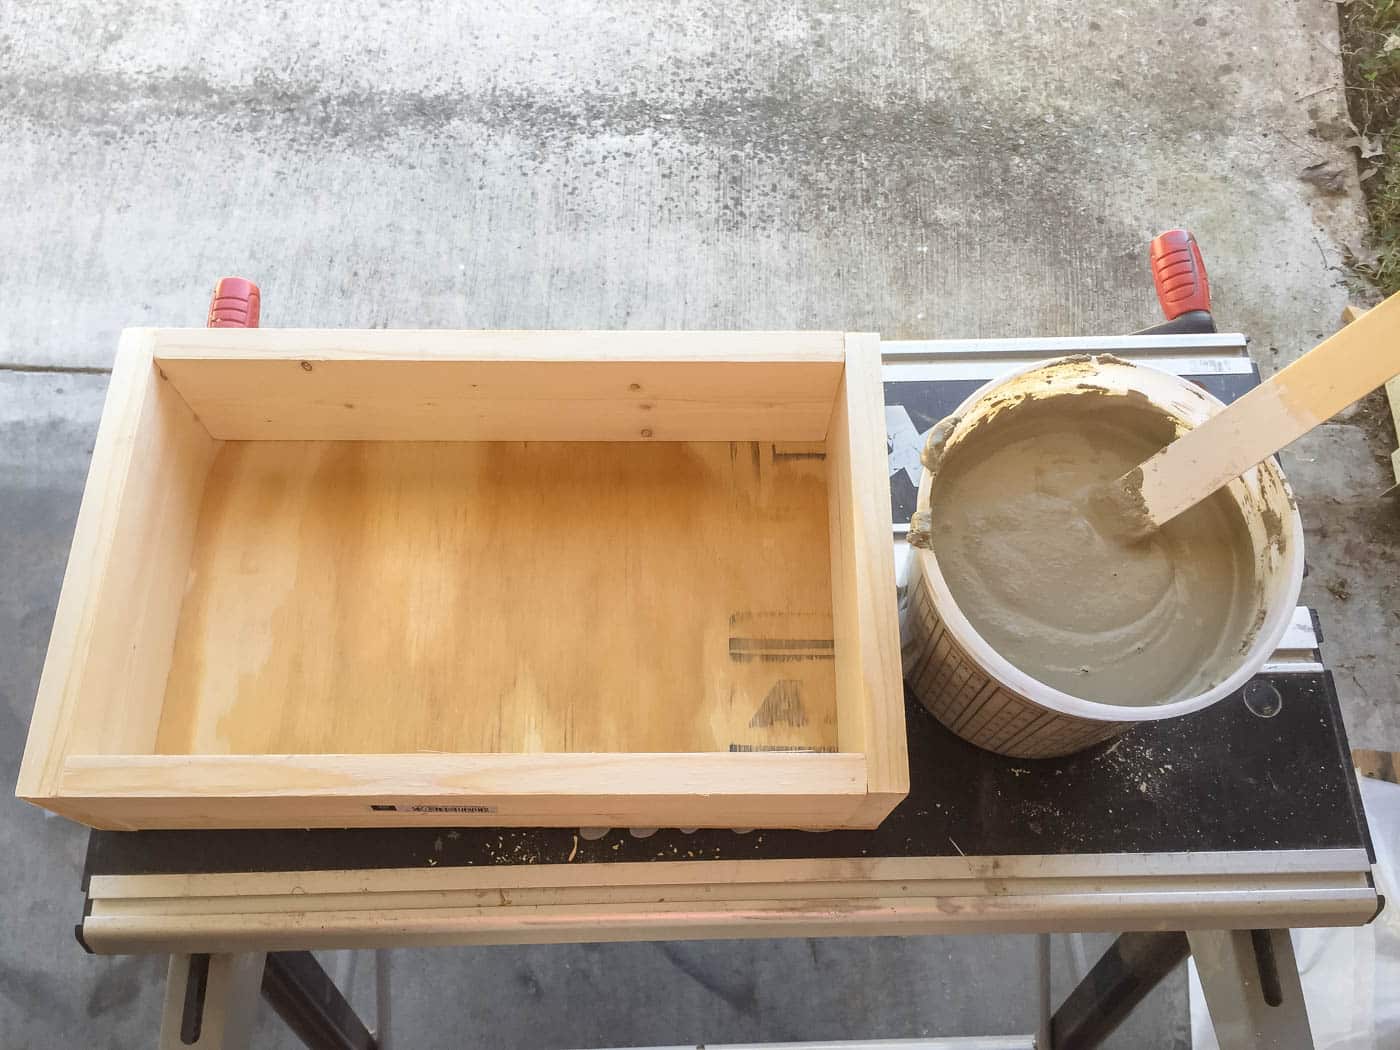
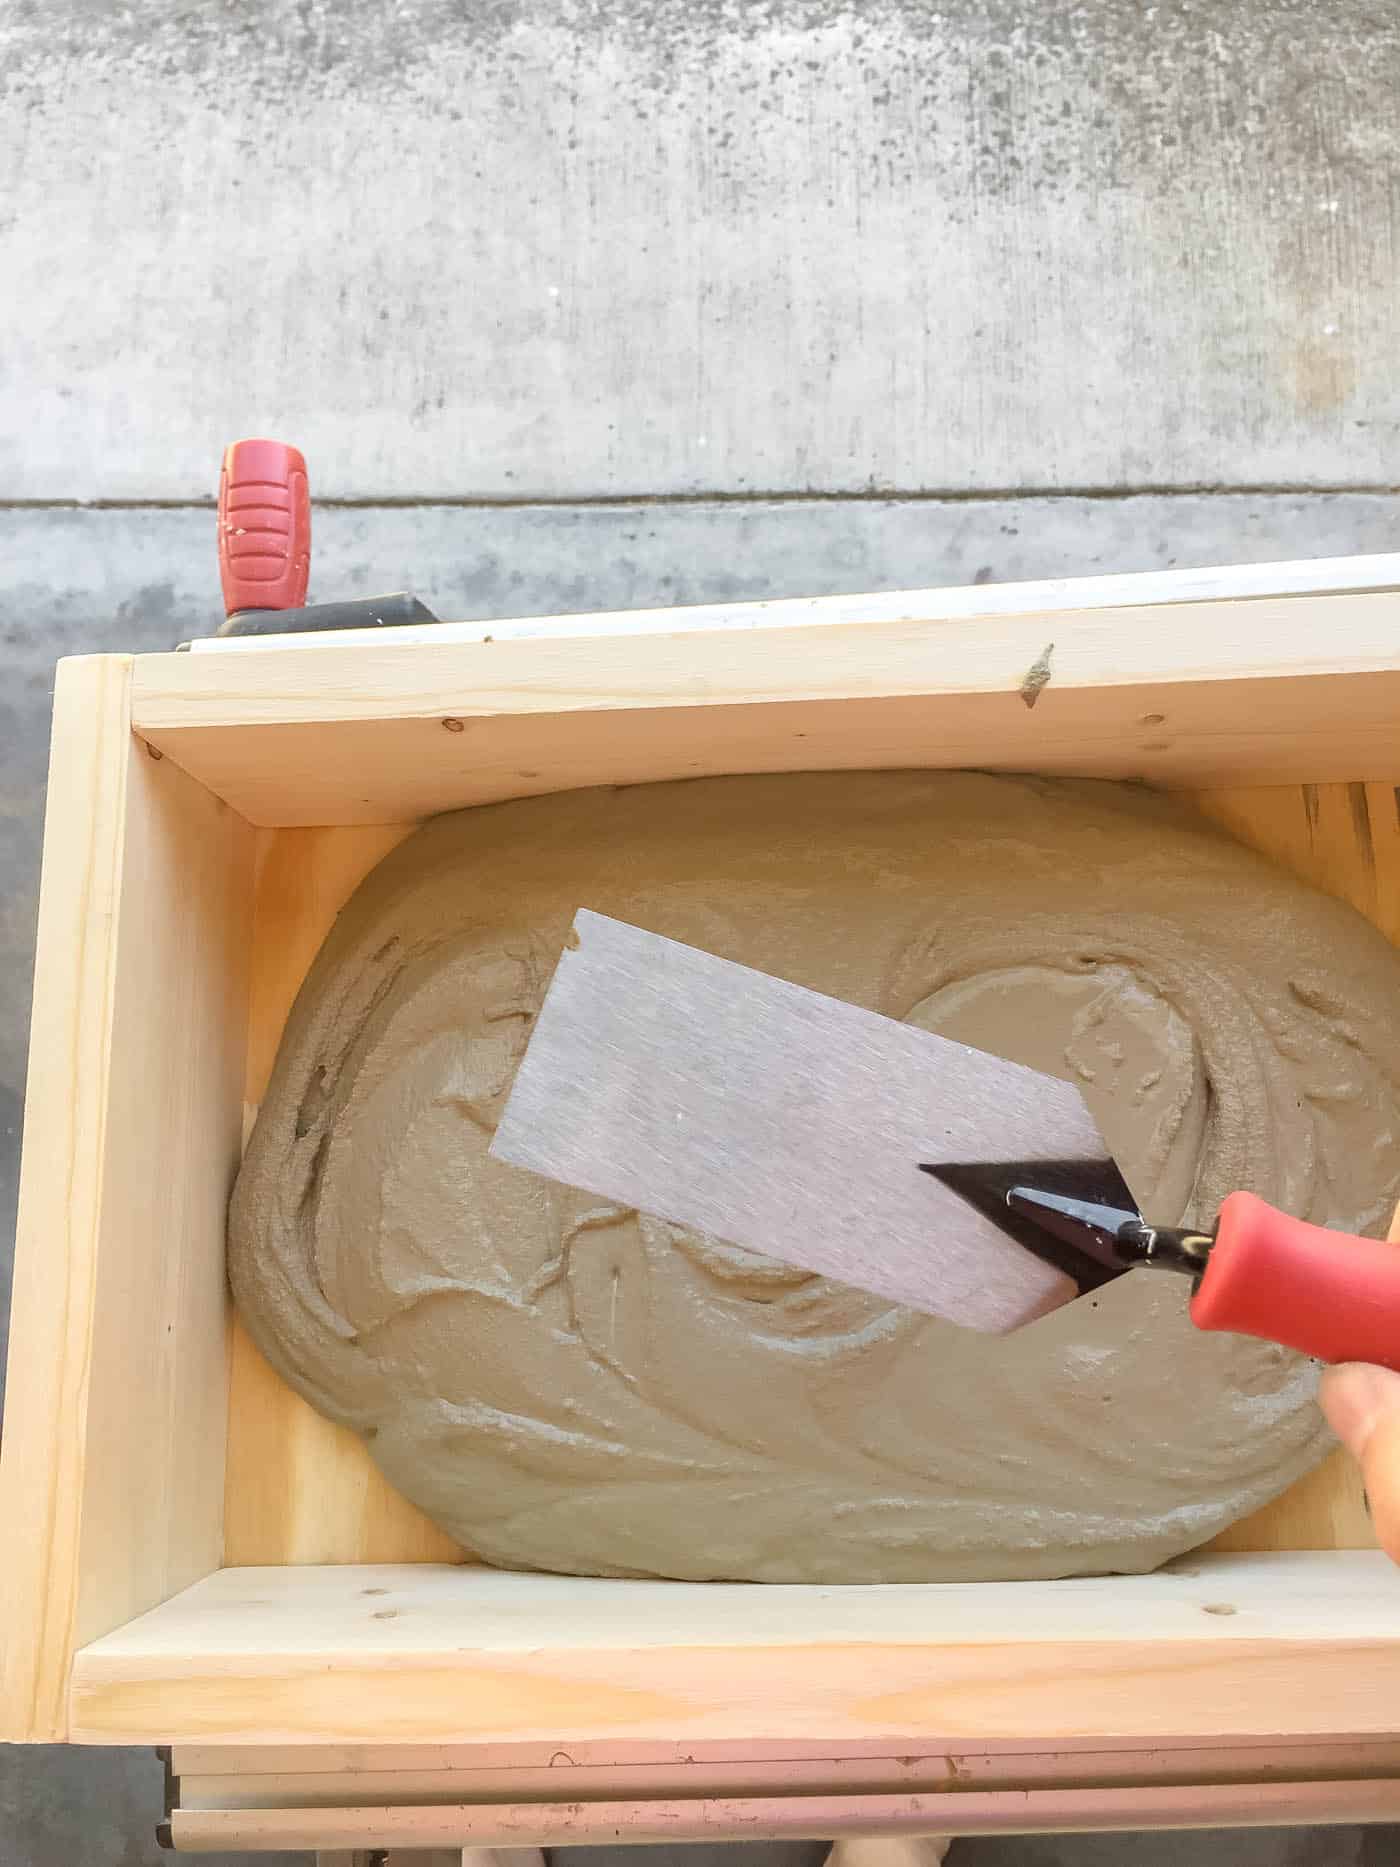
6. Pour the concrete into the Mold
Quickly pour the concrete into the mold, about 2-3 inches deep and tamp it down smooth with the trowel. Gently shake the mold, or rock it back and forth, to help the concrete settle and get the bubbles out.
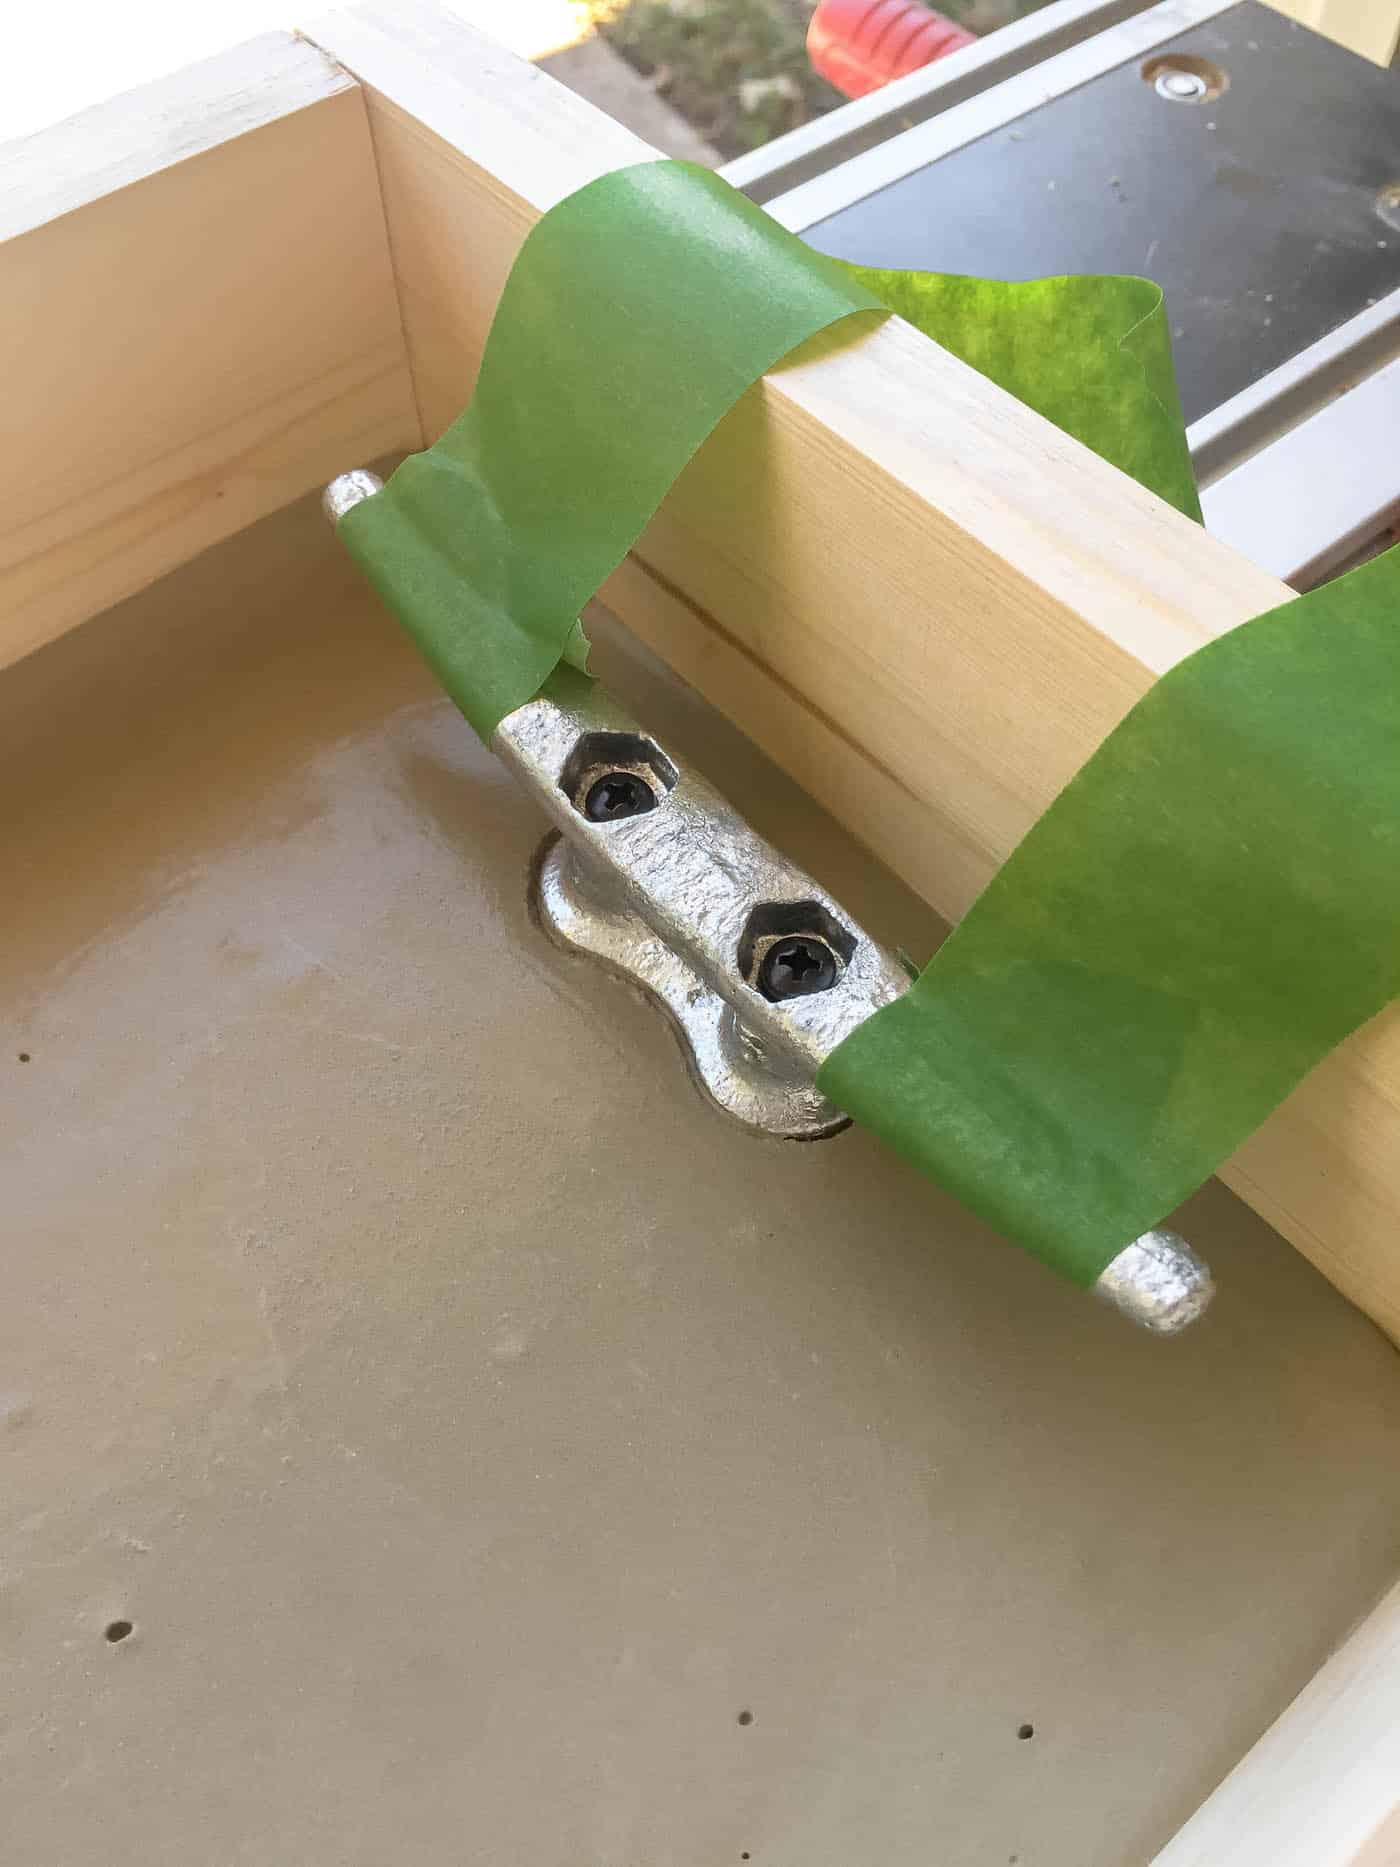
7. Wrap Cleats with Painter’s Tape and Set into Concrete after 5 Minutes
There was a slight learning curve with placing the handles on the tray at the right time. But you need to wait about 5 minutes after you pour the concert before you put the handles on it. I didn’t wait long enough before I put the first handle in it, so it sunk down a little bit. I had to figure out a way to hold it up while it set.
So, while you’re waiting the allotted 5 minutes, go ahead and wrap the handles with painter’s tape, so they will stay upright and won’t sink down into the concrete.
Once 5 minutes has passed, carefully set the cleat handles into the concrete. And use the painter’s tape to attach them to the side of the form.
8. Let the Tray Dry
Follow the instructions on your concrete for exact drying times.
9. Carefully Remove the Form
Once the tray is completely dry, disassemble the form by unscrewing the screws and gently prying it off the tray.
10. Sand down Rough Edges
And enjoy the use of your new concrete tray!
Oh, and if you do plan to use your tray with food touching it, I would recommend sealing it with a food-safe concrete sealer like this one.
Such a super cute tray, though! Perfect for hosting parties in the backyard all summer long!
It’s just so fun and easy to make!
More Posts You Will Love:


Oh wow, so great looking–I love the cleats! And so will my sailor man! But I simply cannot get to the Home Depot event, so thanks in advance for being willing to present the project here!