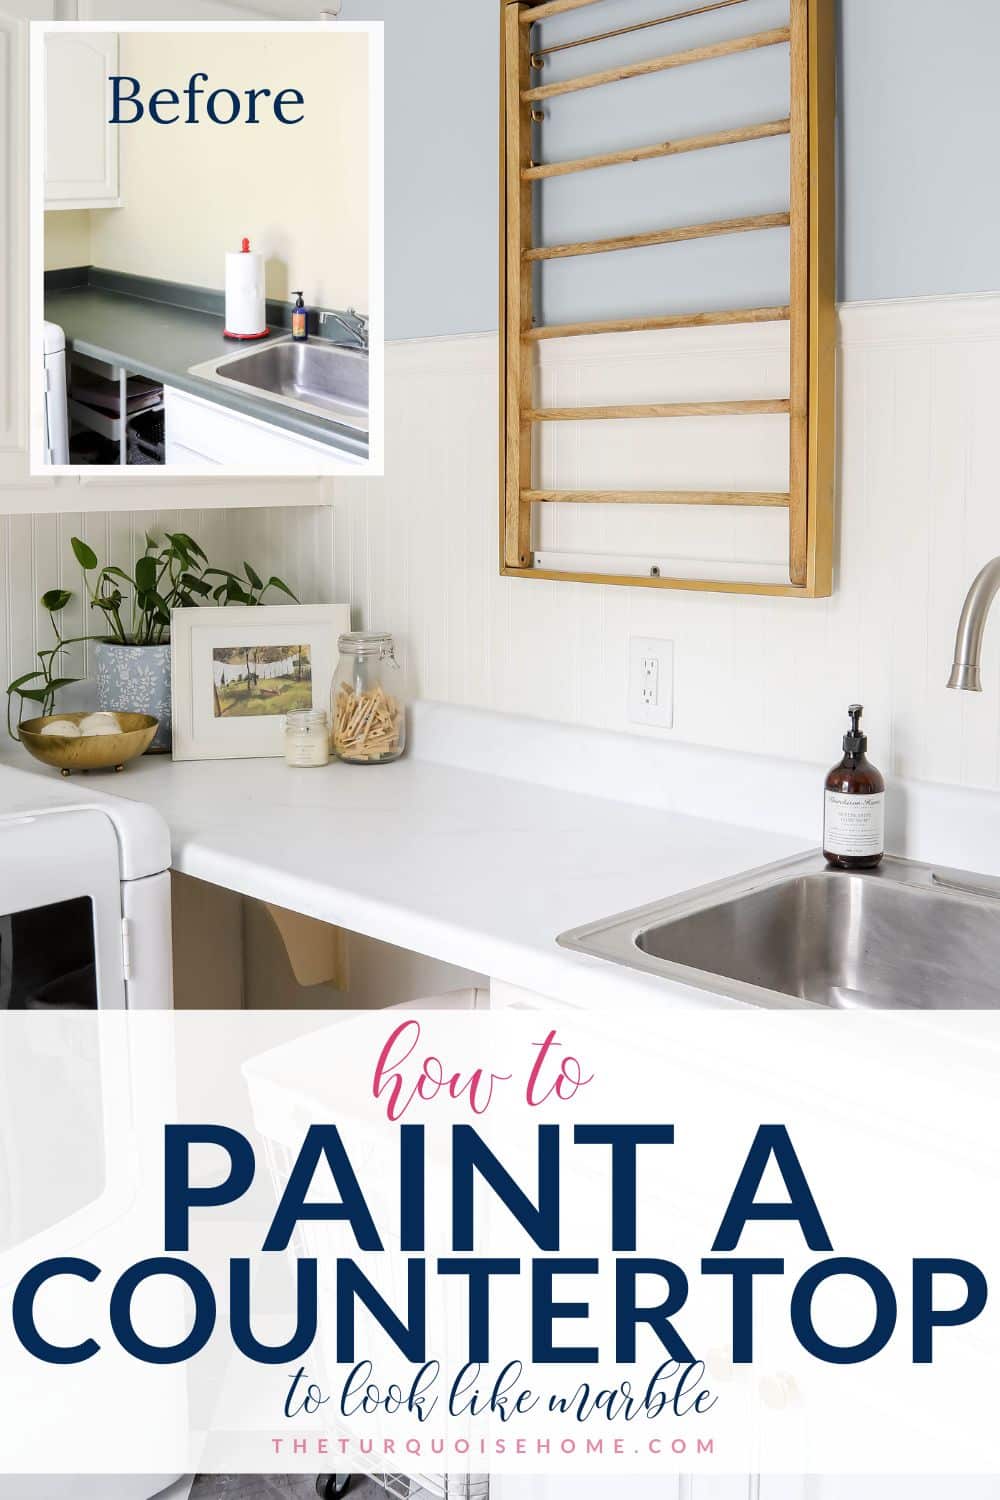
How to Paint Countertops to Look Like Marble
Brighten up your countertops with this easy step-by-step guide on to DIY marble countertops. This is a quick and easy project to cover old, outdated or ugly countertops in your home!
Are you tired of your old, outdated countertops? Are you looking for a budget-friendly way to give your kitchen a fresh, new look? Look no further!
Painting your countertops is an easy and affordable way to update your kitchen, laundry room or bathroom without breaking the bank. In this blog post, we will teach you how to paint your countertops to give them a beautiful, marble look. So, let’s get started!
Our Laundry Room Makeover
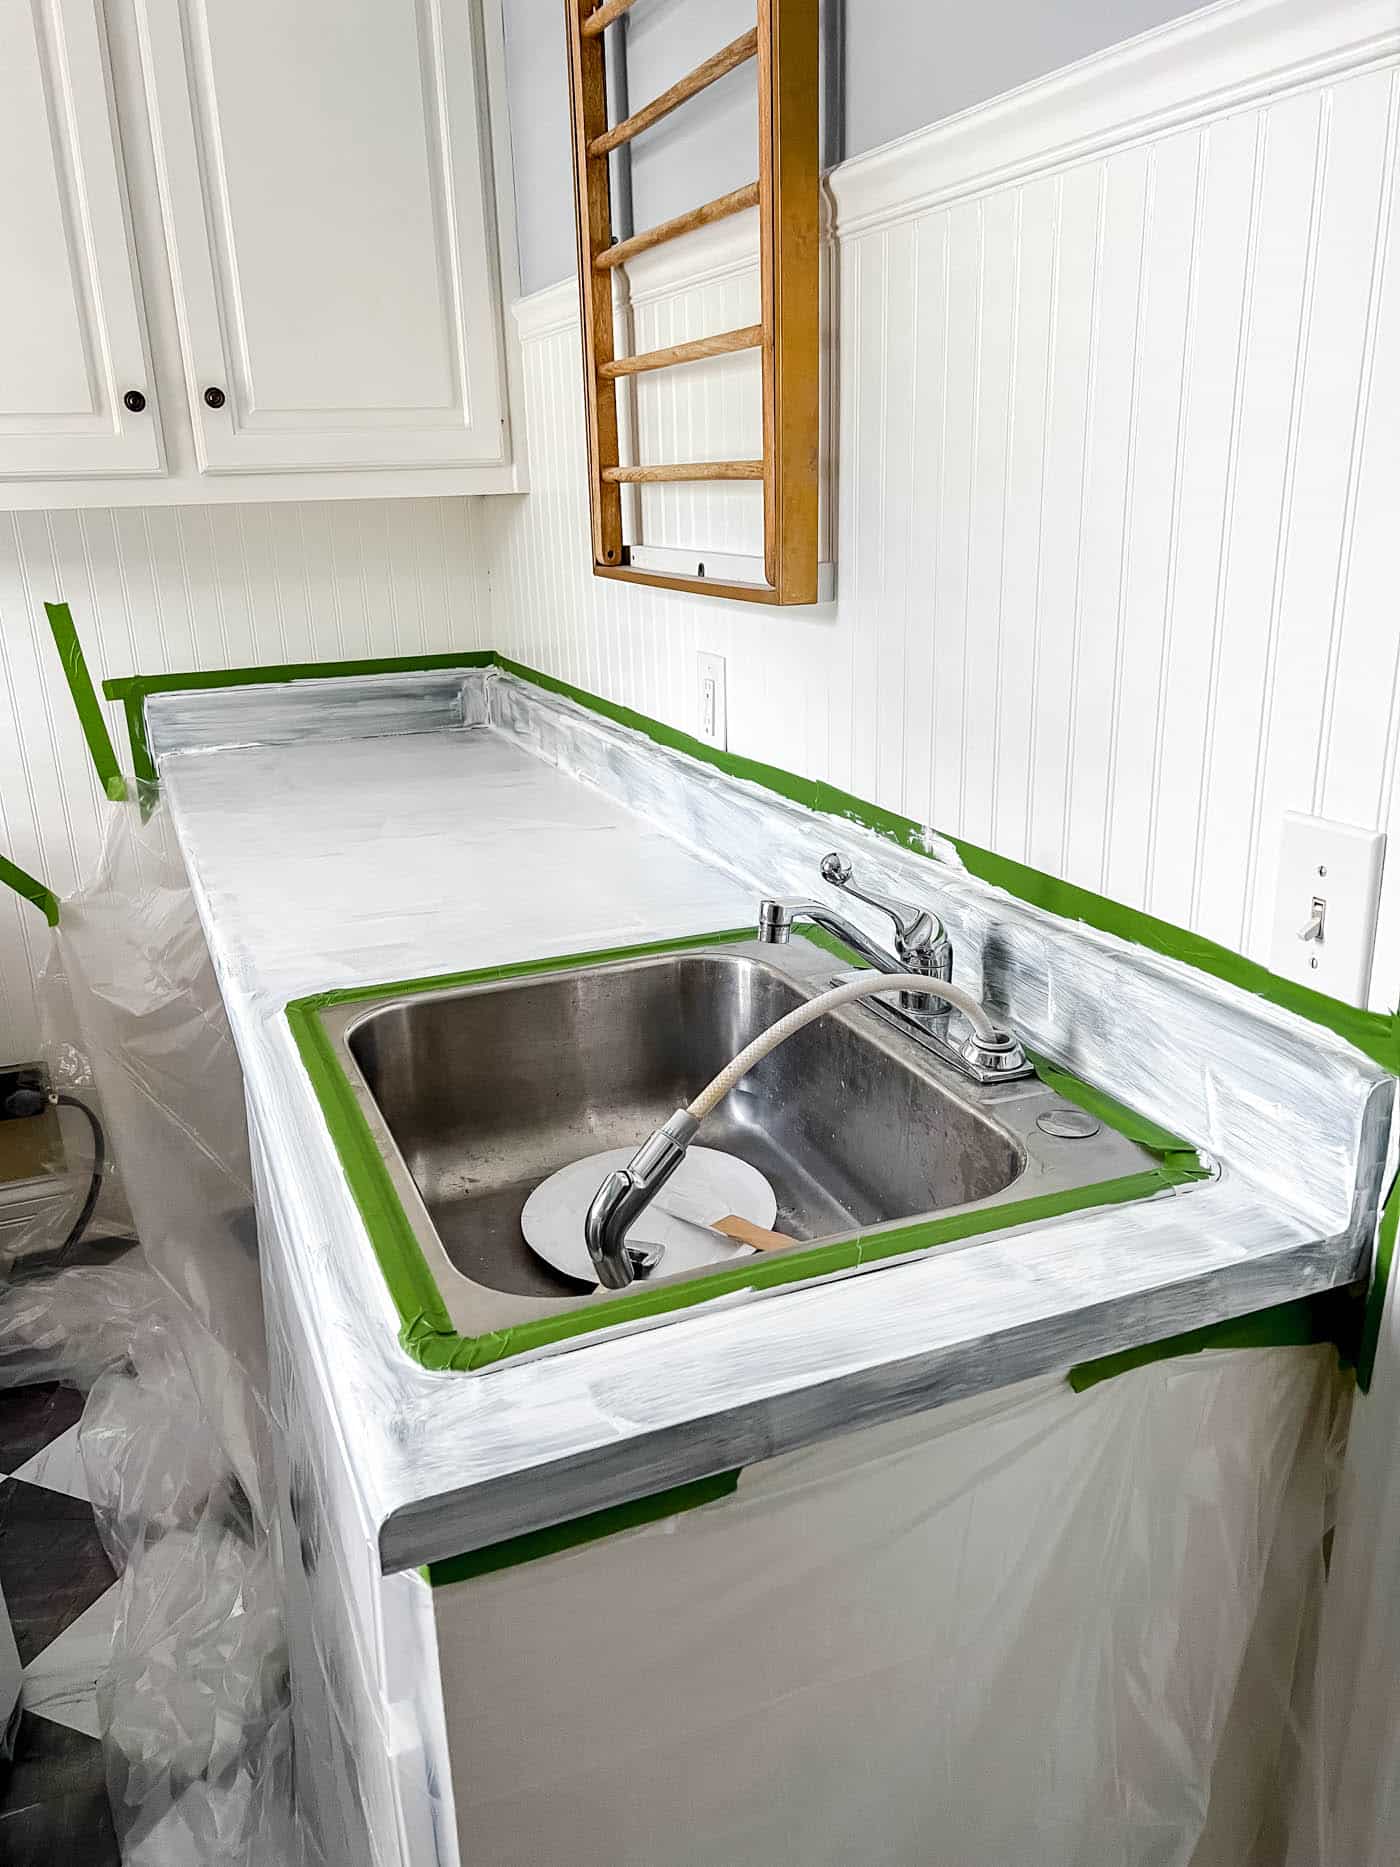
If you have seen the original photos of our laundry room, you will have seen the hunter-green laminate countertops straight out of the 90’s. While the countertops were in perfectly fine condition, I did not want the dark green color any longer. Here’s a peek at the before photo…
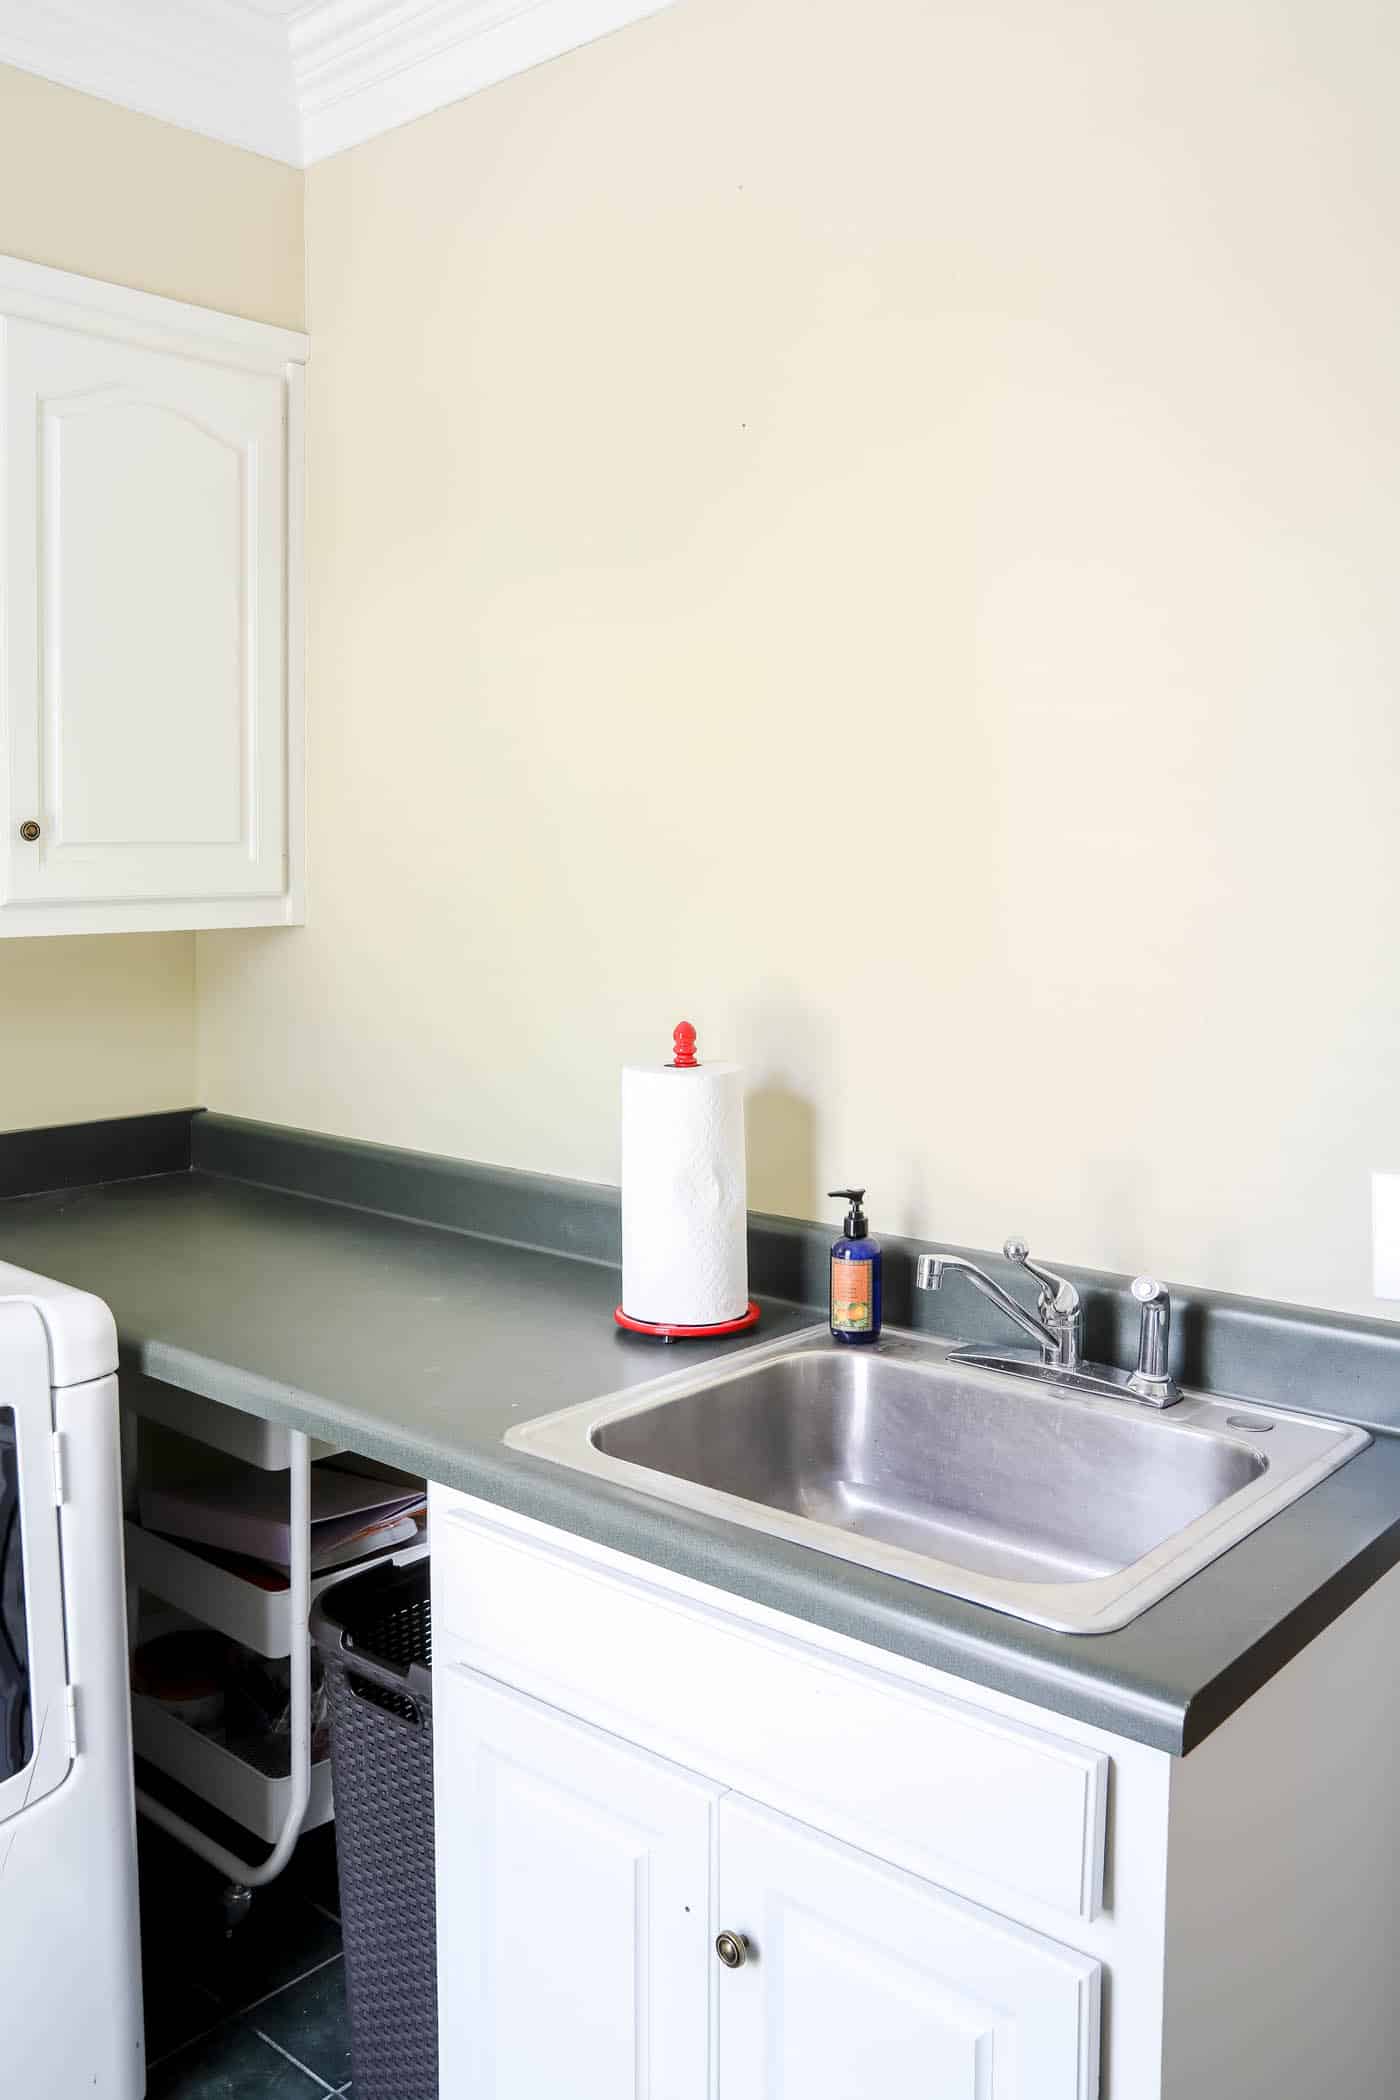
While it’s not a large section of countertop and it could have been easily replaced, I wanted to do this makeover as inexpensively as possible.
Enter the idea of painting the countertops!
I’ve seen this done dozens of times in other people’s homes, but I was nervous to do this myself. The only reason I went ahead with the plan to paint the countertops and backsplash piece, is that it’s tucked away in my laundry room. Ha! If it went poorly, no one would see it, but me.
And honestly, until it was completed, I seriously doubted if this was the right decision.
But now that it’s finished, I love how they turned out. And despite my biggest fears, I would do it all over again! (And I’m planning to do it in a more prominent spot in my home very soon.)
So, if you’re nervous about painting your countertops, don’t be! Trust the process and I think you’ll be happy with the final results. But before you decide, let’s look at the pros and cons.
Want to Save This?
Enter your email below and I’ll send it directly to your inbox!
Are Painted Countertops Right for You?
So, are painted countertops worth the risk? Let’s look at some of the pros and cons to help you decide.
Pros:
- It is a cost-effective option if you want a quick fix without breaking the bank.
- If you like to DIY, you can easily paint your countertop yourself.
- You can create a creative custom design.
- A coat of strong sealant will protect your painted countertop from scratches, spills, and everyday wear and tear.
Cons:
- Painted surfaces don’t last as long as natural materials like marble, granite, or quartz.
- If you’re not careful and don’t use the right paint, it can peel off, chip away, and fade in color over time.
- Regular maintenance may be required to keep your painted countertop looking its best.
Ultimately, deciding if painting your countertop is right for you is up to you. If you’re looking for a unique and budget-friendly solution, painted countertops may be the way to go. Just keep in mind that proper maintenance will be essential for making your painted countertop last.
If you do opt for a painted countertop, be sure to research the best materials, paints, and sealants for your project. Thankfully I’ve tried out a product with high reviews, so I’m happy to show you what I think is the best countertop paint kit for long-lasting, beautiful painted countertops.
This post contains affiliate links for your convenience. See my full disclosure policy.
The Countertop Paint Kit I Chose
I’ve heard of painting your countertop for years. One kit that is commonly used is the Rustoleum countertop coating paint. It’s tintable to 12 different colors, but I haven’t heard great reviews about longevity.
The paint kit I chose: Giani’s Marble Easy Countertop Paint Kit, is known for its longevity and ability to withstand everyday wear and tear. And while it’s a pricier kit, the results are beautiful and long-lasting.
I love that the Giani Marble paint kit comes with everything you need, minus a few household items like painter’s tape and a scouring pad.
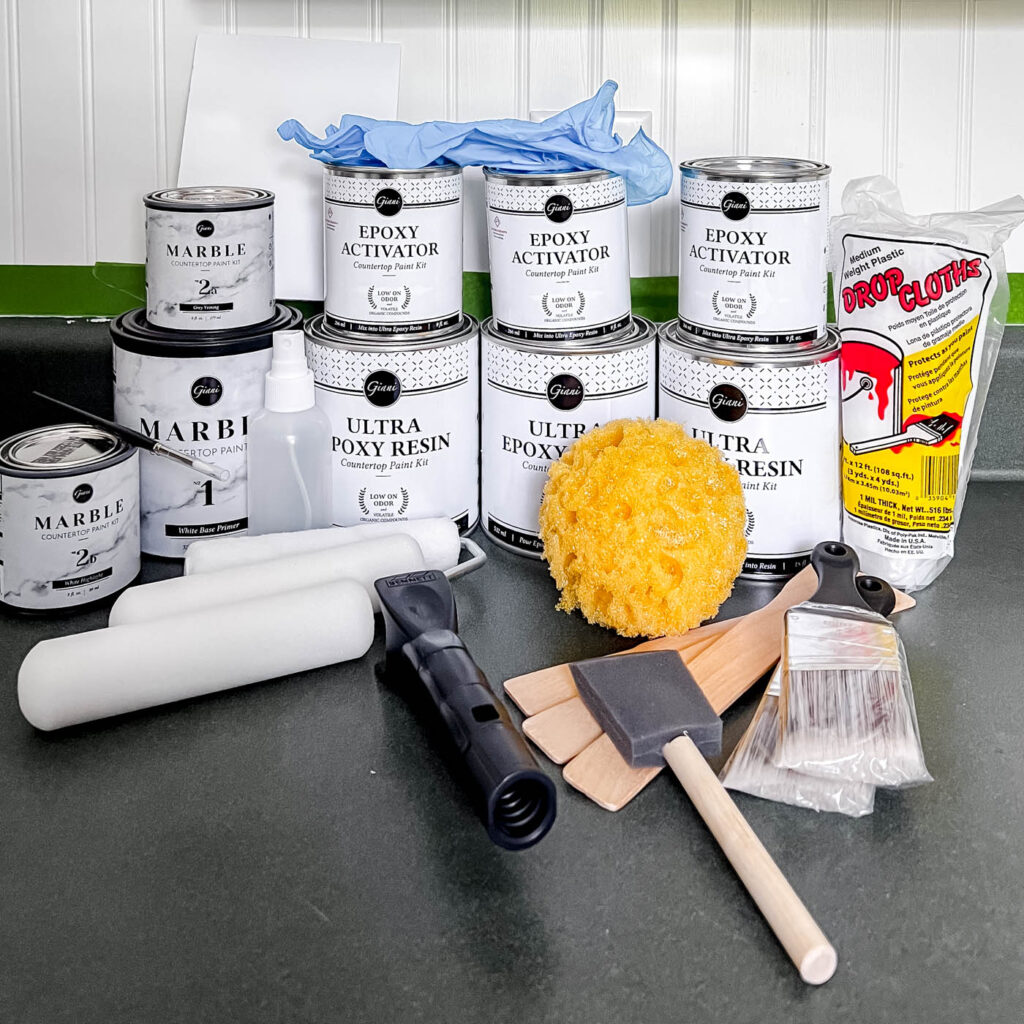
You can use this kit on Formica, laminate, Corian, ceramic tile, butcher block, cultured marble, and traditional granite. So, almost any type of countertop surface in your home can be painted with the right prep work!
One kit covers 35 square feet, so make sure you measure your space and know how much materials you will need. My countertop is much smaller than 35 square feet, so I don’t know how it would cover a larger space, but that’s what the kit says.
As I said before, I used this kit in my laundry room, but you can do painted kitchen countertops as well. You’ll just need to make sure they are sealed well with the epoxy sealer that comes with the kit. I chose to use a different sealer than the epoxy that came with the kit, because my room is not a very high-traffic area.
Supplies Needed:
- Giani Countertop Paint Kit
- Tweezers
- Paint Tray
- Paper Plate
- Painter’s Tape
- Steel wool pad or fine-grit sandpaper
- Paint can opening tool
- Acrylic caulk
- Polycrylic Top Coat, optional (read why I used it below)
- Acrylic Caulk
Steps to Painting Countertops to Look like Marble
These instructions are outlined in detail in the painting kit, but I’ll go over them generally here, and include any insights I gathered during the process.
But really, you’ll need to follow the instructions in the kit to do this DIY countertop project.
And truly this can be done in 2-3 days, so a weekend would be the perfect time to tackle this project. If you use the epoxy sealer, you have to be more careful with the drying process. So, it would be good to schedule it before you leave the house for a day or two. So, doing this before a trip would be a perfect time to do it!
1. Clean and Prepare the Countertops
Before you begin painting your countertops, it’s important to prepare them properly.
Start by cleaning your countertops thoroughly. Use a degreaser to remove any residue, grime, or grease.
Remove any caulk from the edges of the countertop, between appliances or where pieces of countertop are connected. Clean up any caulk residue with rubbing alcohol.
2. Patch any Seams or Nicks
Use wood filler to fill in any seams or nicks on the countertop. Once dry, sand them smooth with a fine sandpaper.
3. Sand the Countertops
Next, sand the entire surface of the countertops with a fine-grit sandpaper, brillo pad or SOS pad. This will rough up the surface and will help the primer and paint adhere better. I used a sanding block to quickly roughen the surface.
I would not use an electric sander, because that would take off too much!
Finally, wipe the surface down with a damp cloth to remove any dust or debris.
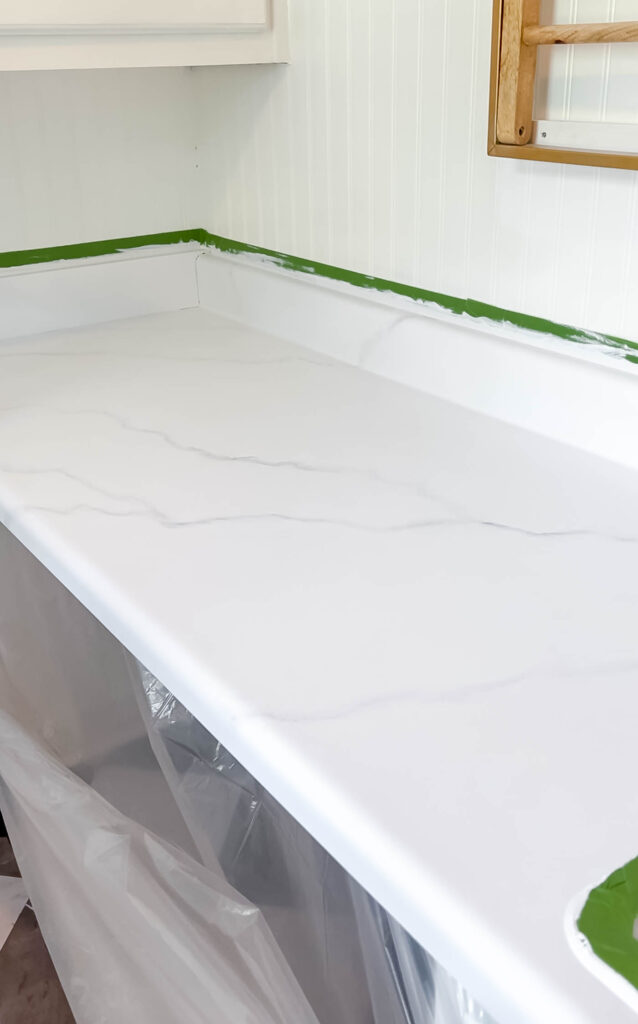
4. Tape off Everything That’s Not Being Painted
I’m talking floors, appliances, sinks, faucets and fixtures. Use the included plastic sheets to attach to the underside of the counters and cover your flooring. And if you have an under-mount sink, use the plastic sheeting to protect the inside of the sink. This will keep the sealer from running off of the counters onto your floors or sink.
5. Prime the Countertops
Now that your countertops are clean and prepped, it’s time to apply the primer.
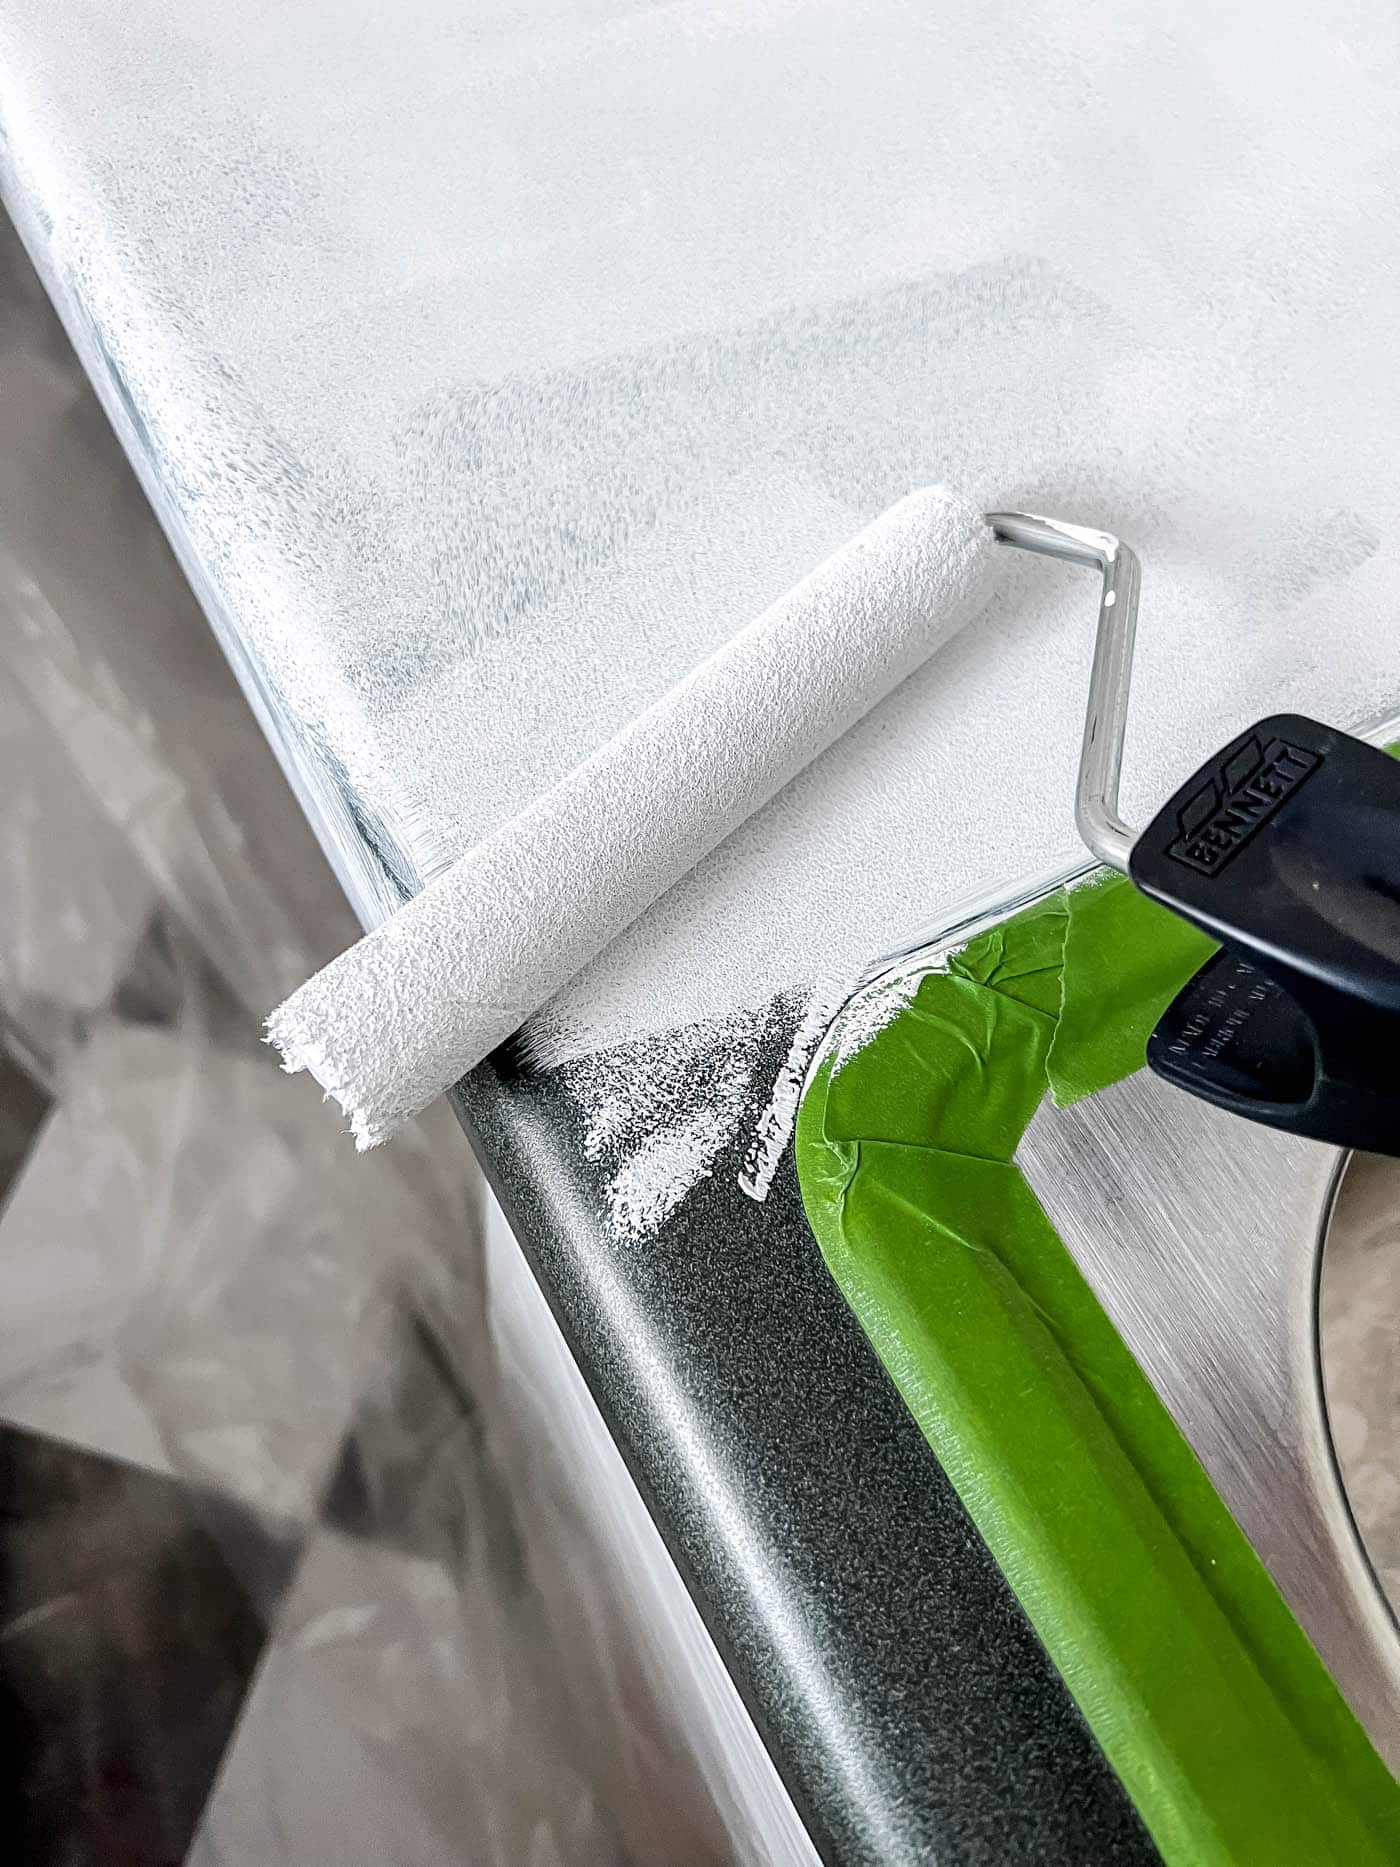
Open the primer that comes in the kit and stir it well. Use the foam brush to paint around the edges of the countertop, up the connected backsplash, and in any corners or crevices. Then use the fabric-covered paint roller to paint the flat surfaces.
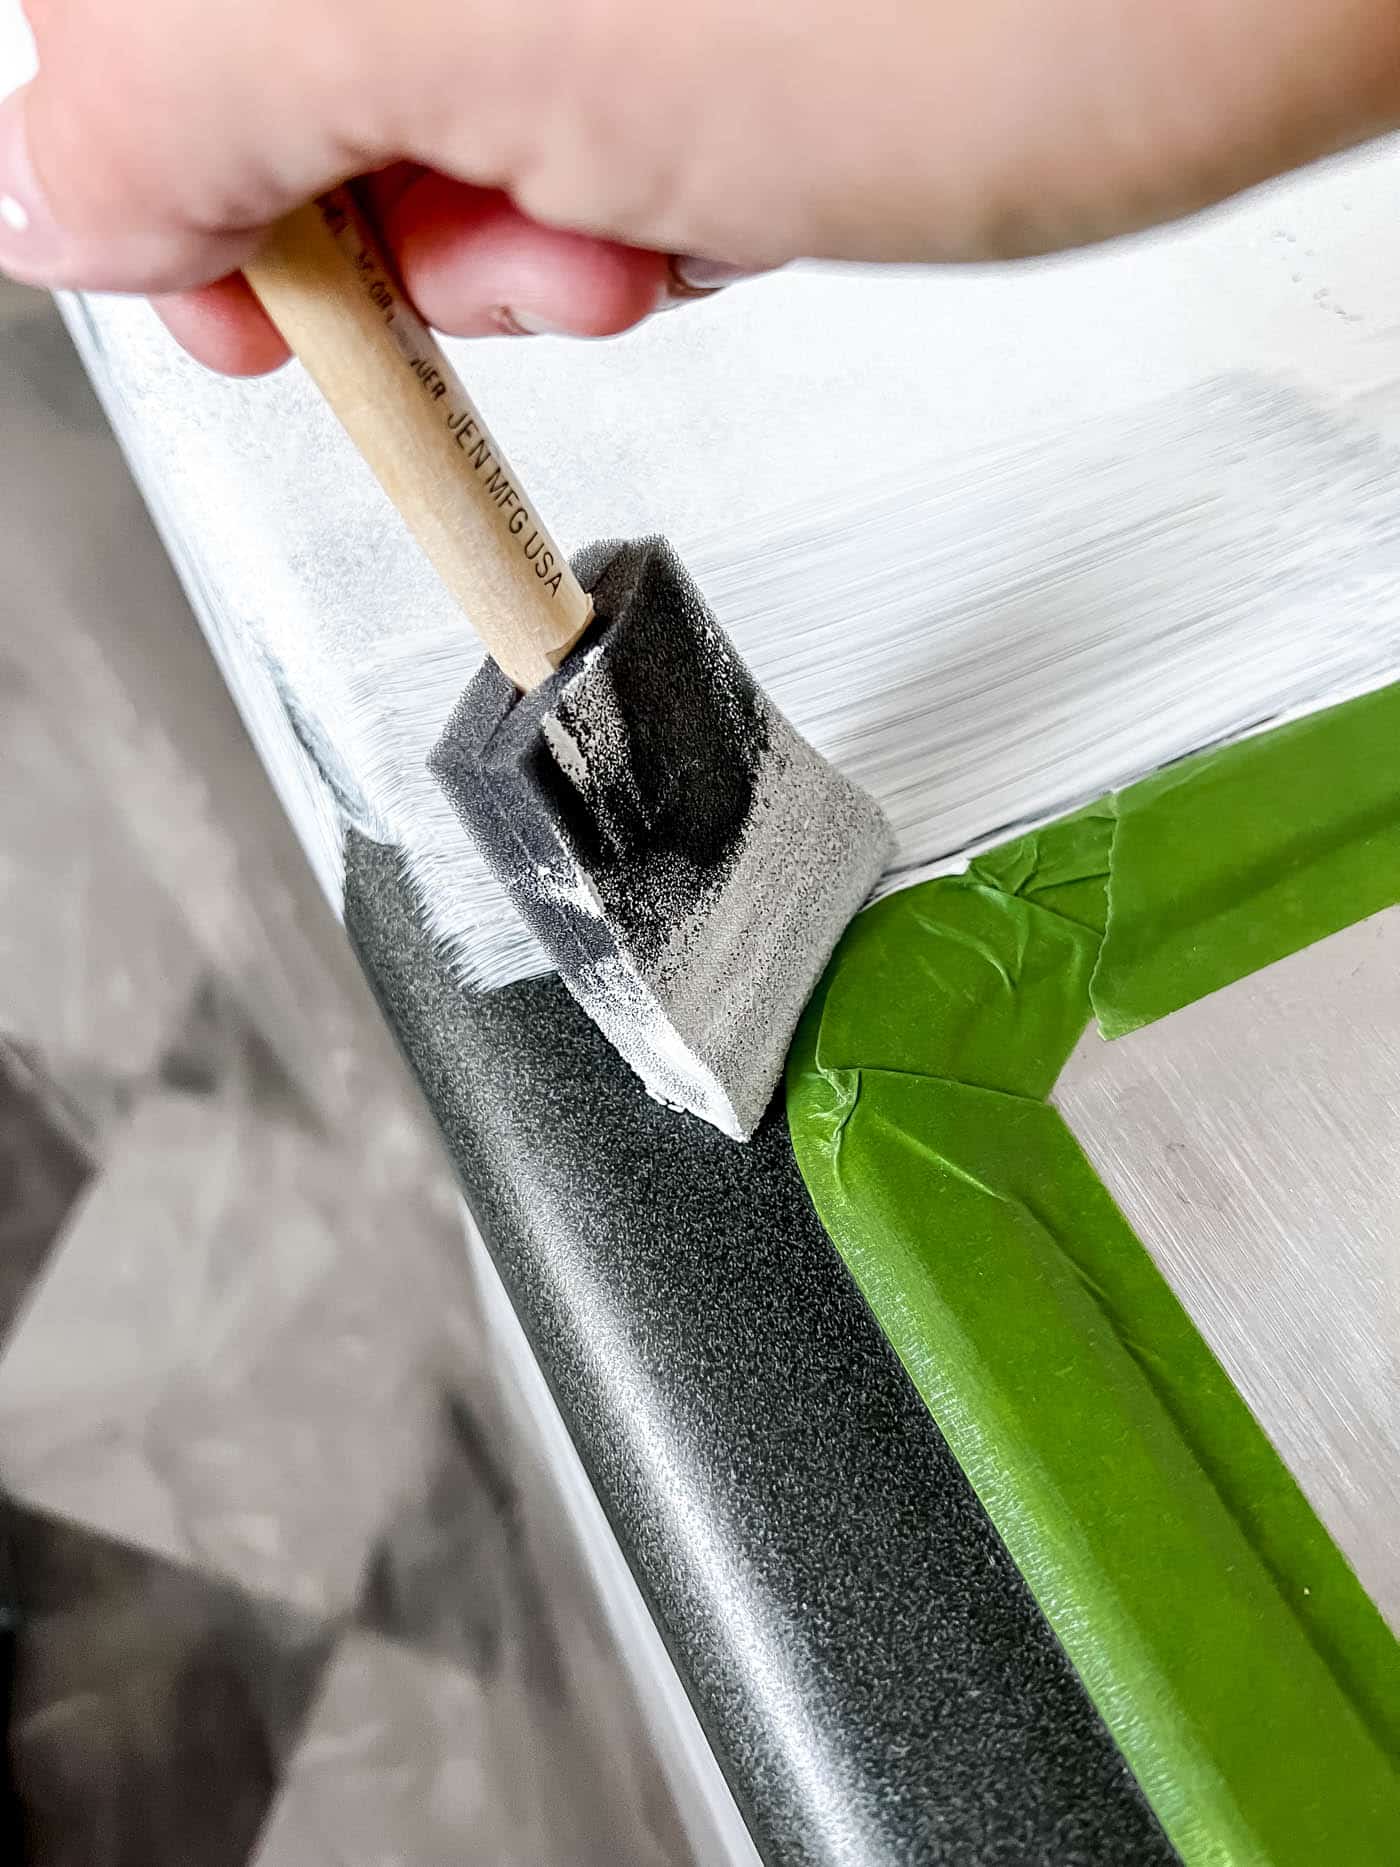
Apply the primer in thin, even coats using a roller or brush. Work in small sections at a time, so that the coat is applied evenly.
Make sure to let each coat dry completely before applying the next one.
The instructions say you will need a second coat, but I needed a fourth coat before the countertop was completely covered. It’s possible that I needed four coats because I started with a darker counter, but you don’t want to see any streaks.
Allow this to cure for at least four hours, making sure it’s completely dry.
6. Research and Plan the Marble Pattern
This is where it got a little nerve-wracking for me. But with a little bit of planning and creativity, I believe anybody can do it!
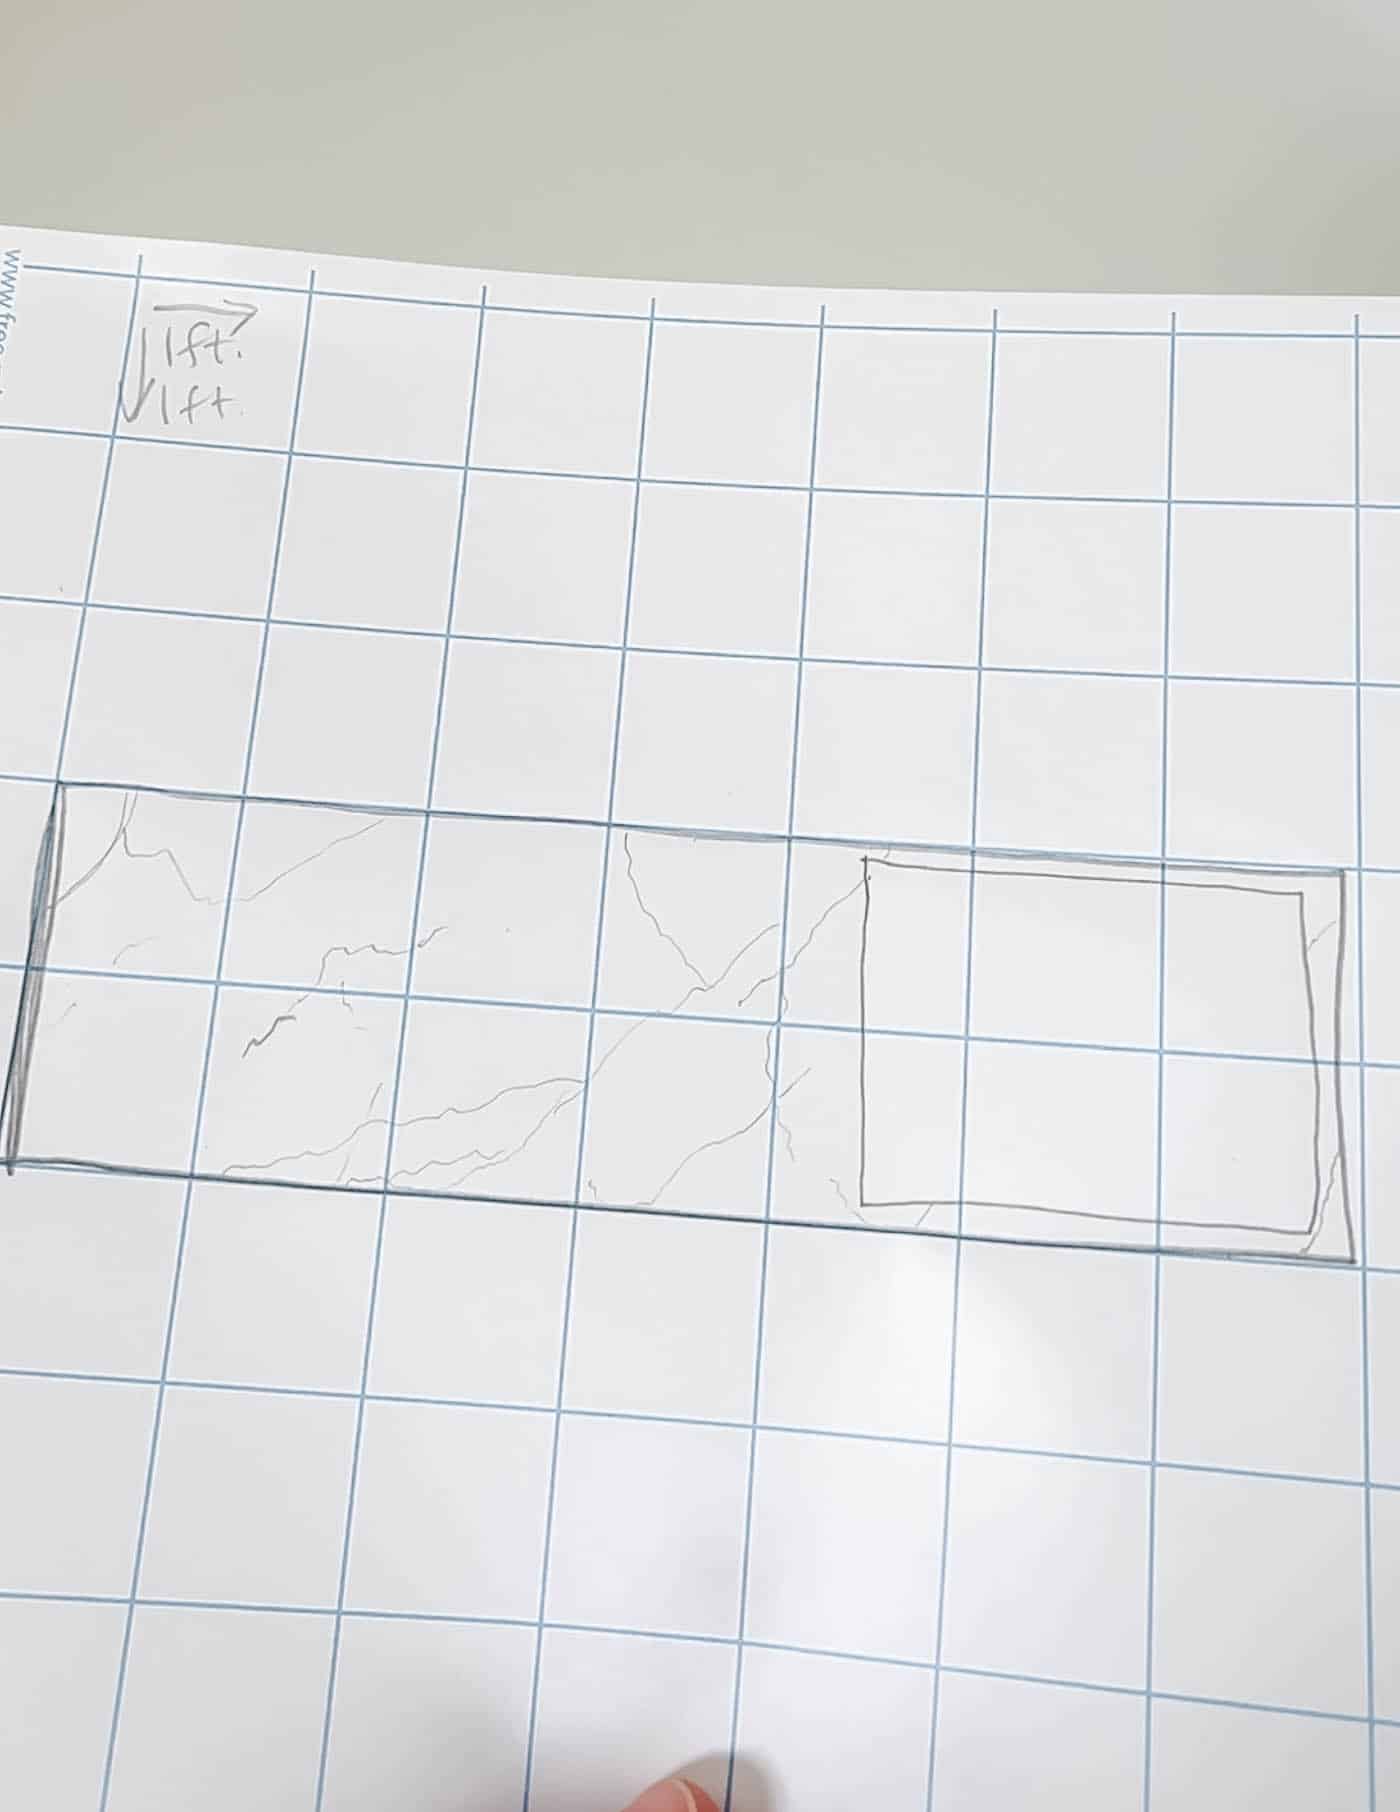
Look up pictures of actual marble and print them off to have on hand for your next few steps. I printed off some graph paper and drew my countertop to scale, then sketched out a plan based on my research.
There is a practice board included with the kit, so use it to practice before you start on the countertops.
Since I have faux marble peel-and-stick tiles on the floor of my laundry room, I used them for reference as well.
7. Apply the Grey Vein Paint
I’ll be honest, that I wish I had done this step a little bit differently than the instructions say to do it.
Instead of immediately starting in on the grey veining against the stark white primer background. I wish I had mottled the background with some gray paint first.
I think what made me doubt the plan was that the gray veins against the stark white background were just too much of a contrast at first. But, if you find yourself in the same boat, just keep going!
In the end, I used the spray bottle to spray some water on the countertops, then add some gray paint to the water, and spread it around with a paper towel. I will do this step first, the next time I use this product.
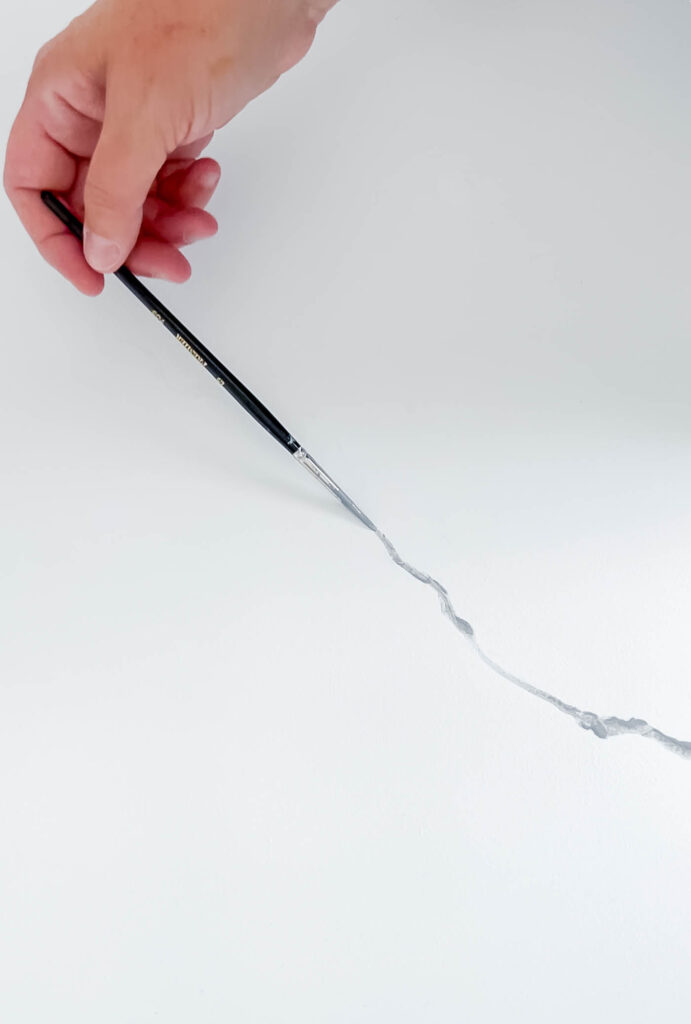
Then you’ll want to go in and draw your grey veins. The key is that less is more and they need to look like the natural flow of marble. You will use the water mister, tiny artist brush and the bristle tips of a paint brush to get the desired marble veins, per the kit instructions.
Have fun with it! Be creative and you can always fix a mistake with paint or water if you make one.
Here’s a great video tutorial from the company to show you how it’s done.
DIY MARBLE COUNTERTOP TUTORIAL on Youtube:
7b. Mottle the Countertop with Gray Paint
As I mentioned in the previous step, I wish I had done this before the gray veins. But, hopefully, if you’re following this tutoring, you’ll read this first and do it before the veining.
Spray some water on the countertop. Then dab the gray paint on the end of the artist’s brush in the water.
Then dab it around with a paper towel until the colors is slight and it leaves a subtle watercolor mark on the countertop.
8. Add Accent Veins and Highlights
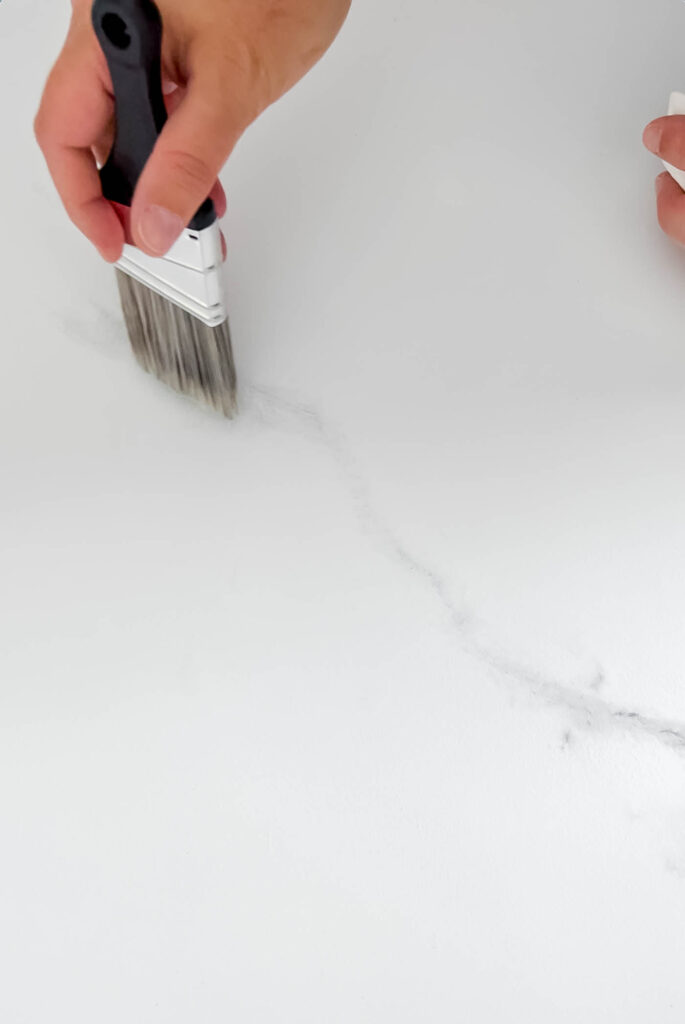
Once your major veining is finished, go back in and add smaller accent veins with the small artist brush. The key is to lightly drag it along the surface, twisting the brush back and forth to create natural-looking veins.

Once your veining looks good, use the white highlighter paint and the provided sponge to add depth and texture to the countertops.
Dab the sponge into the white highlighter paint and dab it over the top of the grey veins, or anywhere that needs some highlighting. It’s pretty watered down, so it’s subtle, but needed!
9. Seal the Countertops
Once the paint is dry, it’s time to seal the countertops. The DIY marble countertops paint kit comes with an epoxy seal with will protect your countertops from rough use over time. It’s a glossy finish.
The epoxy is a detailed process that includes tweezing out any fine hairs that might land in it during the drying process. And making sure there aren’t any bubbles in the mixture.
Since I wasn’t putting this countertop paint in a high-traffic area, and I didn’t want a glossy finish, I decided to use a polyacrylic topcoat for my countertops.
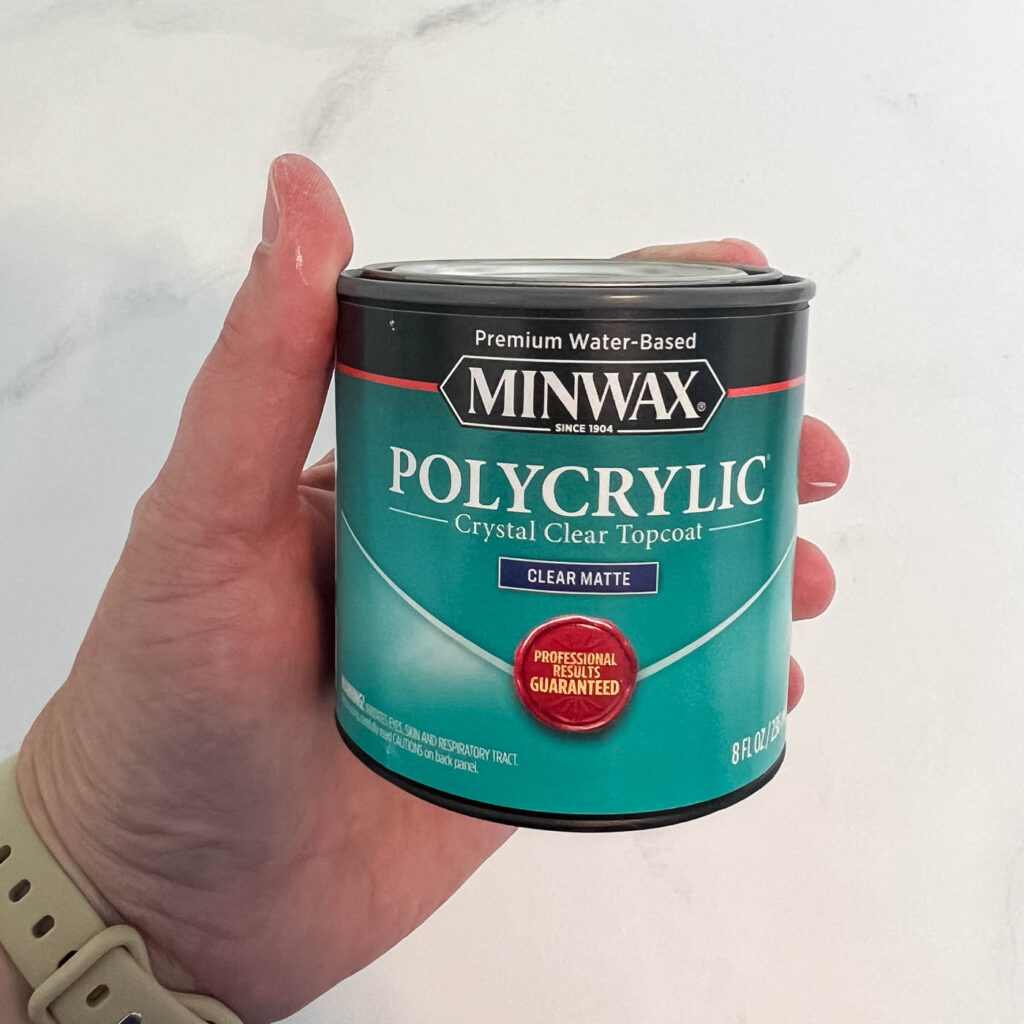
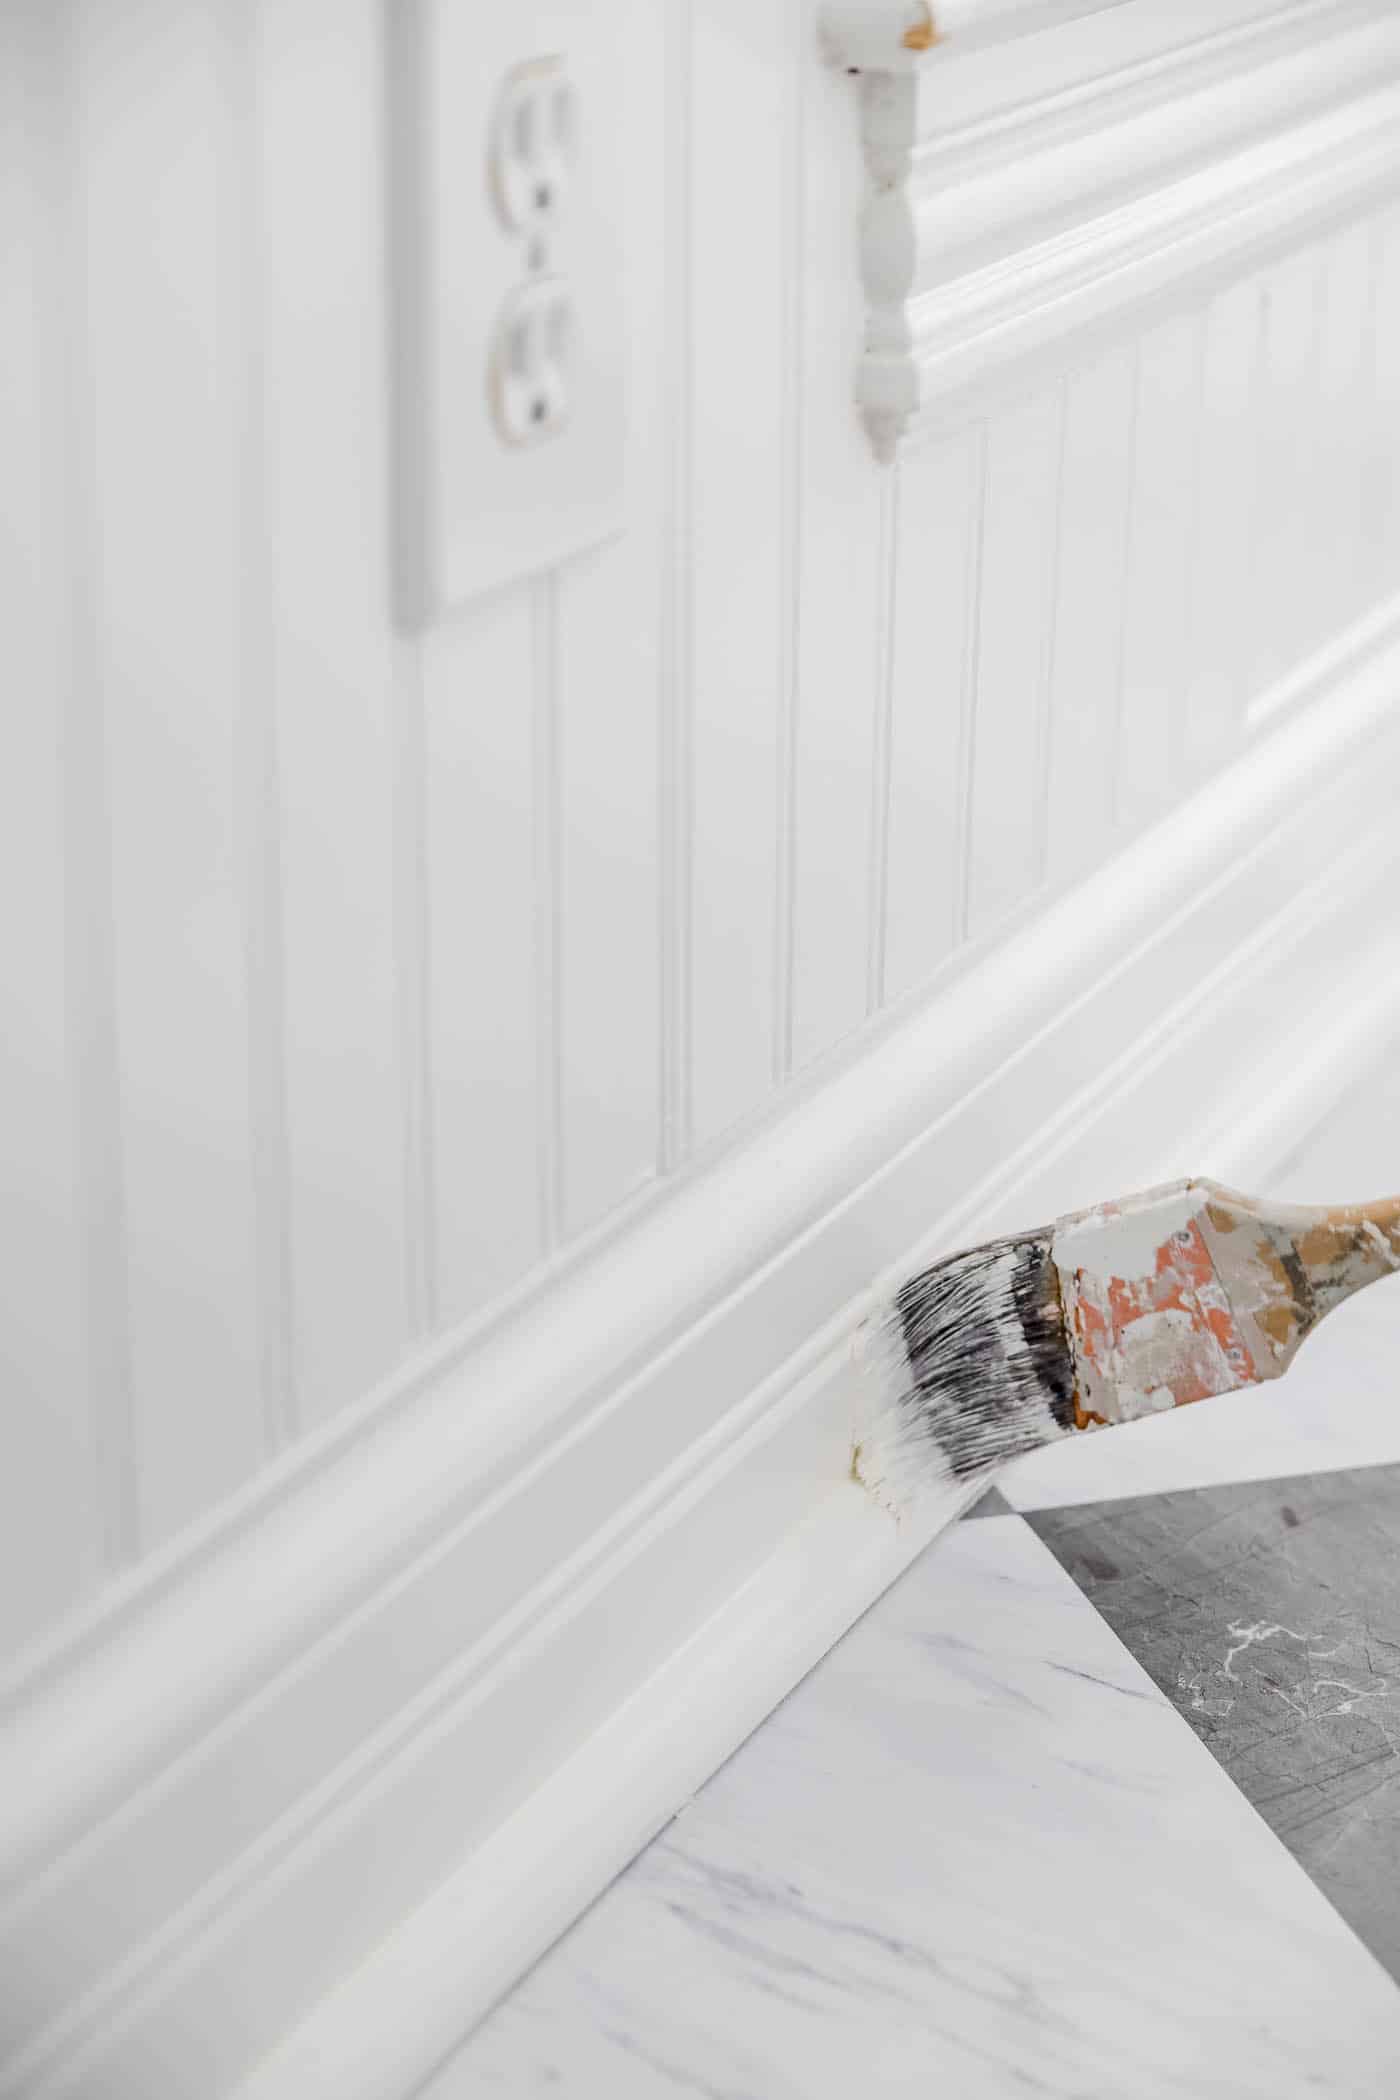
I applied two coats, letting each one dry completely between coats, with a brush. It’s a simple process and I just made sure the coats weren’t too thick, but that they covered the countertops completely.
Allow the countertops to cure for 5-7 days before using them again.
10. Caulk the Edges
One final step in the process is to caulk the edges and around any appliances where there was caulk before.
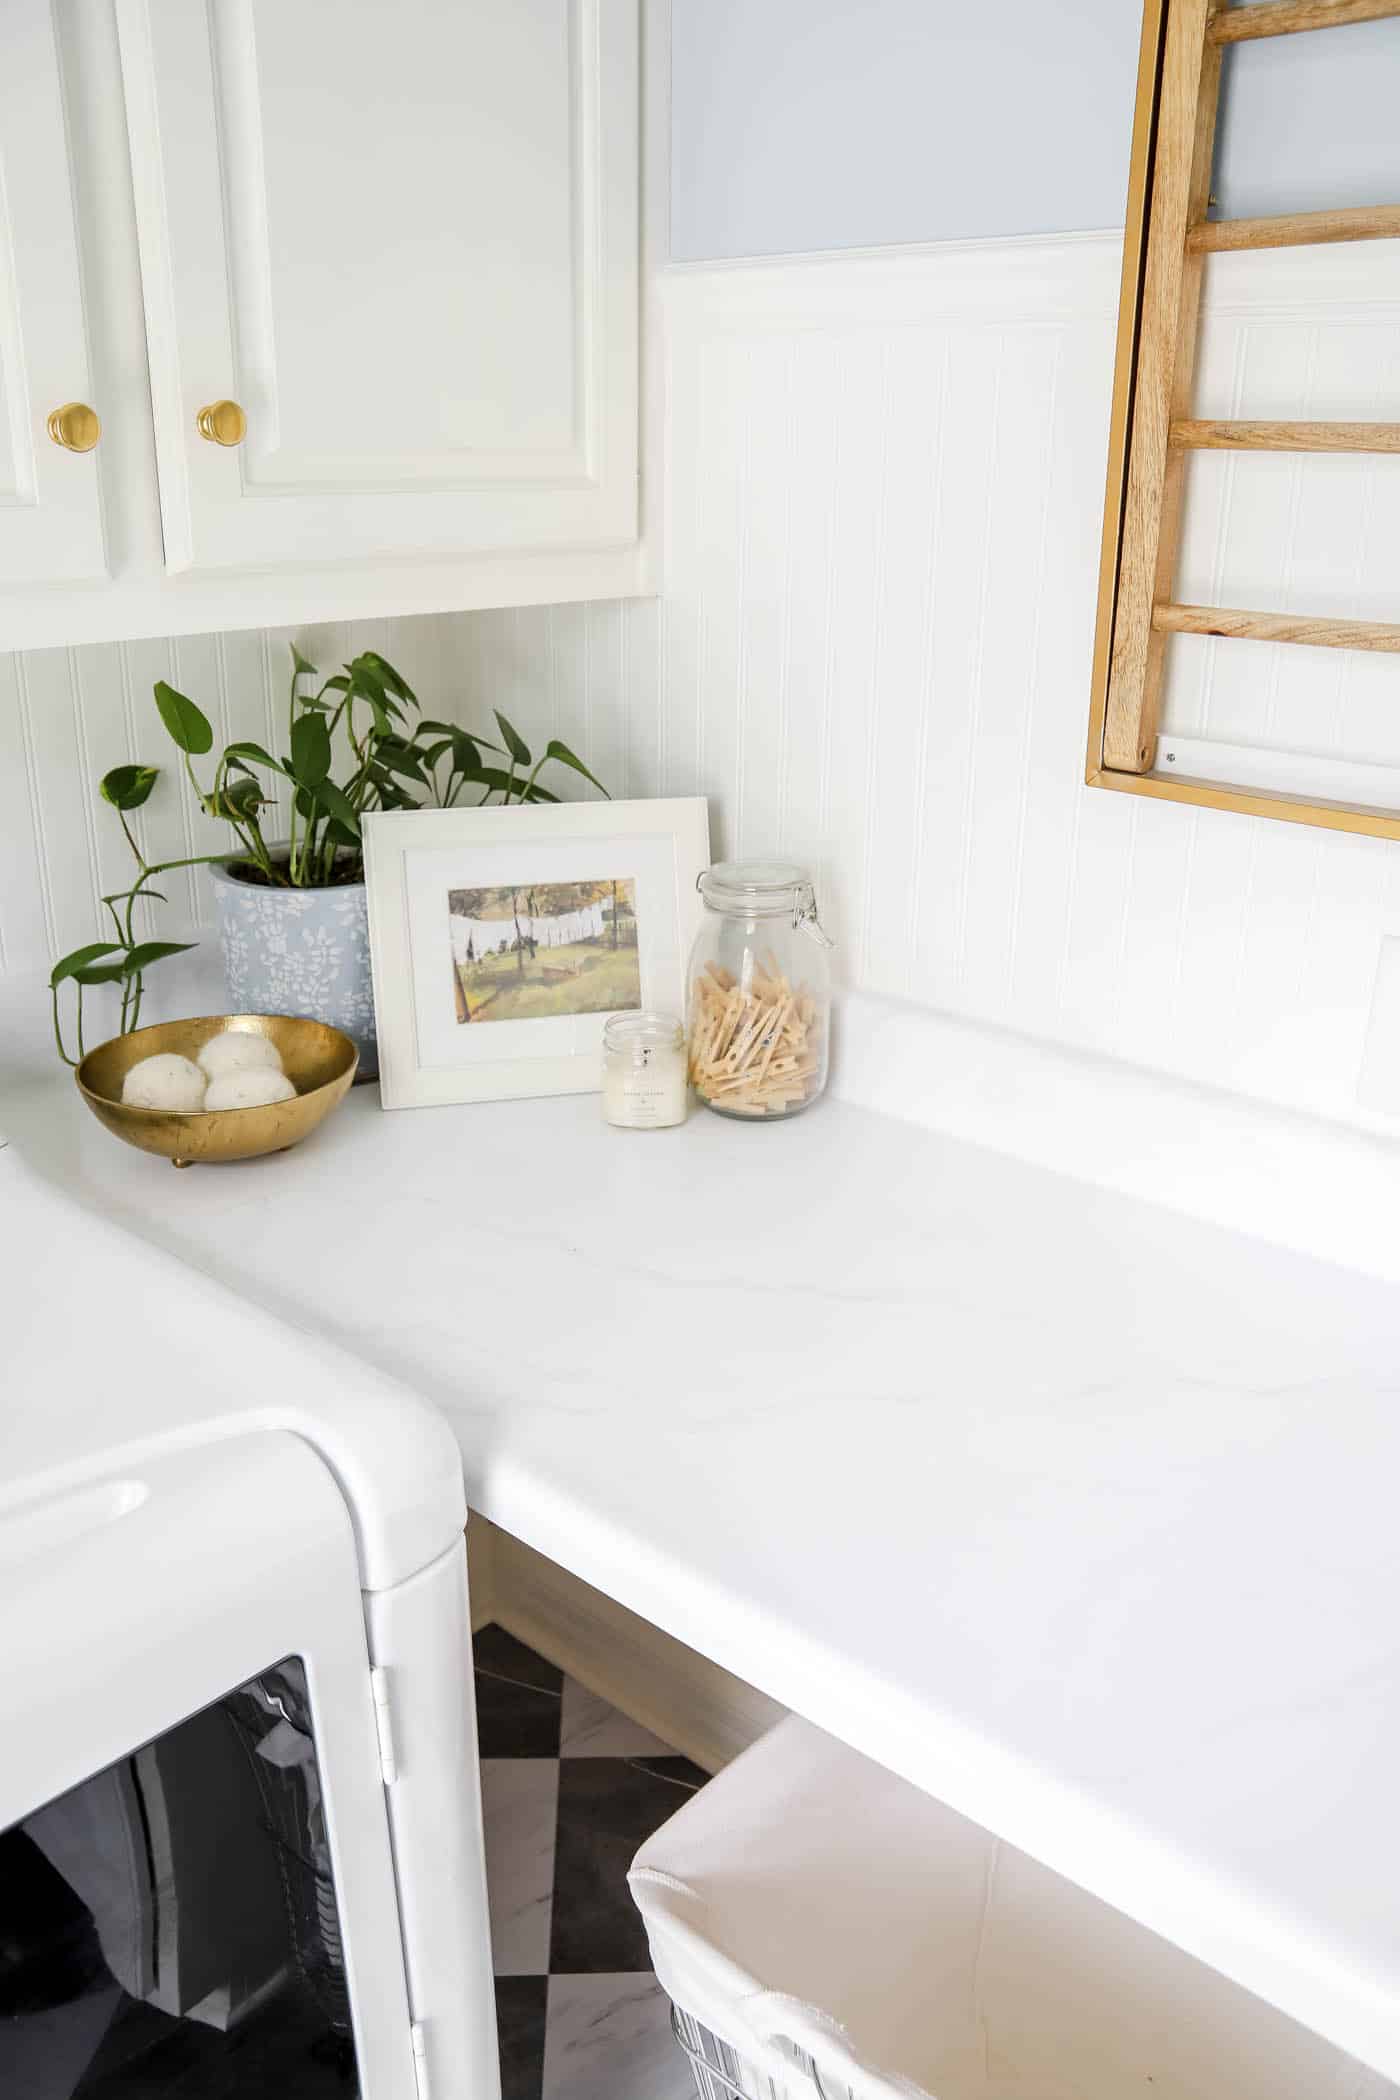
11. Enjoy Your New Countertops
Congratulations, you have successfully painted your countertops to look like marble! Now it’s time to sit back and enjoy your beautiful, new surfaces.
I seriously doubted how this would turn out, but once everything is back in place and you’re using them again, they look beautiful! I would do it again in a heartbeat!
Frequently Asked Questions about DIY Marble Countertops:
Do you need to remove the sink and appliances?
No need to remove the sink or appliances, but you will need to protect them with painter’s tape and plastic.
Can I just paint my countertops?
No, you need to use paint specifically designed for countertops. And you’ll need to prep and seal the surface for everyday use.
Can you Paint Laminate Countertops? What Kinds of Countertops Can Be Painted?
Yes, you can paint laminate countertops, as well as Formica, Corian, ceramic tile, butcher block, cultured marble, and traditional granite!
More Posts You Will Love: