• Skip to primary navigation
  • Skip to main content
  • Skip to primary sidebar
  • Home Decor
    • Paint Colors
    • Printables
    • Our Current House
    • Our Second House
  • DIY Projects
    • Project Gallery
    • Crafts
    • Tools & Tips
  • Blog
    • About
      • Contact
      • Policies
  • Gift Guides
    • Shop
      • Shop My Products
      • Shop My Instagram
      • Shop My Home
    • Email
    • Facebook
    • Instagram
    • Pinterest
The Turquoise Home
menu icon
go to homepage
subscribe
search icon
Homepage link
  • Blog
  • Home Decor
  • DIY Projects
  • Paint Colors
  • Our Current House
  • Organization
  • Contact
    • Email
    • Facebook
    • Instagram
    • Pinterest
  • ×
    You are here: Home / DIY Projects / Living Room Makeover – Part 3: Caulking and Spackling

    Living Room Makeover – Part 3: Caulking and Spackling

    Last Updated: April 26, 2022 | Published: March 22, 2013 | By: Laura | 6 Comments | Filed Under: DIY Projects, Living Room, Paint

    • Facebook
    • Twitter
    • Email

    I’m still working on my living room board and batten. I’m not quite sure how much I want to reveal from here on out before I do the big reveal. But, I will show you what I’m doing today.

    All of the boards in the living room are up on the walls. {Did I hear a Hallelujah!?!?} Well … kind of. I do still have to buy, prime, paint and put up the top ledge on all of the walls. Shouldn’t take too long.

    And I have about 5 more small boards to prime, paint, cut and put up. But they are in the kitchen around the bar area. I’m trying to finish the living room first so that we can move everything back in it’s place. #tiredofhavingallthefurnitureinthemiddleoftheroom

    These are my two best friends today: Alex and Dex.

    Alex Fast Dry Caulk
    Dry Dex Spackling

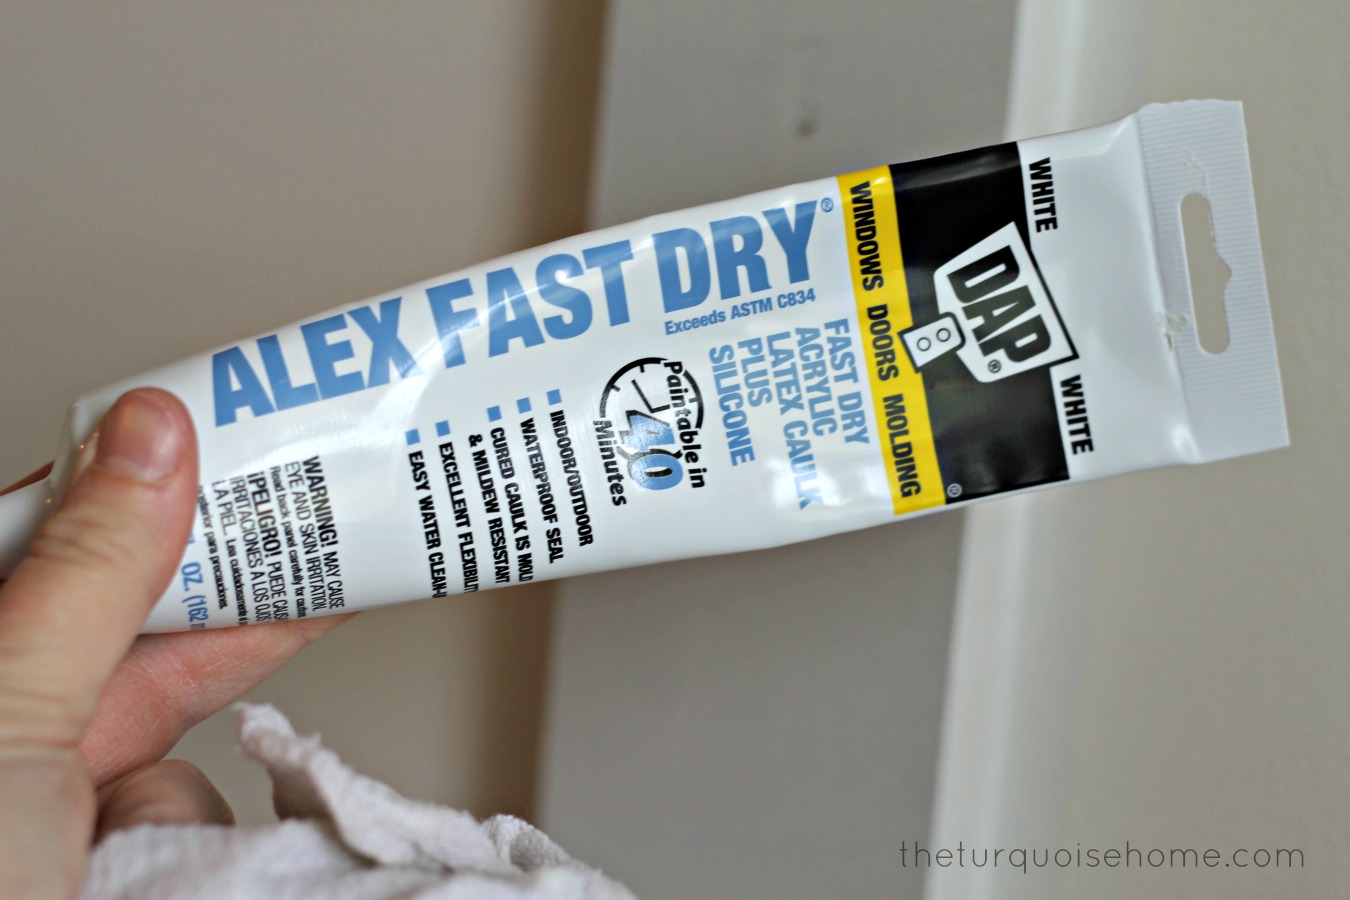
    I’ve been caulking and spackling all day and am looking forward to this project being done!! I think I’ve somehow burned part of my finger from wiping the caulking off the rough MDF sides. Ouch!

    I can say that other than the burning finger part, I loved seeing the transformation from before to after caulking. It makes the look so much more cohesive. And almost like a finished product. Almost. 🙂

    Results of caulking and spackling

    And you may notice the pink dots on the right picture. That’s the spackling. For the first time I used the pink spackling that dries white. It lets you know when it’s good and dry and ready to be sanded and painted. How handy, right? I think I love it!

    So, it may not be quite finished this weekend, but we’re getting so close!! And then I can work on hanging pictures on the wall. Soooo excited about that part.

    I hope you have a happy weekend!

    More Living Room Makeover Posts:

    1. Part 1: Paint
    2. Part 2: More Paint
    3. Part 3: You’re here!
    4. Part 4: Blue Accessories
    5. Part 5: Gallery Wall
    6. Part 6: Super Easy Throw Pillows
    7. Part 7: Final Reveal
    « Living Room Makeover – Part 2: More Paint
    Happy Easter {& a family update} »

    Reader Interactions

    Comments

    1. Sarah Miller

      November 05, 2020 at 1:12 pm

      I’m so into home decor. Just love doing transformation for my home. As I love doing this I always try to explore new ideas! Really impressed with your ideas. Hope this will be helpful

      Reply
    2. Daber

      May 15, 2020 at 3:00 pm

      Thanks, Laura for such an informative post. It will helpful for all the people who love their home decoration. I already read parts 1 and 2 and it really helpful.

      Reply
    3. Daniel

      March 27, 2020 at 12:55 pm

      Thank you for the very informative post on Caulking and Spackling. I think so This idea will be useful to everyone. Thanks for sharing.

      Reply
    4. Gary Jae

      January 30, 2020 at 5:30 am

      Wow LAURA, this is a wonderful article.
      You share great tips and infographic in this article.
      This guide help me a lot and I enjoy it.

      Reply

    Leave a Reply Cancel reply

    Your email address will not be published. Required fields are marked *

    Recipe Rating


    Primary Sidebar

    Grab Your Free Copy of The Decorator's Easy Cheat Sheet
    About Laura Nickelson, the author and creator of The Turquoise Home

    Popular Posts

    Sea Salt | Paint Colors in Living Room | Sand and Sisal

    The Best Living Room Paint Colors

    Edgecomb Gray by Benjamin Moore wall color | paint color

    Best Home Decor Paint Colors: Edgecomb Gray

    Benjamin Moore White Dove Paint Color - inspiration photos

    Benjamin Moore White Dove {The Best Home Decor Paint Colors}

    Grab a piece of plywood and some paint and we're good to go!!

    How to Make a Large Wooden Sign

    Footer

    ↑ back to top

    Meet Laura

    • About
    • Contact
    • Privacy Policy

    Newsletter

    • Get the 5 Secrets Every Decorator Knows!

    Home Decor Index

    • Decorating 101
    • Paint Colors
    • DIY Project
    • Living Room
    • Kitchen
    • Outdoors

    TheTurquoiseHome.com is an Amazon Associate and earns from qualifying purchases.

    Copyright © 2022 The Turquoise Home