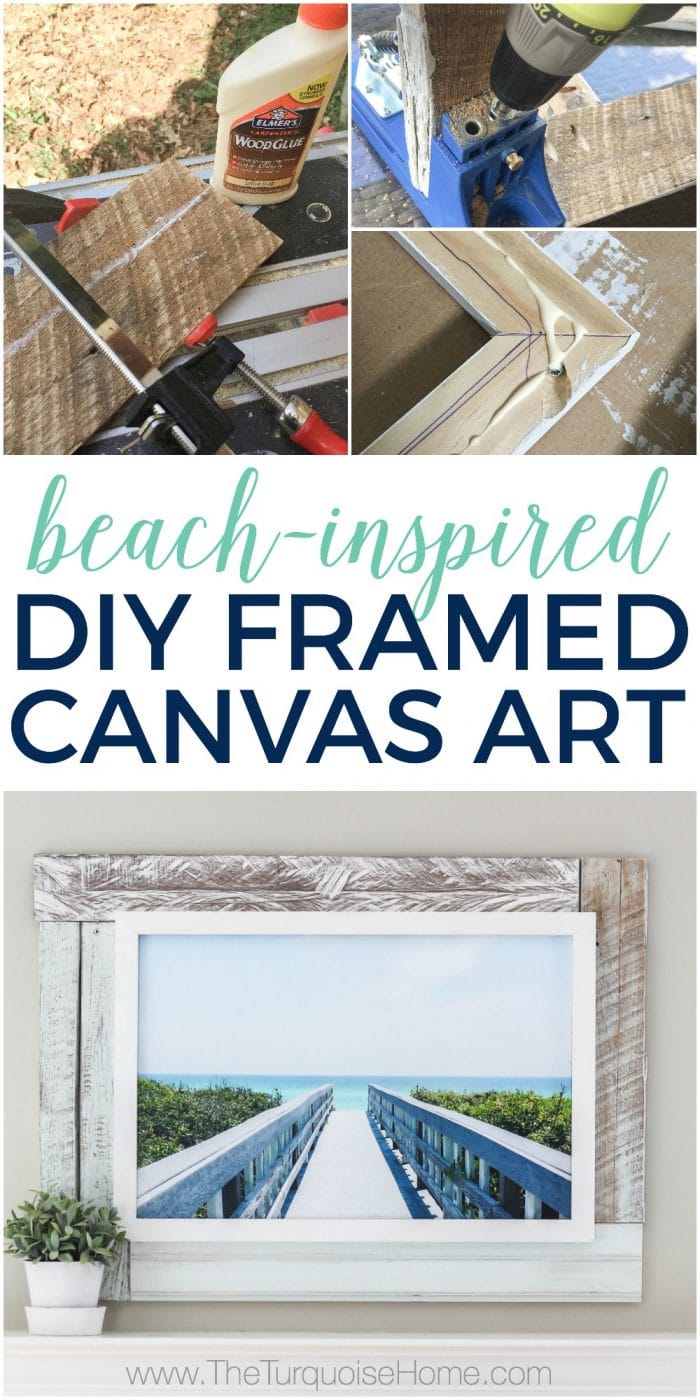
Beach-Inspired DIY Framed Canvas Art
This DIY framed canvas art is a budget-friendly way to get a gorgeous masterpiece in your home for a tiny price.
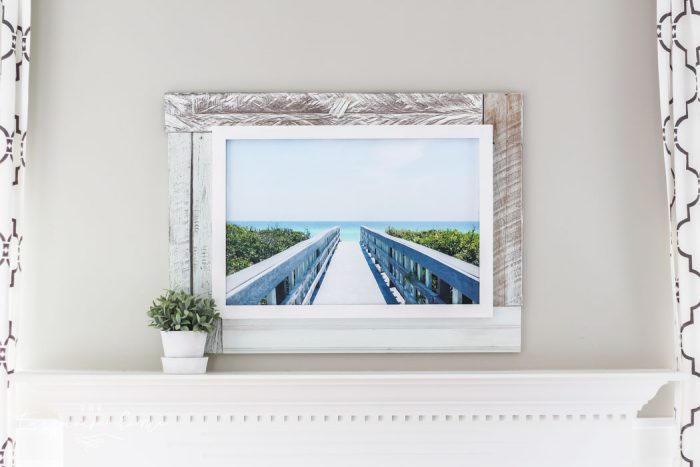
Framed canvas art can run anywhere from $100 to $1,000+ depending on the quality, but typically the frames are pretty thin. This frame is large and in charge and can be created from scrap wood pieces you may have laying around the workshop (aka garage)!
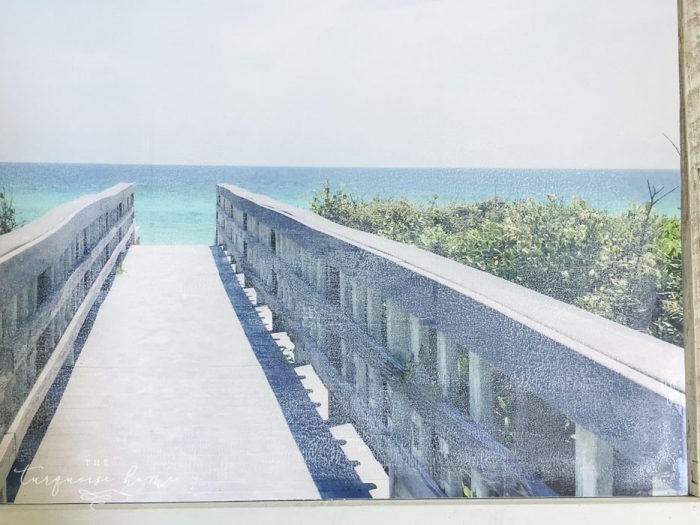
Several people have asked about how they can purchase the beach picture I used.
It’s my own photo from our favorite vacation spot (30A Florida) and you can buy it HERE! 😊
I intended to just DIY a large canvas art piece and make a thin wooden frame, much like this one I made previously for my DIY abstract art piece. That simple framing tutorial is one of my most viewed posts, so I just planned to use my previous tutorial and create something similar. If it ain’t broke, don’t fix it, right?
Well, when I hung the canvas up on the wall to just get a visual of the space, it was most certainly too small for the spot above my mantel. This screen shot from a video on my Instagram Stories gives you an idea of how small it looked… Sorry for the poor quality, but it’ll do the trick to show the scale.
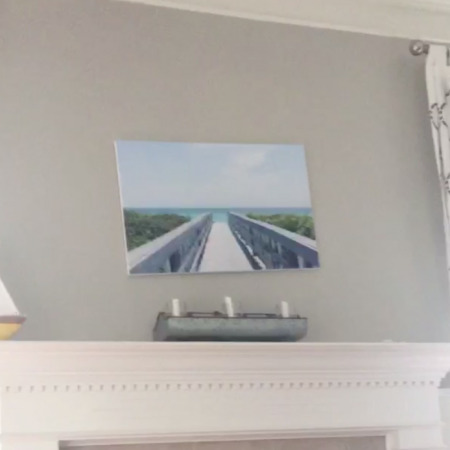
Scale matters a great deal in decorating. I see this problem a lot out in the real world when a homeowner puts something way too small on the wall. Trust me, I’ve been one of those homeowners as seen in these master bedroom photos. The thing I didn’t consider when putting my photo wall above my bed is that the scale was just way too tiny!
If I had hung this canvas art on the wall with a thin frame, I would have been a definitely NO. That’s not to say that I don’t have decorating “no’s” all over my house, but I have learned to consider scale when hanging things on the walls.
It’s a lesson I think I’ve learned pretty well over the years of studying the masters and getting my “Google University” interior design degree. 😂
So, back to the drawing board for my focal point of my summer mantel. I keep a pile of wood scraps in the garage that I’ve collected over the years. There are pieces from old pallets and some old barn wood in there. And just leftover pieces from projects, too. I pulled some pieces out that looked like they would work and started piecing them together around the canvas frame.
See the Framed Canvas Art in my Summer Mantel HERE.
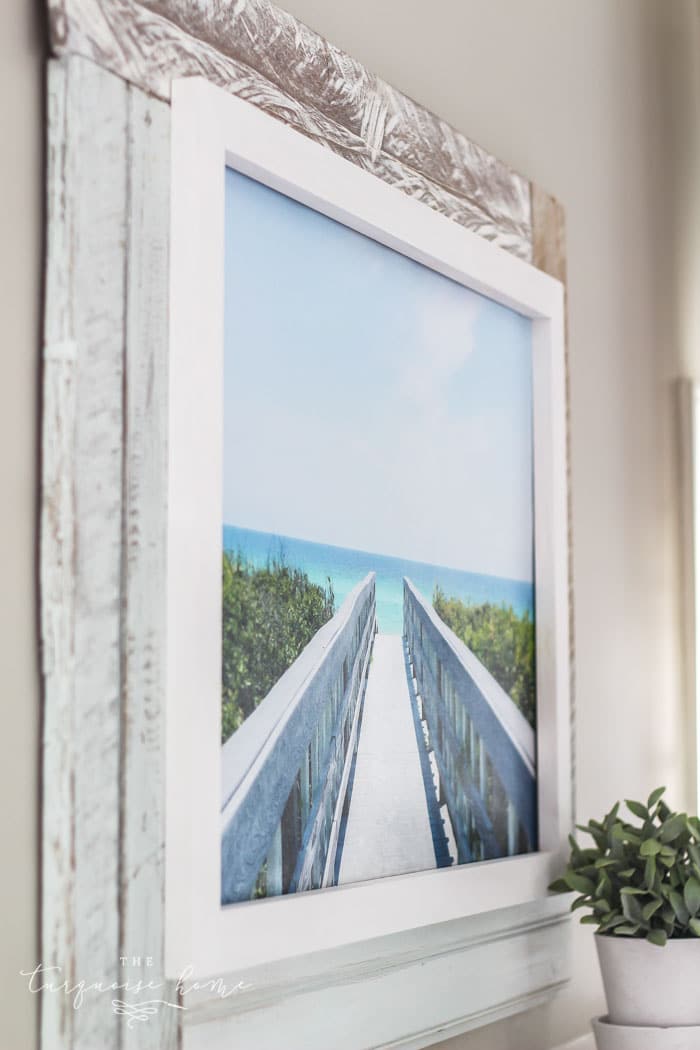
And I ended up with something I absolutely ADORE! It would have never turned out so well if I hadn’t tested the canvas in the space first. So, don’t be afraid to check things out as you go and take a detour when needed! I’ll show you how I made it all. Are you ready? This post contains affiliate links for your convenience. See my full disclosure policy here.
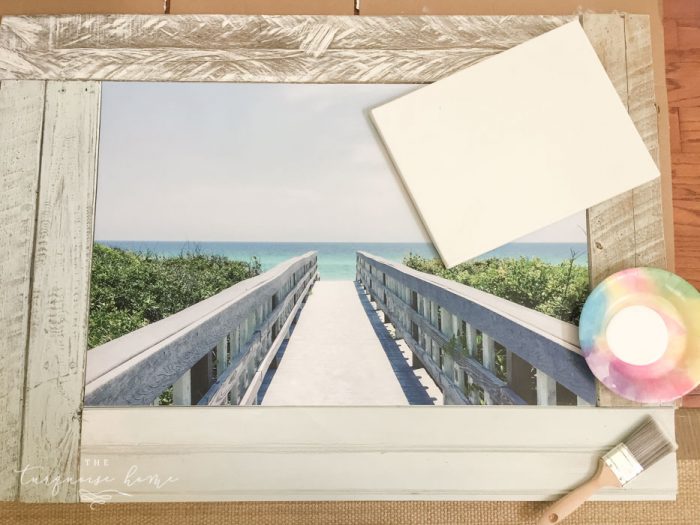
What You’ll Need for your DIY Framed Canvas Art
- Large Canvas – mine was 20″ x 30″
- Printed photo the same size, or larger than your canvas – I used Shutterfly to crop and print my photo. You can purchase my beach photo HERE.
- Mod Podge, matte finish
- Small Paint Brush or craft foam brush for Mod Podge
- Cutting Board & Utility Knife
- Extra Blank Canvas (optional)
- Scrap Wood for the frame – use whatever you have on hand or cheap common board from the hardware store!
- 1 x 2 x 8 Common Pine Board
- Kreg Jig – perfect for joining corners and pieces of wood for the frame
- Drill
- Miter Saw – this is the one I have now and highly recommend!
- Kreg Jig Screws – I used 1.5 inch screws for my boards and this PDF will tell you which size screw to get
- Wood Glue
- Sand Paper
- Paint and Stain of your choice
- Brushes for paint and stain
How to Build your DIY Framed Canvas Art
Step 1. Mount the Print to the Canvas
The first step in creating your masterpiece is to use Mod Podge to adhere the print to the canvas. Paint a medium to thin coat of Mod Podge on the canvas.
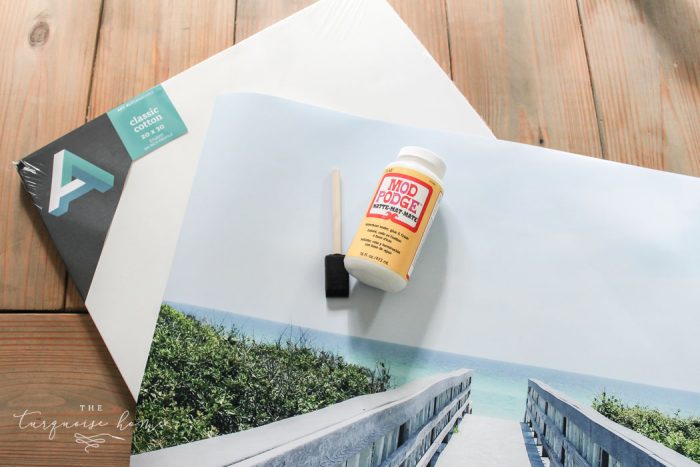
Then press your print on to the canvas. Turn it over and place heavy objects on the underside of the canvas to help the print adhere with little to no bubbling.
I let my canvas sit like this for more than 24 hours, but less time would probably be fine!
Step 2. Cut Off Excess Print around the edge of the Canvas
If your print is like mine, it overlapped the edges of the canvas just a little bit, so I placed the canvas (print-side down) on my cutting board and cut off the edges with a sharp utility knife.
Step 3. Choose and Cut Your Frame
It’s now time to go out to the wood pile (or the hardware store) and select your wood pieces for your frame. You can do this with any size boards, just keep them kind of similar on every side.

My boards were all different lengths (not shown), so I had to cut them down to size.
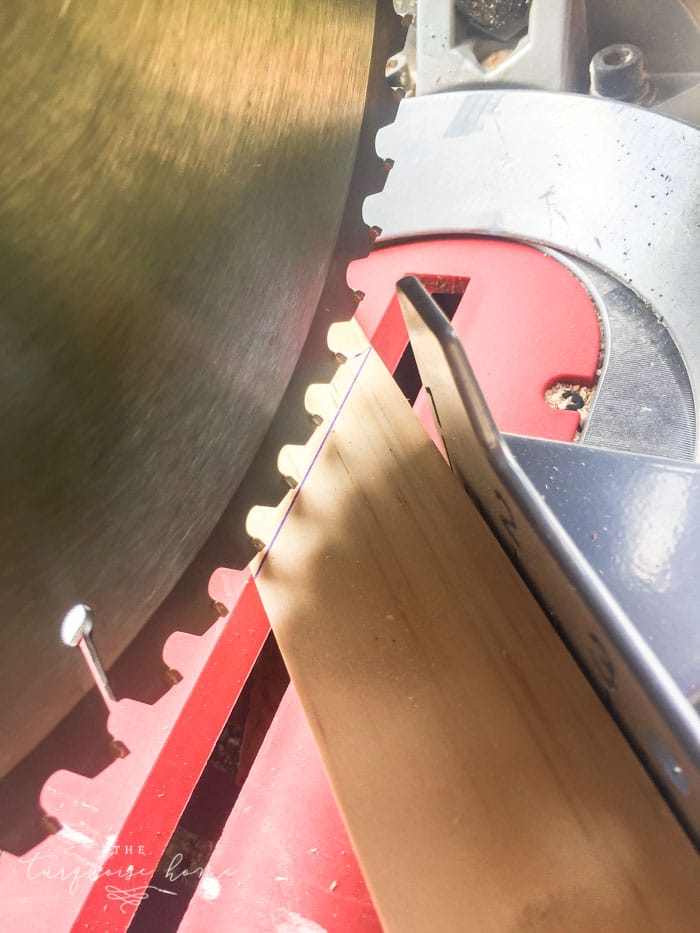
TIP: If your miter saw doesn’t have a laser, then pull your saw down to touch the wood before you cut. Make sure that the cut line is right at the outside of the blade with the piece you want to keep on the opposite side from the blade. This will keep you from cutting your wood piece too short. You can always sand it down a little bit if it’s a little too long. P.S. I know there are more technical terms for all of this, but I have no idea. 😂
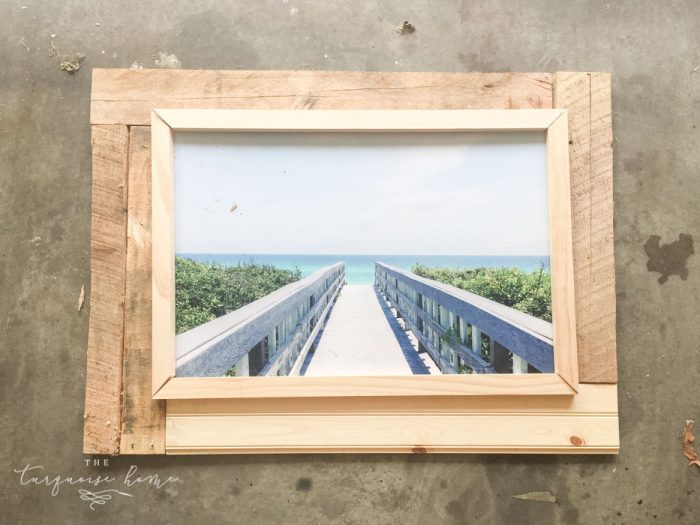
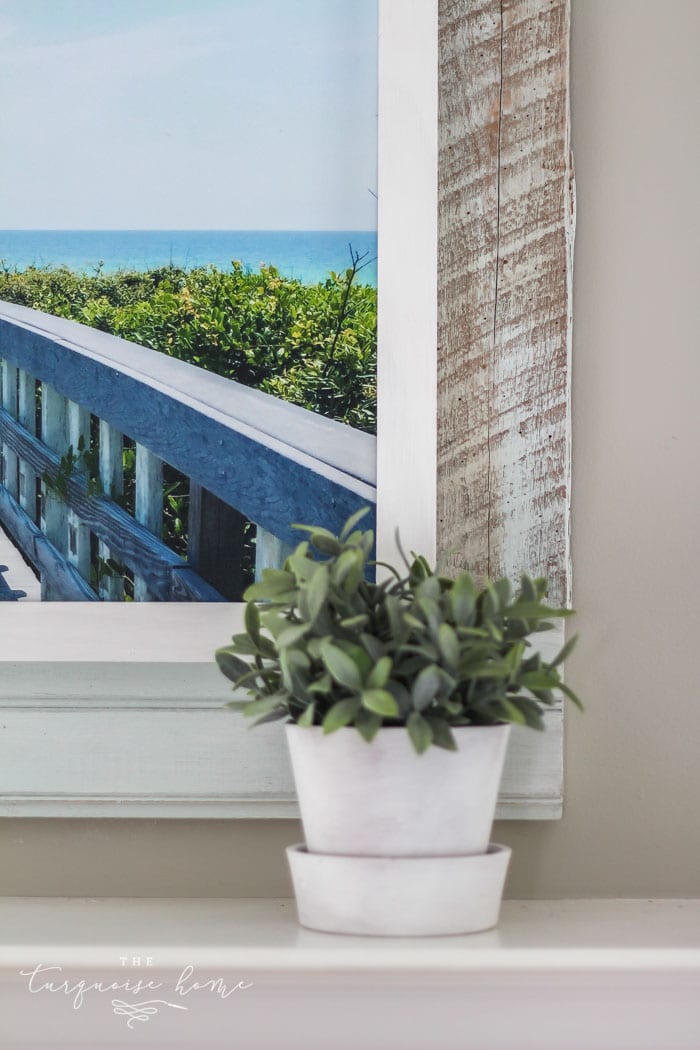
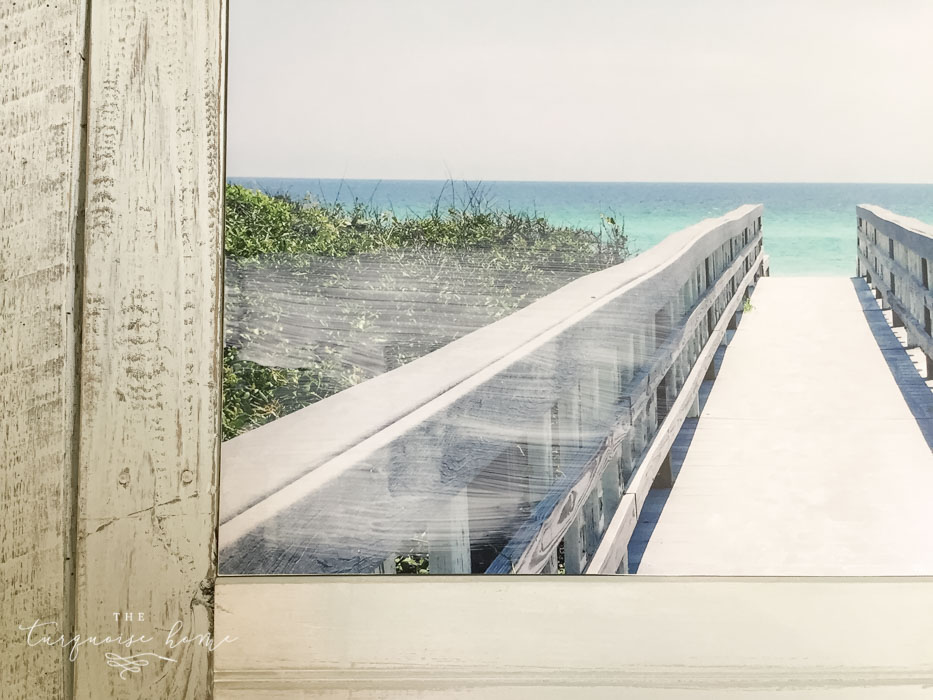
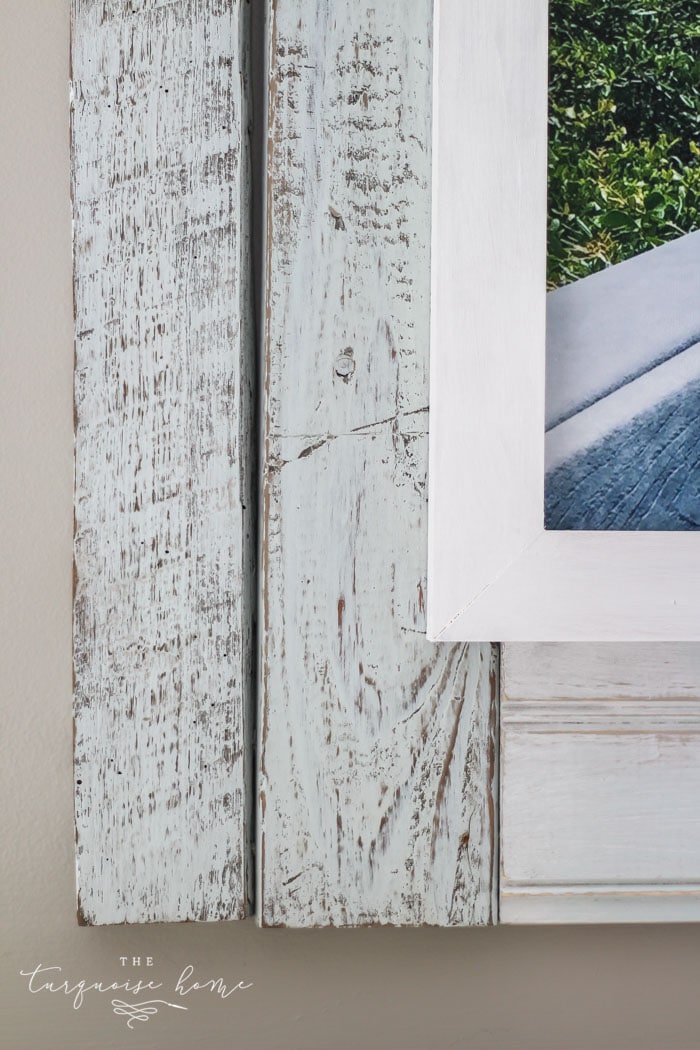
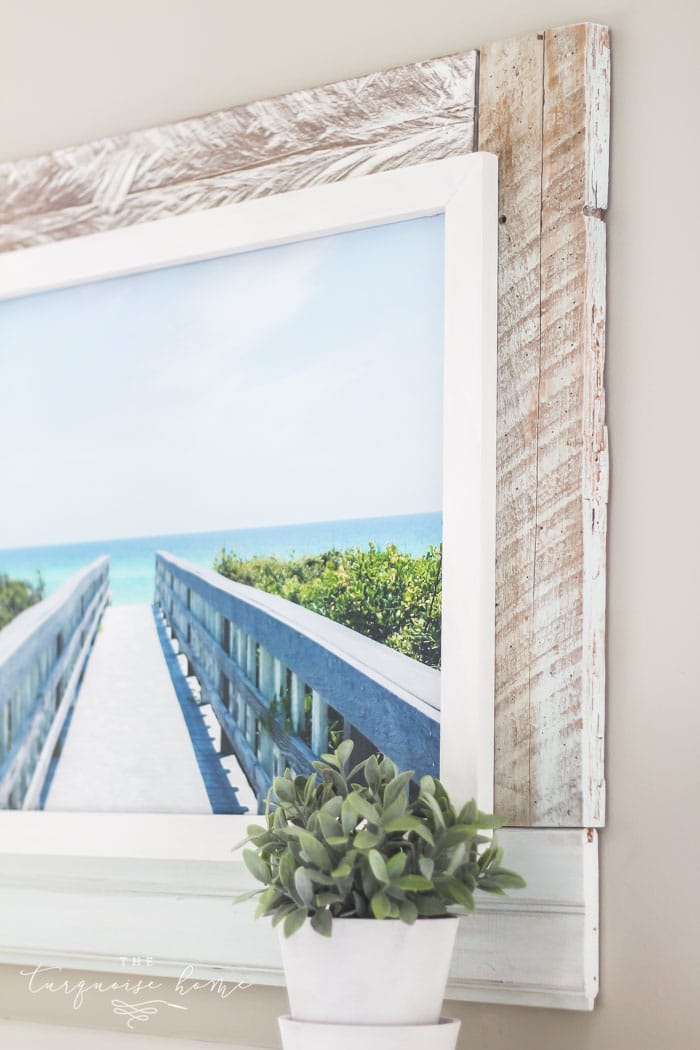
My frame boards aren’t exactly the same size on each side, but I’m ok with that. I liked the funky, non-symmetrical look of the frame.
I also decided that the boards around the canvas didn’t look finished enough, so I miter cut a 1x2x8 board down to finish off the frame. It gives it a more polished look, I think.
Step 4. Paint your Frame.
OK, so I decided to paint the individual pieces of my frame before I put it all together. That is because I wanted each piece to look a little different.
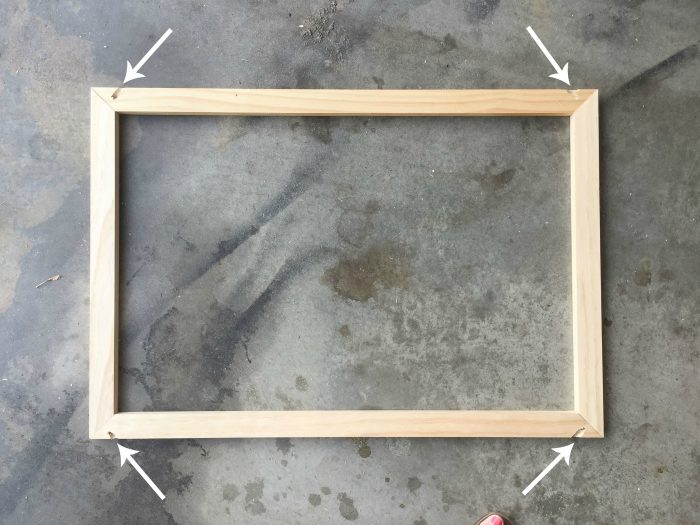
I did, however, go ahead and assemble the thin inner frame, because it was all going to be painted the same. I’ll show how I did that later, though.
While I didn’t really approach this step with a plan on how I would paint each piece, I did plan out my paint colors. I chose 3 colors that looked beachy and matched my decor. Then I chose one “stain” color and decided to just use a combination of all of them.
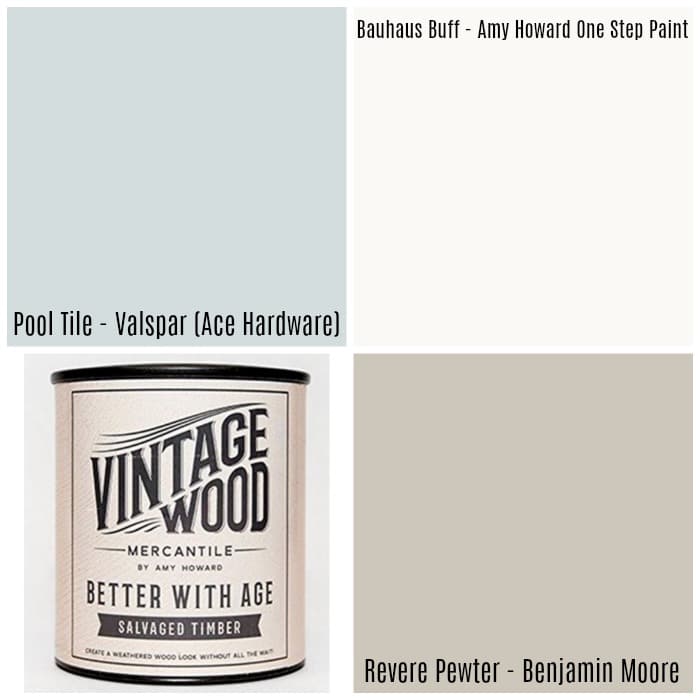
By the way, I love the Better with Age product! I used it last summer with Amy Howard, the creator of the product, and I just loved it. But I haven’t had the time to play with it since. I used it on 4 of the 5 pieces of wood in my frame and I LOVE it!
It isn’t an actual stain, but it is a water-based product that reacts with the tannins in raw wood. It gives it a gorgeous gray, weathered wood look. And for the top board on the frame, I also applied Venetian plaster to the boards. You can find the exact tutorial for this process on Amy Howard’s site HERE.
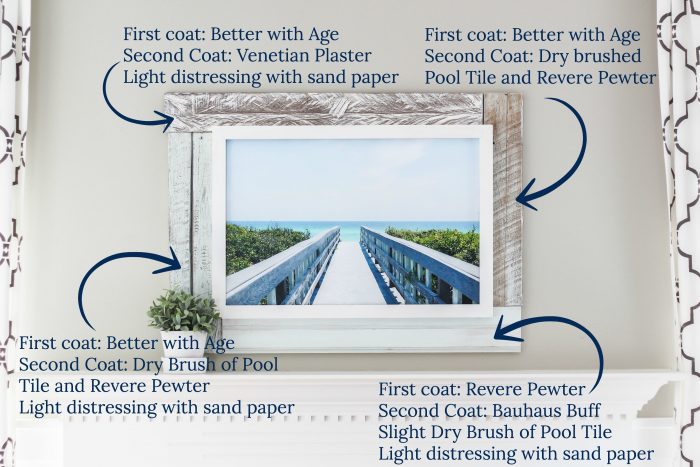
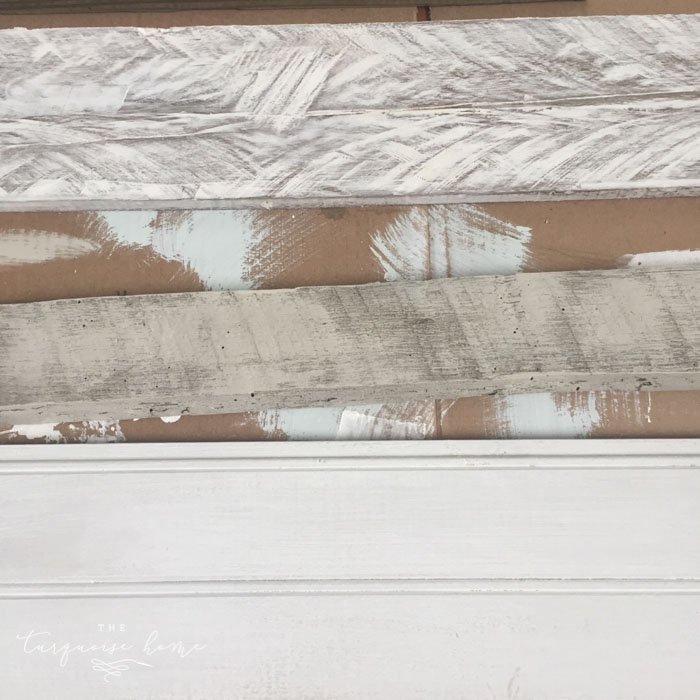
The bottom frame board, I just painted with layers of all the paint colors I had, starting with the gray, then white, and then a very dry brushing of the blue. Do you know how to dry brush paint? You get a little on your brush and then brush it off onto another surface before brushing on your wood. I just use a scrap piece of cardboard to brush the excess out before painting my piece.
After painting all of my pieces, I sanded them with some fine grit sandpaper until they looked good to me. I didn’t paint full coverage on most of the pieces, but the sanding knocks more paint off to give it that distressed, beach-worn look I was going for!
Let all of the pieces dry completely before moving on to the next step.
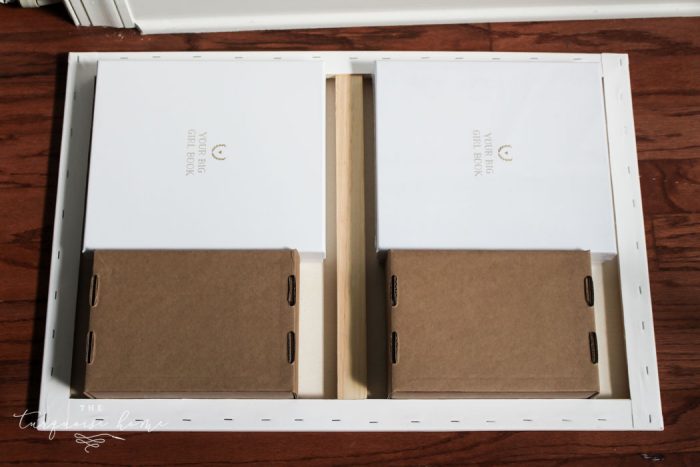
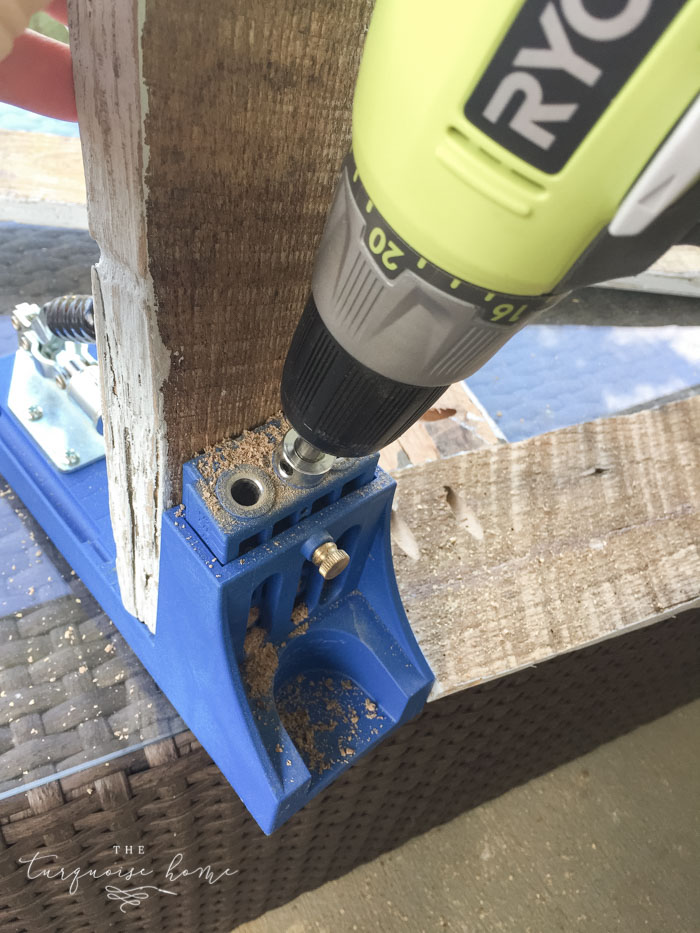
Step 5. Assemble Your Frame
Now it’s time to attach the frame together. I was a little worried about this step because my boards were different sizes and had natural wear and knots, but it worked out! It would obviously be easier if you’re using new boards from the hardware store.
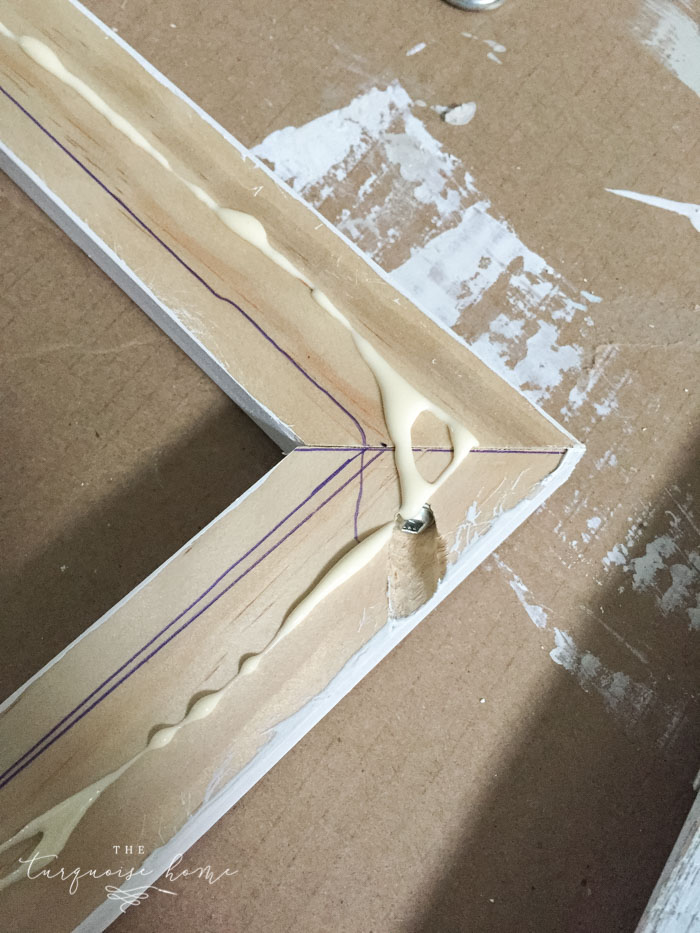
You could use a variety of methods to assemble your frame, but I chose wood glue and my trusty Kreg Jig. It’s perfect for joining boards together without bulking them up and it’s a super sturdy joint!
I had to put the canvas in the middle as I pieced the frame together, because I couldn’t get it just right without the canvas in there. Here are all of the joints I made. I messed some up when I started and “x’d” them out in the picture. 😜
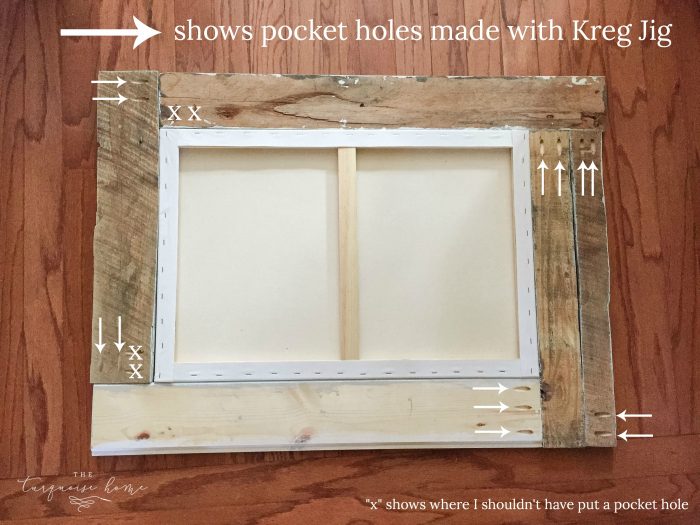
So … the joints were so tight that the canvas was stuck in there when I finished. Ha!
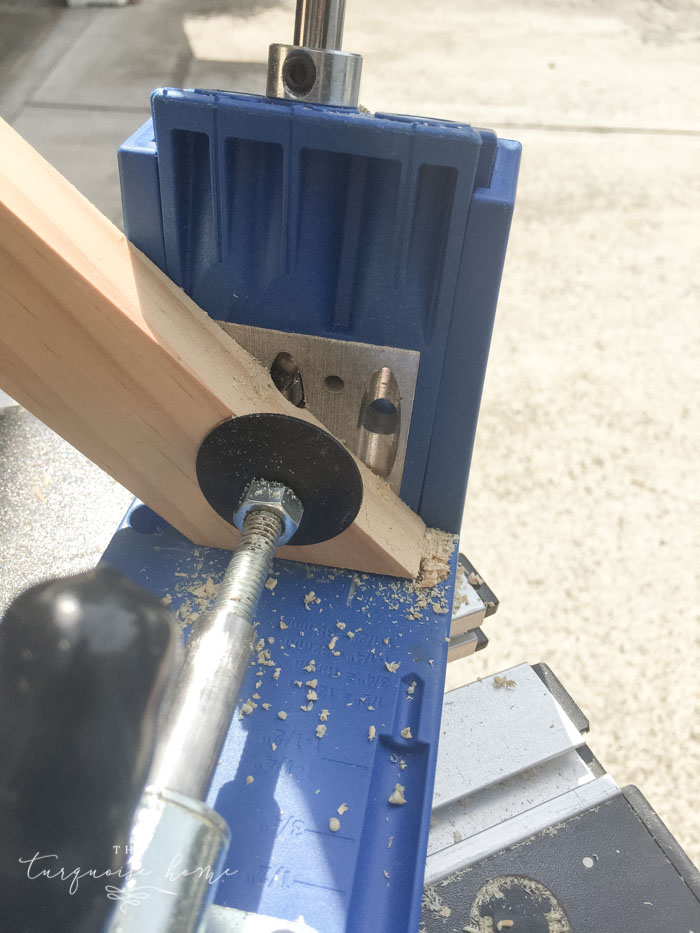
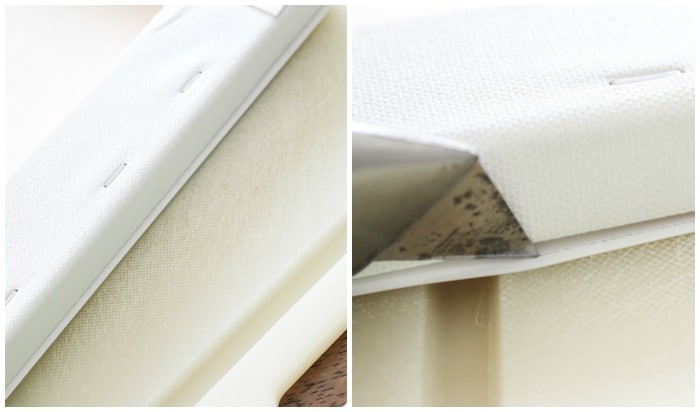
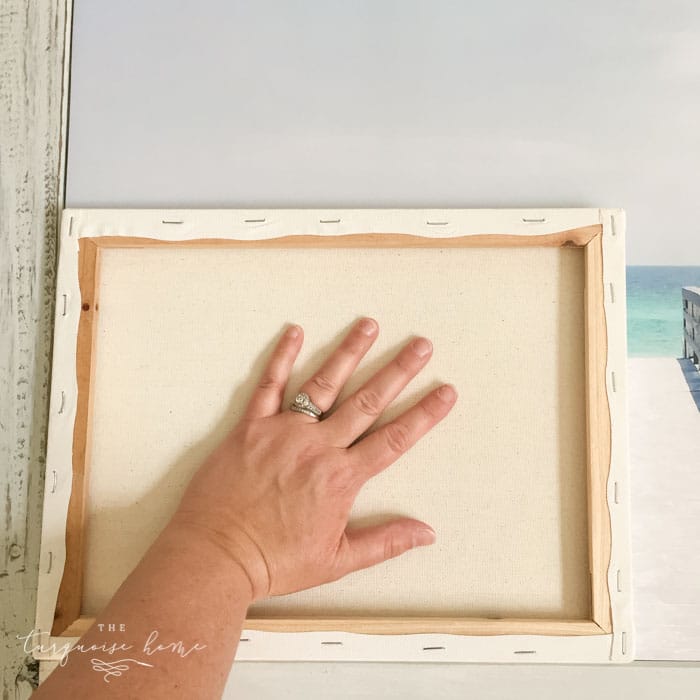
I assembled the thin frame for the top before I painted any boards, because I was going to paint it all white. I also used my Kreg Jig to join the corners together. The Kreg Jig drilled some through the sides of the boards as you can see in the above picture, because I didn’t have short enough screws, but it doesn’t bother me and you don’t notice it on the frame. (I should have had 3/4 inch Kreg Jig screws for this board, but I only had 1.5 inch screws.)
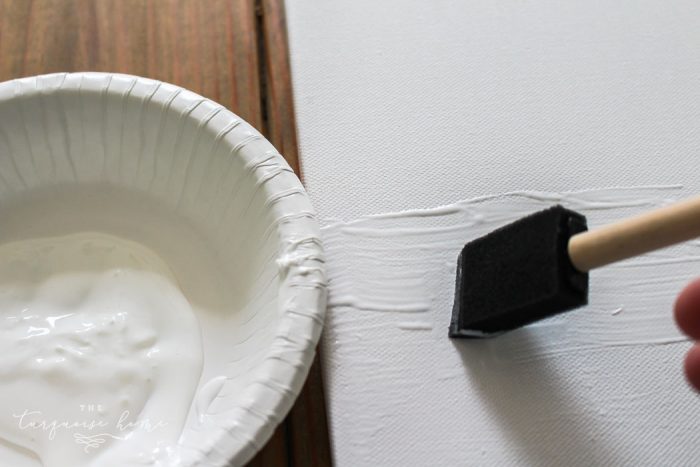
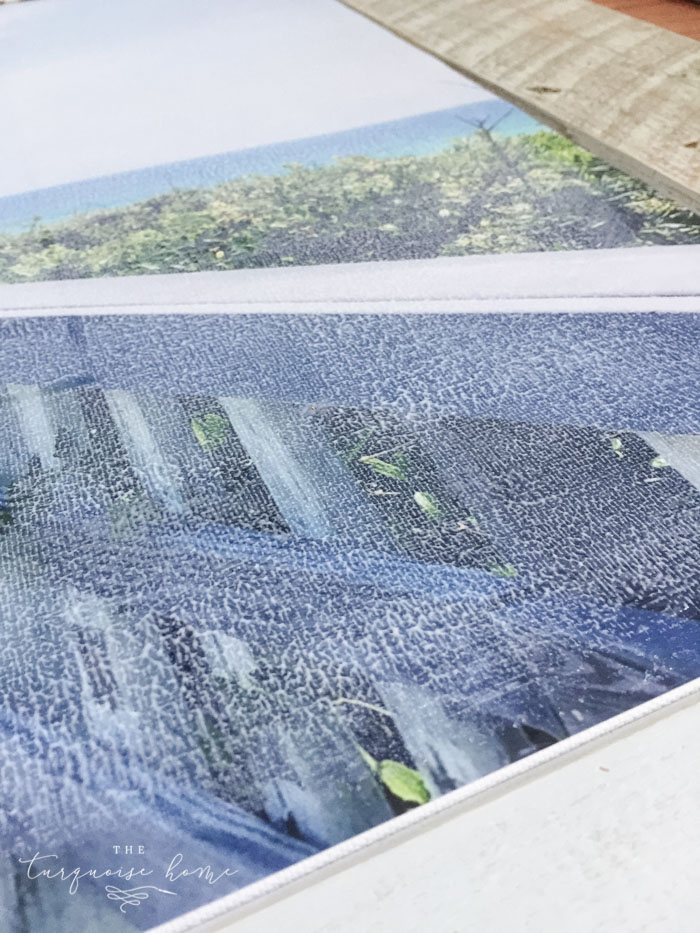
Step 6. Give Your Canvas a Professional Canvas Texture with Mod Podge
I should probably make this step a whole different post, but for now I’ll include it in this post. I tried a tip that I got from my friend Tasha at Kaleidoscope Living.
I love how mine turned out and it camouflages any small bubbles that happened when I put the print on the canvas. It also keeps the sheen from being shiny and reflective. The matte sheen lends itself to a more textured, beachy look. I love how it turned out!
So, you just brush a layer of matte Mod Podge on the top of your print.
Then press a blank canvas on top of the Mod Podge. Press it down really well and then pick it up slowly to keep the canvas pattern on it. Pick it up straight up and don’t move it around, or else the canvas texture will look smeared.
This is how it should look when you pull the canvas off…
Keep repeating these steps until you cover the entire canvas. I had to go back and redo some spots, but it was super easy! You can see how it looked before the Mod Podge dried all the way.
Don’t worry, it will dry all the way and leave a wonderful professional canvas look!
Let it dry completely before moving on to the next step.
Step 7. Add on the Thin Frame to Finish it Off
Now it’s time to add your thin frame to the top! I chose the super easy route and just used wood glue to stick it on!
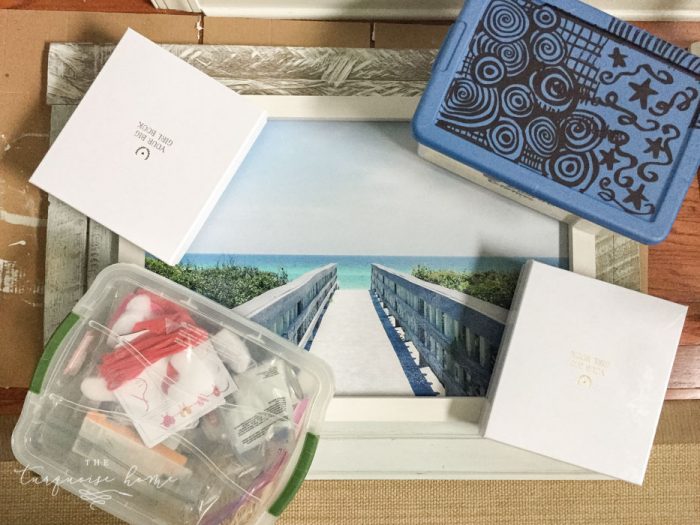
Make sure it’s straight and exactly where you want it and then set some heavy books or boxes on each corner.
Let it dry for a few hours.
Step 8. Add a Hanger to the Back
I didn’t get a picture of this step, but I used one of these.
Step 9. Hang Your Beautiful Frame and Admire!!
Yay!! You did it! I’m so happy with how mine turned out and I know yours will be fabulous as well. If there’s any part of this tutorial that doesn’t make sense, just leave a comment below and I’ll try to clear up any confusion.
And if you end up making one for your home, send me a picture of it to [email protected]. I’d LOVE to admire your handiwork!
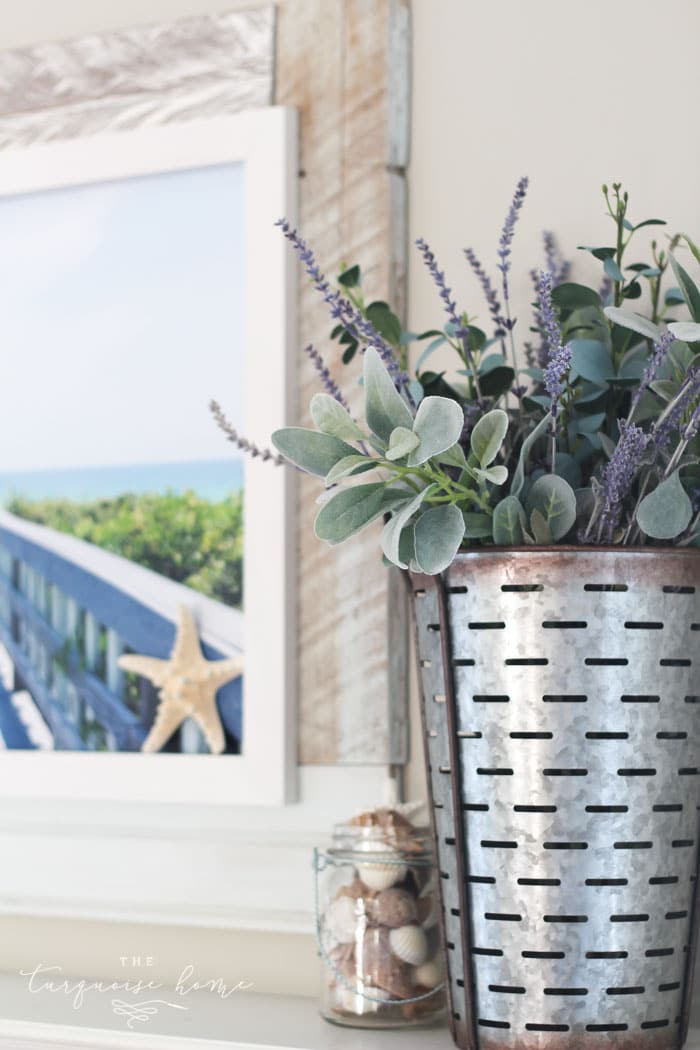
If you want to see the frame and how to whole summer mantel turned out, then click HERE.
And if you’d like this beach picture, you can buy it HERE! 😊
More Posts You Will Love:

Absolutely gorgeous! Gotta make this.
Good detailed instructions. Thanks for sharing. I can’t wait to try this.
Love it! So inspiring! Your directions are easy to follow, thank you!
Awww, thank you! That’s always good to hear. I hope my tutorials are helpful! Have a blessed day! Laura
So cute. I love it. Great tutorial on how to make this. Thanks for sharing.
Thank you so much, Pam! xo, Laura