DIY Picture Frame Moulding
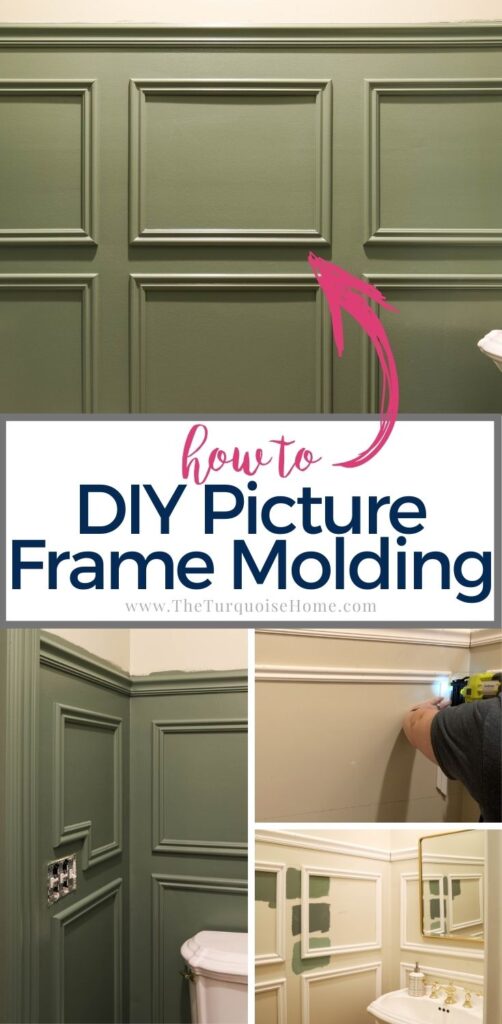
Adding DIY picture frame moulding on walls or adding a chair rail gives instant character to a room! And it’s a great beginner DIY project!
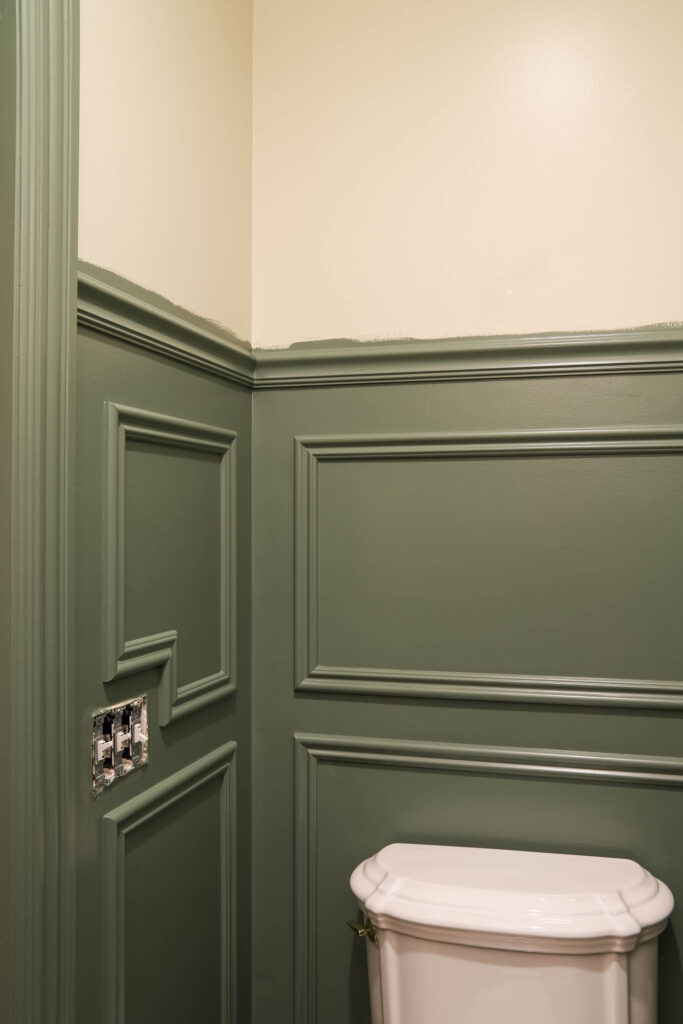
I love the idea of going big in a small powder room like my hall bathroom. It’s a tiny space that can pack a punch. And I knew that adding some picture frame molding to the walls would give it the architectural details it needed!
The Planning Phase
I’ll tell you that planning my molding probably took longer than actually installing it. But don’t worry! I’m here to help you walk through the decisions you need to make before we jump into how to install the moulding.
I looked at a lot of photos of wall trim online in the planning phase. See what style you like and use it for your inspiration.
These are some questions you might want to consider.
1. How many boxes are you doing vertically on the wall?
It’s always good to divide a wall into thirds since the “rule of thirds” is most visually appealing. And for that reason you will often times see moulding take up the bottom third of the wall, or the bottom two-thirds of the wall.
2. How many boxes will you have horizontally on the wall?
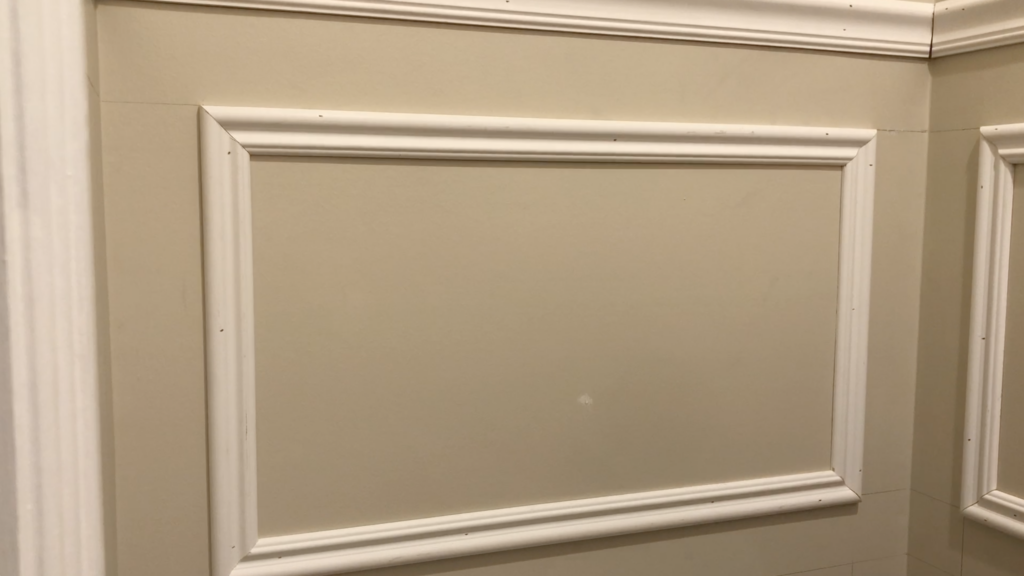
For me, I did one box across on the smaller walls in the bathroom, and I divided the larger wall into thirds.
3. Will you use one large box or have two smaller boxes on the wall?
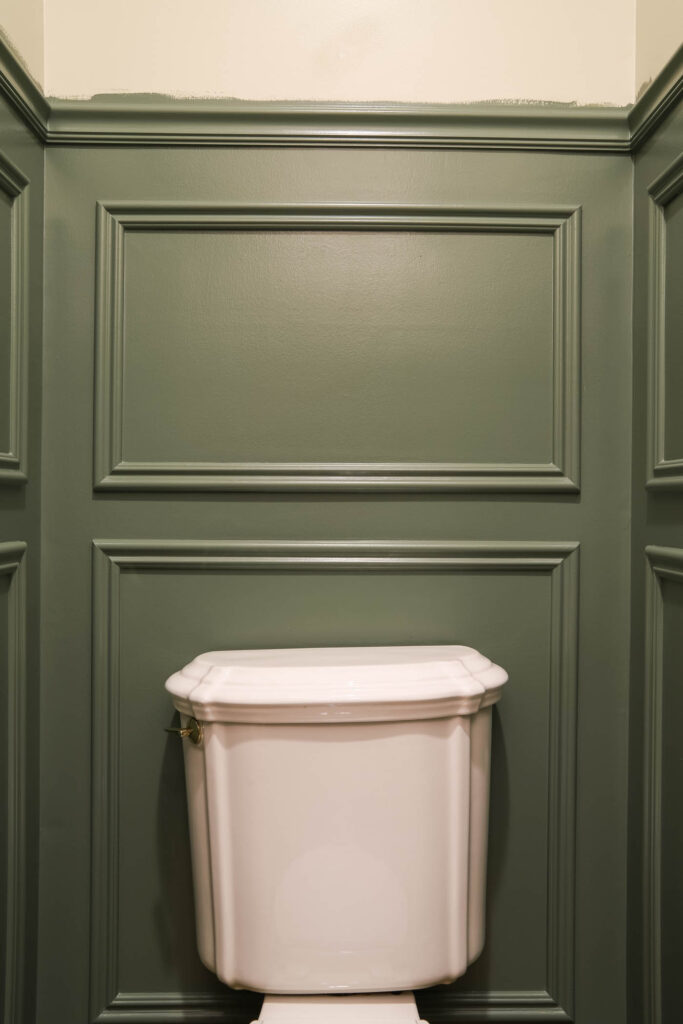
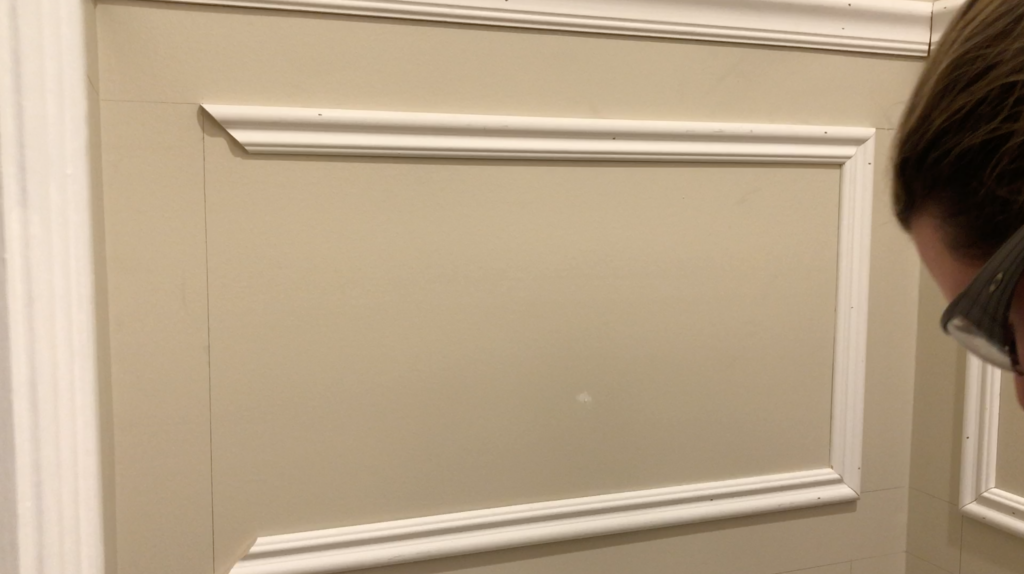
I did two boxes stacked on top of each other with the one in the middle being smaller than the one on the bottom.
4. Spacing between each of the pieces of trim?
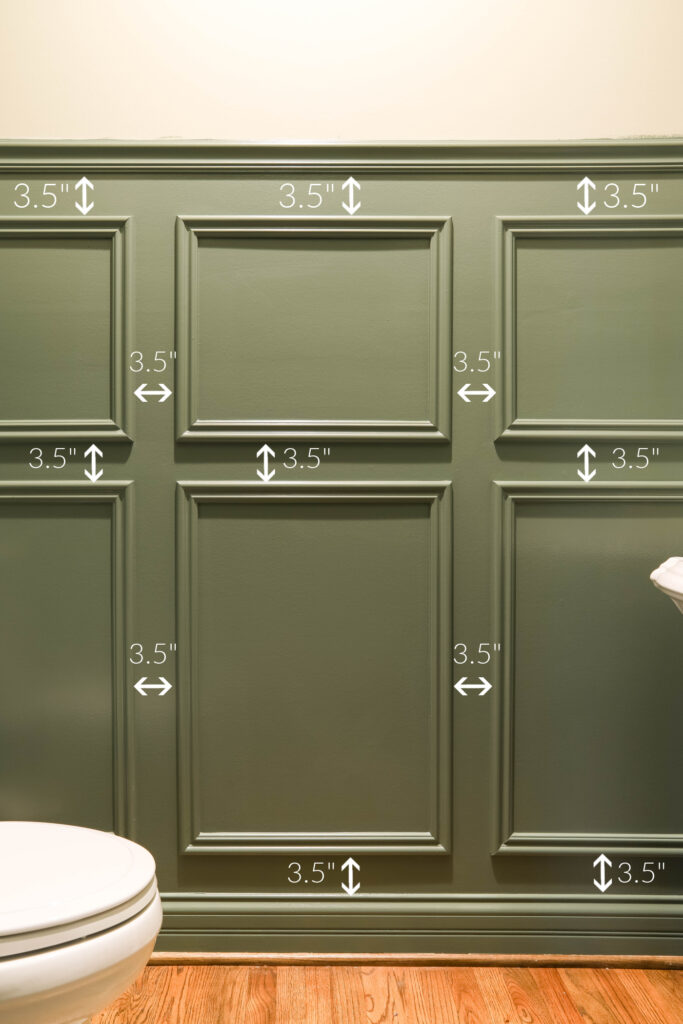
This is your most important measurement. And it will depend on the size of your space. For the tiny powder bathroom, I measured 3.5 inches between each picture frame molding. A larger wall would need something like 5-6 inches between each piece.
The boxes can be different sizes on each wall, depending on the sizes needed for that wall. But you keep the distance the same between all of the boxes, it will look uniform. Does that make sense?
5. Choose the Style of Trim.
If you have a more modern or farmhouse style home, you may want to choose a simple board. But I chose traditional chair rail moulding in my house because it’s a more traditional style house.
6. Decide How You Will Handle Obstacles.
I’m talking about objects in the room that you can’t remove, like the toilet or the sink. I chose the height of my trim based on how it would look around the toilet and sink. This will also include light switches and power outlets. Will you build them up and return the trim into them? Or will you choose to go around them like I did?
This post contains affiliate links for your convenience. See my full disclosure policy.
Want to Save This?
Enter your email below and I’ll send it directly to your inbox!
Supplies Needed for DIY Picture Molding
- Laser Level (I used both a manual level and a laser level for this project, but highly recommend a laser level.)
- Tape Measure
- Pencil
- Miter Saw (or Miter box & saw)
- Brad Nailer (I just got this cordless nailer for this job. I can’t sing its praises enough! I love that it’s cordless. So much easier than using my nailer with the air compressor!)
- Finishing Brad Nails
- Spackling
- Caulk (I love this fast-drying, paintable-within-20-minutes caulk for trim!)
- Caulk Gun
- Nail Punch
- Decorative Trim (in the amount you will need for your space) – I used this chair rail for the top of my trim. And I used this smaller decorative trim for the picture boxes. I chose them partly because they were already primed. But if you choose non-primed boards, be sure to prime them first.
- Paint
- Paint Brush
How to Install Picture Moulding on the Wall
1. Draw your boxes with a level and pencil.
This is huge! I highly recommend drawing out all of your boxes on the wall ahead of time. This will help you visualize how it will look before you ever cut your first piece of trim. Remember to keep the same distance between the boxes, corners, baseboards, etc. (I used 3.5 inches, but you could do larger if you’re working in a larger room.)

This will show you that your boxes will clear the obstacles in the room and will allow you to truly plan out each box before making the first cut.
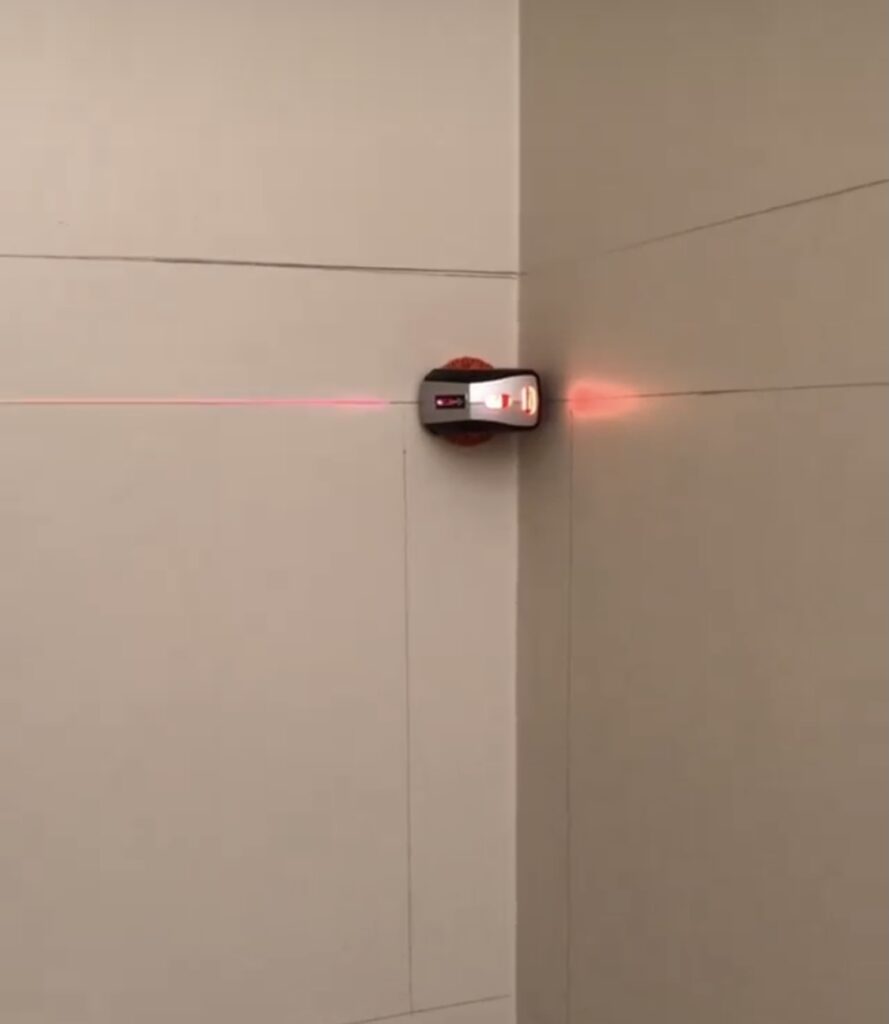
I recommend using a laser level to make this job much easier. But you could do it with a hand held laser, too.
2. Measure the boxes and see how much trim you will need. Then buy it at the store.
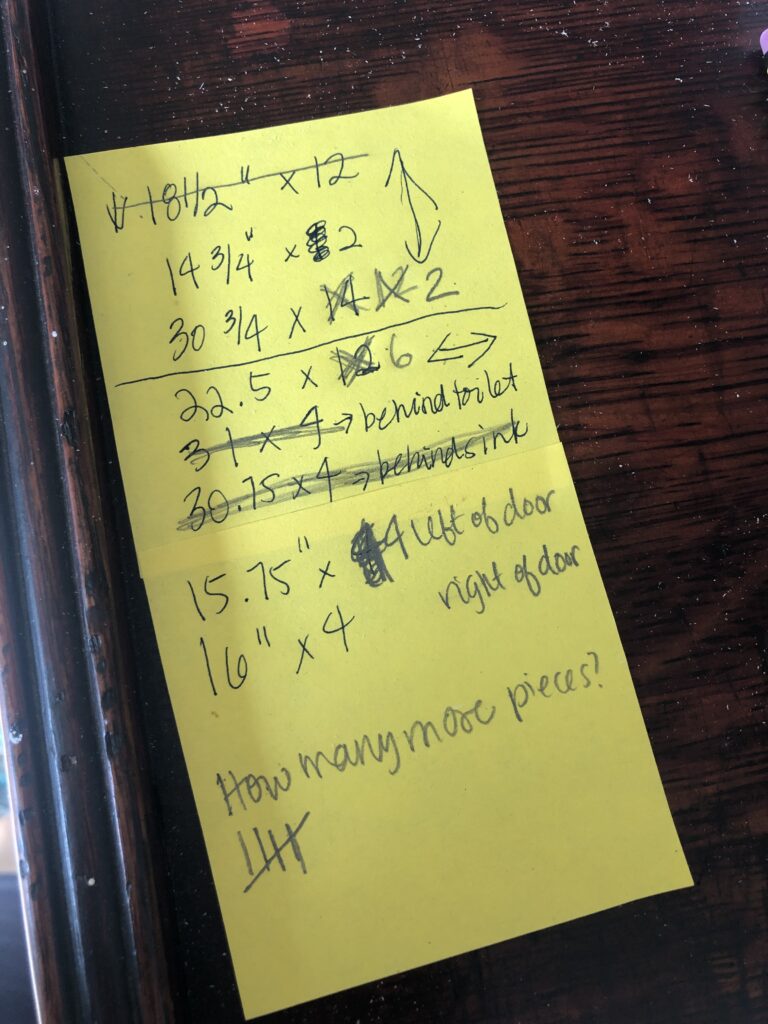
I wrote mine down on a piece of paper so that I could take it outside to make the cuts.
Calculate how much trim you’ll need and go buy it at the store. Be sure to take into account any waste. I underestimated how much I would need because I didn’t take into account the waste from the cuts.
3. Make a Cut List
So for my walls, all of the vertical cuts would be the same for the top boxes and the same for the bottom boxes. Since I had to make 7 small boxes and 7 large boxes, I could cut 14 of each size.
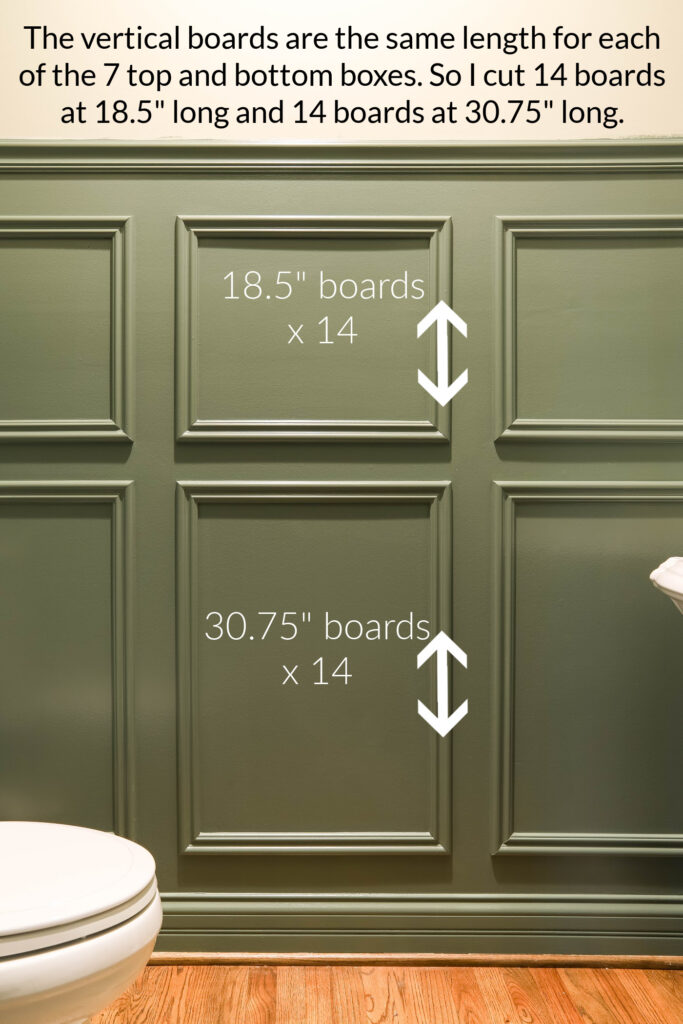
I initially forgot to take into account the light switch and outlet I was working around. So, I ended up only needing 12 of the 18.5″ pieces, but that was fine and I was able to cut those extra 2 pieces to the needed length.
Then I had to measure each horizontal piece. Some were duplicates, like on the wall of 3 in the photo above. But since the horizontal pieces are the same for boxes stacked on top of each other, I could measure the top horizontal piece and then multiply by 4.
4. Cut the Trim
Once I wrote down all of my measurements, I took the list outside and cut everything in batches with my miter saw.
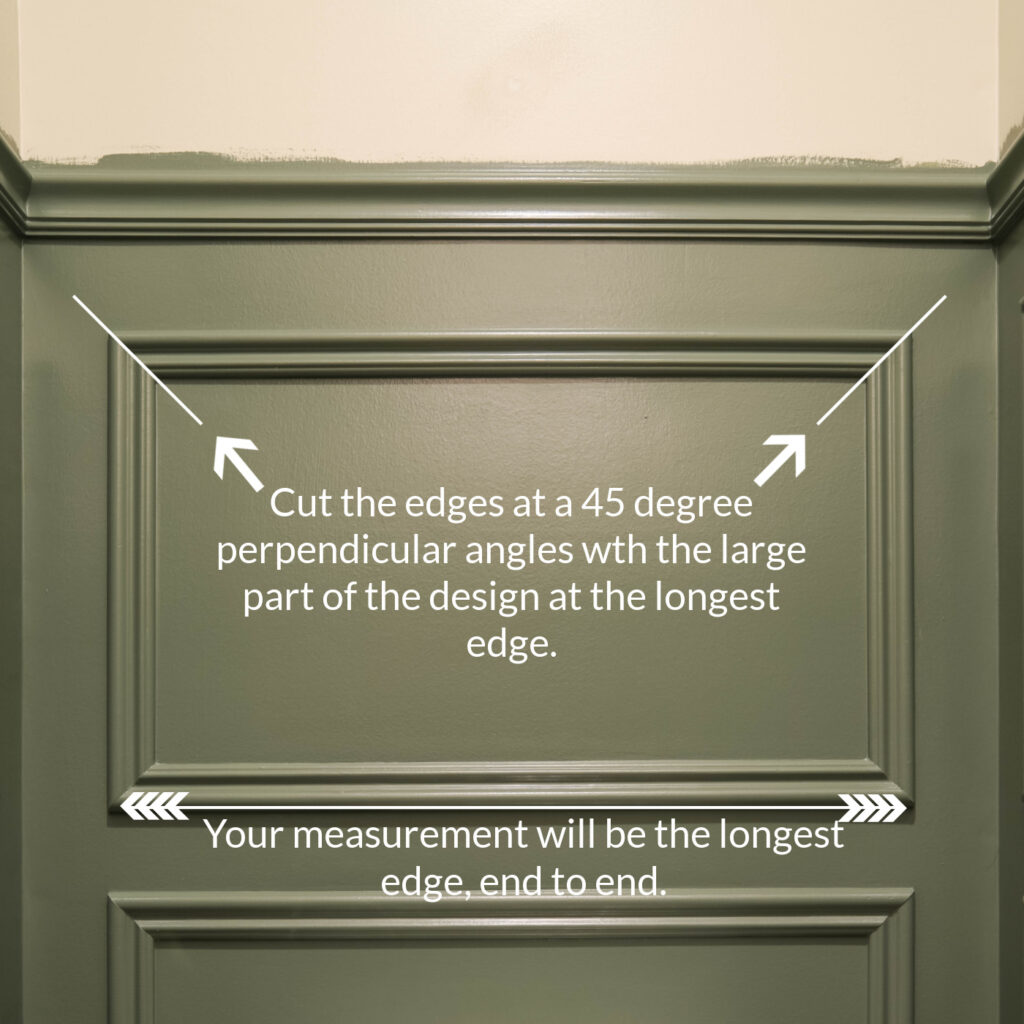
The key here is to cut each piece at a 45 degree perpendicular angle with the larger part of the design on the outside edge.
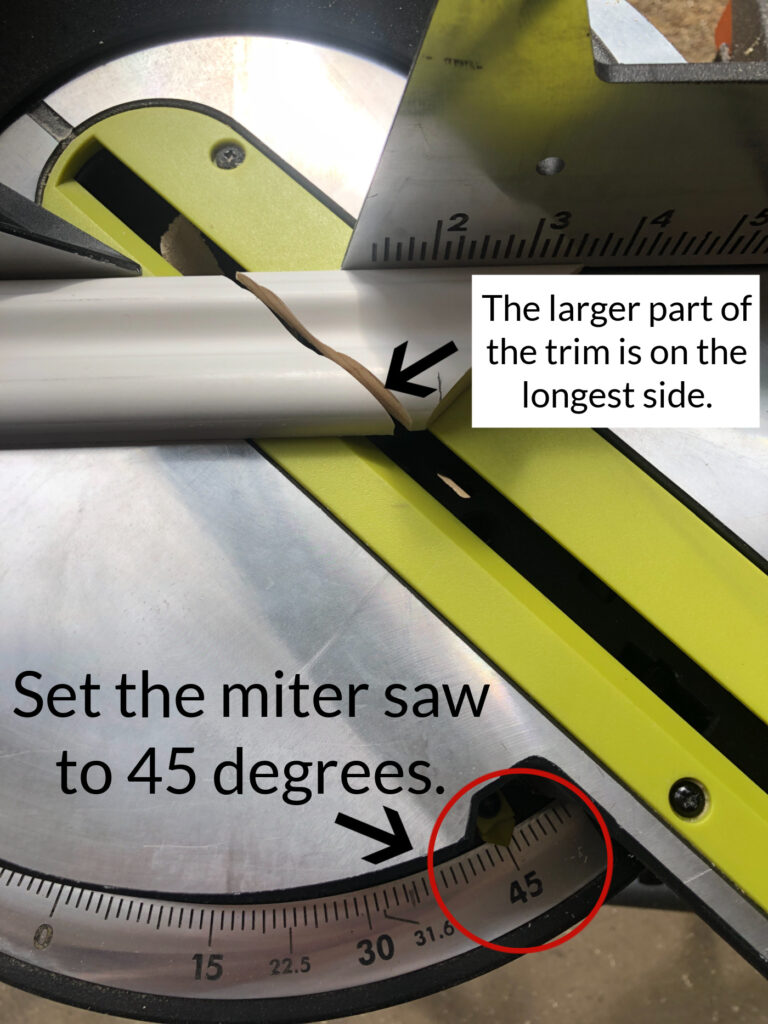
Then you will flip the saw over to 45 degrees on the other side and cut the other end at a perpendicular angle. The longest edge will be the measurement you need.
I would cut the first piece, then write “original” and the measurement on the back to know that it was my first piece. And then I would use that piece as a guide to measure the rest of the pieces.
After I cut each piece, I would hold it up to the original cut piece and make sure they were flush. Making sure they are exactly the same size as the original will help tremendously in making square rectangles on the wall. ☺️
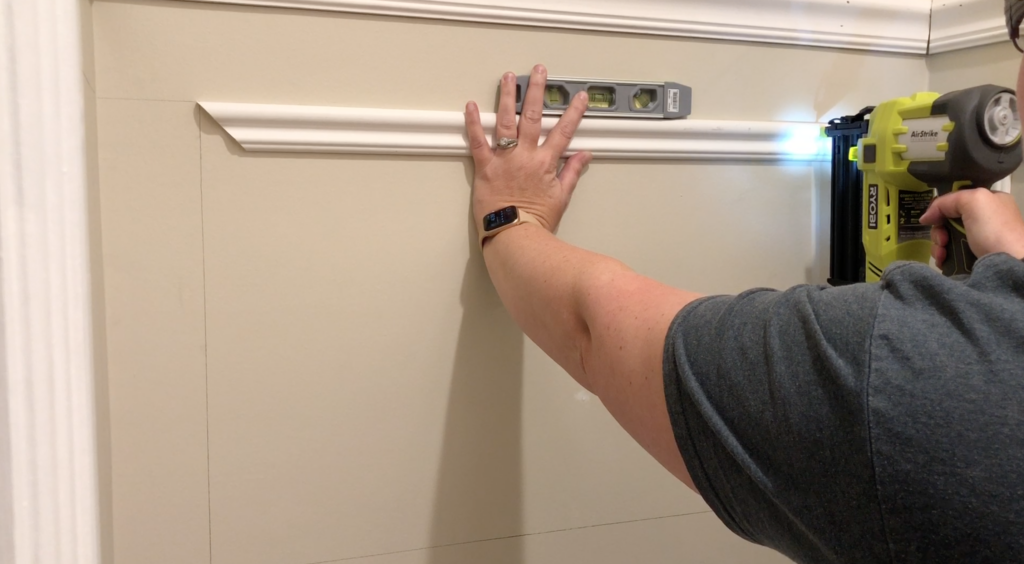
5. Install the Picture Frame Moulding
Now it’s time to put those boxes on the wall with a brad nailer and brad nails.
You will want to line up each piece on the pencil marks you already drew on the wall. I check each board for level with my handheld level before nailing it on the wall.
I put the top piece on first, then I will nail in one of the side pieces with one nail at the top. And then work my way around with the bottom piece next, and finally the other side piece. I try not to put more than 3-4 nails in each board, because that creates more work when you’re covering all of the nail holes in the next step.
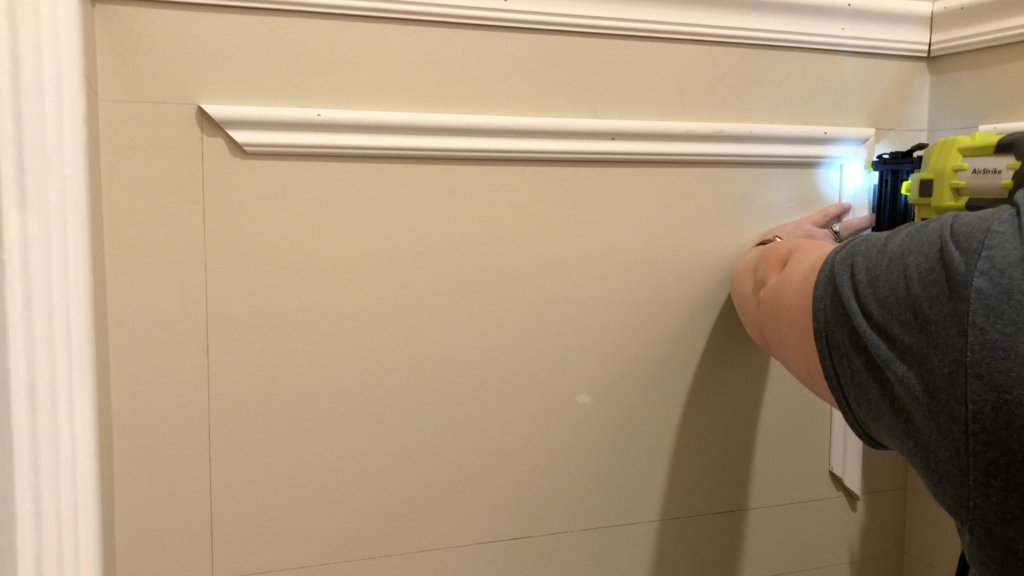
Check for square and level as you go!
Note – I have been eyeing this cordless brad nailer for years, but couldn’t really justify the purchase since I already had a compressor and brad nailer. But I decided this job called would be the perfect excuse. And I LOVED it! It was so much easier to get the job done without dealing with a large compressor and cord.
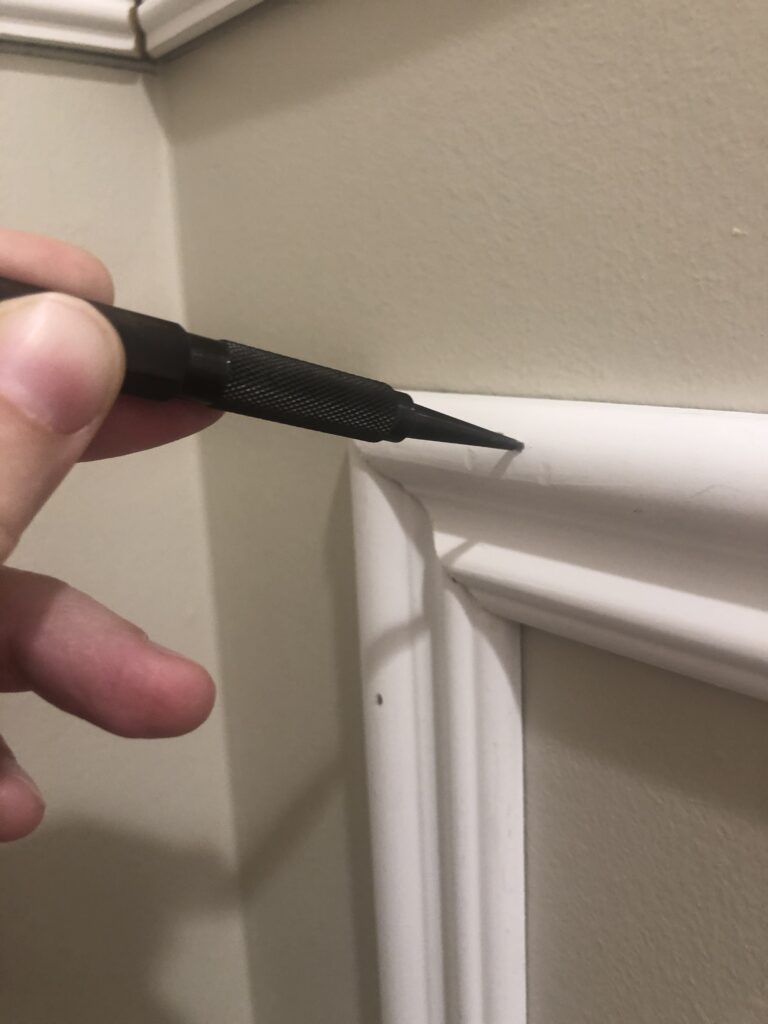
6. Drive in Any Extended Nails with a Nail Punch
You’ll want to make sure all of the nails are fully submerged into the trim pieces. So, find any nails that are sticking up out of the surface of the trim and hammer them in with a nail punch.
7. Fill all Nail Holes with Spackling
I use my finger and a little bit of spackling to fill each nail hole. I try not to leave too much excessive spackling on the trim. Once it’s dry, I come back with a warm, damp paper towel and wipe off the excess. I’ve heard a baby wipe works well, too!
8. Caulk the Seams
Use paintable caulk and a caulk gun to caulk every seam between the wall and picture frame moulding and in the corners where the trim meets. You will want to smooth this out before it dries because once it’s dried, you can’t sand it. I use a combination of my fingers and wet paper towels to get everything smoothed down!
This step will make the trim look like it’s one piece and will cover a multitude of mistakes! It really makes the end result look amazing.
9. Paint!
This is obviously the last step. But I will mention here that you can choose to paint the wall ahead of time, or wait and paint everything together at the end. If I were working in a larger space, I would have painted the walls first, then marked my lines for where to place the boxes. Then I would go back and paint the trim once it’s done.

But since I was working in such a small space, I didn’t feel it would save me much time to paint the walls ahead of time. So, I painted everything after and it turned out great!
I used Farrow & Ball’s Caulke Green, color matched at Benjamin Moore in their Advance Paint in a Satin finish. I decided to do Satin because this is a bathroom. The walls will get splashed with water, and I want to be able to wipe them down.
And of course I used my favorite Purdy brushes for this job. I love them!
Related: Which Interior Paint Finished to Use
You’re finally done! It’s time to step back and admire your beautiful new room!
If you are wondering about the rest of the bathroom and how I’m going to finish the space, you can read the full powder room design plans here. (Hint: wallpaper is coming up next!)
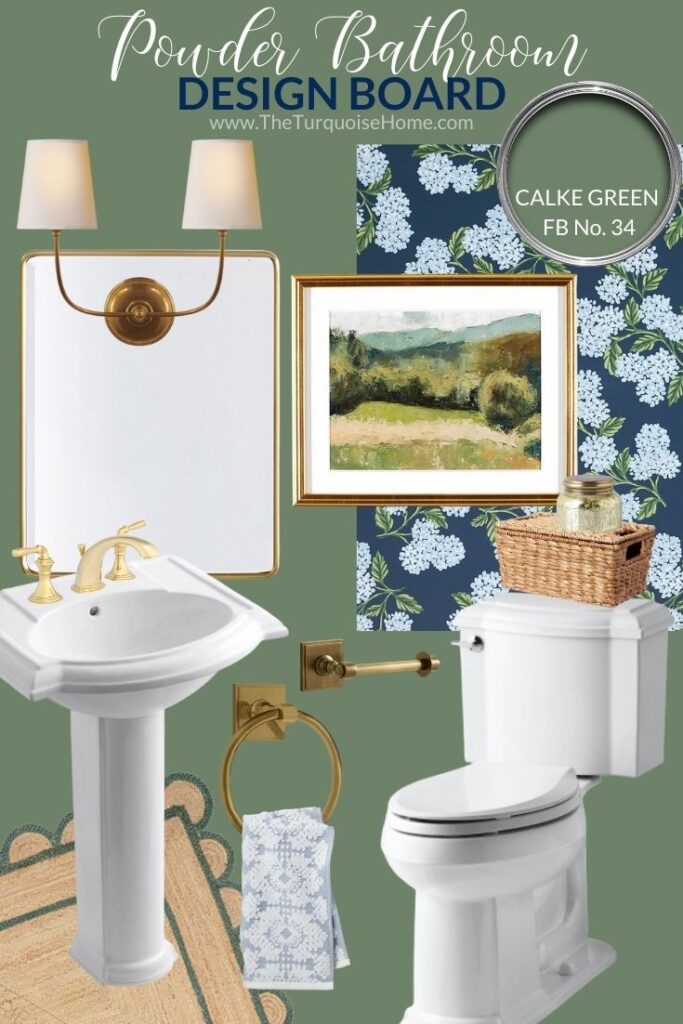
Vendome Double Sconce | Calke Green paint | Vintage Rounded Mirror | Summer Mountain Petite Art | Navy Hydrangea Wallpaper (here, too) | Pedestal Sink | Tank Basket | Candle | Toilet | Toilet Paper Holder | Towel Ring | Hand Towel | Scallop Jute Rug
This is a great project for a beginner DIYer. It’s really simple and straight forward and doesn’t need many tools! If you try it, I’d love to see your work!
And if you have any questions about the process, please leave them in the comments below!
More Posts You Will Love:


Did you also go 3.5” in from each corner of the room?
Beautiful look- what are the dimensions for the picture frame moulding you used?
This is stunning! Do you have to worry about hitting plumbing?! That’s my current hold up with tackling this as a total novice. I know my shower is on the other side of the wall I want to do picture frame moulding on. Thanks!!
Love it! Will the brad nailer hold in drywall or is liquid nails also needed?
Hi Cheryl, I didn’t need to use liquid nails. It was able to work with just the brad nailer. Then only exception is if the walls aren’t perfectly flat, then you may need more than the nails to hold the trim on the wall. I will nail them in at an angle first, to see if that will work. And if not, then I would use liquid nails. Hope that helps! xo, Laura
Thank you so much! This tutorial was very helpful! Your powder room is perfection!
Thank you for this article! I am a complete novice doing some picture frame trim on my kitchen island. You answered a couple questions I had about measuring and placement that were really helpful. Your bathroom is gorgeous!
Oh good!! I’m so glad it was helpful! We still love the picture trim in our bathroom and plan to do it in other rooms in our house, too! xo, Laura
Hi! Love your new powder room, especially the picture frame trim.
I have a question about the trim and mirror hung over it. How did you hang the mirror? Is it standing away from the wall? Did you have to add a board to the wall to hang the mirror?
Hi Janet! Great question! I just used large screws that were extra long in order to hang the mirror. It helps that the mirror isn’t too heavy, but one screw is in a stud and the other one I used an anchor. It sits about half an inch out from the wall in order to account for the wall trim! It was super easy to do. Hope this helps! Laura
Looking FABULOUS!
Laura 1st off – LOVE this powder room, everything about it! BRAVO!
I want to try the frame mounding in my 1/2 bath. Three walls surround the toilet but one is only 11-1/2” wide. Would you leave it blank?
Hi Terri, I think I’d do a really small one if I could make it work! Thanks so much! Laura