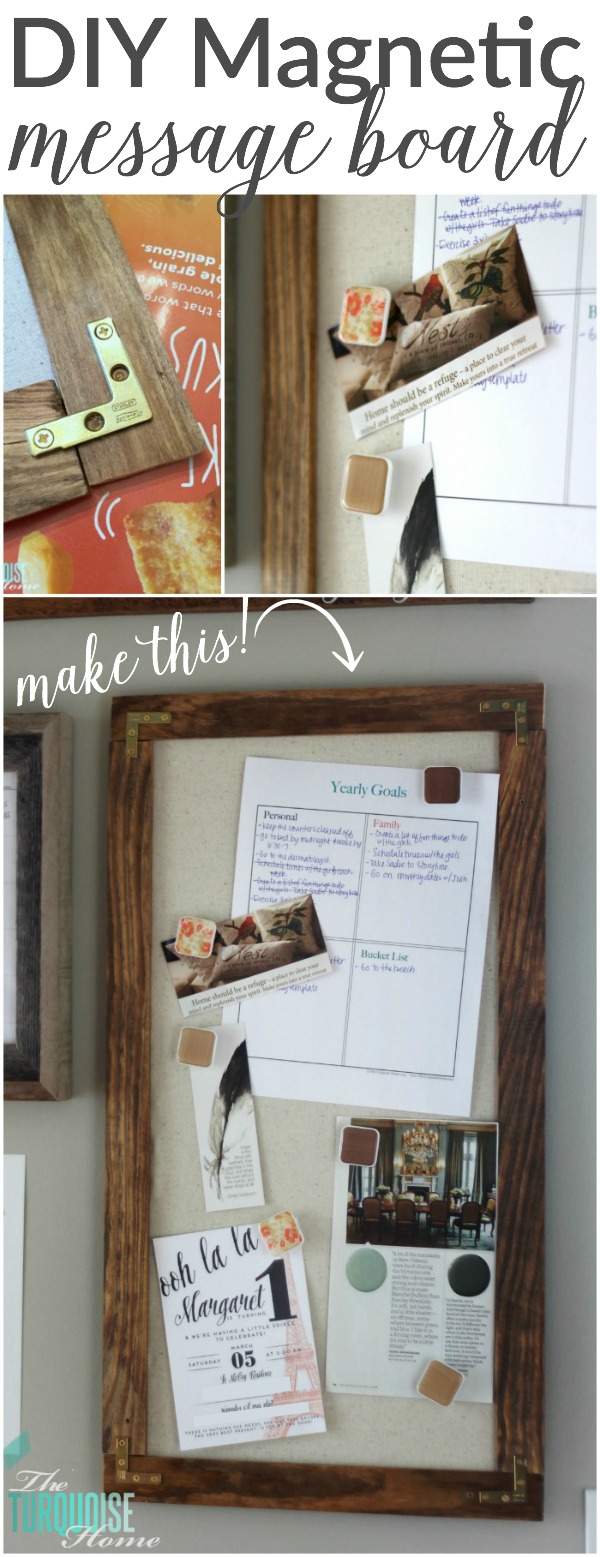
How to Make a Magnetic Message Board
A DIY magnetic message board is great for holding important papers from work, school or church. It also can be used for dated reminders like invitations or inspirational pictures or sayings!
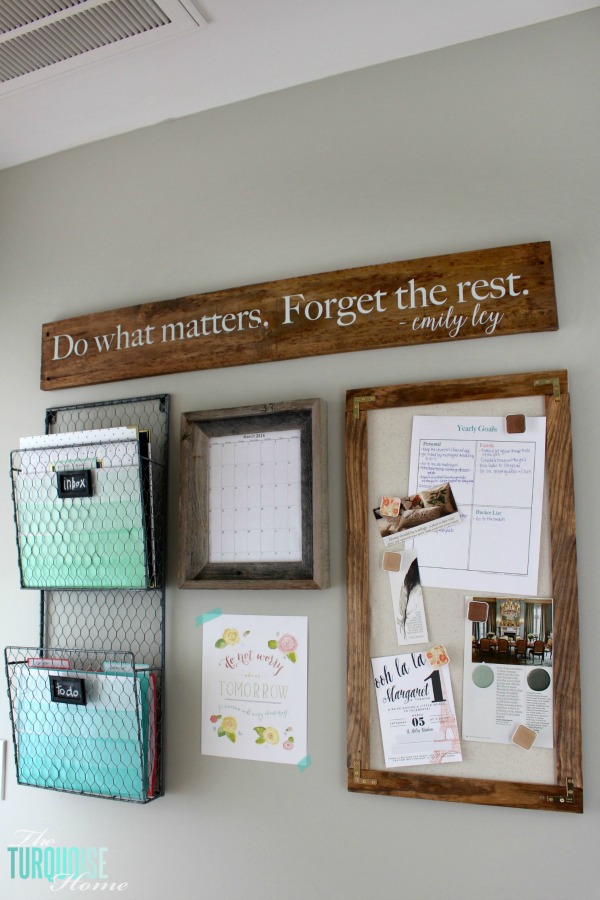
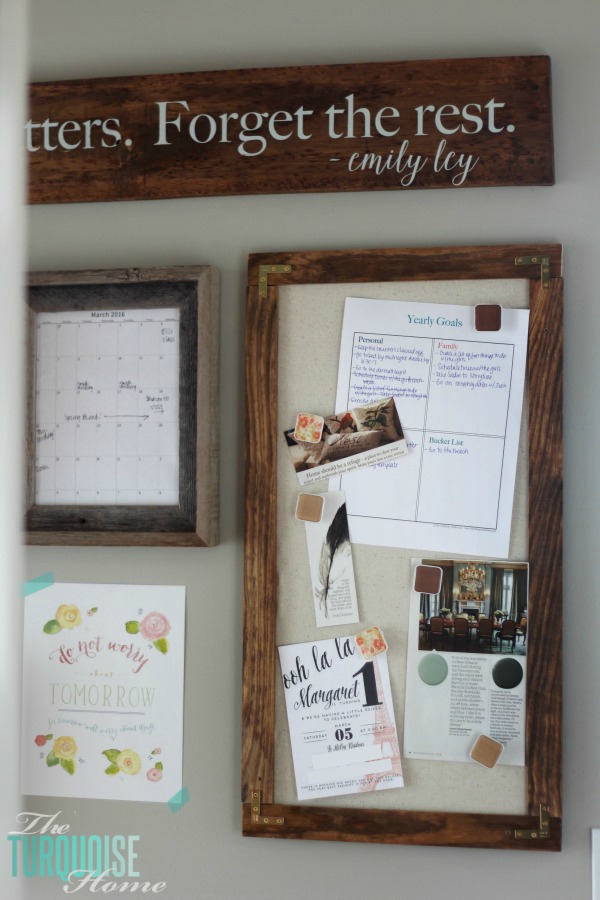
I use my magnetic message board as a part of my command center near my kitchen. It holds my girls’ school lunch calendar, the ballet schedule, my daughter’s recent art work and a few other inspirational sayings. I cleaned it up a bit for its photo shoot, of course. 😉
So, this message board was super simple to make. I made it because I had almost everything on hand. But not to worry! If you don’t, the supplies aren’t hard to find and they are inexpensive. Affiliate links have been included for your convenience. Find my complete disclosure policy here.
Tools Needed for a DIY Magnetic Message Board
- Large piece of sheet metal – (I used a 24″ x 12″ piece of sheet metal, but you can use any size you can find or like. I found mine at Hobby Lobby.)
- Fabric – (Large enough to cover your sheet of metal, plus a little overage. I used leftover fabric from this project. But the beauty of making your own board is that you can use whatever cute fabric you want. And it can coordinate with your room!)
- Wood trim long enough to frame your metal – (I used leftover lattice from another project, but I would recommend something thicker than lattice if you’re going to buy it, like a 1 x 2 board.)
- brass L brackets
- Glue gun and glue
- Stain (optional) – (I used Minwax’s Early American.)
- Miter saw or miter box
- Command strips – (I always keep these on hand for hanging random things around the house. I love how easy it is to hang something and not put a hole in the wall!)
- Don’t forget the cute magnets!!
Steps for Making a DIY Magnetic Message Board
Step 1
Cut down your boards to frame your sheet of metal. I just laid them out, measured them and then cut them with my miter saw. They are small pieces of wood, so you could also use a miter box with a hand saw for an inexpensive solution if you don’t have a big miter saw.
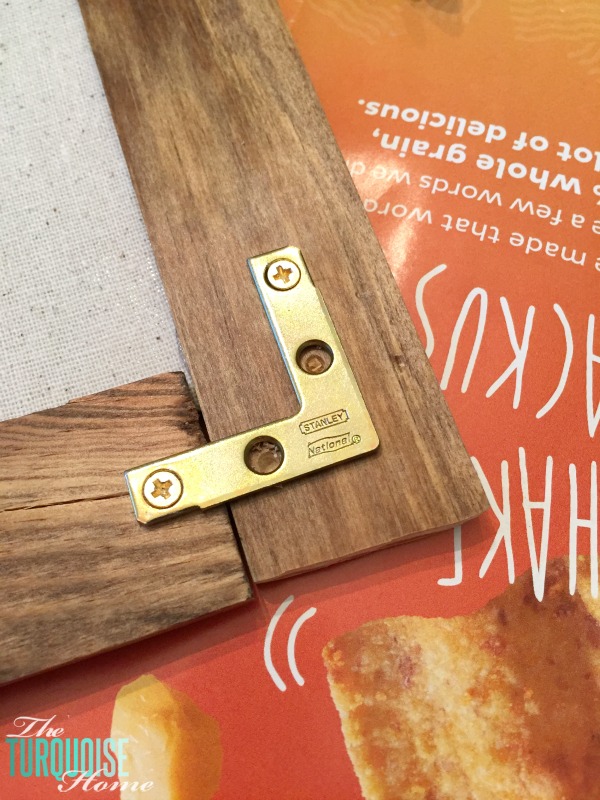
See in the above picture where the far left screw is screwed in? The board is splitting a little bit there. You can solve that by pre-drilling in your wood before screwing in your bracket.
Step 2
Fasten your boards together at the corners with your L brackets. I thought I could just hot glue my boards to the metal and they would stay in place. Not so much! The L brackets keep everything nice and secure. And they are cute, too!
Step 3
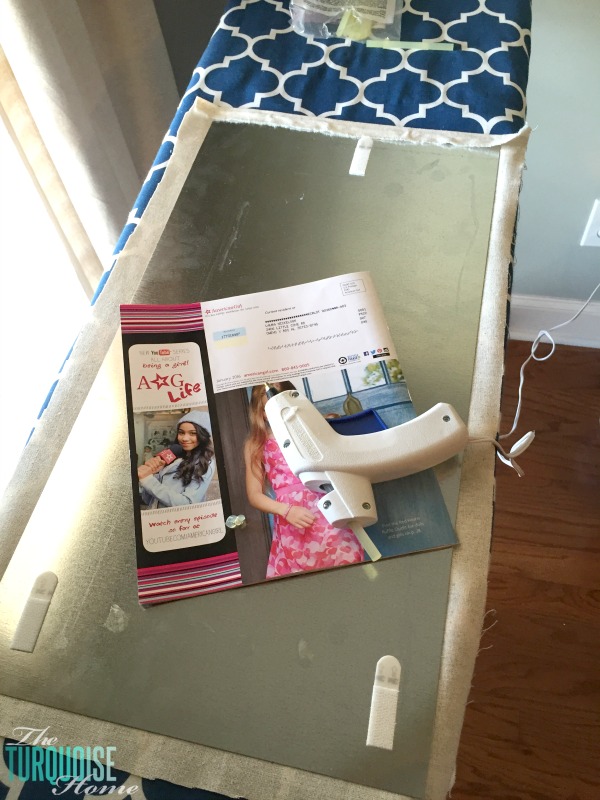
Cut your fabric about 2 inches larger than your sheet of metal. Then hot glue it down around each side. Be sure to pull it tight, but not too tight. You don’t want the fabric to pucker or gather, but you don’t want it to be loose either.
Step 4
Hot glue your frame to the fabric covered metal. Since they are both pretty light weight, hot glue worked perfectly.
Step 5
Hang your new message board! I used command strips to hang mine. They are super easy and worked great with the metal.
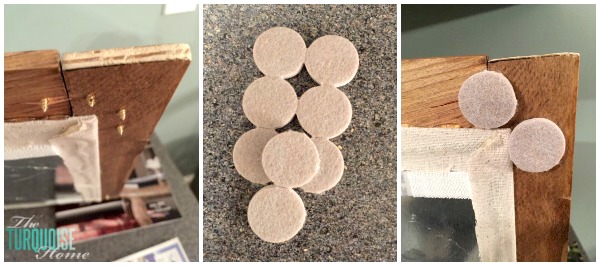
Side note: If you use lattice for your frame, like me, then the screws from the L brackets may come through the back side of the wood. I had to make sure that they were going to be on the outside of the metal. But then they poked through enough on the back side that they wold have poked holes in my wall when I hung it. So, I just put some felt chair pads on the back of the screws and it keeps them from marking up my walls! I think if you used 1×2 boards, you could find screws short enough that you don’t have this problem. 🙂
I hope you enjoy making your very own magnetic message board! I love mine!! Let me know if any of the steps are confusing and I’ll do my best to explain it better. And send me a picture if you end up making one. I love to see your creations with my tutorials!
More Posts You Will Love:


can you use vinyl wall phrases on this magnetic board?
Absolutely!
Can you tell me the measurements of your boards for your frame? I need a reference.
Thank you!
This is a great idea, and I love how simple you made it look with the detailed instructions and pictures. Thank you!