DIY Peel and Stick Vinyl Floor Tile Stickers
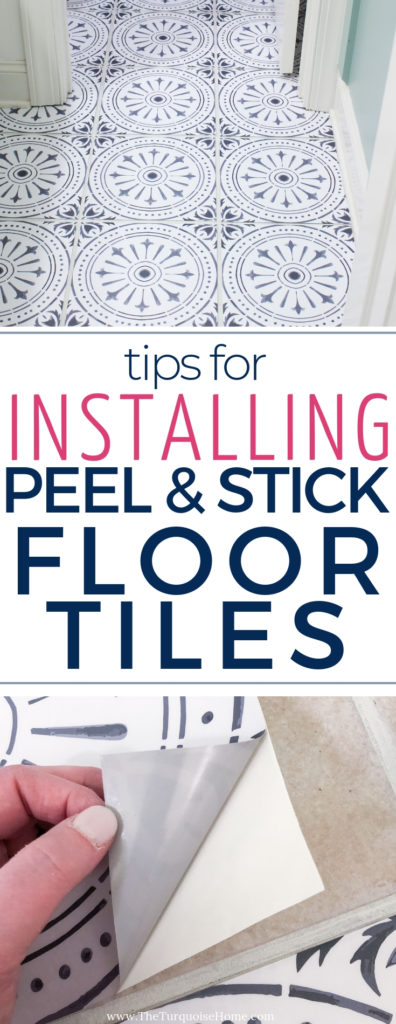
Have you ever wanted to apply peel and stick vinyl floor tile stickers? You’re in luck! I’m sharing my tips, tricks, pros and cons with you today!
I’m sharing my honest review about how to apply DIY peel and stick vinyl floor tile stickers and the pros and cons of using it in your home. It is a great solution for a budget-friendly DIY flooring idea: cheaper than replacing the floors and less messy than paint!
Note: If you are looking for how to install more durable vinyl floor tiles, check out this tutorial!

I’m a huge fan of simple DIY projects that don’t require any demo or a lot of dust. And this is one of them!
Painting my kitchen cabinets is about as intense of a DIY project I want to do on my house. 😂 Hats off to all of the DIYers who remove cabinets and replace countertops and rip out flooring. But I’m going to need a professional to tackle those jobs at my home. 😜
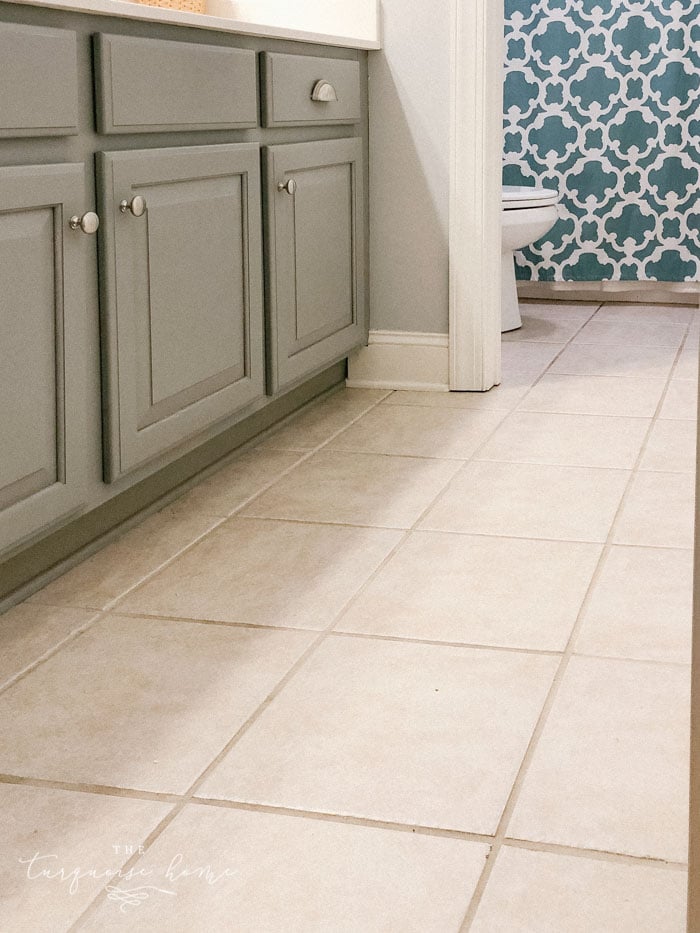
Before the tiles… all the beige floors in the house! I’d already painted these cabinets years ago!
Since we moved into our home with it’s beige floors, beige walls and beige cabinets, I’ve been on a mission to change things up! We have the same exact beige tiles in both of our bathrooms, our laundry room and it’s even the tile on our fireplace. Nobody got creative when building this house, that’s for sure!
So, while I’ve been wanting to change them for a long time, fear has held me back. I didn’t want to:
- Have to demo anything,
- Mess them up permanently,
- Or, do anything too complicated.
I love the look of the moroccan floor tiles you can see everywhere today. And I was planning on stenciling them before I discovered the peel and stick tile option.
But the stick on decals sounded so much easier. Keep reading to see if I would use them on my tiles again. 😉
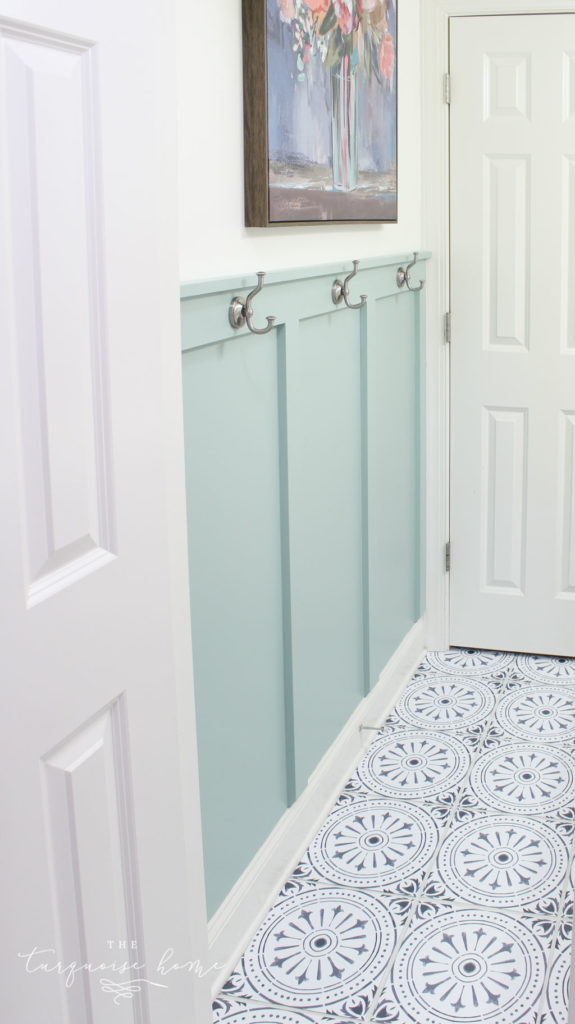
I decided to use them in my girls’ bathroom refresh first to get my feet wet. It’s a small space and it’s for our guests as well, so I wanted to do something fun in there that everyone would see and enjoy.
It took me a little bit to decide on the style I wanted because there are just so many great options out there. I outlined my favorites in this post with 25 options for varying styles of peel and stick vinyl tile flooring. And I finally narrowed it down to this naples tile sticker (click here).
Want to Save This?
Enter your email below and I’ll send it directly to your inbox!
Prep Work
Before you order your tiles, you will need to:
- Calculate how many custom floor decals (stickers) you will need. I added 3-4 extra tile decals to my count just in case I messed some up.**
- Measure your tiles inside the grout lines. Do not include the grout lines in your measurements. Order the tiles 1/8 of an inch less than the size of your tiles! The Etsy shop I ordered from can make your tiles the exact size you need at no extra charge (at the time of this posting).
- Keep reading to find out my exact experience, but in my opinion, you will want to make sure your surface is level before you use vinyl stickers. My existing tiles were beveled on the edge, which caused me some grief, as I share below.
** Be careful to read all of the instructions given to you by the store you buy from in case there are additional prep items.
Supplies You Will Need to Apply Peel and Stick Vinyl Tile
- Tile Floor Stickers – I gathered up my favorites in this post (click here), which will give you an idea of all the different options you have! You can use them on most any surface (like a kitchen backsplash, too), but be sure if you plan to use them in a wet area that they are safe for bathrooms, kitchens, laundry rooms, etc. I used this tile sticker (click here).
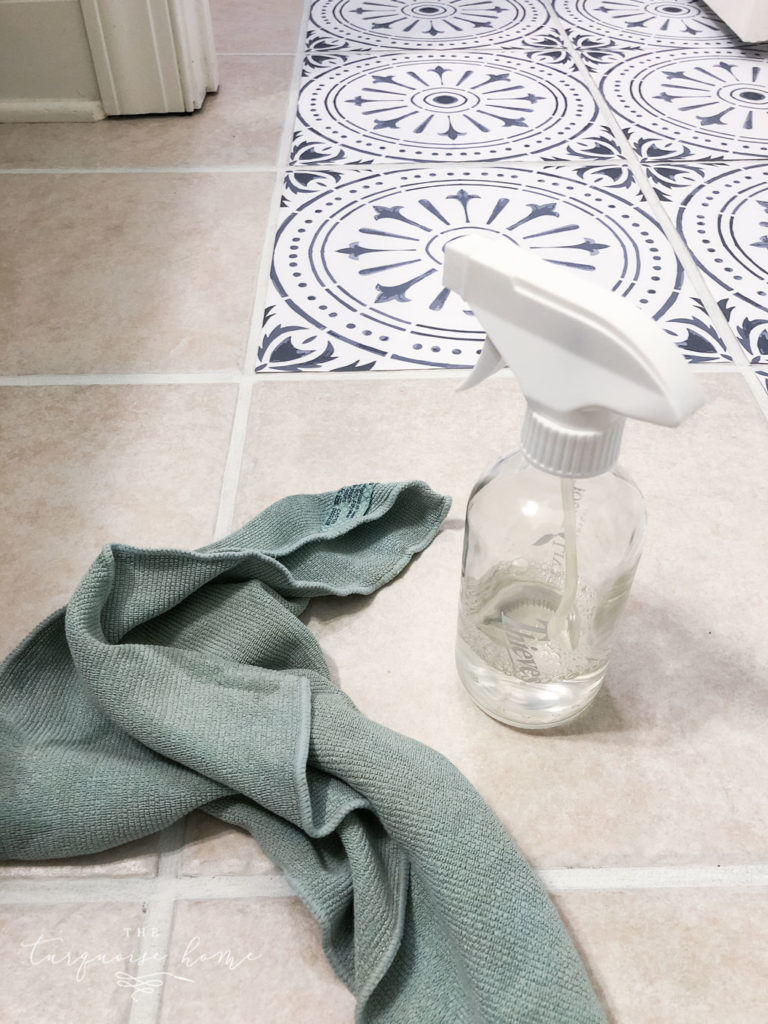
- Cleaning spray & cloth – I used my Thieves cleaner from Young Living, but any kind of Krud Kutter or other degreaser works, too!
- Scissors
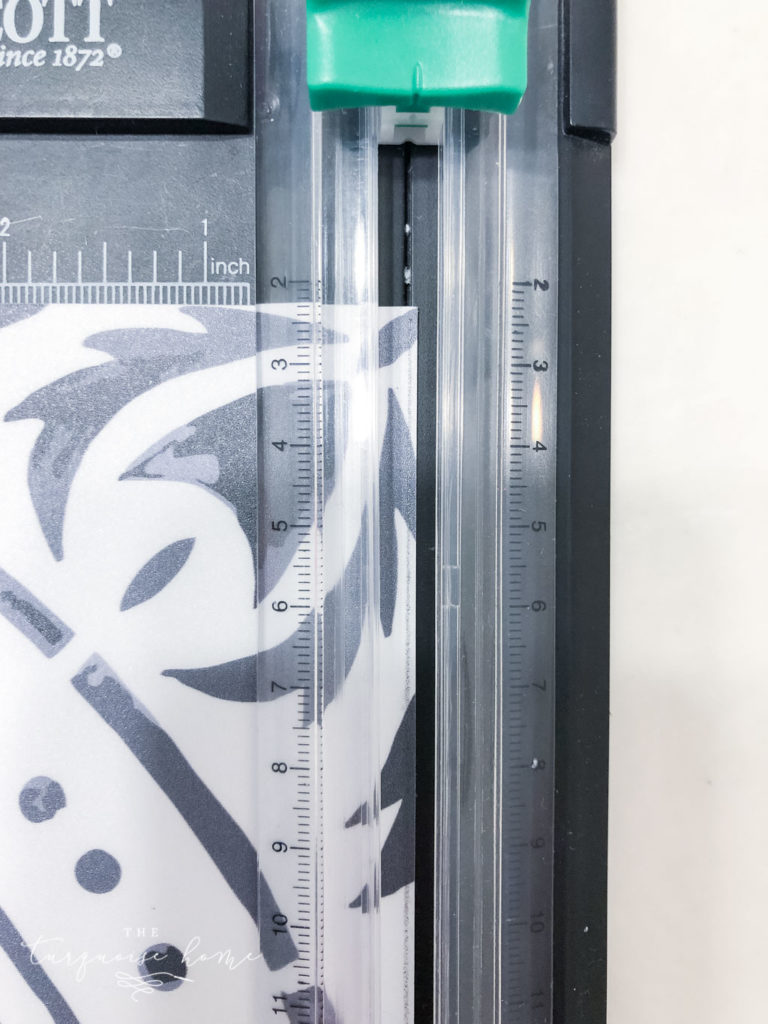
- Paper Cutter, optional
- Pencil
- Wallpaper smoother tool, optional
Steps to Apply Peel and Stick Vinyl Tile Floor Stickers
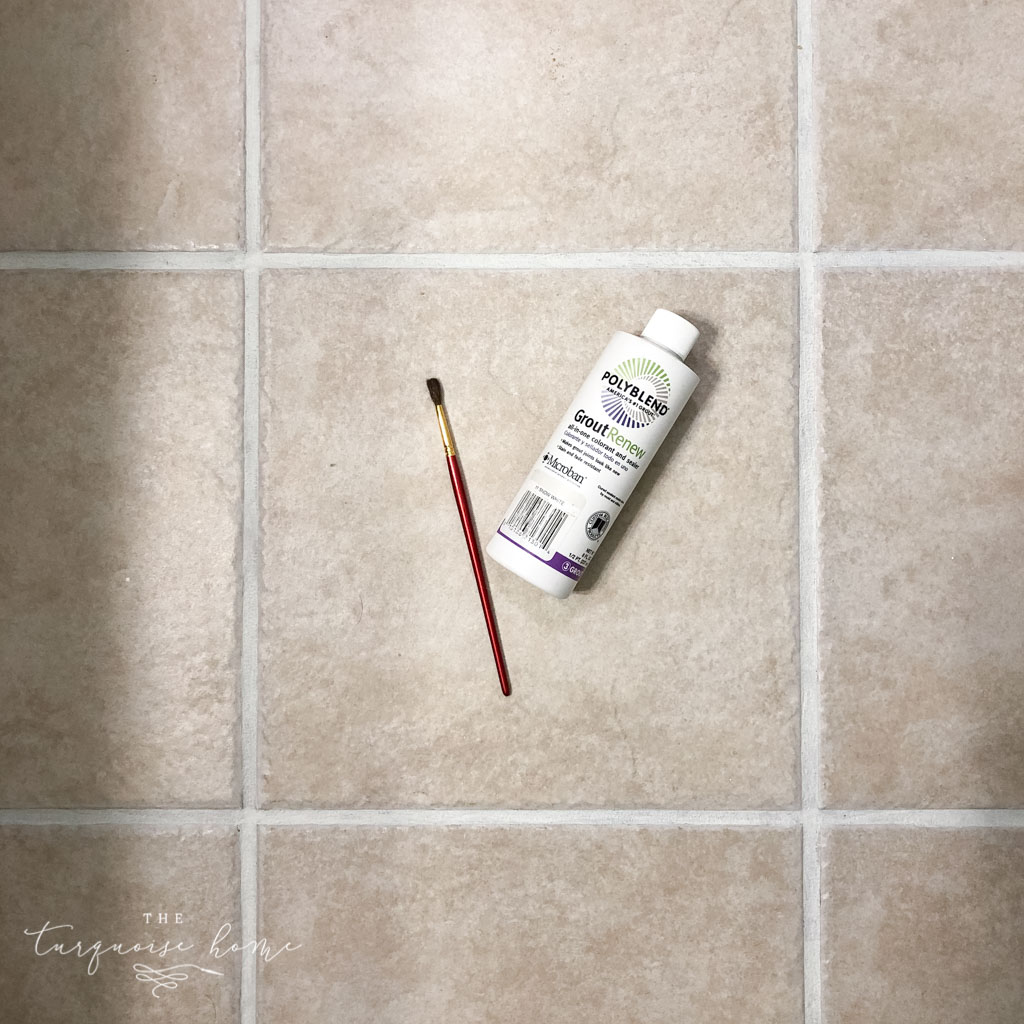
1. Over paint the grout lines with floor paint or grout paint.
I painted my grout lines exactly as they were, but as you’ll read down below, I should have ordered smaller tiles. And so I would have needed to paint further on to the top of the tiles. Don’t make my same mistake!
2. Clean your existing tiles really well.
I clean the whole floors first, and then I vacuumed each tile with my stick vacuum and wiped it down with my cleaner before each tile I placed down. Allow the cleaner to dry before applying the stickers.
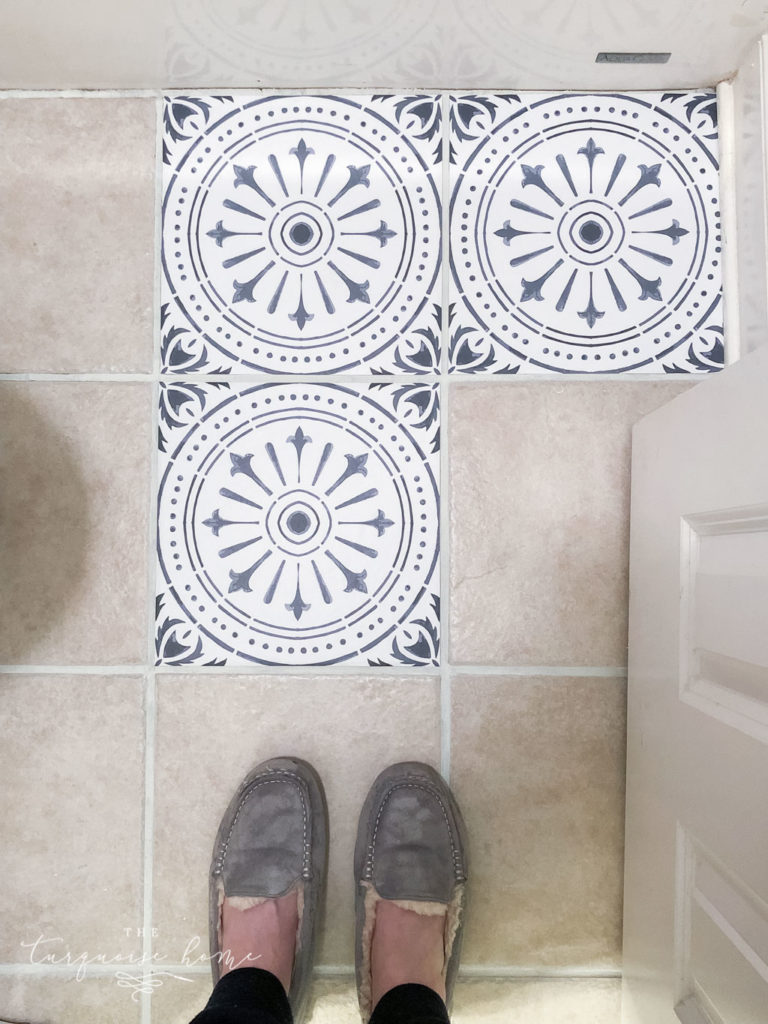
3. Peel back a small strip of the backing and then place the sticker down in place.
I found that if you mess up, you could quickly pull it off and reapply. Once the strip is stuck down, peel off the rest of the backing and smooth it down. Work out any bubbles that might have gotten trapped underneath.

4. Use a wallpaper smoothing tool to go over each tile to press the bubbles out.
Sometimes, I used my hand or the side of my paper cutter to go over the tiles, too. They stuck pretty well.
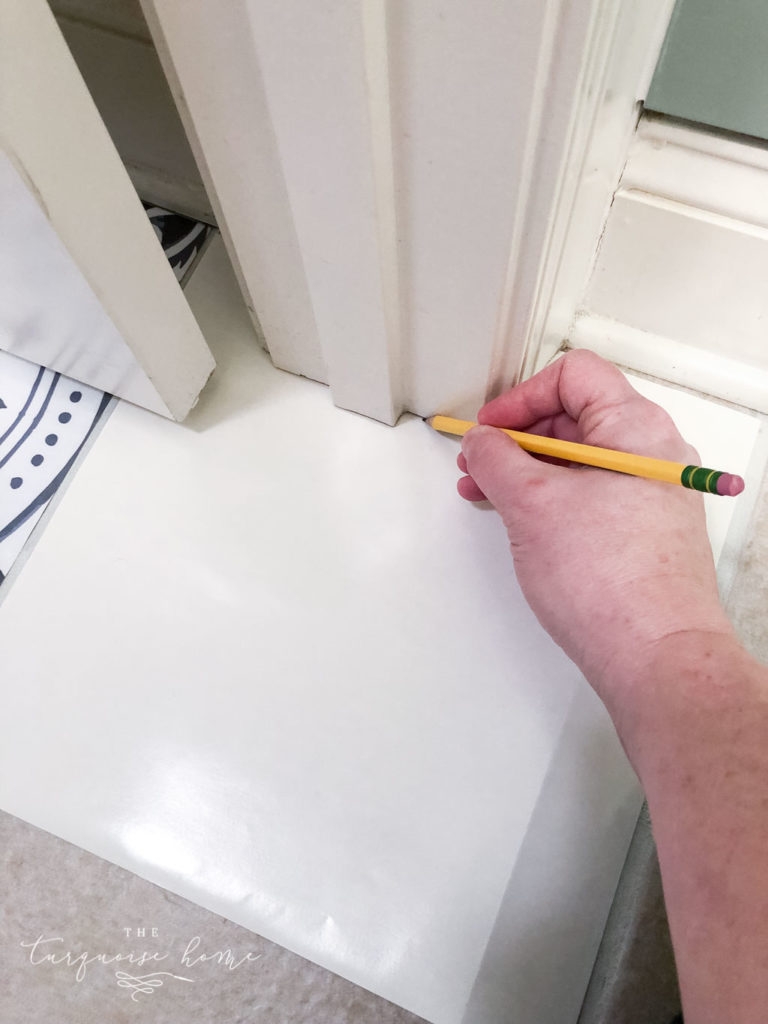
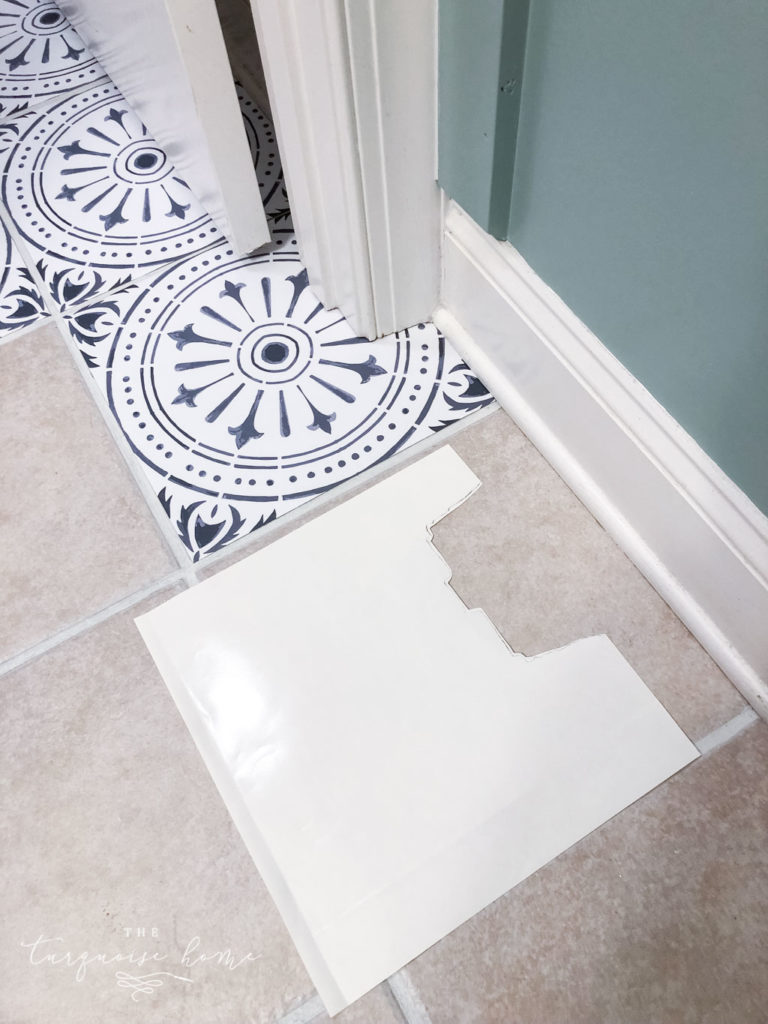
5. Trace out unusual angles or corners or around trim pieces with the back of a used tile sticker.
I would use the paper backing of an old sticker and trace out where I needed to cut. And then just cut the decal with my scissors. If the trim didn’t touch the floor, I left about 1/8th of an inch inside the cut line so that the sticker would fit under the trim piece.
That’s all! It’s a super simple process and easy DIY for a big impact!
Pros and Cons of using Peel and Stick Floor Tile Stickers
Pros:
- The tile sticker itself is great! It’s thick and durable.
- It’s easy to install if you use my instructions above.
- The Etsy shop I ordered from was fantastic.
Cons:
- My issues happened when I realized that my tile on my floors were slightly beveled on the edges. The vinyl tiles aren’t meant to wrap around the tiles, so the edges wanted to pop up a bit. My ceramic tiles are also a little bit textured, which was fine on the flat part, but made it difficult for the vinyl tile to grab the beveled edges.
- After I put down the first row, I realized that the edges were going to come up too easily and that I didn’t think it was going to work. So, I found that if I trimmed off 1/8 of an inch from two perpendicular sides (keeping the tile square, just a 1/4 inch smaller), then my vinyl tiles would cover most of the ceramic tile and wouldn’t have to bend as much on the edges.
See what I mean?? If my tiles were completely flat, this wouldn’t have been as issue.
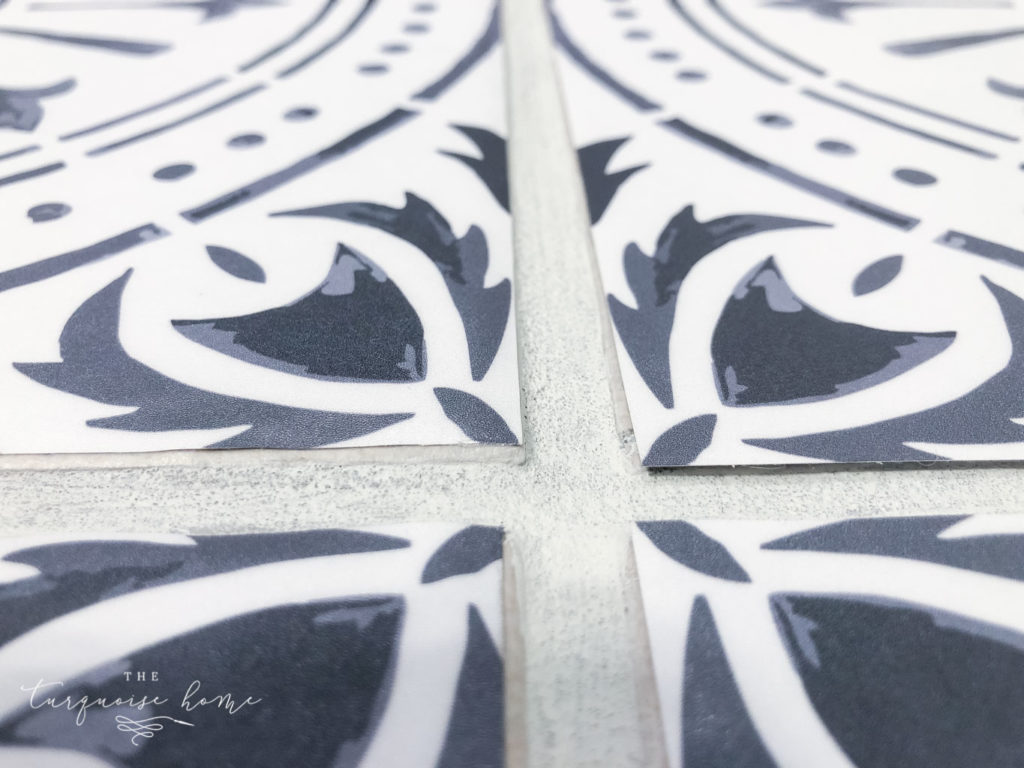
My advice would be to order slightly smaller sized tile stickers if your tiles are beveled, and over-paint the grout lines.
And honestly it may not even be an issue. I haven’t had them coming up at all, but my fear is that someone or something is going to catch a corner of a tile and it’s going to just peel off.
Only time will tell – and I WILL do a follow up in probably a year to see how they’ve held up.
But in the meantime, I’m just waiting for one of my kids to come yelling that they’ve lifted one off the tile. Maybe I’m just paranoid? We’ll see. Like I said, so far, so good.
Update: I did end up removing the bathroom floor tile stickers when the toilet overflowed right before we put the house on the market in 2019. It was a year and a half after I put them in. So, for the price, I was happy with how much use we got out of them!
You DO want to wait 24 hours after laying the vinyl tile before using it and 72 hours before you get it wet. So, there is some curing time for the adhesive. Hopefully it will all stay put. #fingerscrossed
What I would do it differently if I had to do it over again…
Since my tiles were beveled on the edge …
- I would have over painted the grout lines.
- I would have ordered the vinyl tiles to be 1/8 of an inch smaller than my floor tile.
- Or, I would have leveled the floor by filling in the grout lines with thin-set mortar or leveling compound and getting the grout lines printed on the vinyl tiles.
- Or, I would have just gone with the stencil, because then it wouldn’t matter if it was beveled or not! 🤪
Final thoughts …
I think the peel and stick vinyl tiles are fabulous! I would 100% use them again in my home. But I think they would be best suited for covering a flat surface, either linoleum, flat tiles, wood or a floor that has been leveled. Or you could use them on a vertical space that doesn’t have to deal with traffic!
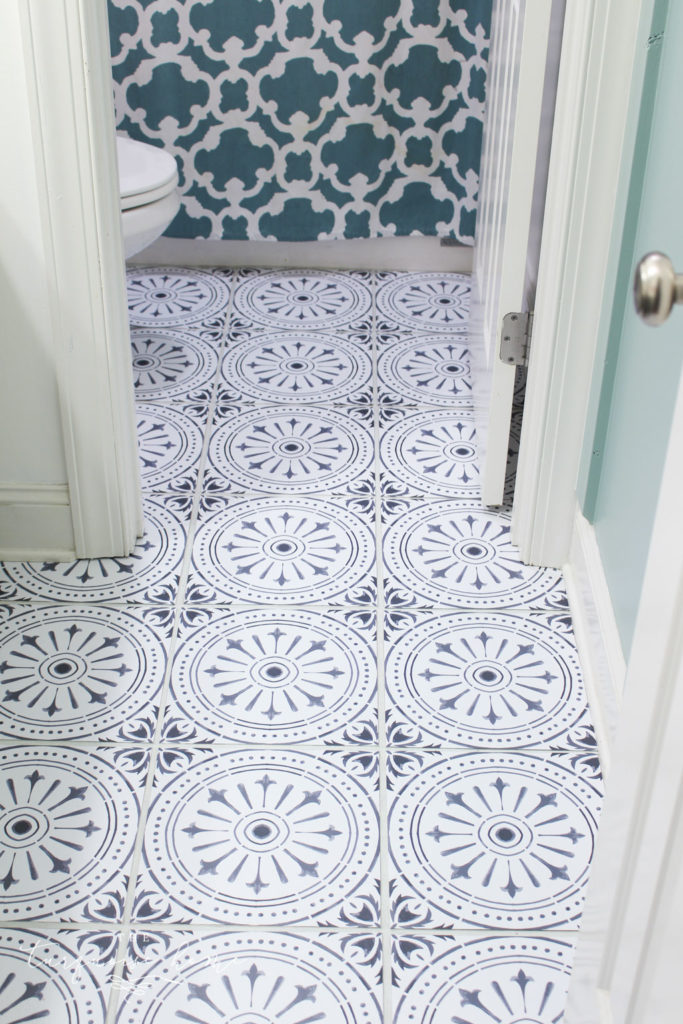
They ARE so pretty – aren’t they?!
I hope this helps you make your decision about peel & stick vinyl tiles. I kept telling myself that if it didn’t work, then it was a small price to pay for trying something new! It wasn’t going to break me if they didn’t work out. 😊
Frequently Asked Questions about Vinyl Tile Stickers
1. How do Vinyl Floor Tile Stickers Hold Up Over Time?
I think they can hold up for years in a non-high traffic area of your home. I wouldn’t use them on the floor of an entry way or laundry room that gets a lot of traffic! With too much traffic, you will find that the corners will roll up. I’d use a stencil instead!
2. Are Vinyl Tile Stickers Waterproof?
Yes, and no! If you pour water on top of the tiles, they are very waterproof. But water can get under the edges if the floors get soaked. And depending on what type of water gets on them will determine whether you’ll want to leave them in place or not.
So, when we had our toilet overflow in the girl’s bathroom. I also knew we’d be putting it on the market soon, so I removed all of the vinyl tiles.
3. Are Vinyl Floor Tile Stickers Worth It?
This is always hard to decide for someone else and someone else’ budget. But overall I think they are a fun, inexpensive way to update a small space. If it’s a room that doesn’t get much traffic and isn’t prone to water standing on the floors, I would do it again in a heartbeat!
Have you used peel and stick tile stickers in your home? Or do you want to use them in your home?? Leave your thoughts and experience, tips and tricks in the comments below!
Want to See More of the Bathroom Plans & Projects?
The Girls’ Bathroom Refresh Mood Board
How to Patch a Hole in Drywall
The Best Peel & Stick Vinyl Tiles
Girls’ Bathroom Makeover Progress
DIY Board and Batten in the Girls’ Bathroom
How to Make Grout White Again

I bought some tile stickers for my bathroom and wish I would’ve ordered them just a tad smaller. I’m in the process of adding a floor sealant, water based polyurethane, to protect the tiles better. I’m on my third coat. I’ll probably try for five coats. So far it has stiffened up the stickers and is helping to seal around the edges. This bathroom is in the basement and hardly ever gets used so I figured I’d try them there and only there. They are a tad expensive so I really took my time with the floor.
I really like that pattern you chose. Too bad they didn’t work out for you.
Hello I want to buy the same peel and stick floor tiles you used can you send me link for them?
Everything you wrote is exactly how I feel! We also have the same exact floors in all the bathrooms and laundry room! Did you regrout first? I can’t seem to get mine clean enough. If you were to order again would you have ordered a smaller size to save from cutting. I have samples now in 13×13.
Hi Celene, I did regrout first. And yes, I would have ordered them just a little bit smaller next time!
I was wondering if you could re-do the grout lines after installation – grouting over the existing grout to give it a clean, complete look. Thanks so much! Your floors and wall look fab!
Curious… do you think grouting after the install would solve the bevel edge issue?
I saw where someone ask what the color of the paint and brand. Yet did find a response to the question. Can you please provide the answer. Thanks
these are amazing! i’ve had the same issue (rounded edge tile and the sheets slightly larger)
Ive also had issues with dust and hair (my dog’s fur too) getting into the gaps.
how has it been for you?
How are you liking these a year later?
What is the name of the paint color? I love it.
Hi there! The blue/green paint color on the wall is Wythe Blue by Benjamin Moore.
So, do you think a couple of good coats of a flooring clear coat, made for sealing wood floors, would work well?? As far as maybe keeping those edges from popping up, any crud from getting stuck underneath, and just adding protection to the pretty floor. I did a faux wood floor out of paper strips I made and stained. It was really just a large
Elmer’s Glue Decoupage project that came out beautifully and held up well. What do u think?
I LOVE these tiles. We are are looking at placing them over the current linoleum. I was wondering if you requested a certain color? Your tiles look a little more grey / blue (which I would love), compared to the grey/black on the link. Did you ask for something different? Is it something specific I could ask for? Thanks!
Hi Shelley, I didn’t ask for anything special. They were what’s listed on the Website. It might be my photo editing that makes them look more blue? In real life they look dark gray!
Hey there,
I’m considering doing this to some tiles that look similar to yours. They aren’t completely flat either, so I wanted to know how yours have held up? Thanks so much.
Hi Lindsey, they have held up OK. Not great, but they are still there after several months and LOOK good. If you get down on the floor and look closely you’ll see where some have peeled up. It’s a toss up whether or not I’d do it again on these exact tiles. Actually if I had to do it over again, I’d stencil them. I’m going to do that in my laundry room eventually because they have the same tiles in there.
I love the tile pattern you chose and they look fabulous in your bathroom. I have used peel and stick vinyl ‘wood’ planks before in our garage converted den. There are definitely some pros and cons.
Pros: I did it all myself with no help. No power tools required. Cost was way less that any other flooring.
Cons: it cannot get wet! A little spill or quick swipe with a damp mop is fine, but a washer hose cane off and soaked the flooring once, and my cats are constantly knocking their water bowl over. Those water accidents weren’t caught right away and the water has caused some planks to come loose. Luckily I have an extra box and can replace those pieces, but at the same time – shouldn’t it be just a little more durable? Also a few pieces have gotten scratched from moving furniture and will probably need to be replaced.
Ultimately I’m still pleased with our flooring after almost 2 years, but I’m not sure I would go to his route again.
Thank you for giving your experience with it, Melanie! That’s super helpful!! xo, Laura
WOW, It looks great.
Thank you, Cheri!
The builders of our house must have had the same ideas as yours! We have those EXACT beige tiles throughout our first floor. On our fireplace, too! And beige walls. And carpets. You absolutely KNOW what I am talking about, ha!
Those look great, and would totally go with what I am envisioning for our downstairs bathroom, but I am concerned with dog hair getting underneath them. I am so happy you mentioned the beveled edges, since that it what we have, also. I still wanna give it a try. Plus, the peel and stick will probably appease my change-averse husband!
Haha! I know exactly what you’re talking about with the beige everything. So blah! But I guess the safe solution when building a new house?? Anyway, the hair will probably get under them. But just know what you’re getting into! They look great and I’m loving them for now! We’ll see how they hold up after a year or so!
xo, Laura
Laura, they certainly LOOK great. I’m wondering if the overhang ones are gonna get crud stuck under them as you try to sweep. And what about mopping? Those are by far my biggest questions. But again, they look fantabulous. Now just dont let anyone actually use the bathroom and you’ll be good to go.
Haha! Exactly! I’m sorry, no one use this bathroom, please. LOL
I plan on vacuuming in there with my beloved Dyson stick vacuum so that hopefully things will be sucked up instead of swept under those edges. And mopping?!?! I don’t even know how that will work. I’ve heard from some friends that they mop theirs just fine. I haven’t mopped mine yet, so we’ll see!
You’ve got me wanting to try this on my fireplace. Hmmm…I’m not sure the adhesive would stay long term with the heat from the gas logs. 🤔 Your bathroom looks great!
I’ve wondered the same thing about mine because we have gas logs, too. But I think it might be likely to stay put better on the wall than on a bathroom floor.
Wow Laura – these look great!! And I love your detailed tutorial and pictures. I now feel inspried to consider these for my yucky linoleum floors. But first, the mood board… ahhh. One thing at a time, right? Anyway – your bathroom refresh is looking so fresh and pretty! Kudos to you for making steady progress, and for knowing when to change direction midstream (board & batten, which is GORGEOUS!) to allow the creative process to function. I was going to tell you this earlier… just to share my insight… when doing something creative, you must have a plan, or nothing will get done, or at least it won’t get done in a cohesive manner. But if the “CP” stays too rigidly within the plan, then it won’t be creative at all. I think you were very wise to pause when you felt inspiration, listen to that inspiration, and then adjust your plan to act on it. Please don’t feel bad for having made this change. The results were worth a change of course. Thank you for your blog – I am enjoying it so much – and keep up the great work! Jane.
This is awesome! Laundry room here I come! Also wondering what paint product you used on the bathroom cabinets? I love that color and would love to do it in my kitchen.
Yay! Everything you need to know about how I painted my kitchen cabinets is in this post: https://theturquoisehome.com/how-to-paint-kitchen-cabinets/
🙂 Hope that helps! It’s a labor of love, but so worth it!!
They look fantastic!! I really hope they work well for you! We are currently and SLOWLY redoing our kitchen and we are toying with the idea of peel and stick tile backsplash…
Oh I think it would work amazing as a backsplash!!
I think you’re a genius to do peel-and-stick in a current trendy pattern! In 5-10 years when you want to change it, it won’t take a jackhammer!!! Your floor in gorgeous, I love your choices!
Exactly!! I’ll just peel them up! Fingers crossed they last 5-10 years! 😉
What is the brand and color of your bathroom walls? It is so very pretty and fresh looking. The floor looks awesome and I’m sure no one else will even notice the bevel issue. You just happened to get a birds eye view of it! I enjoy your blog very much!
The white color is Simply White and the blue color is Wythe Blue … both colors are from Benjamin Moore!
I was wondering if these peel and stick tiles would work on the wall?
Yes!! They are made to work on walls as well, and I think they’d work even better on the wall!
Do you have to remove baseboard trim before you install?
I didn’t!
I wonder how these would do on a concrete basement floor?
I think they’d work well on a concrete floor! It’d be a smooth surface and you wouldn’t run into the same problems I did with the beveled edges on my tiles.
Love the look! The pattern is so pretty. Great job! I’m curious to see how well they hold up ….
I’ll keep everyone updated, for sure! I’ll probably do a 6 month and 1 year update post.
Any update on how the tiles are holding up? I really like the pattern you chose, but want to make sure it’s worth it…we’d be using it in our bathroom.