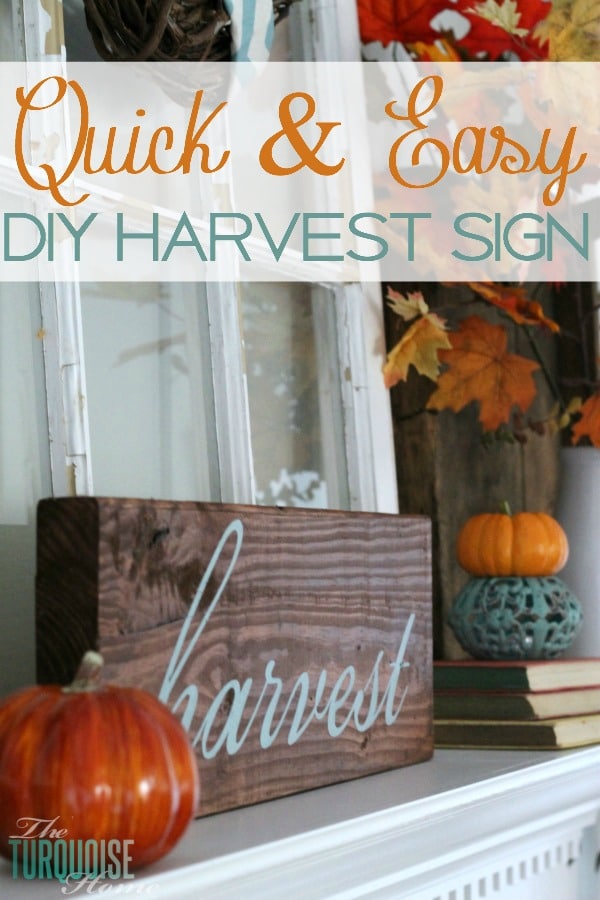
Quick and Easy DIY Harvest Sign
My DIY Harvest sign took me less than two hours to complete from start to finish. It was so stinkin’ easy thanks to a few strokes of luck and handy tools I already had around the house.
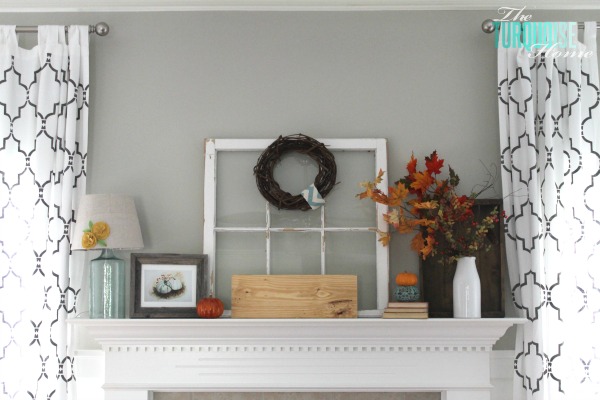
When I was making my mantel, which I shared all about the process HERE, I wanted something in the middle that grounded the whole vignette. Luckily I keep almost all of my scrap wood from my projects, so I went out to the garage and found a wooden board that I thought would work in that space. It fit perfectly. Yay!
But now I needed to make into a pretty sign and quick. It was around 11:15 on a preschool day, meaning I had about an hour and a half to make this sign before having to go pick up my daughter from preschool.
This post contains affiliate links for your convenience. See my full disclosure policy.

I remember I had these stain cloths from Minwax in the dark mahogany color. I used them at a conference to stain some unfinished picture frames and they worked like a charm.
Want to Save This?
Enter your email below and I’ll send it directly to your inbox!
So, I busted mine out and found that they even came with one pair of plastic gloves. Awesome!
I love that they have little to no odor and can be cleaned up with water. Amazing!! One of my least favorite things about staining is having to use mineral spirits to clean it up.
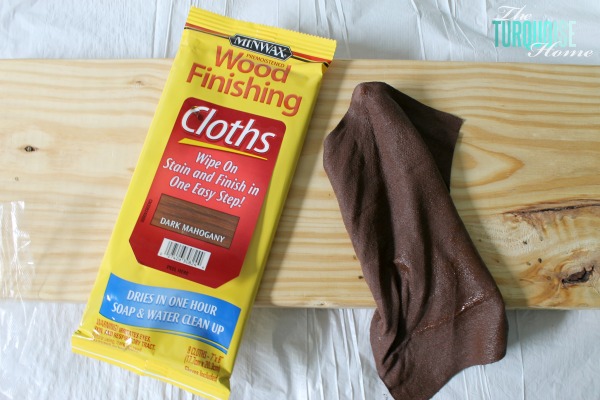
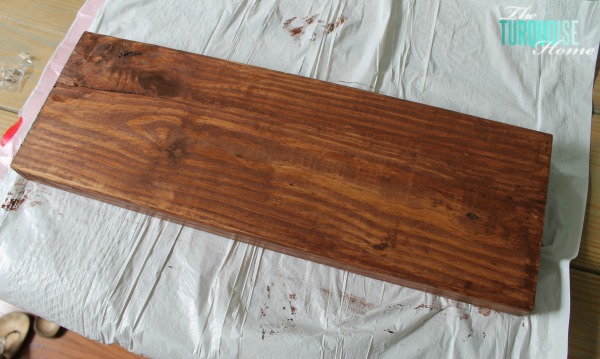
So, I pulled out one wipe and followed the instructions on the back. Within a few minutes, I had applied the coat of stain and wiped off the excess. Now I just had to wait for it to dry. These stain cloths are so great for small projects around the house – love them!
While it was drying, I created my word in my Silhouette studio and cut it with contact paper. (I didn’t get any pictures of this process, but I have several posts on creating stencils with a Silhouette and contact paper HERE and HERE.)
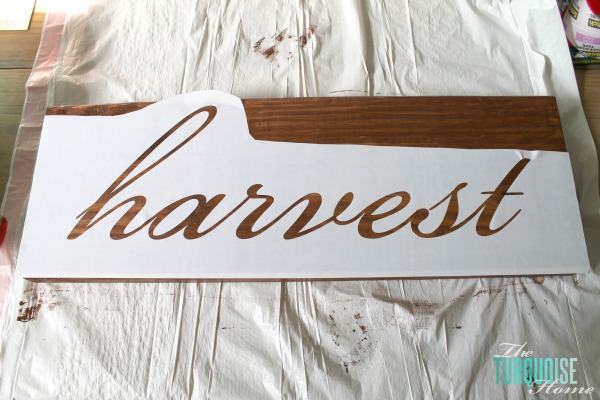
I used Bickham Script Pro for the “harvest” font and quickly had my stencil ready to go. Once the stain was dry, which took about 30 minutes, I stuck the stencil on the board and applied a quick coat of Mod Podge. Click here to find out WHY I use Mod Podge first.
And then I painted a coat of Stratton Blue (Benjamin Moore color in my kitchen) after the Mod Podge had dried. I peeled away the stencil before the paint had a chance to dry and voila! I had a simple and quick sign for my fall mantel, which I love!
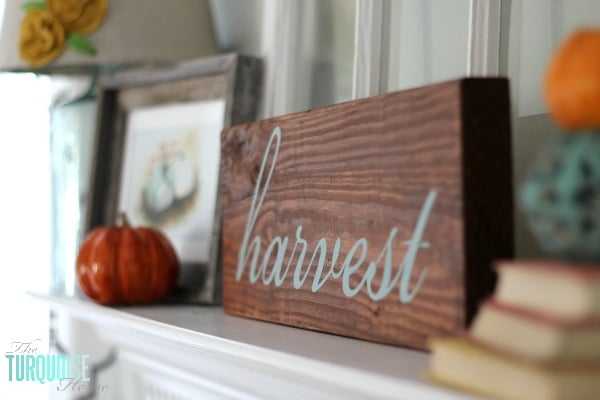
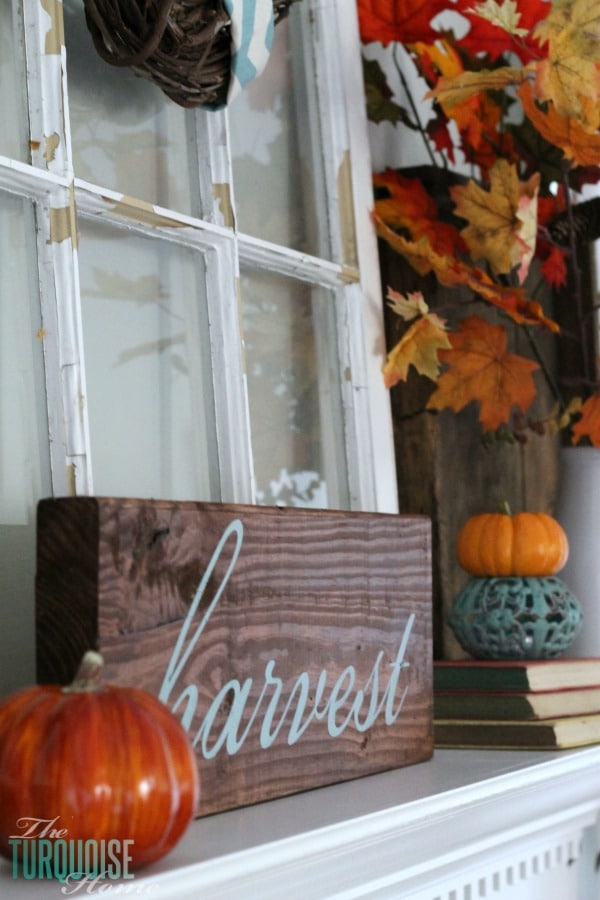
It truly is the star of the show on my mantel and I love how I used things I had on hand to create it. Cost was $0 to me and I used up leftovers I already had. That’s a winner in my book!
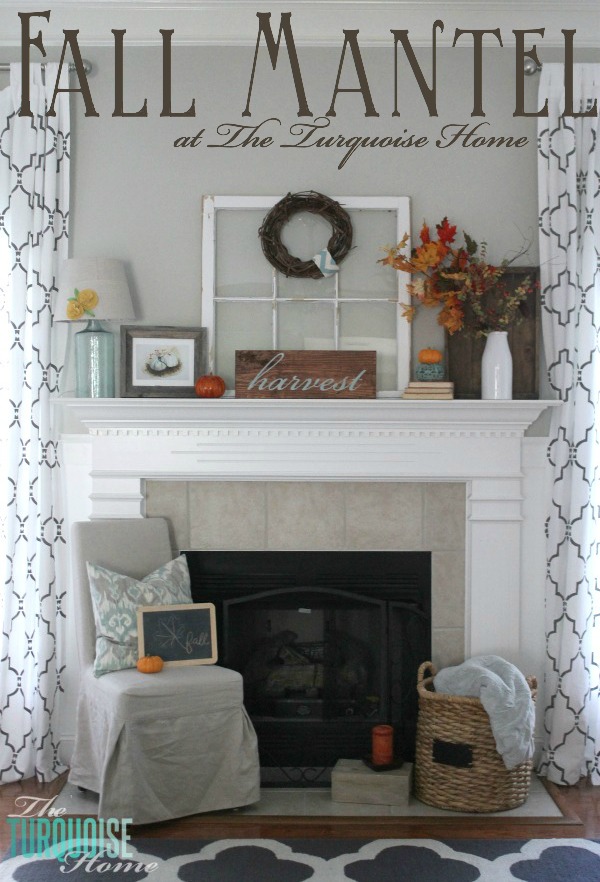
Turquoise & Orange Fall Mantel
More Posts You Will Love:


Oh my goodness, where was this tutorial when I needed it?! I did a wooden sign a month ago and I hand painted the letters (after tracing them). I have a Cricut, but I couldn’t figure out what I needed to do to create a stencil… I love the idea of using contact paper AND the modge podge trick. Oh, this is just awesome! Thank you SO much!
Wow! Such an easy and gorgeous DIY idea! And it really looks great. Thanks for inspiration!
Hi Laura! I love your sign! And thanks for sharing about the stain wipes, awesome! I am a new ‘woodworker’ and this project looks like something I could do! I like how you utilize contact paper instead of expensive vinyl! Thanks for sharing! Blessings from Bama!
Can I ask you a question..what plug in do you use for your comments and the thank you page that follows? I have not seen that and I LOVE IT! 🙂 If you dont mind sharing!!
Oh, that’s so funny!! You know what? I had totally forgotten that I had set that up! I had to go back through my plug-ins and sure enough, there was one for taking first-time commenters to a specific page. 🙂 And then I found the page where it takes my commenters. I should probably remember that and update it every now and then, huh? Haha!! It’s a plug-in called Comment Redirect by Yoast. Thanks for reading and leaving a comment. I really do love them!! 🙂
HAHA that is too funny. I have only been blogging for a short time but I constantly forget that I downloaded something and never set it up. My brain just goes to fast for my hands to keep up lol. Thank you so much for sharing. i just thought that was the sweetest thing!
I have a a serious addiction to making wooden signs. They are so fun and cute and you can do so many things with them. I am constantly making them for my shop! Stopping by from New Nostalgia’s link party!
I’m addicted to making wooden signs as well. They are so easy and personalized and just so cute! Thanks for stopping by and I hope you’ll stick around!
I just love the font and paint colour (so delicate!).
I like your colour theme:)
xx
Mila
milaslittlethings.com
[email protected]
Beautiful sign, and it looks great on your mantel.
What an awesome sign Laura, I love the light blue against the dark stain, so pretty!!
xoxo, Tanya
So cute! I love it!