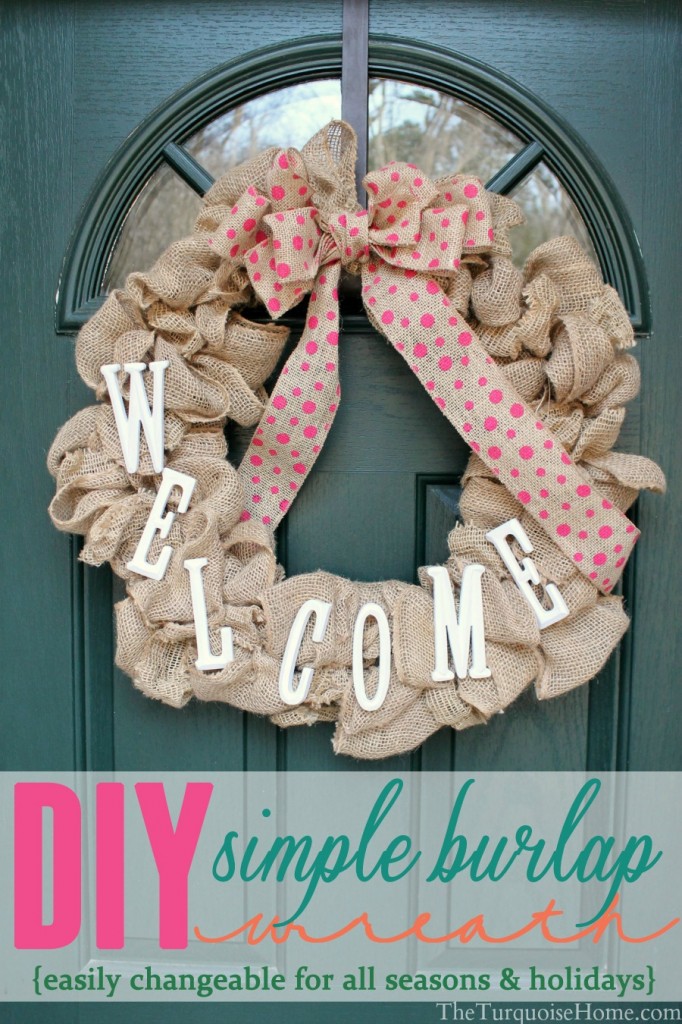
Simple DIY Burlap Wreath
This simple DIY burlap wreath is easily changeable for every season. Dress it up for holidays, birthday parties, or leave it plain for all of the other days of the year.
Last year I made a small burlap wreath for Christmas and loved it. So I quickly returned to Hobby Lobby and bought a larger wire frame with the intention of making another, bigger one. Fast forward almost a year and I finally made it for Miss A’s Birthday party this year. Whew, talk about procrastination!
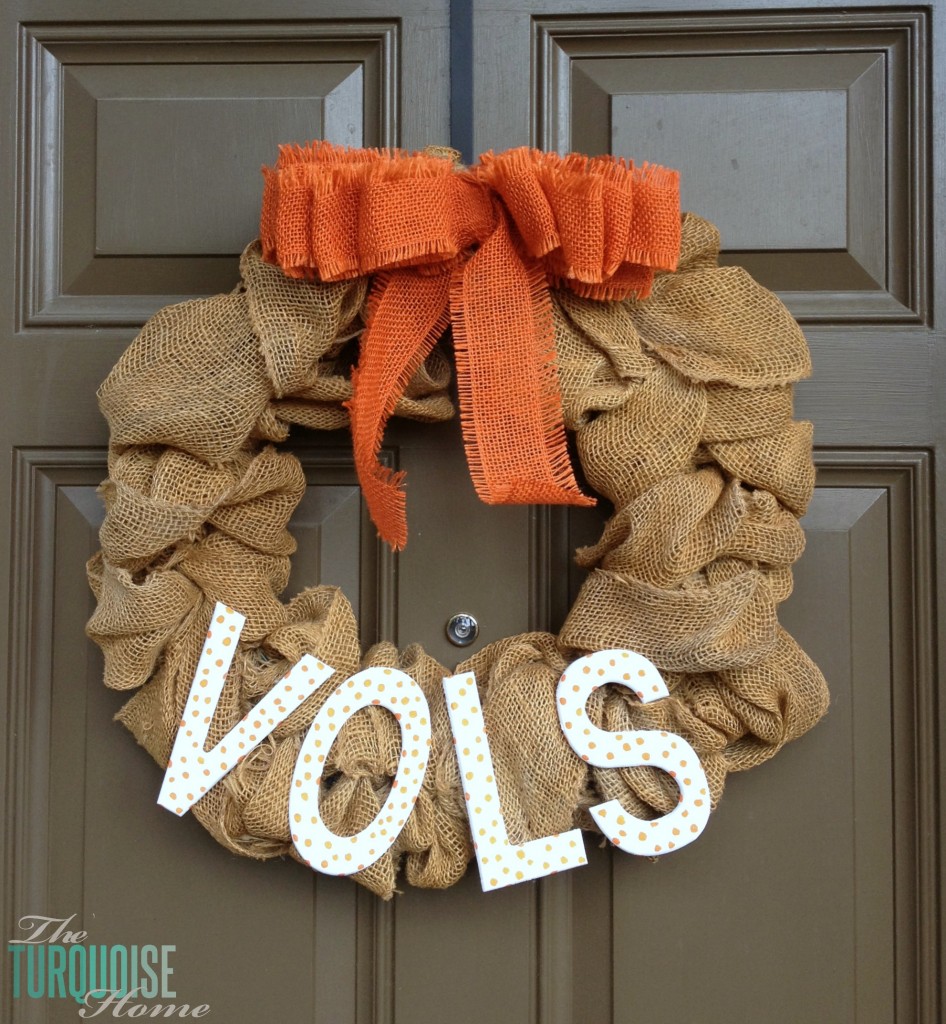
I know we’ve seen burlap wreaths all over the place, but I was especially inspired by my sister-in-law’s wreath. She made it a while back, but changes it out for different seasons and occasions with wooden letters. Here’s what hers looks like during football season. Go VOLS!!
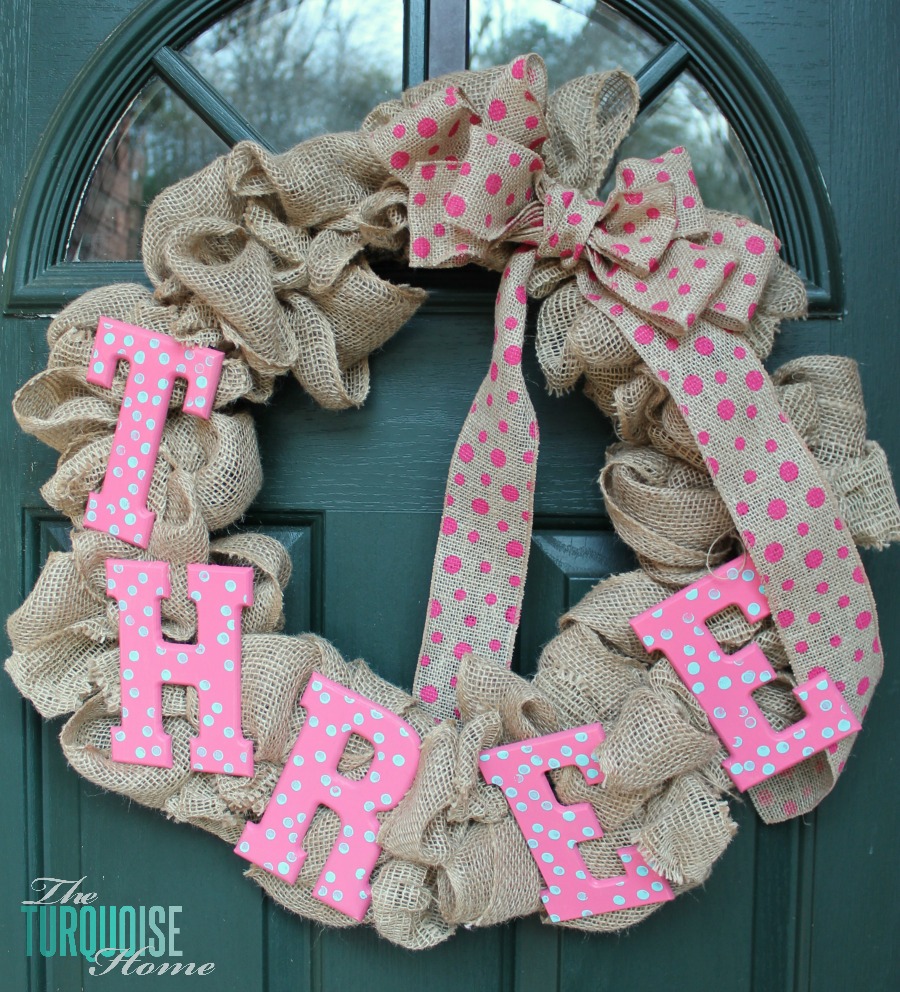
And then she changed it out with “ONE” letters for her son’s birthday last year and I thought it was so cute, so I copied for Miss A’s birthday. 🙂
And now I’ve changed it into my winter/anytime-of-the-year wreath! I’ve always struggled with what kind of wreath to put out between Christmas and Spring. So, I kind of love this! And I left the pink polka dots for Valentine’s day. I’ll probably change out the top ribbon after that.

And there you have it! And easily interchangeable wreath for any season or occasion! So simple and so cute!!
The Details…
We used this tutorial from Top This Top That to make the wreath. It’s soooo simple. You just weave the burlap in and out of the wreath frame until it’s full. That’s what we call a nap-time craft, folks. Maybe even a half a nap-time craft depending on how long your kids sleep. 🙂
{Note: I used a ton of burlap. She says you’ll use 12-15 yards, but I think I used 30-40 for an 18-inch wreath frame. I only bought 20 yards of the non-wired burlap ribbon, which is what you want. So, I had to use about 10+ yards of some wired burlap ribbon I already had on hand. I didn’t want to make any more trips to HL. Don’t forget to buy it when it’s 50% off! Or use a coupon.}
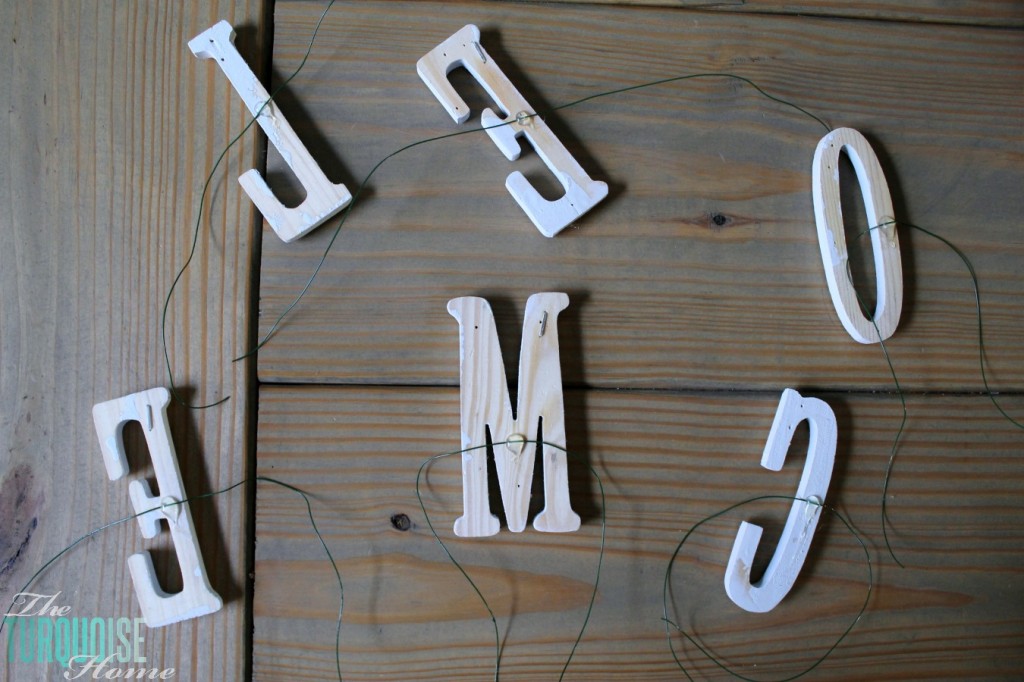
I bought the larger letters for the birthday wreath at Hobby Lobby. And I got the “welcome” letters at Michaels.
I love that polka-dotted burlap ribbon. I picked it up at … you guessed it: Hobby Lobby. They have all kinds of patterned burlap ribbon. Love it! I used this tutorial from Thistlewood Farm to make the bow. 🙂
OK, so the ingenious part about this whole wreath was my SIL’s idea on how to attach the letters. If I had been left to my own devices, I probably would have tried to hot glue the letters to the wreath and then attempted to pull them off when I wanted to change them. Thankfully I asked before I acted.
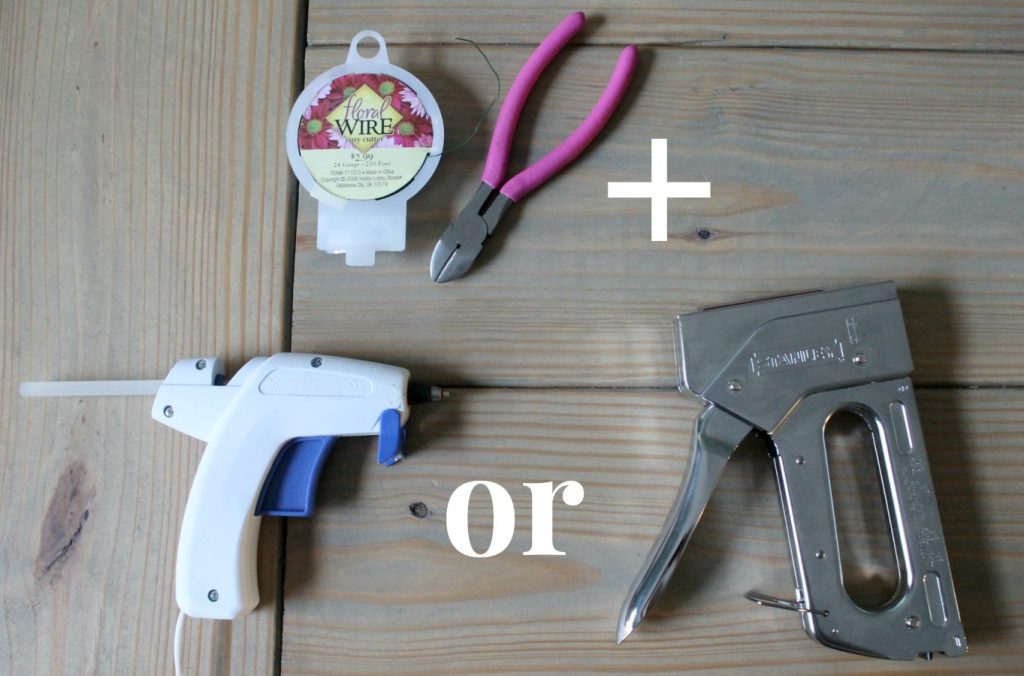
She just stapled a piece of floral wire to the backs of the letters and tied them on to the wreath form. I tied the bow on to the top using floral wire as well. {Sorry this pic has the staple out of focus, but I think you can still see it.}
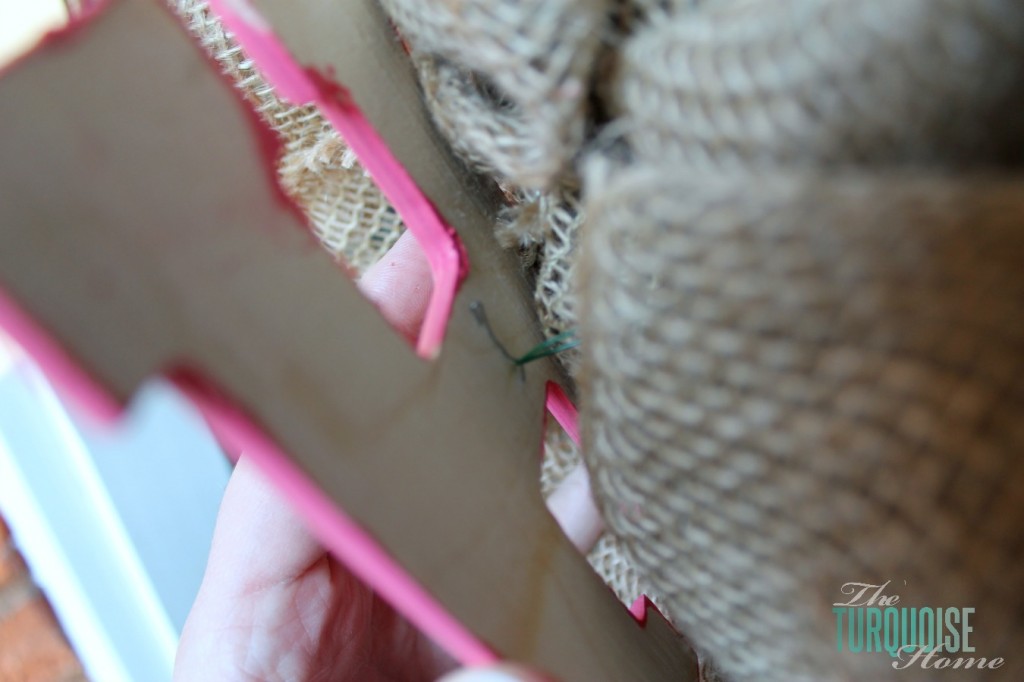
This worked great with the larger letters, but I had to use hot glue and floral wire with the smaller letters. Make sure not to pull too hard on the hot glue when you tie them to the wreath. It can pull off. Ask me how I know. 🙂 But if you can get them attached without pulling off the hot glue, then they are fine.
I love this DIY burlap wreath! My only regret is that I wish I hadn’t waited so long to make it!
Do you ever buy craft supplies and then wait foreevvveeerrrr to make them?
What’s your favorite year-round wreath?
More Posts You Will Love:


such a great post, i love these burlap wreath design. i will try it at home by following these information. thanks for sharing this informative article.
Love burlap…and how awesome that it can be used ALL year round!
I love the interchanging of letters! This has been on my to do list for a while…super cute!
Too cute! I always appreciate a project that can be so versatile, as well.
I love this idea! I’m tired of getting wreaths for my front porch and watching them fall apart and fade due to harsh weather. This looks like it will stay put and pretty for the duration!
Thanks
This is so cute! I have been wanting to try to make one of these but have not bought the stuff to do it yet. I always look at the supplies whenever I go to Hobby Lobby. They have a cute wreath book there too that I have been admiring. This inspires me to get one made.
Great job on the tutorial! Now I gotta go to HL for some supplies! 😉
This is such a great idea and so versatile! I love it! Thanks!
-Karli
http://www.somethingsplendidblog.com
So cute! I love the idea of making it interchangeable!
this is adorable!! great job
Having a burlap wreath to change through the seasons is such a great idea- saves so much time from remaking the whole thing every month. Thanks for the tutorial Laura, pinned!!