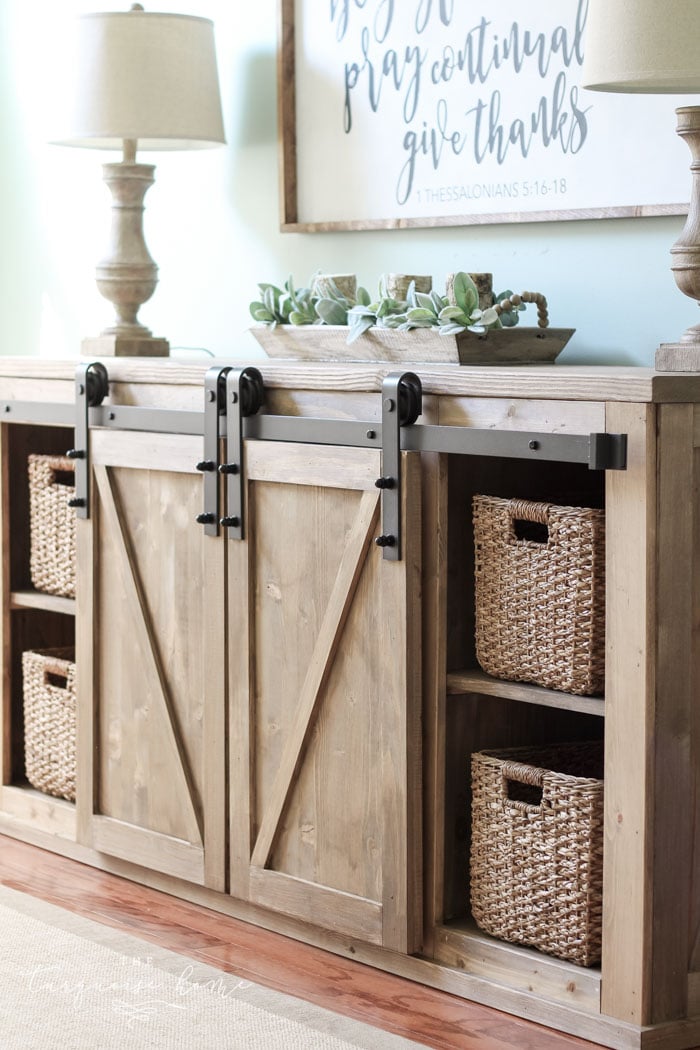
DIY Farmhouse Media Console Table
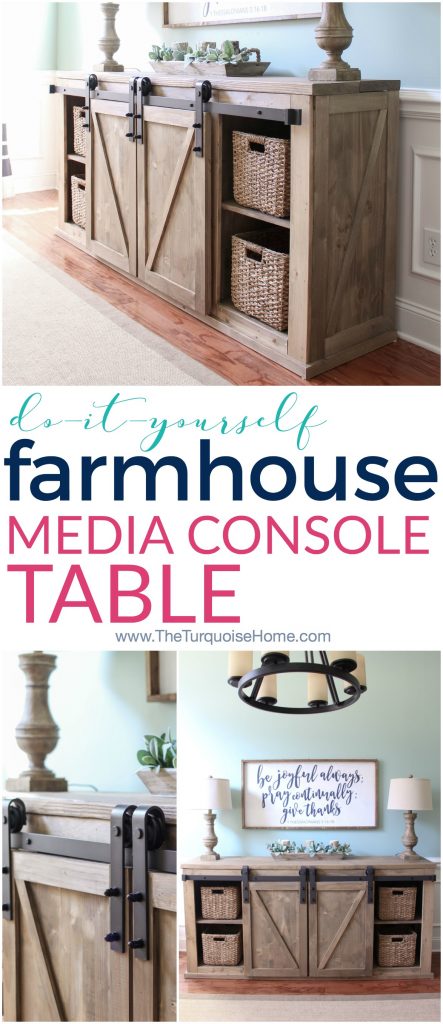
This DIY Farmhouse Media Console Table is both beauty and beast. It is gorgeous with the rustic weathered wood and a beast of a storage unit with two sliding barn doors to cover the junk and four basket drawers to hold even more!
And it’s not hard to build at all. Just get someone strong to help you bring it inside when you’re done. Trust me!
I am so excited to share the plans for the DIY farmhouse media console table today. Ever since I shared it before Christmas I’ve had numerous messages and e-mails asking when I would post the plans. Well, today is your lucky day!!
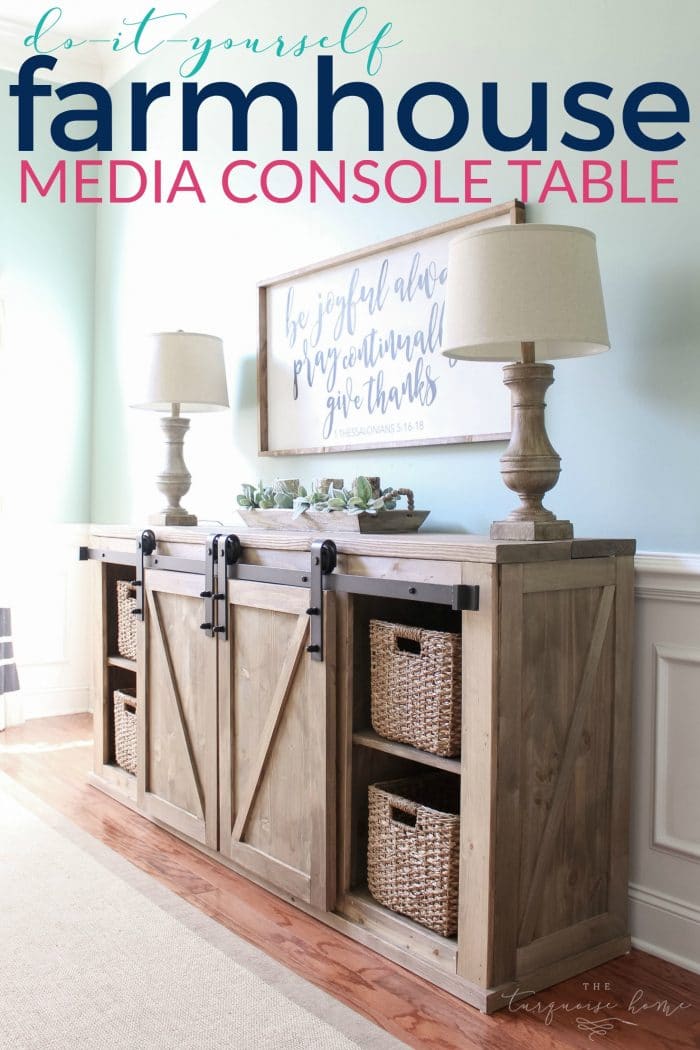
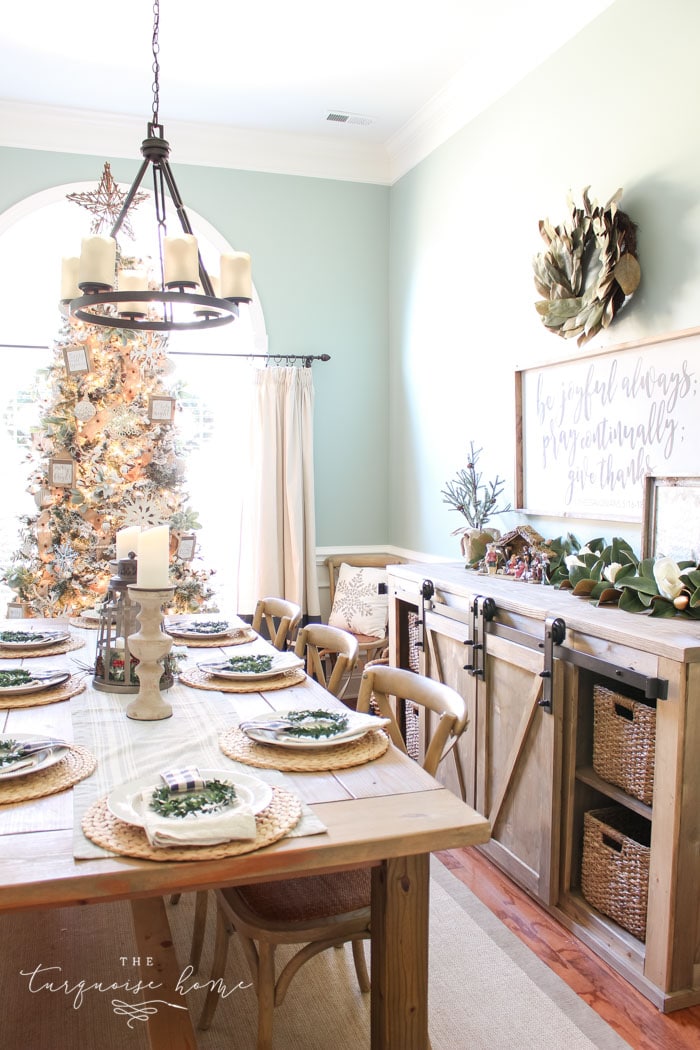
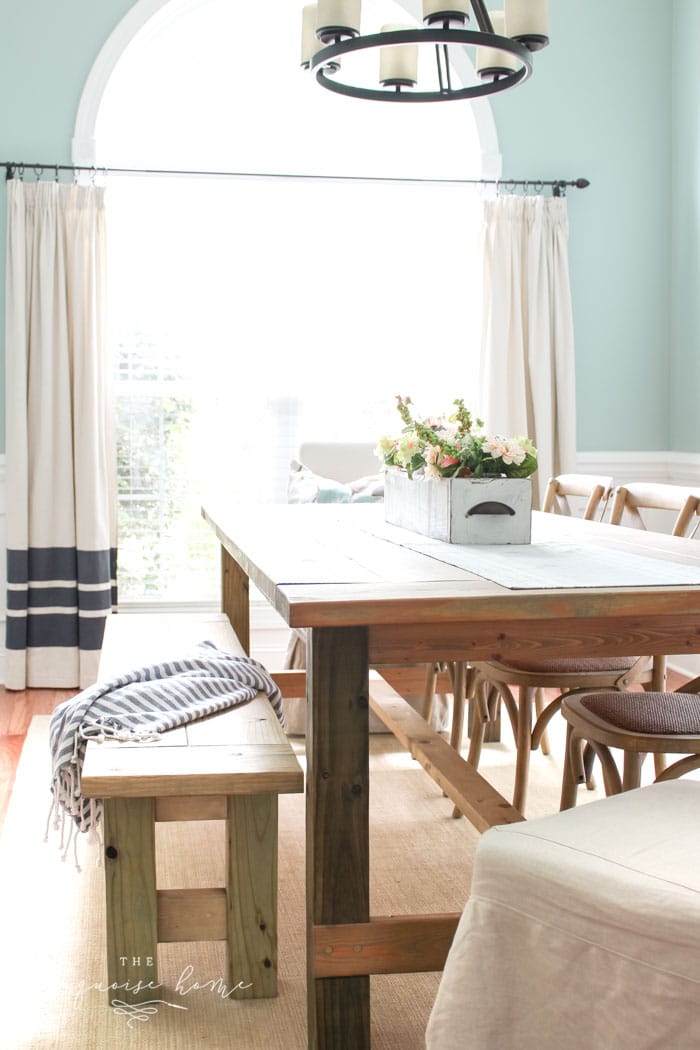
This formal dining space in my home has worn many hats since we moved in 6 years ago. It’s been a play room, an office, a craft room and a dining room about once a year when we host Christmas brunch. I want this square footage to work for my family’s needs, which it has, but at the same time I wanted it to look nice since it’s the first room people pass when they come into our home.
I knew a buffet-type console table would be the perfect piece to anchor the wall and to hold whatever our heart desired. It could be toys, office supplies, craft supplies, seasonal decor or even entertaining pieces. But no matter what we decide to put in it, it holds a ton, which I’m so excited about!
Originally, I found these Grandy Console plans from Ana White’s blog. Since I have analysis paralysis most of the time, it only took me 4 years to choose the exact plans I wanted to build. And I had to modify these to fit the space. I wanted to use a 6.6-foot sliding barn door hardware set, so I knew that would be how long I needed the console table. I didn’t want it any longer than that, and the original plans called for making it closer to 7.5 feet long. Whew! That’s a big boy. 😳
Make sure you decide on your sliding barn door hardware before you start the project, because that will make a difference in everything. I cut down the specs of the project to fit the hardware and it did fit it perfectly.
Ok, so let’s jump in and I’ll share all the details! Please read through it all and let me know if you still have additional questions in the comments!
Want to Save This?
Enter your email below and I’ll send it directly to your inbox!
This post contains affiliate links for your convenience. See my full disclosure policy here.
What You Need to Build a DIY Farmhouse Media Console Table
Tools:
- Miter Saw – (I recently purchased this miter saw, but used this beginner miter saw for the past 5 years. Either one would be great depending on your budget.)
- Drill
- Tape Measure
- Level
- Brad Nailer
- Safety Goggles
- Carpenter’s square
- Kreg Jig
- Clamp – (this one is my favorite!)
As you see, you don’t need anything too fancy to build this buffet. The miter saw, drill, braid nailer and Kreg Jig are probably the first tools I would recommend to anyone getting into to building their own furniture. Therefore it makes this an awesome project for new-ish builders. Probably not a good 1st project, but maybe a good 5th project. 😉 It might take a while to finish it (kinda how it took me 2 months to finish), but it’s not hard!
Materials:
- 2 – 2 x 10 @ 8 feet
- 2 – 1 x 8 @ 8 feet
- 2 – 1 x 10 @ 8 feet
- 1 sheet of 1/4″ thick plywood for the back @ 36 inches long
- 3 – 1 x 2 @ 8 feet
- 4 – 1 x 4 @ 8 feet
- 6 – 2 x 3 @ 8 feet (This is what the plans call for, but I tried to be smart with my cuts and I only needed 5 – 2 x 3’s.)
- 2 project panel pieces @ 17.25″ x 36″ or 18″ x 36″ (I could only find 16″ x 36″, so I improvised to cover it up as you’ll see below.)
- 2 – 17-1/4″ x 36″ project panels at 1/2-3/4 inches thick – I couldn’t find this dimension, so I bought a 36″ x 16″ boards and they worked out with a little tweaking as you’ll see in the steps below.
- 1 – glued edge panel at 3/4″ x 20″ x 6′ (for the 2 barn doors at 20 x 30.75)
- 2 1/2 inch screws
- 2 inch screws
- 1 1/4 inch finishing nails
- Wood filler (optional)
- 6.6 foot sliding door hardware
- 2 more sliding barn door hangers
- Spade bit
- 4 Baskets – I found these Seagrass Wicker Baskets for under $20 and they are perfect!
- Stain or paint of your choice
Cut List:
These are the measurements I made for my buffet, which ended up being 82″ long, which is 9 inches shorter than the plans called for, but I wanted it to perfectly match the 6.6 foot sliding door hardware I bought. I made it to fit that, so if your sliding door hardware is different, you’ll want to accommodate for that. I kept the height at 37.5 inches and the depth at 18.75 inches like the original plans, because some of the materials came in those sizes and it meant less cutting for me! 😜)
Frames:
- 4 – 2 x 3 @ 75″
- 4 – 2 x 3 @ 17″
- 4 – 2 x 3 @ 14″
Face Frame:
- 5 – 1 x 4 @ 36″
- 8 – 1 x 4 @ 16.25
Shelves:
- 2 – 1 x 8 @ 78″
- 2 – 1 x 10 @ 78″
Middle Shelf Supports and Cleats:
- 7 – 1 x 2 @14″
- 5 – 1 x 2 @17″
Shelf Dividers (optional):
- Top Shelf Dividers:
- 2 – 36 x 16 project panels @ 16.75″ x 14.625″
- Bottom Shelf Dividers:
- 2 – 36 x 16 project panels @ 16″ x 14″
Top:
- Cut the 2 – 2 x 10 @ 82″
Doors:
- Cut large project panel into 2 pieces @ 20″ x 30.75″
Back:
- Rip the plywood down into 5″ strips at 36″ long. I had the hardware do this since I needed 16 of them!
**I didn’t make note of the trim pieces I used on the doors and the sides because you can use whatever you want for whatever design you want. I used 1/4″ thick pine project boards for all of the trim on the doors and sides.
How to Build a DIY Farmhouse Media Console Table
I will walk you through all of the steps that I took, but the best first step is to download and print the free plans over at Ana White’s blog. And then you can come back here and take notes on exactly how I implemented them.
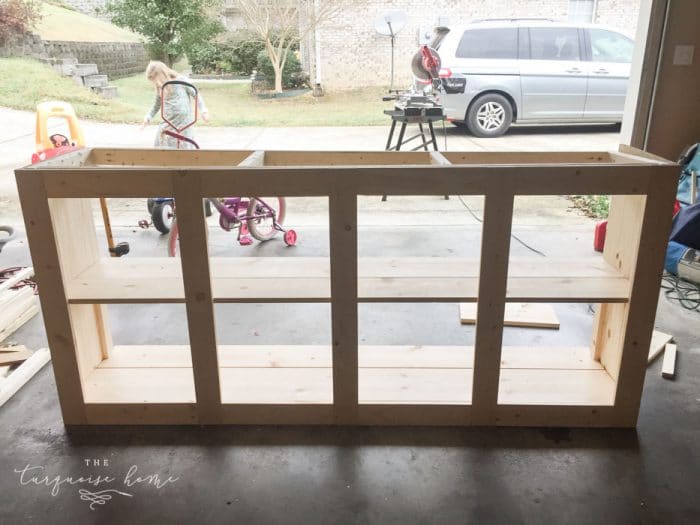
1. Cut the 2×3 Frame Boards and Assemble the Frame
Cut the 2 x 3 boards for the frame and assemble it with screws and wood glue. If you plan on attaching the top of the table with pocket holds from the underneath side of the top of the frame, then go ahead and add pocket holes to the top of the frame before you assemble it. See step 10 for more clarity on this.
Tip: You will want to make sure these boards are straight when you are buying them. I usually lay the boards on the floor to check to see if they are straight, but I didn’t with these. And while it wasn’t the end of the world, it made my frame a little wonky as you’ll see in step 2.
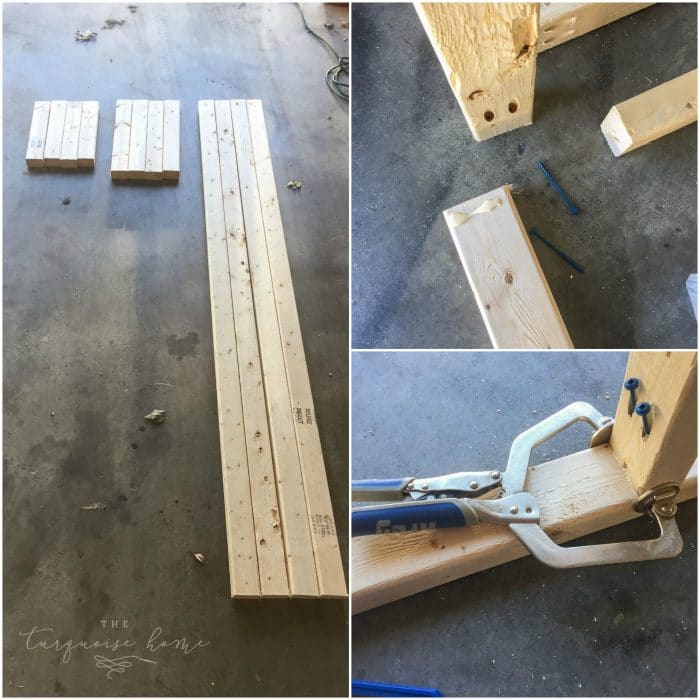
I made my joints with my Kreg Jig, which creates amazingly strong joints and I wouldn’t want to build this piece of furniture without one! I used my clamp to hold down the joints while I screwed them together, using 1-1/2″ pocket holes and 2-1/2″ pocket hole screws. The frame doesn’t have to be perfect or pretty because it will all be covered.
2. Cut the Face Frame Pieces from the 1 x 4 Boards & Assemble the Face
Cut down all of the 1 x 4 boards for the face frame and assemble it. You can either lay the frame on its back and attach all of the face frame pieces directly to the front with 1.25″ screws, or you can assemble the face frame separately first with the Kreg Jig and then attach it to the front.
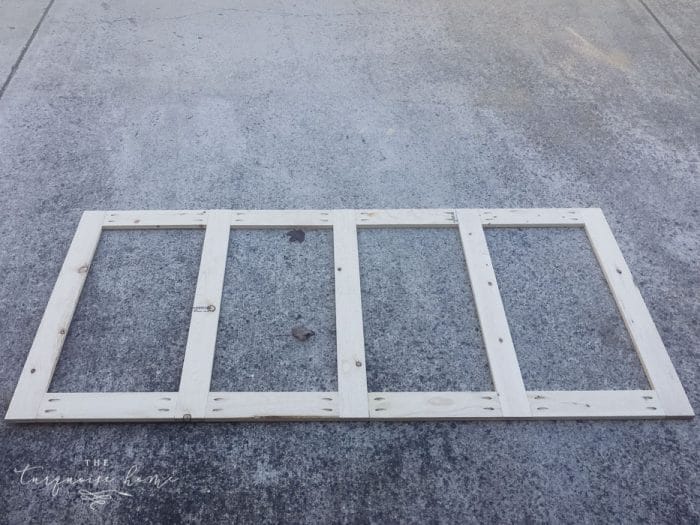
I decided to use my Kreg Jig to assemble the face frame first and the attached it to the frame with wood glue and my nail gun. You can see in the picture below how wonky my frame was. It was straight on the bottom and this corner was the only one not straight, so it ended up being OK. But any more than this and I would have had to taken it apart and start over. I just made sure that everything I attached to the frame was straight.
3. Attach the Side Panels to the Frame
Add the project panels to the sides of the frame with 2″ screws from the inside or you can use glue and a nail gun. I decided to use the screws.
My project panels did not cover the entire width of the sides because the largest panel I could find was a 36″ x 16″ board. And I needed a 36″ x 17.25″ board. I could have cut down plywood, but I decided to just cover the gap in the back with some decorative trim. It looks just fine!

I clamped the face frame to the front after I nailed and glued it and left it that way overnight to let the glue dry completely. (The above picture gives you a glimpse of the sides being just an inch or so too short.)
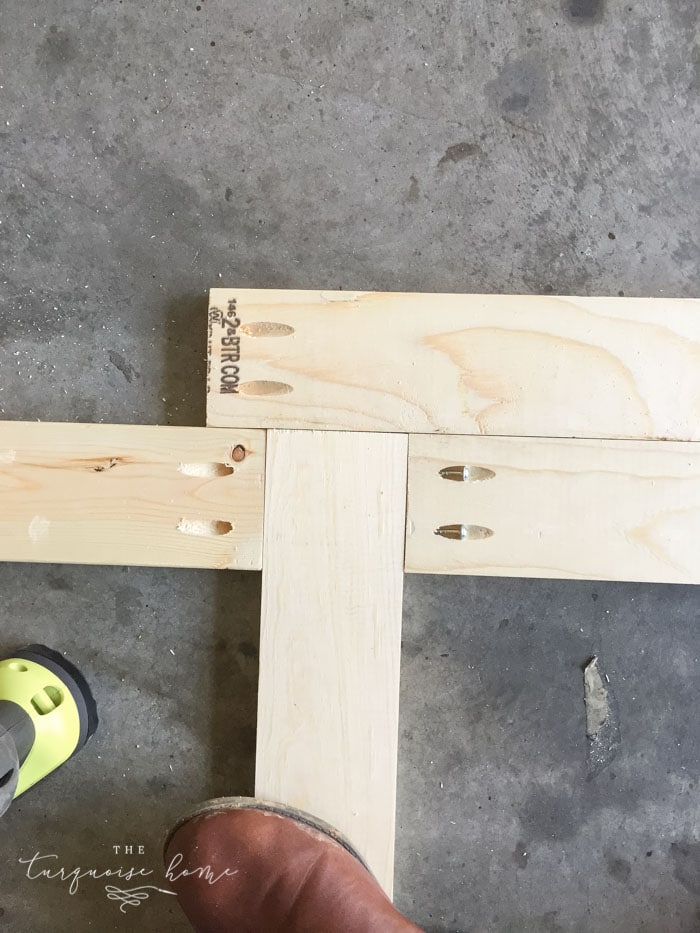
Tip: I used another board to make sure the boards were flush on the frame as I assembled them with the Kreg Jig screws.
4. Add the Bottom Shelf
Cut the 1 x 8 and 1 x 10 to the width of the bottom shelf and insert them into the bottom. Nail them into the bottom frame with 1.25″ nails. You can have a gap in the middle between the two boards. But make sure the back board doesn’t overhang the back of the frame.
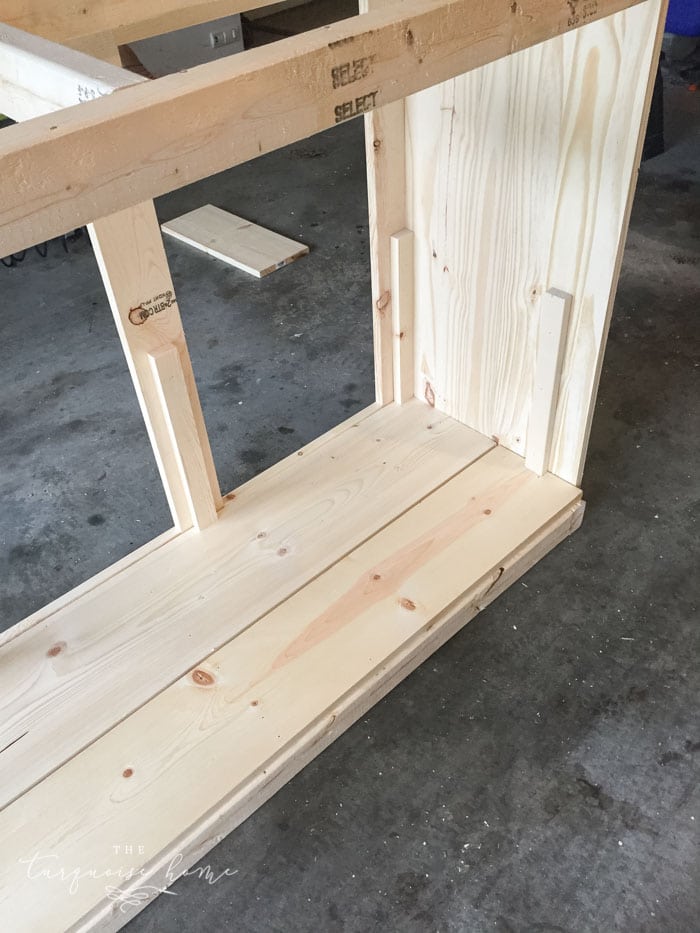
You can see in the above picture that I left a little bit of a gap between the boards and a small gap at the back. I didn’t want any bigger of a gap in the middle of the boards than that.
5. Attach the Shelf Supports
Cut your 1 x 4 Middle Shelf Supports and Cleats boards. The 7 boards at 14″ long will go around the inside of the frame sitting on the top of the bottom shelf. Attach them with 1.25″ nails and glue.
I put the top shelf boards on top of these supports and then marked where they were in order to see where to put the top shelf supports. Definitely follow the instructions on the original plans from Ana White for this because I didn’t take pictures of all these steps. I just followed her steps.
6. Assemble the Top Shelf
Assemble the top shelf and add the shelf cleats (5 – 1 x 4 boards cut to 17″ long) to the underneath side of the shelf boards with 1.25″ nails and glue, leaving a small gap between the shelf boards if necessary.
7. Attach the Top Shelf
Put the top shelf in place and attach it by nailing it in place from the outside.
8. Apply Stain
At this point I stopped and stained everything that had already been assembled. And everything else I added after this point I stained before adding it to the table. I talk about the stain I used at the end of the post.
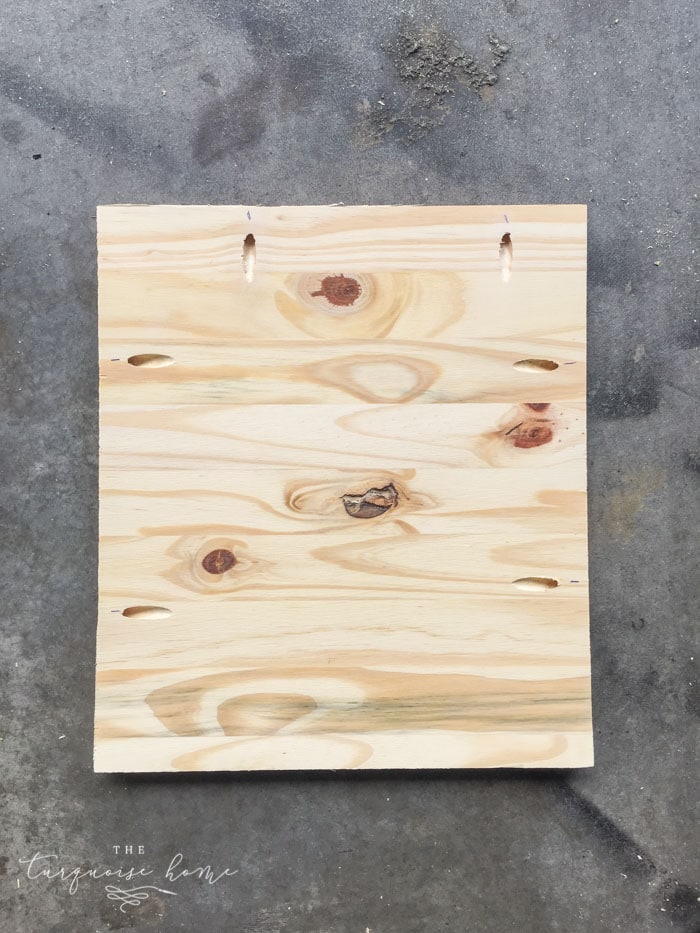
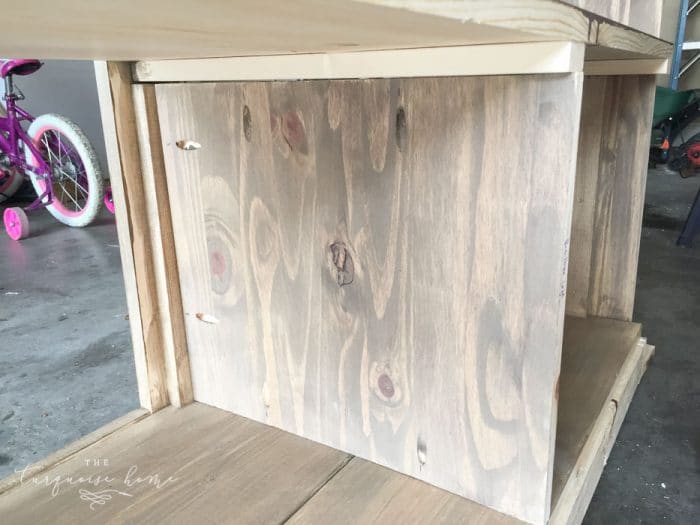
9. Attach the Shelf Dividers
Attach the shelf dividers between the left and right sections.
This is where I added something of my own to the original plans. I have a 3-year-old and she is notorious for getting into stuff, so I realized while making this that there would be no way for me to keep her out of the part of the table behind the doors. Granted, unless I figure out a way to lock them, she can just slide them open.
But I am going to be able to lock them, and I didn’t want her reaching her hand around through the opening next to it in order to access stuff. Also, I didn’t think it looked very pretty to have the shelves open all the way through.
So! All of that to say, I added some dividers. Just to the left and right sides, not in the middle. I cut down some 16″ x 36″ project panels to the specs in the cut list. And I added pocket holes to the sides where it touched the shelves or the frame. I stained it before installing it, just to keep things easy!
10. Attach the Back Pieces
Attach the plywood strips to the back of the table with 3/4″ – 1 1/4″ nails to get the planked look. You can use a full sheet of plywood if you don’t want to go to the trouble of ripping it.
11. Add Bottom Trim Pieces
Trim the bottom of the console in the 1 x 2 with mitered corners. Sorry I didn’t get any pictures of this step, but it’s really just measuring your cabinet and cutting the boards down to size. Attach with 1.25″ nails and glue.
12. Attach the Top of the Table to the Frame
Cut the two 2 x 10 boards at 82 inches each. Stain them first if you want to do things the easy way! Then attach them to the top of the table frame, overlapping on the sides and front, but flush with the back.
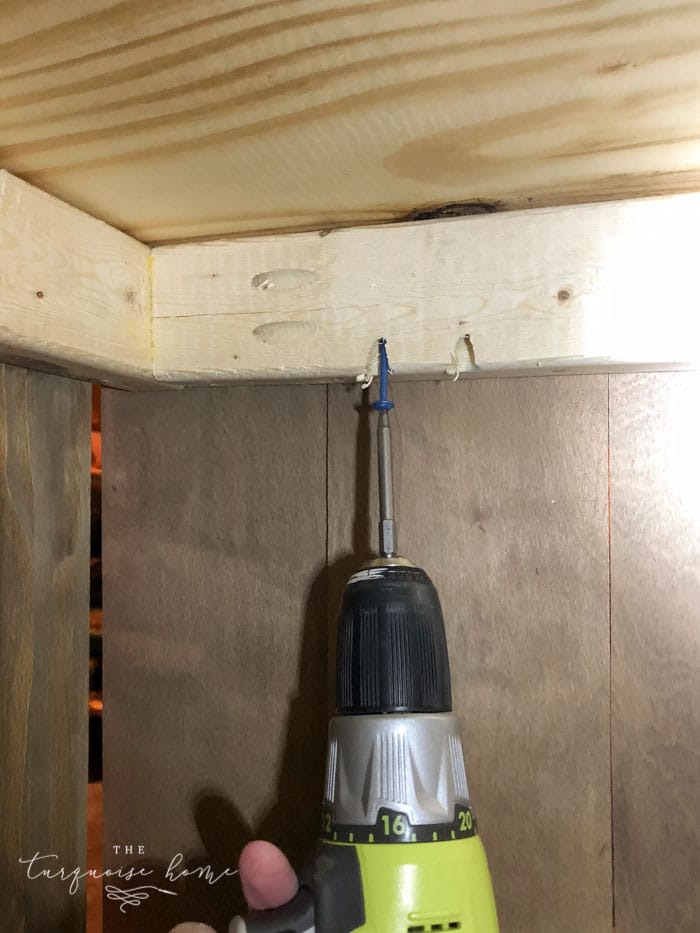
If you have a Kreg Jig, then you hopefully followed my instructions in step 1 to add pocket holes to the (underside) top of the frame before you assembled it all. This makes attaching the top a cinch and keeps the screw holes inconspicuous. Just screw them in from below with 2 1/2″ pocket screws.
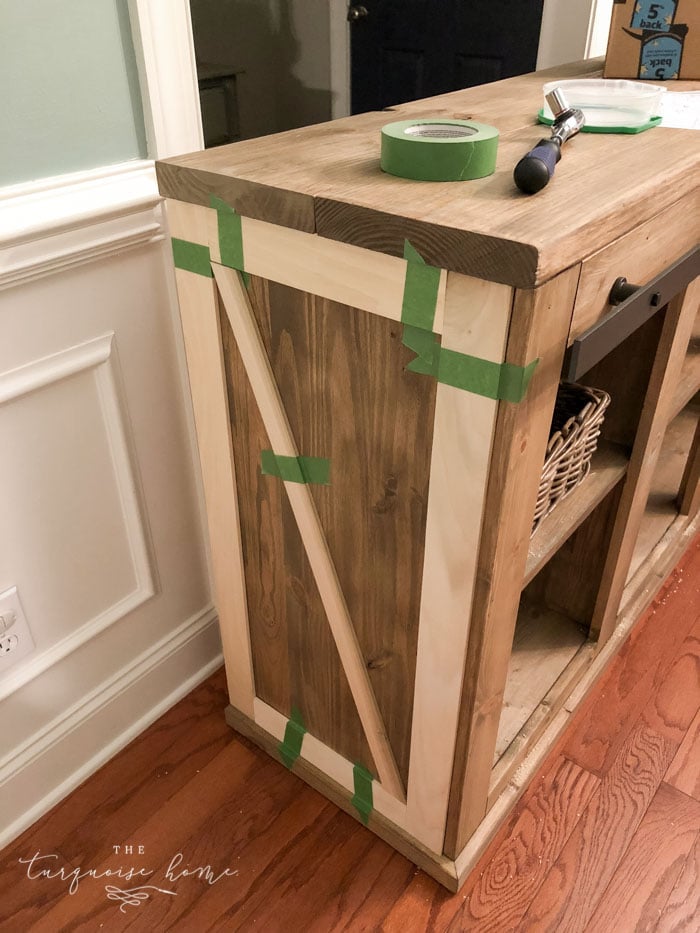
13. Add the Decorative Trim to the Sides
Adding the decorative trim to the sides is an optional step. But it actually wasn’t an optional step for me, because my side panels weren’t wide enough, so I needed the trim to cover the gap up!
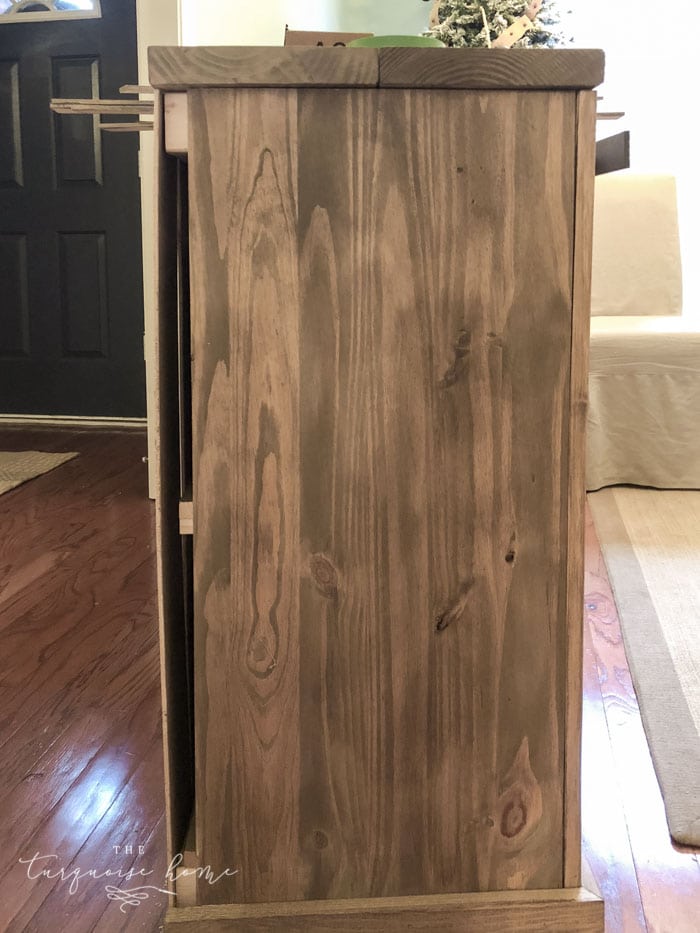
Even if you don’t have a gap, I think it looks good and ties the cabinet in with the doors, if you choose the use the same trim style. Use wood glue and nails to attach it.
14. Build the Sliding Barn Doors
I used the glued edge panel at 20″ x 6′ and 3/4″ thick for my doors. I cut them down to 30 3/4″ long and 20″ wide and then added decorative trim with pine project boards.
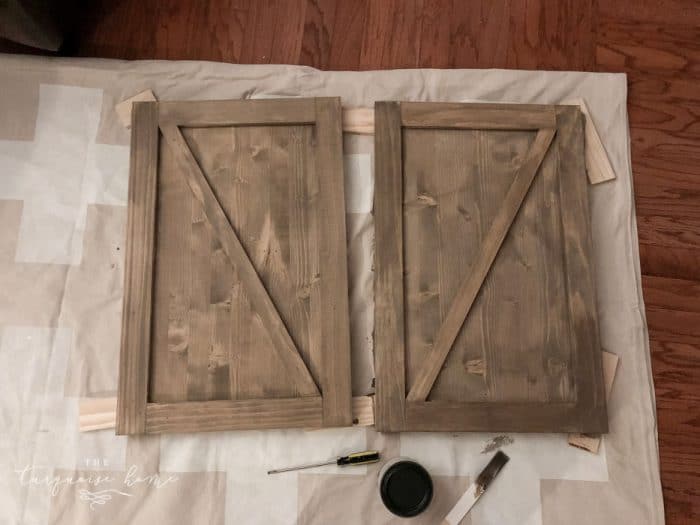
Stain them before you assemble them. (I’ll talk about what stain I used, which I looove, here in a minute.)
15. Attach the Barn Door Rail to the Front of the Table
Follow the directions that come with the sliding barn door hardware. This particular hardware set on this console table doesn’t leave much room for error. It’s a pretty precise location where you have to put the hardware in order for the door not to rub on the bottom of the table and for the hardware not to be above the top of the table. 😬
Once you find the perfect spot for the hardware, use your level to make sure the hardware is level. I made the mistake of measuring mine in the garage and not realizing that the floor wasn’t level. So when I brought the table in to the house, the hardware wasn’t level. So, just make sure your cabinet is sitting on a level surface before you try to install the sliding door bar.
16. Attach the Hardware to the Doors
I used a spade bit to drill the holes in the door for the hardware.
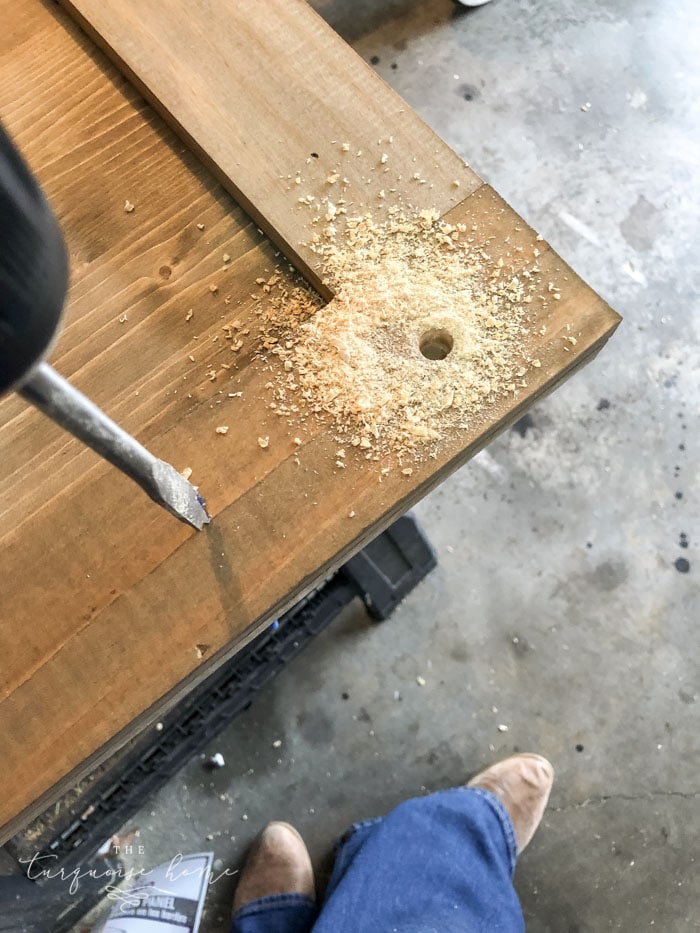
You’re done! Obviously you’ll put the doors on the hardware. Just follow the instructions that come with the hardware and you’ll be fine.
Stain for the DIY Farmhouse Media Console Table
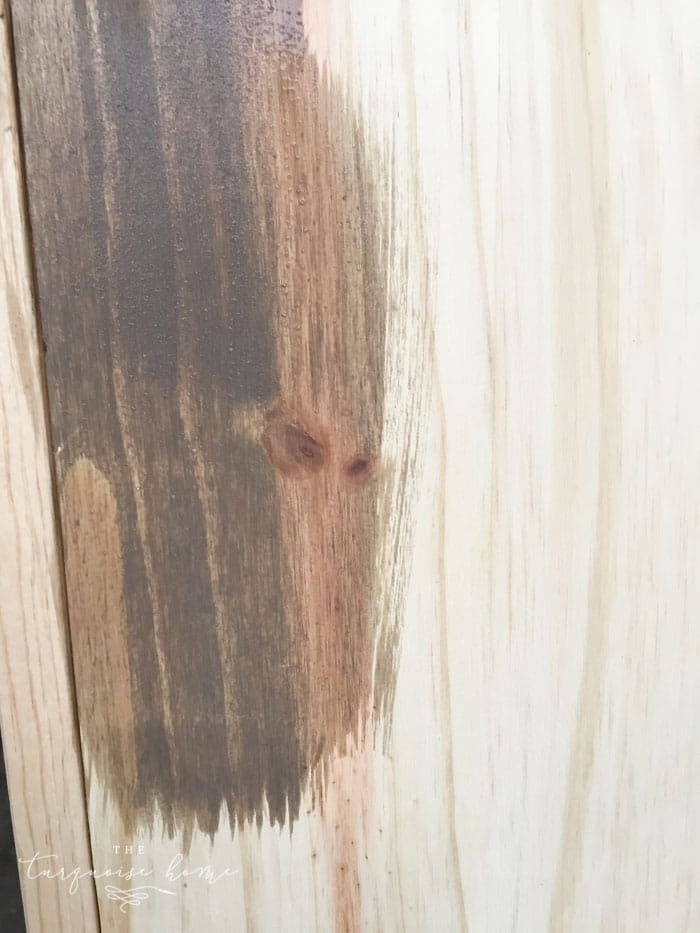
I’ve already gotten so many questions about what stain color I used for this project. It’s actually a new-to-me product that I bought specifically for this project! It’s a no-VOC stain that is water based and I fell in love with the color. But then when I used it, I fell in love with it all over again!
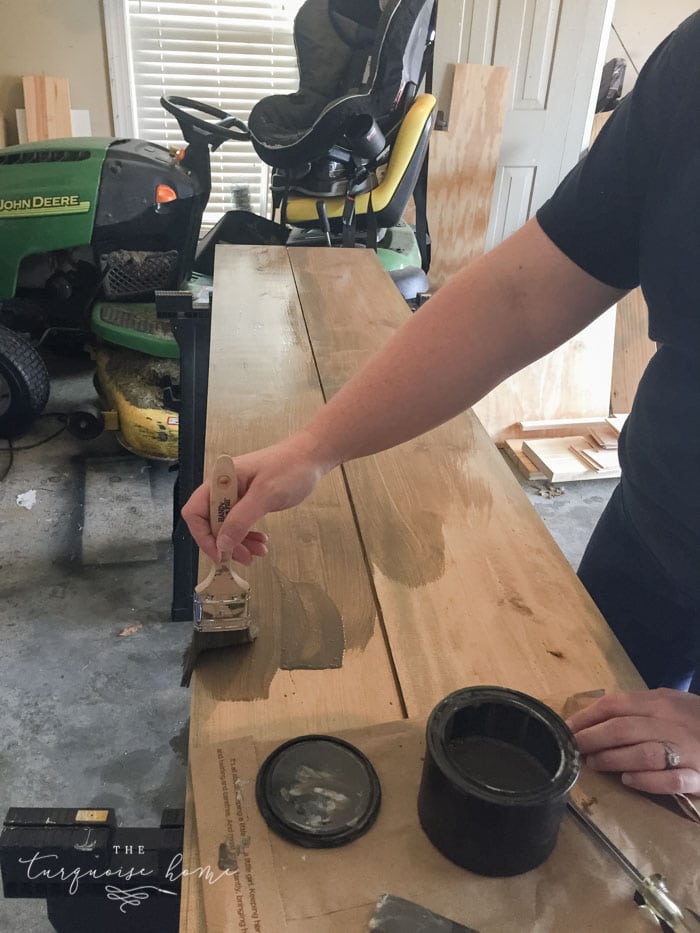
Don’t mind the super dirty lawnmower and extra car seat on top in the background. LOL
It’s called Weathered Stain from Old Barn Milk Paint. I love that is it odorless, which means it doesn’t give me a headache and can be used indoors. And I love that it’s water-based, so it can be cleaned up with just warm soapy water. Yay!!
It goes on somewhere between a regular stain and paint. Some of the boards didn’t want to accept the stain as well as others, so it kind of sat on top and I just wiped it off after a minute or so. But some of the boards soaked it up and there was no need to wipe it off. Just know that it’s not like regular stain in that you want to always wipe it off. If this stain dries at all, it looked bad if you wiped it.
It took almost 2 cans of stain.

I really, really like it! I will say, though, that it’s owned by a small business owner and so sometimes it takes a while to get it shipped, which means you just need to plan your projects in advanced if you plan to use it! But I love that we’re supporting a small business like ours.
Also, the stain says it’s a top coat and stain all in one. I still plan on sealing mine with clear wax, because I like the way that finish feels. And it doesn’t feel finished quite yet. But I haven’t done that step yet. 😊
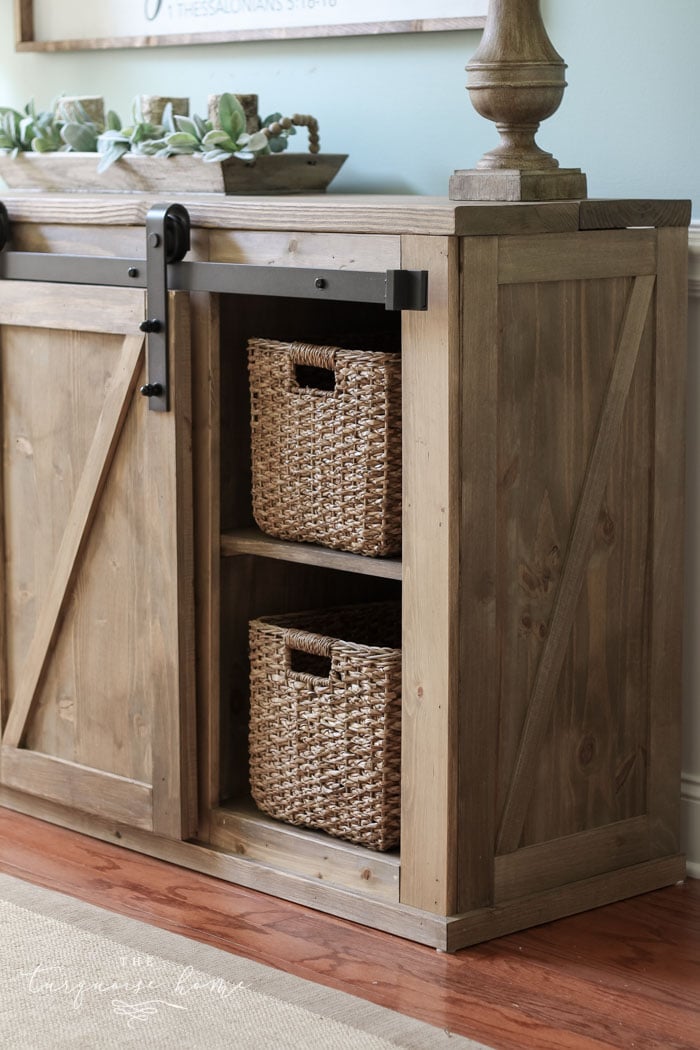
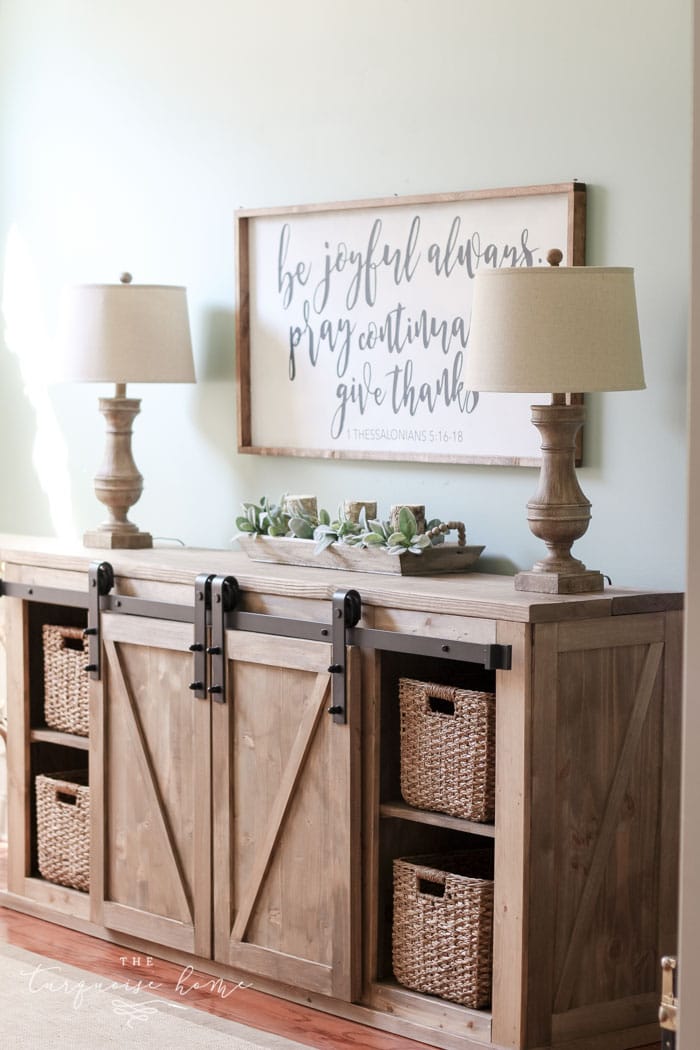
After searching high and low for baskets that would fit these cubbies, I found the Seagrass Wicked Baskets at Target at under $20! They are perfect and I am thrilled!!
I hope this tutorial is helpful for creating your very own DIY Farmhouse Media Console Table. If you have any questions, just let me know in the comments below!
More Posts You Will Love:

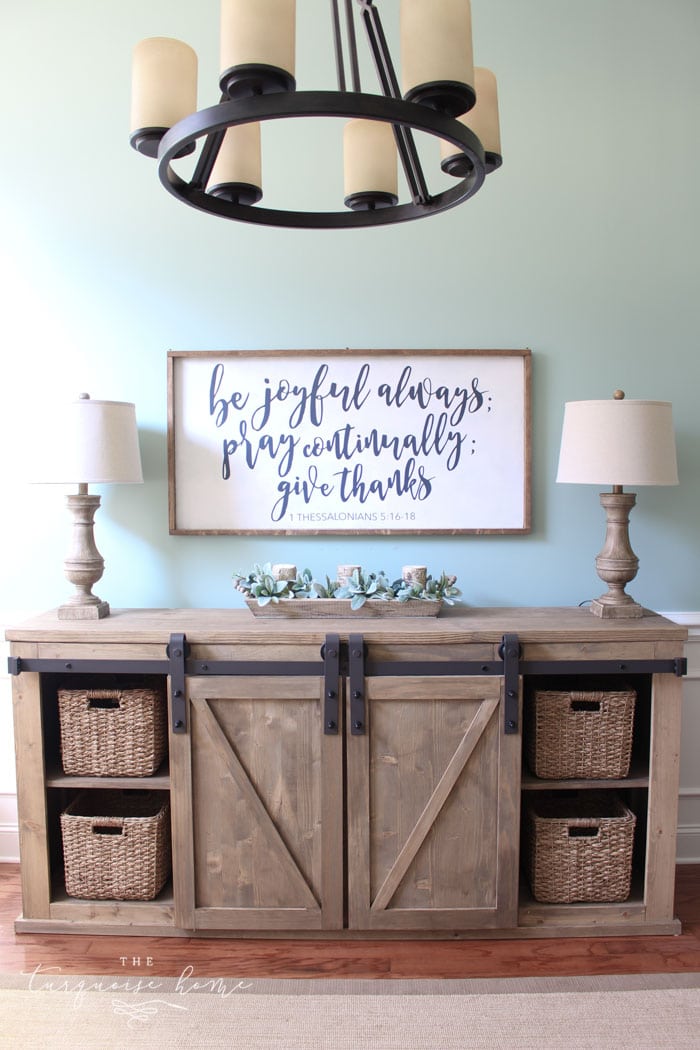
Hi, I was wondering where you got the lamps from! Thank you so much!
Hi Sara, those are old lamps from HomeGoods. Womp. Womp. So, I don’t have a link for you. I would search for “turned wood lamp” and see what comes up. I have seen similar lamps from everywhere from Walmart to Pottery Barn. Sorry I’m not more help!
Hi these are the Anna white plans we are thinking of using, but need to change the dimensions to fit the area we want this for. How did you change the dimensions for your project?
I wrote down all of the dimensions I wanted, then went through the instructions and changed the pieces as needed. It’s definitely time consuming to think through the whole project beforehand, but it was worth it to me!
Hi, this is so beautiful, and perfect for what I need. I’m going to attempt this in the spring, and am making mental preparations now. Along with other readers, I also would like photos of the unit with the doors open.
Has the question of the measurements be resolved? I see several comments about the steps at the beginning having incorrect measurements.
Finally, can you give me the dimensions of the baskets you found at Target?
Thank you so much for sharing. I am excited and so appreciative that you’ve taken the time to share the instructions.
Hi, my wife gave me this plan to build for her. It appears the 2×3 framing you have listed at 75 inches should be 78 inches. Cutting the length at 75 inches and adding the end pieces puts it at 78 inches total for the inside framing and out side framing with (5) 1×4’s and (4) 16.25 pieces equals 82.5, so the inside framing comes up 4.5 short. I’m assuming it should be 78 to leave a 3/4 overhang on either side for end panels.
We also ran into this issue. Unfortunately we didn’t notice it until after we’d cut all the shelves and build and tried attaching the face frame. That’s when we noticed that it was much wider than the box frames. We ended up just centering the face frame and building out face frames with 1×1’s for the sides that filled the empty space. Overall the impact was minimal but it did require some adjustments to the ends’ exteriors (as mentioned) and the shelf supports.
This is absolutely amazing. Give yourself a pat on the back! You should be so proud of yourself and how well you laid out the instructions here. Well done!!!
I am very analytical so I need specifics. When you say trim pieces that doesn’t tell me much. I will probably keep the sides with the original intentions of Anna White but neither of the plans states what trim dimensions are used for the sliding door. Are these 1×2 and 1×1’s or what have you?
Anna used a 0.50″ panel for the doors but you used 0.75 which I am using based on the hardware you linked.
I used your cut list for everything because I was using the same hardware. I am a bit perplexed with the measurements of your face trim. You show a cut list of 16.25 but when I did the calculations I came up with 15.50. Since you did the side trim I’m not sure if that’s where you came up with your numbers. Cutting based on your numbers frame was 3″ longer than the frame.
You are correct. I was actually recreating this in CAD as I wanted to then scale it down some and noticed that the face frame was significantly wider than the rest of the frame. 15.5 inches is the correct cut for the 1×4.
Since you discovered the issue, could you please update your original post to correct the measurements? We just had to do a lot of last second changes and taking apart the face-frame and redoing it because of this issue not being addressed in your original post.
We fixed it by taking 1/8 of an inch off all of the 16 1/4 inch face frame pieces.
Luckily we caught it before going any further
Hi! I love this console! I was wondering, is this wood pine? Also, did you use a pre-stain primer before applying the stain?
Thanks!
Love this plan! My husband and I have the wood in the garage ready to go. I was just wondering if you had a picture of the frame put together after step one before you put the sides on.
You did a beautiful job! Love that console. And that stain is perfect.
I was wondering if you could tell me more about the accessories and decor: greenery, tray, lamps, and the lovely sign.
Thanks so much. Love your style!
Hi I was wondering if you had the materials cost (except tools) for this project. Thanks!
Hi Beatriz, I don’t have the exact cost, but I think I remember it being in the ballpark of $300. Maybe a little bit less. It will depend on the cost of lumber in your areas, too. Thanks for reading!
xo, Laura
What did it cost you to make this project? Trying to decide if it’s a cost savings to make vs. Buy.
Thanks!
What are the dimensions of the finished product (particularly height)?
Could you send me pics with the door open also. I’m trying to attach the frame but one of my pieces doesn’t fit between the 36 frame work thanks
Could you please send me the photo of it with the doors open as well? Also what are the finished dimensions? Thanks! I cant wait to get started!
Hi, can you tell me what kind of end caps are on the door track. They didn’t come with the track. I need to shorten the track a little. Thanks, Larry
Hello- love this, and thank you so much for sharing!!! I have one question/request… could you possibly post a picture of this piece with the barn doors opened? I am considering downloading the plans but need to see what’s behind those doors. Surely do appreciate!!!!!
I e-mailed you some pics, Ginnie! I hope it’s helpful! 🙂
Hi can u send my the pic too please
Sure thing! I just sent it!
Beautiful work! I was wondering if you have a template for the letters of the wood sign?
Hey Laura – You did a fantastic job. I love how it turned out. It is just beautiful and I know you’ve got many many hours in it – so JOB WELL DONE my friend. So proud of you for taking on this project and making it look so much better than store bought. Have a great week and God Bless.
WOW! You go, girl – it’s beautiful.
Thanks for the tutorial and confidence!
Love, Love , Love, The console is beautiful. Thanks for sharing.
I absolutely love the console!!! I am crazy for barn doors and your design is perfect. Don’t know whether I’ll try it on my own; but I have a carpenter husband who always manages to make my dreams come true. Thanks so much for sharing.
Your console is beautiful and amazing. In my heyday, I too built things (at the time had a husband who couldn’t hammer a nail) and had a storage shed full of power tools. At 75, I’ve given up a lot of my DIY activity (also gave up on the husband many years ago) and have made peace with just hanging shelves, draperies and other “light” carpentry work. Still have my trusty power screwdriver, drill, dremel and just enough small hand tools to do what I need to do. We do our children a huge favor when we teach them to do for themselves.