DIY Driftwood Finish
This DIY Driftwood Finish is an easy way to create the whitewashed look of real driftwood. It’s the perfect backdrop for my beachy, weathered sign on my summer mantel.
I’m so excited to share my latest DIY project with you today! I’ve been eyeing this rope pillow from Kirkland’s for about a year now. I saw it recently in the store and while it’s super inexpensive, I wanted to try my hand at making a DIY rope sign that mimicked the same look!
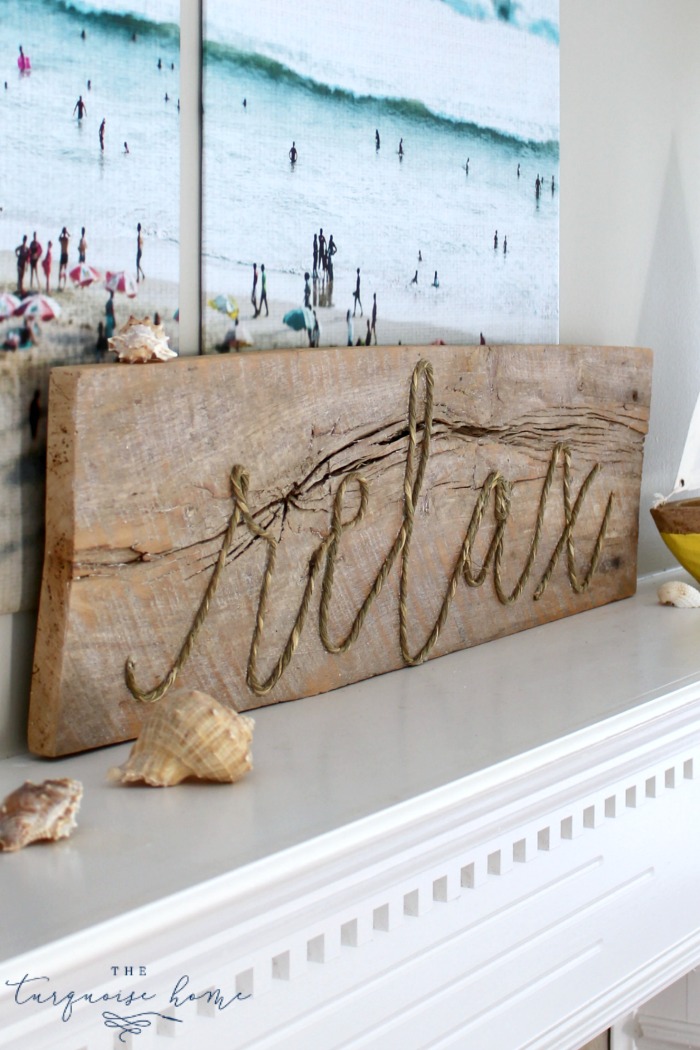
But first, I needed the perfect piece of weathered wood with a driftwood finish. Seeing as I don’t live near an ocean and that you wouldn’t even find a large, flat piece of driftwood in nature, I had to create the look out of something I had on hand.
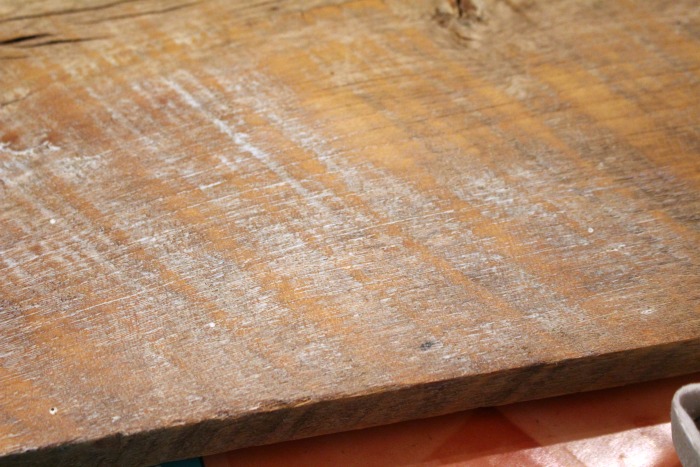
I went to the garage to check my scrap wood pile see if I could find a piece that would work for my project. This old piece of barn wood jumped out at me. I had been saving it for a few years for just the right time and I was excited to finally be able to use this old piece of barn wood. You can’t beat free!
For this sign, I wanted to create a weathered driftwood finish and less of a barn wood finish, so I added a special treatment to give it that beachy, weathered look that is so popular these days.
Affiliate links are used for your convenience. Please see my full disclosure policy.
Tools You’ll Need to Create a Driftwood Finish
- Wood with grain
- white or light paint
- finishing wax (like this one)
- cloth rag
- wire brush (optional)
- stain (optional)

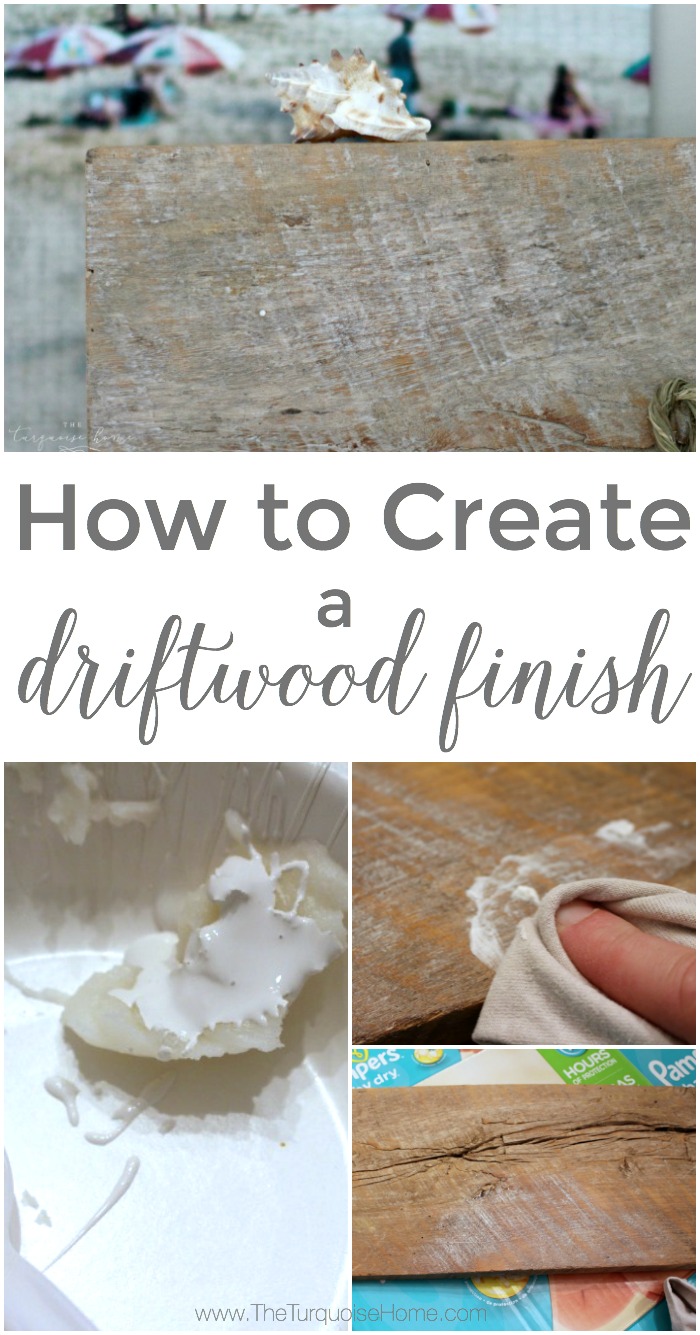
How to Create a Driftwood Finish
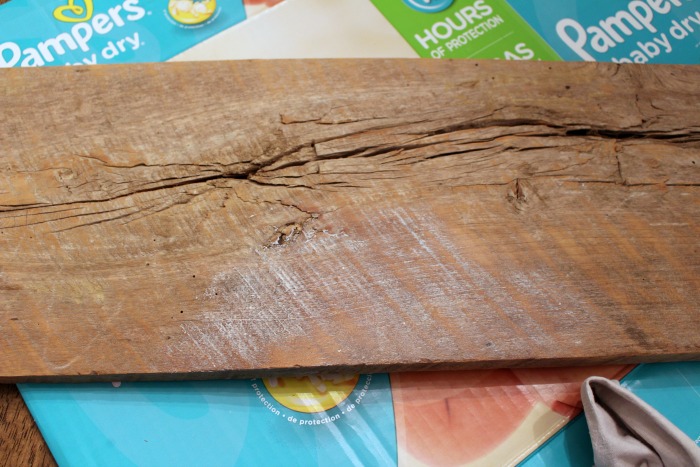
For this finish, you’ll need to have a piece of wood with wood grain (either real or created) and luckily mine had plenty of grain and roughness to it. I sanded it some to knock off the dirt and a little bit of the roughness, but I made sure to not sand it so much that it took away the pretty grain.
If you don’t have an old piece of barn wood with lots of grain, you can use a new piece of wood and add grain to it. Using a spray bottle of water, spray the wood until soaked. Then take a wire brush and run it along the wood going with the grain to create grooves. Wait for the wood to dry before completing the next step.
Also, I loved the color of my barn wood as it was, so I didn’t stain it. But if you want to stain it, I love Minwax’s weathered oak stain for a gray, weathered look!
(Please excuse the super yellow, poorly lit night progress photos. Mama’s gotta work while the babies sleep.)
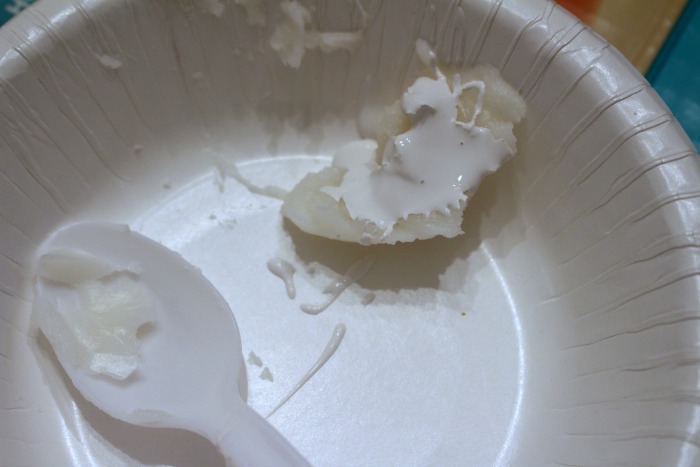
Then just take your finishing wax and mix a smidge of white or light paint into it, creating a white wax. Yes, “smidge” is a technical term. 😉 You can buy white wax and I’m assuming it would give you the same results, but I’m not sure because I’ve never tried it.
I used Annie Sloan’s finishing wax, but you can use other brands. You just want to make sure it has the consistency of butter.
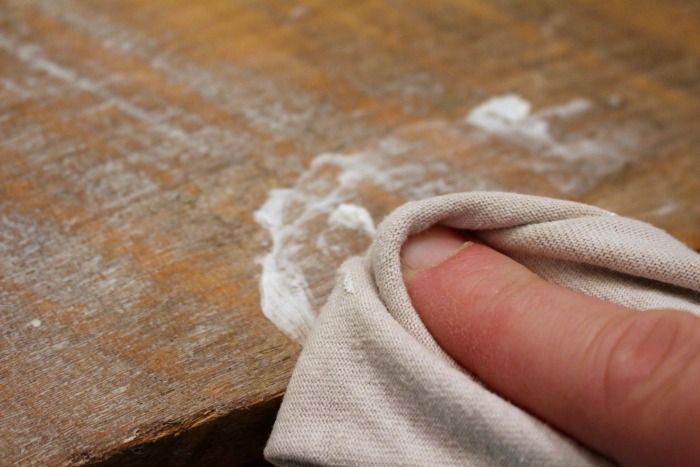
Take a little bit of the white wax and rub it on to the board. And then just rub it in until it’s gotten down into all of the grooves. I wipe it off as much as possible to give the board as authentic of a driftwood finish as possible. I don’t want big clumps of white wax hanging around.
And that’s it! The board now has the lightened look of driftwood, even though it’s old barnwood. Hehe. It created the perfect backdrop to my rope and wood sign.
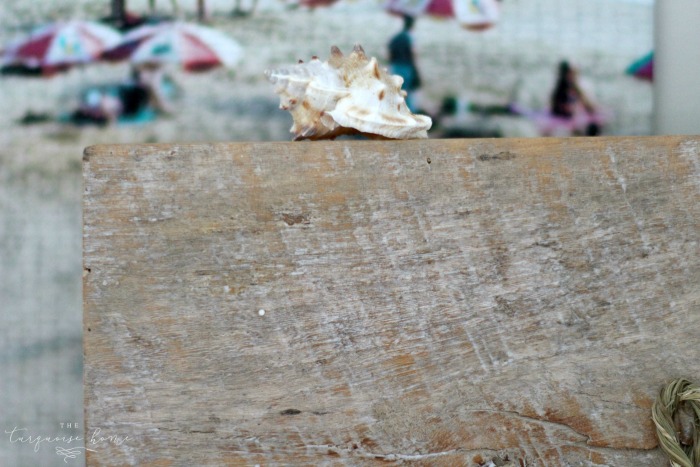
I just love the weathered white look of the new sign. More tomorrow on how to create the rope “relax” part of the sign! It’s also super easy.
More Posts You Will Love:


Love this! Thank you so much for sharing!