IKEA Rast Hack: New Nightstands
This IKEA nightstand hack is a great way to customize an inexpensive dresser into a nightstand that fits your home!
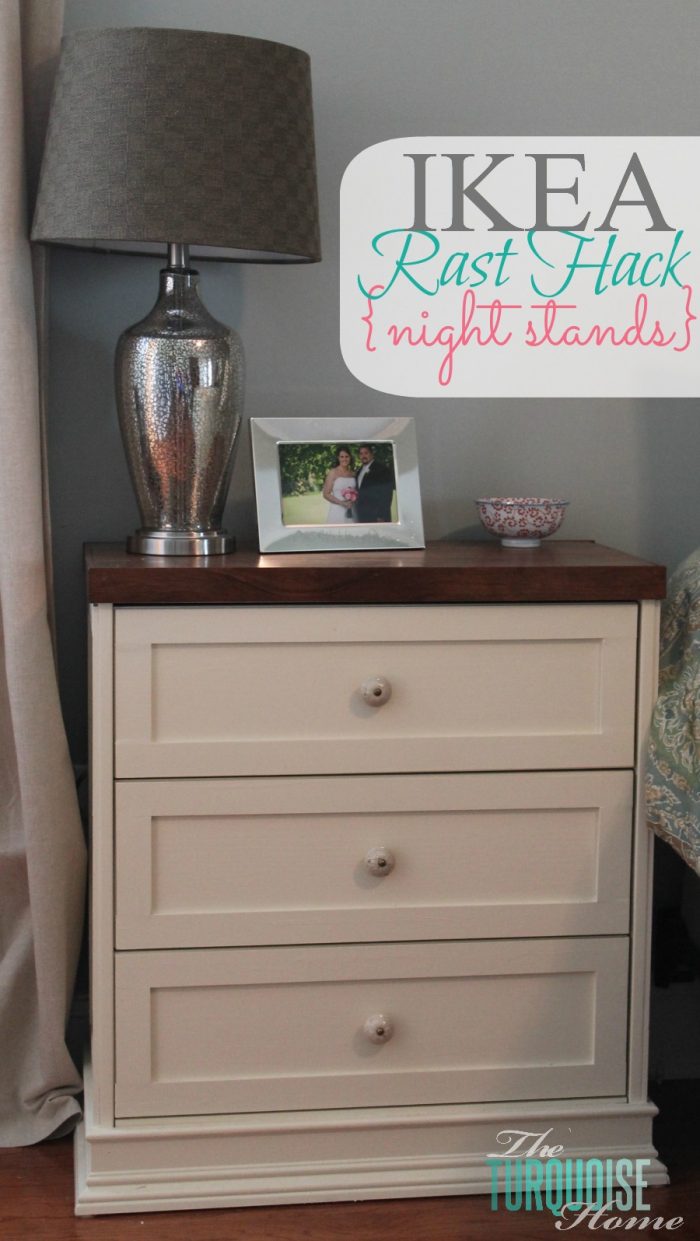
It’s done! It’s done! I finished my new bedside tables and can I say that I love them!! I wanted matching, nice bedside tables for our new bedroom, but I didn’t have a bunch of money to spend, so I did an IKEA Rast Hack. You know how IKEA sells simple, modern wood furniture and it’s oftentimes the perfect start to a great piece of furniture!
This is my very first wood-working project and started a love of making my own furniture and home decor. It was hard work and took me quite some time to get it done (about 4 days), but I’m sure I’ll get faster with time. 😊
Since our old master bedroom wasn’t big enough for two nightstands, we only had one before on my husband’s side of the bed. But the new bedroom is plenty big enough for two night stands!
I am so happy to now have my own night stand with drawers to hide my junk! And the room just seems more balanced. I guess it’s because it IS more symmetrical. This post contains affiliate links for your convenience. See my full disclosure policy here.
The Rast Hack is pretty trendy right now. The base Rast dresser from IKEA is only $35. (Updated: The Rast dresser is no longer $35, but $39.99. Still a fantastic price for a solid wood dresser!) The beauty of it is that you can transform it into almost any style or type of furniture.
Want to Save This?
Enter your email below and I’ll send it directly to your inbox!
Tools Needed for an IKEA Rast Hack Night Stand
- Miter saw
- Nail gun
- Putty knife
- Wood putty
- Sand paper
- 1 – 1 x 4 x 4 for the dresser top
- 1 – 1 x 6 x the width of the dresser
- About 40 feet of lattice (per dresser, if you’re doing two dressers, get about 75 feet of lattice)
- Drawer pulls
- Stain
- Paint
- Floetrol
- Polycrylic
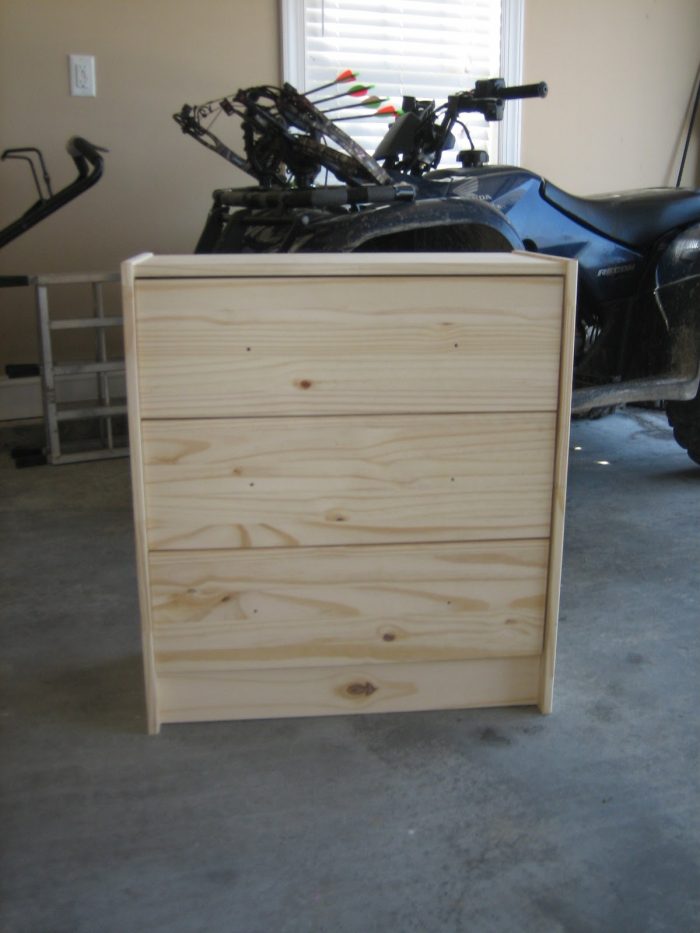
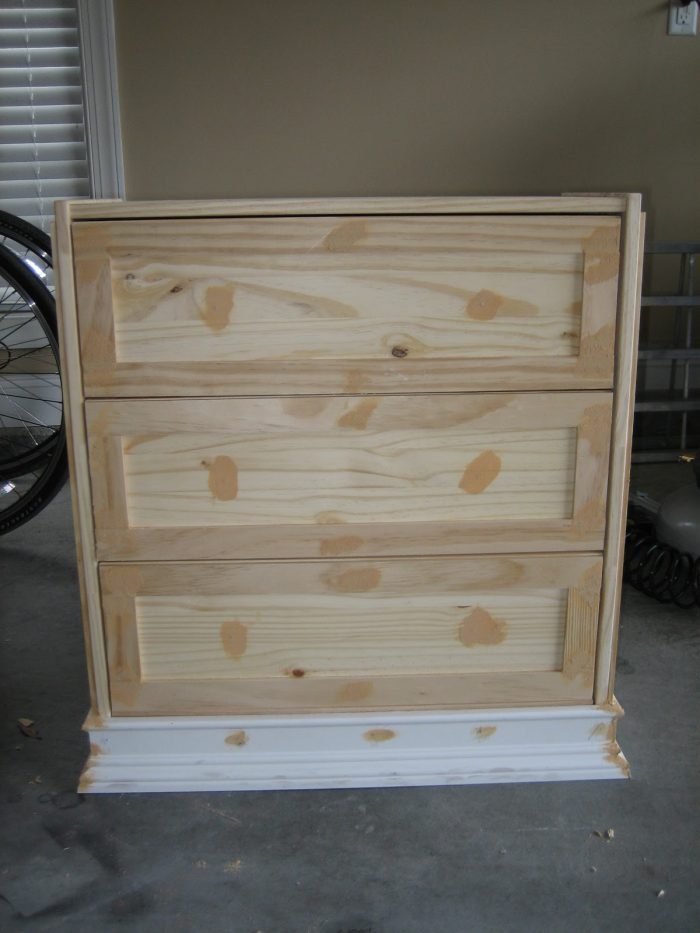
This is the IKEA Rast dresser. Pretty plain and boring, but solid wood and perfect for dressing up.
First thing I did was build up the bottom so that I could attach the molding to something.
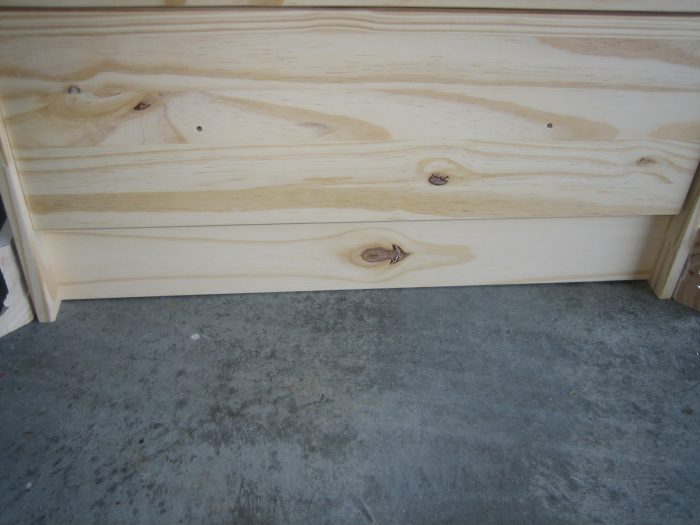
Before Building it up.
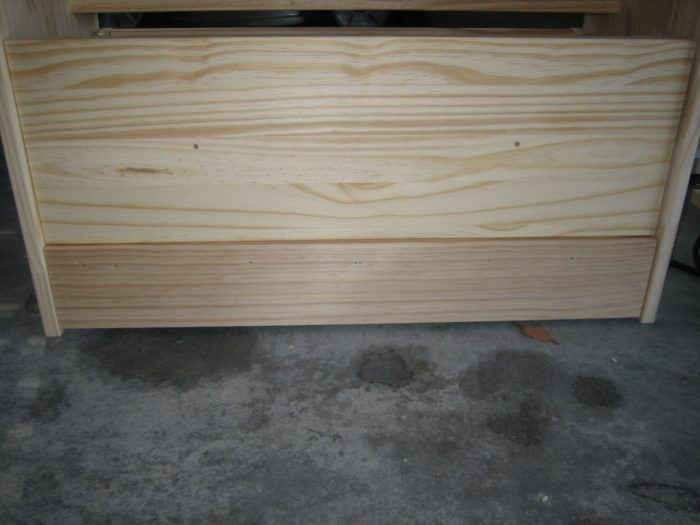
I used one 1 x 4 (I think) and a piece of lattice behind it to build it up.
Then I cut the base molding and lattice to trim out all of the drawers and sides. I used my new miter saw I got for my birthday. Love it!

Starting to get cute! 🙂 I fitted the trays to the top of the dresser before I attached the lattice to the sides.
I then filled all the holes with wood putty.
And painted, two coats. I put Floetrol in my paint to minimize the brush strokes. I used Sherwin Williams Antique White paint color.
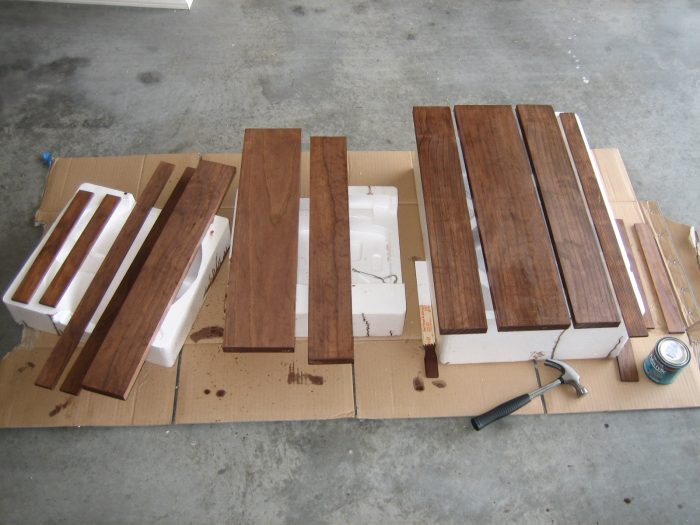
I pre-stained the top “tray” that I put on the top of the nightstand. I placed two 1×6’s and 1 1×4 side by side on the top and used the nail gun to fasten them to the top. And then I used stained lattice to trim around the edge of the top.
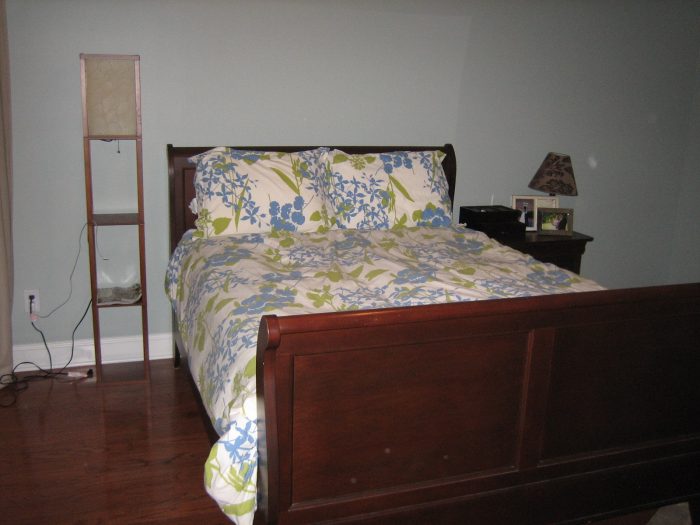
Before
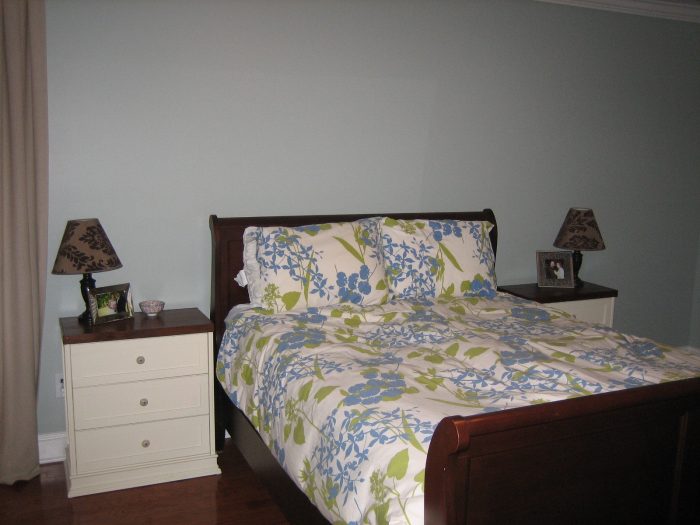
After
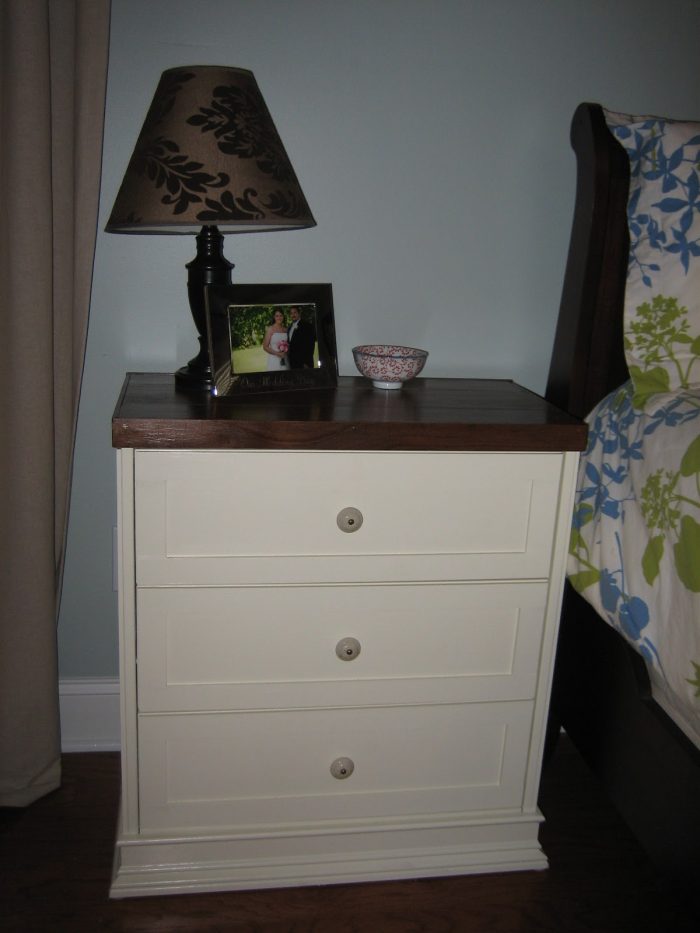
I LOVE LOVE LOVE them.
Now I just need new lamps, new duvet cover, pictures above the bed, and more … 🙂
What do you think of my first project???
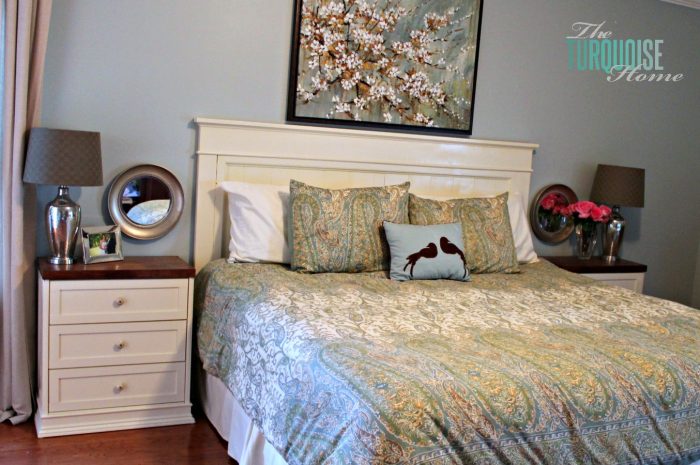
Check out my nightstands in my master bedroom now.
More Posts You Will Love:
- A’s Room: Hot Pink Night Stand Makeover!
- 7 Must-Have Nightstand Decor Ideas
- Bedroom and Office Inspiration with a Nautical Theme
- How to Make a Headboard: 13 Beautiful DIY Headboard Ideas
- How to Start a Room Makeover


Just saw this and I love it! I’m confused about lattice. When I look for lattice I only find the large panels with the criss-cross pattern used for gardens, etc. What is the lattice that you used? And where do I find it? Thanks so much.
Thank you, Laurie! It’s been years since I made this and I was such a newbie at building stuff back then. I still don’t always know what I’m talking about. Ha! But I just measured the boards on my nightstand and they are 1 1/5 inches x 1/4 inches. I found some online at Lowe’s, so that if you have a store near you, you can see how many are in stock. https://www.lowes.com/pd/Common-1-4-in-x-2-in-x-4-ft-Actual-0-25-in-x-1-5-in-x-4-ft-Poplar-Board/1000074305 I hope this helps!
Did you put the molding around the back of the dresser, too? Also, where did you find the molding that wide to cover the entire bottom of the dresser?
Yes, it’s on the back as well. I found it at Lowe’s!
WOW! Now that is AWESOME! It looks fantastic. It’s amazing what little wood and a lot of work and imagination can do. Great job!
I am thoroughly impressed!! I want to do this now! So glad for girls like you with ideas like this because I can make it but I sure never would’ve looked at that little dresser and seen that potential 🙂
You rocked this Laura! Fabulous inspiration! What a great hack, I’ll pin this and remember it the next time I see something that needs a little help 🙂
Spotted your amazing IKEA hack on Pinterest and, taking Beckie’s advice, followed the Pin to the blog first … and here I landed! How perfect is that? So now I can repin with confidence!
So great meeting you last week!
🙂 Linda
How funny, Linda! I also try to go to the source to repin, because if nothing else I hate clicking on a pin and it just going to the image or the front page of a blog or site instead of that specific tutorial or whatever. So, I try to verify that it’s a “good” pin first … even though it takes more time.
I’m glad you liked my Ikea hack. 🙂 It was so great to meet you, too!!
Looks beautiful! I may replace my particleboard nightstands now! One question….how wide is the lattice you used and where did you buy it. HD has 3 widths and they can actually be up to $1.xx per foot so 75 feet could be so pricey it would defeat the purpose of buying the Rast pieces. Thanks!
Hi Elisa, I bought the lattice from Home Depot. And I think it was the 1 inch size. But I’m pretty sure the $1/piece was for an 8-foot piece. So, 75 feet would only be $10-ish. 🙂 Much better than $75!! I couldn’t have done it if the supplies cost that much!
Laura, I love that you took a VERY plain jane piece of furniture and gave it a full makeover! Nice job.
Thanks so much, Brittany. I’m so flattered that you liked them!
Lovely job! Just wondering how much moulding you bought-didn’t catch that on your list of materials. Also, did you get the store to do the cuts of the moulding for you, or did you do them yourself?
Thx, can’t wait to try it myself!
Cindy
{A Charming Nest} blog is now at http://www.acharmingnest.net
Thanks!
Erin
Do you remember how much stain you used for two dressers? 1 quart or two?
Thanks!
Oh, I think I used less than half a pint – so little!!
LOVE!!! Saw this on Pinterest. It’s exactly what I’ve been needing by my bed. I’ve had the cheapo 3-legged round particle board table with ruffled tablecloth (you know the ones!) for 17 years and desperately need a “real” bedside table. My husband is a great woodworker and keeps asking me to show him what I want. THIS is it! He could totally make it from scratch, but I doubt he could make the base unit for that price (not to mention his time). I think a 30 min drive to Ikea with the babies is in my near future. Thanks for sharing this!
Awesome, Julie! I love it when I find exactly what I’m looking for. 🙂 I’m sure your hubby can whip these up in no time! I’d love to see pics when you finish them!!
Thanks for stopping by!
OMG I love these! Great job!
They are awesome! The moulding really does a lot for them. Your bedroom looks lovely.
OMG!! It is awesome!
I love it.
Regards form Spain
Really, really beautiful!
Way to go! It looks amazing; can’t believe it was your first project!
I cannot believe you did this to that nightstand before. I am so mad at myself. I had TWO of those from Ikea that I got on clearance. I thought I would do SOMETHING with them, then gave up and gave them away. Yours looks like a very expensive piece. Great work!!!!!!
Oh no!! You got them on clearance and gave them away?!? Maybe you can get another set on the cheap. 🙂
REally cool!
LOve them!
Thanks for sharing!
Stacey of Embracing Change
Thanks so much for linking up to our Inspire Me Please Weekend Blog Hop! This nightstand is fabulous and I love how you were able to custom build it to coordinate with your farmhouse headboard. Perfect combo!
xo, Jennifer @Blissfully Ever After
I love Ikea hacks. I’m ready to tackle my Leksvik tv-cabinet (with Annie Sloan Chalk Paint). Feel free to join my link party with hour hack. Crafty Country Cottage @ Old Red Barn.
Goedele
This is just beautiful! I just linked my klubbo table hack to the Common Ground party and saw your hack. Did you submit it to the Ikea Hackers blog yet? If not, you should!
Nice work! They turned out beautifully! We just hacked the Tarva dresser over at our place… It’s so fun to turn something plain and cheap into something you really like.
Wowza!! These look absolutely amazing. Great hack job! Love how your bedroom is coming together:)
Krista @thehappyhousie
There’s one of those nightstands in the vacation home we’ve been renting. I was just thinking last night, that there would be lot’s of ways to ‘udate’ it to reflect some personality. So deja vu. Love how yours turned out.
Wow! That looks great! I was actually kinda shocked to see the original after seeing what you had turned it into!
Looks terrific and such a great idea. I’ve got to get myself to that IKEA store in Atlanta!!
This looks great! I love a good Ikea hack! That store is dangerous for my bank account. 😉 I popped over from The DIY Dreamer–have a great week!
~Abby =)
cute! doesn’t look idea at all
Seriously? Love the hack! Makes me really rethink my nightstands!
That’s amazing!! I can’t believe what you did to it! I thought, no way those are from Ikea. You’re so clever and handy 😉
Jamie @ somuchbetterwithage.com
Laura
Great job! I love how it turned out. I’m visiting you today from Sugar Bee.
~ Megin of VMG206
love this! well done 🙂 i love your blog; turquoise is a huge color in every room in my home too! it just makes me happy. i’m your newest follower!
This is totally on my to-do list as part of my daughter’s room makeover. Yours look amazing!
I am just floored, what a transformation, you go girl. That is incredible and you did that yourself? You are very talented. Can’t believe the difference in before and after. The night stands look like fancy expensive furniture. You should be very proud of your first project like that.
Love the molding on the bottom, I can’t believe it is the same dresser.
Love this!
Hugs, Cathy
Much Better! I like the ‘shaker’ style molding around the drawer fronts.
What an amazing job you’ve done! I really like the finished look you’ve created. Your room is beautiful.
Wow! I love them. Fantastic transformation. I love your new headboard as well. The room looks great.
KC
I love this! I love Ikea and this makes me love it even more! Stopped by from Show me the Goods Link up.
Corey
Love this! Looks amazing! I am new follower from southern charm! I would love for you to check out my blog and follow me back! Nicole!
What a lovely dresser. I look forward to you stopping by My Dream Canvas. I am hosting a spring soiree at my home 🙂 The party also includes a giveaway by the famous tabletop and giftware brand Mikasa. Hope to see you there!! Have a great week.
Amazing, wow, I love how they turned out. You did such a great job. Hugs, Marty
Beautiful! I just repainted and Ikea dresser in our guest room and added new hardware but never thought to add trim-
wish I had seen your post first lol!
Cheers
I’ve been wanting to do this exact same thing! They look great!
Christine