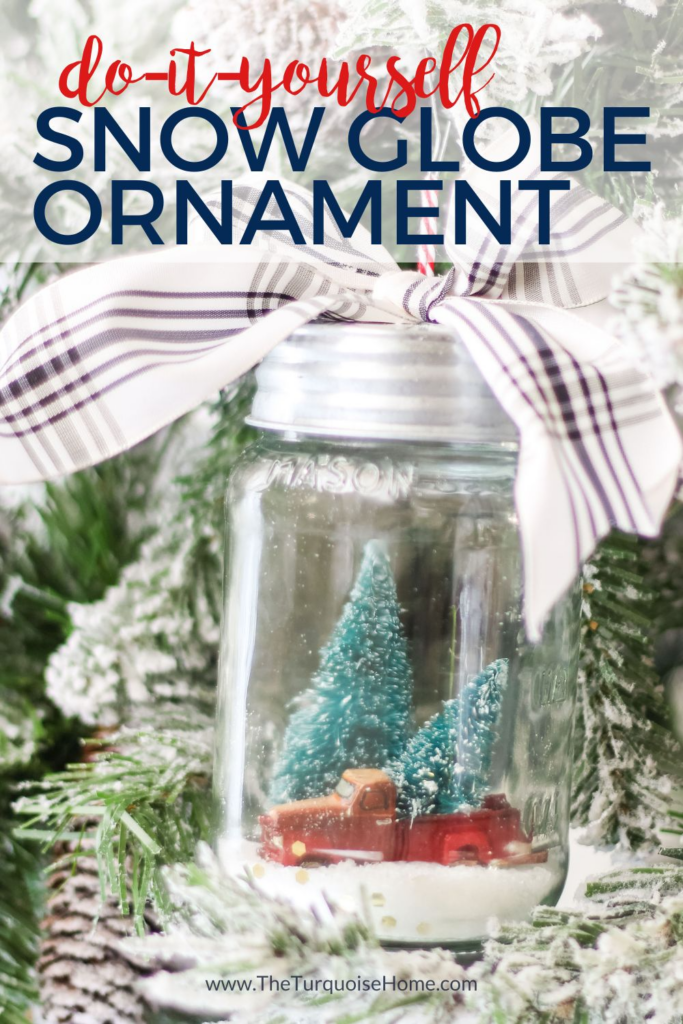
DIY Mason Jar “Snow Globe” Ornament
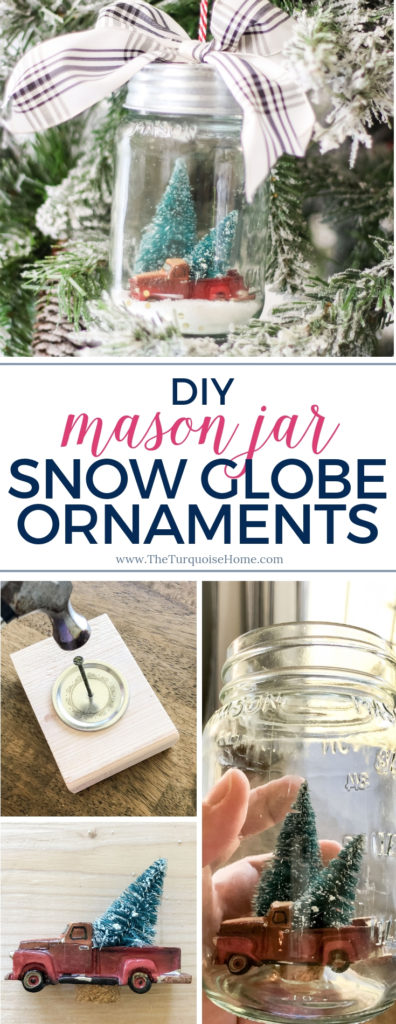
Create a snowy scene in an old jar for a cute Christmas snow globe ornament DIY project! Just 5 simple steps for this cute project!
I love making a new Christmas ornament craft each year and this year is no different! Last year I bought several inexpensive glass canisters and put fake snow in them and created my own “Christmas Village” of sorts from these Christmas scenes. I think they are so magical and my kids do too!
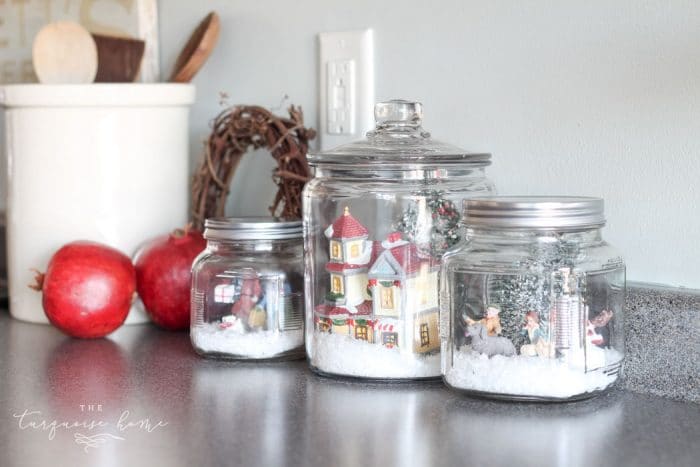
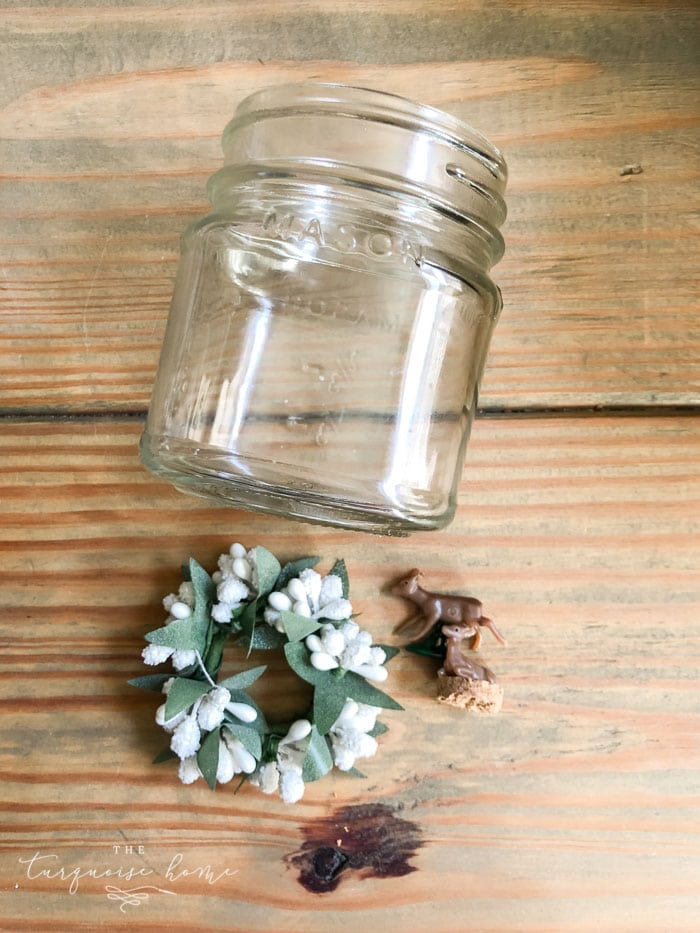
So, I got the bright idea to do the same thing, only with smaller glass jars and teeny little figurines. I grabbed some of my jelly jars from my stash and headed over to Hobby Lobby’s dollhouse section to see what I could find.
The mini deer are so cute, but I found some other cool things as well. (I didn’t see these mini street lamps while I was there, but they would have been cute, too!)
When I got home and started to make my craft, I realized that the patterned glass on the jelly jars was going to make it difficult to see what’s inside. I could have used regular mason jars, but then I realized that I had several burned candles from my favorite candle store just waiting for the perfect craft.
I cleaned those up using their tutorial and they worked out perfectly! I’m so glad I saved them and yay for being able to reuse the candle jars!
I love sharing about all things Christmas decor! I’ve shared all about the best Christmas tree collars, how to decorate a bedroom for Christmas and how to decorate with Christmas ribbon. My hope is that these articles will help you create a home you love for the holidays!
This post contains affiliate links for your convenience. See my full disclosure policy.
Supplies You Will Need to Make a Mason Jar “Snow Globe” Ornament
- Mini Tractor and Truck
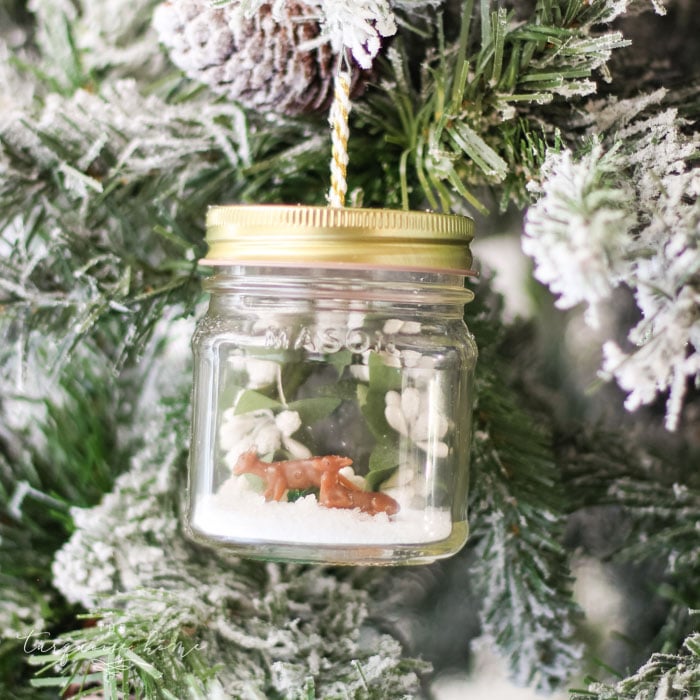
- Mini Reindeer
- Mini Winter Wreath
- Miniature Bottle Brush Trees
- Mason Jars (I used my old candle jars, but these would probably work well too.)
- Fake snow (or Epsom’s Salt in a pinch)
- Hammer
- Large nail
- Hot glue gun & hot glue
- Scissors
- Jute or string
- Ribbon, optional
How to Make Mason Jar “Snow Globe” Ornaments
Step 1. Choose your mason jars and Clean them up
I started out with some mini jelly jars, because I thought the smaller size would lend itself better to an ornament. But then I realized I needed a clear sided jar. And I had these leftover candle jars that were perfect. The large size is a 16 oz. jar and the small is a 8 oz. jar. I found these on Amazon that looked like they’d work well, too.
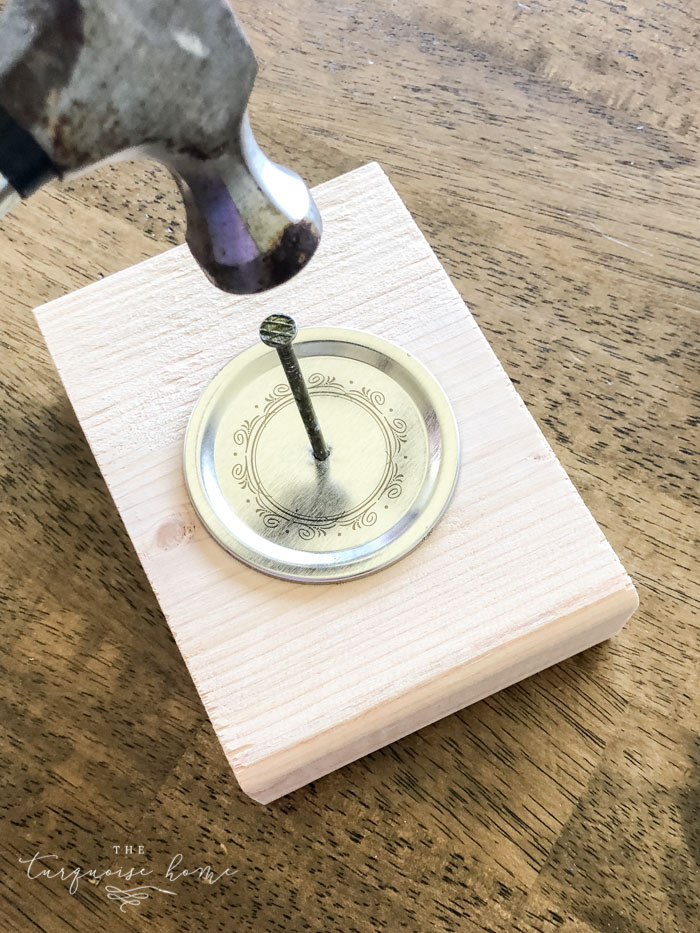
Step 2. Create a Hanger from the Top
Hammer a nail through the center of the lid and run a piece of jute or string through the top to make a hook.
Step 3. Add the Scene to the Jar
Choose your miniature pieces and hot glue them inside on the bottom of the mason jars.
I didn’t want my miniature pieces to move once I got the snow in place, to I glued them down. Since there will be a “blanket” of snow on the ground, you don’t want to sit everything flush to the jar.
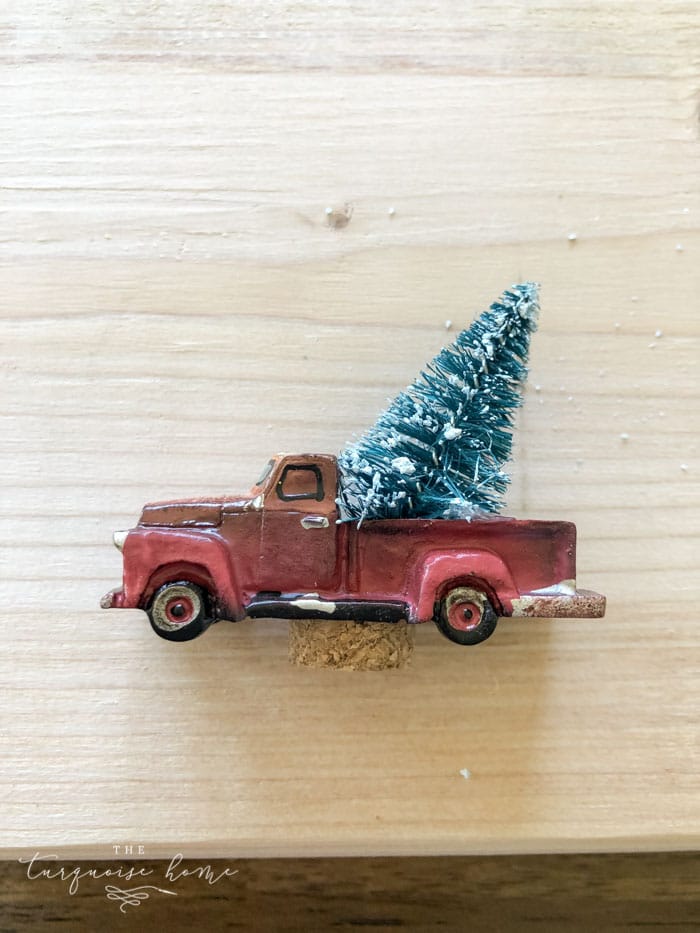
I glued a small piece of cork to the underneath side of the truck in order to make it stand up out of snow a little bit. The same for the deer who was laying down.
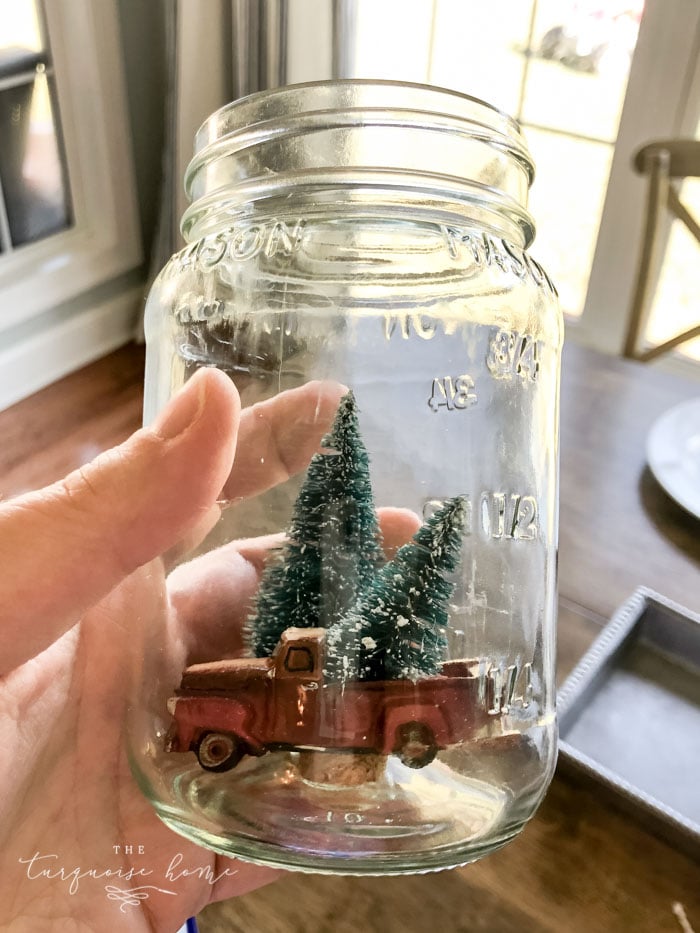
I also cut the top of the miniature tree off and glued it into the bed of the truck.
Step 4. Create a Layer of “Snow”
Fill in the bottom quarter inch with “snow” and make it look like a winter wonderland!
I added some large glitter to the truck and tree ornament, which was cute. I found the glitter in Target’s dollar section.
Step 5. Close the Jar with the Lid and add a Bow
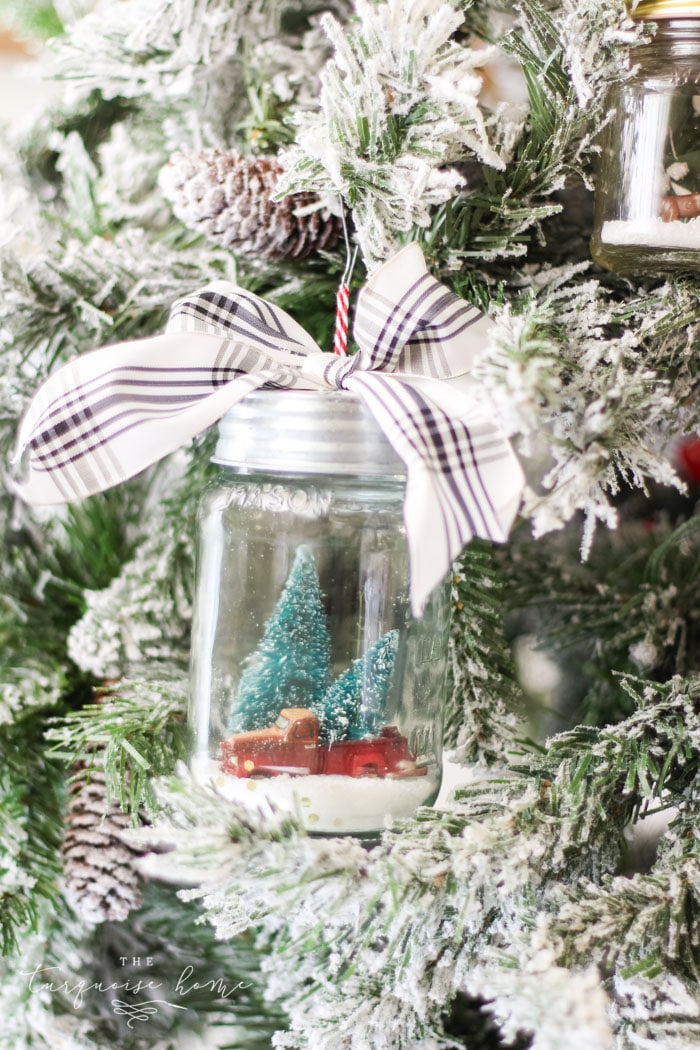
That’s it! Something super simple for your tree and it’s so stinkin’ cute!


I almost bought one similar to these and then I thought I could make that. So here you are with an excellent idea thank you! I especially love the truck with the tree in the back it reminds me of the time my dad and I would go and pinch a pine tree on the side of the road from the State forest. Ha ha… this brought back a good memory and gave me the idea to include in the bottle all the little memories I treasure so much about Christmas. Thanks heaps for this unfortunately in Australia we have heat at Christmas but we do like to pretend it’s snowing gives a magical feel to it.
These turned out so darling, Laura! I’m so happy to be on this blog hop with you!
These are beyond cute! I LOVE that cute little truck and tree. I can’t wait to make a few of these myself. Thanks for sharing these!
Such a sweet ornament. The truck is adorable!
Those are darn cute! Thanks for sharing and being a part of the blog hop Laura!
So adorable! What a great tutorial!
xoxo
Very cute idea, thanks for the instructions
How cute!! These would be so fun to put together.
Oh gosh. I wouldn’t have thought to use mason jars on a tree. I love this idea! So glad you shared it 🙂
So very cute. Thanks for sharing and showing how easy it is done.
Loved all the outfits in yesterday’s post. Looked cute on you.
These little snow globe ornaments are so adorable. I love how they came out. xx