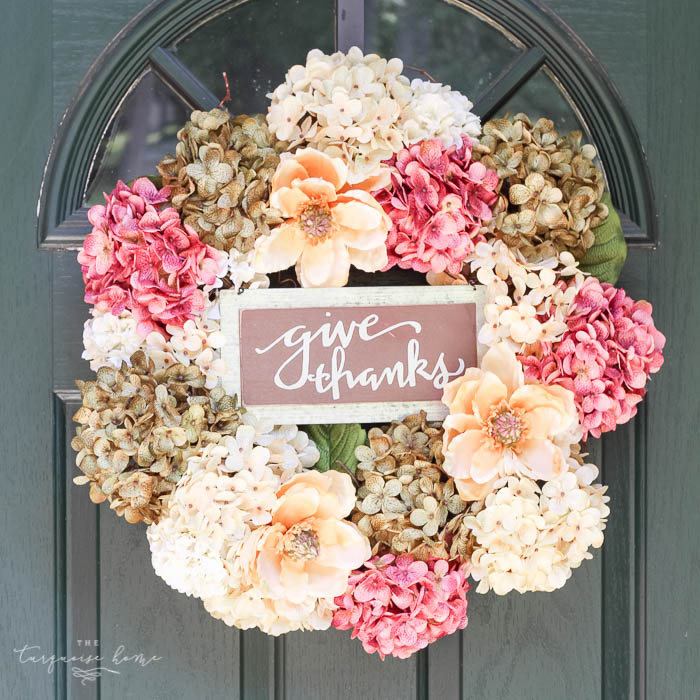
DIY Fall Hydrangea Wreath Using Faux Stems

If you’re anything like me, you love welcoming a new season with a fresh wreath on the front door. This year, I crafted a fall hydrangea wreath that’s both cozy and classic using just a few faux stems and a grapevine base. It’s an easy DIY that brings those warm, autumnal colors right to your entryway and it only takes about 20 minutes to make!
This hydrangea wreath DIY is so simple, I’m hesitant to even share it with you! But I’ve had friends who’ve seen it that think they can’t make it, so I’ll spill my easy secrets. It is SO easy and doable. Don’t be intimidated at all!
I have used a store-bought fall wreath the past few years. And it was lovely and worked great, but I’m always a girl who wants to change up decor, so I decided to make a new one for my front door.
I love how this fall decoration doesn’t necessarily scream orange pumpkins and you can go ahead and display it any time of the year – with or without the “give thanks” sign!
I was originally inspired by some gorgeous real dried hydrangea wreaths. But since I have no way to procuring these gorgeous blooms, I decided to try my hand at the fake stuff. 😉

It’s kind of how I roll with my black thumb and all. Maybe someday I’ll have fresh flowers in my yard, but until then the floral section at Hobby Lobby is my jam. (Update: I now have gorgeous Hydrangeas in my yard, but I would still use faux flowers for this wreath so it will last for years to come!)
Want to Save This?
Enter your email below and I’ll send it directly to your inbox!
This post contains affiliate links for your convenience. See my full disclosure policy.
Supplies Needed for Your Fall Hydrangea Wreath:
- 14-18 inch grapevine wreath
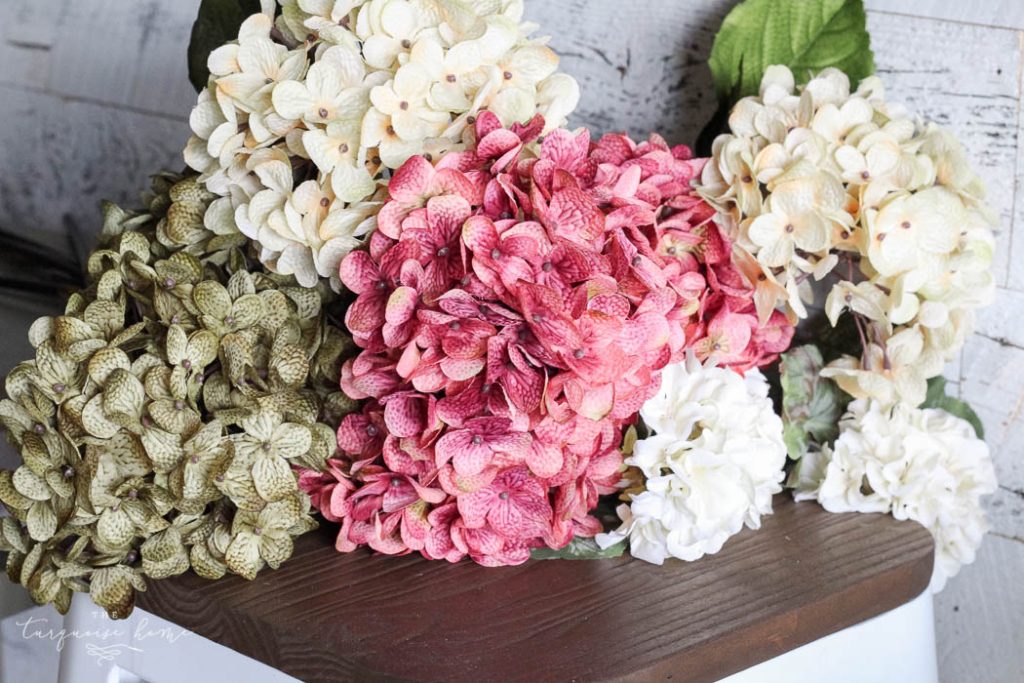
- 6-8 Faux Hydrangea & Magnolia Stems (enough to fill the wreath in fall colors like rust, cream, or plum)
- Fall faux hydrangea stems (more here and here)
- Green snowball flowers
- Blush pink artificial hydrangea flowers
- Faux magnolia blooms
- Or check your local craft store
- Other blooms, greenery or fall leaves if you’d like to add them
- Floral wire or hot glue gun
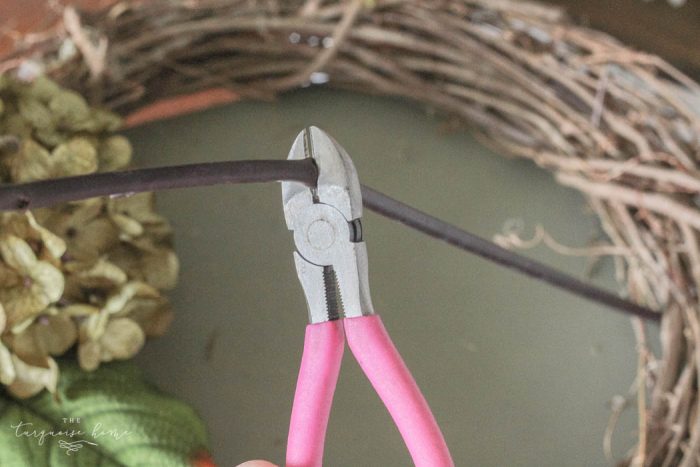
- Floral wire cutters
- Fall-esque sign (similar, similar, similar and similar)
This is so super easy, it’s going to blow your mind.
Steps to Make a Fall DIY Hydrangea Wreath
1. Gather Your Supplies
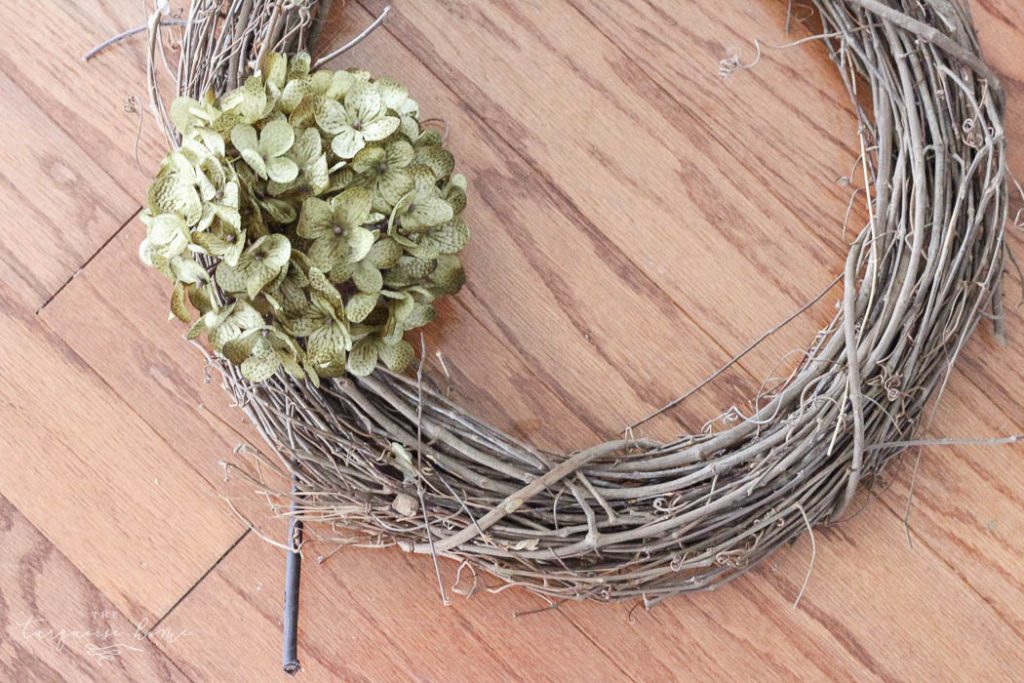
Take your grapevine wreath base and set it down on a flat surface. See?! It’s already so not hard!
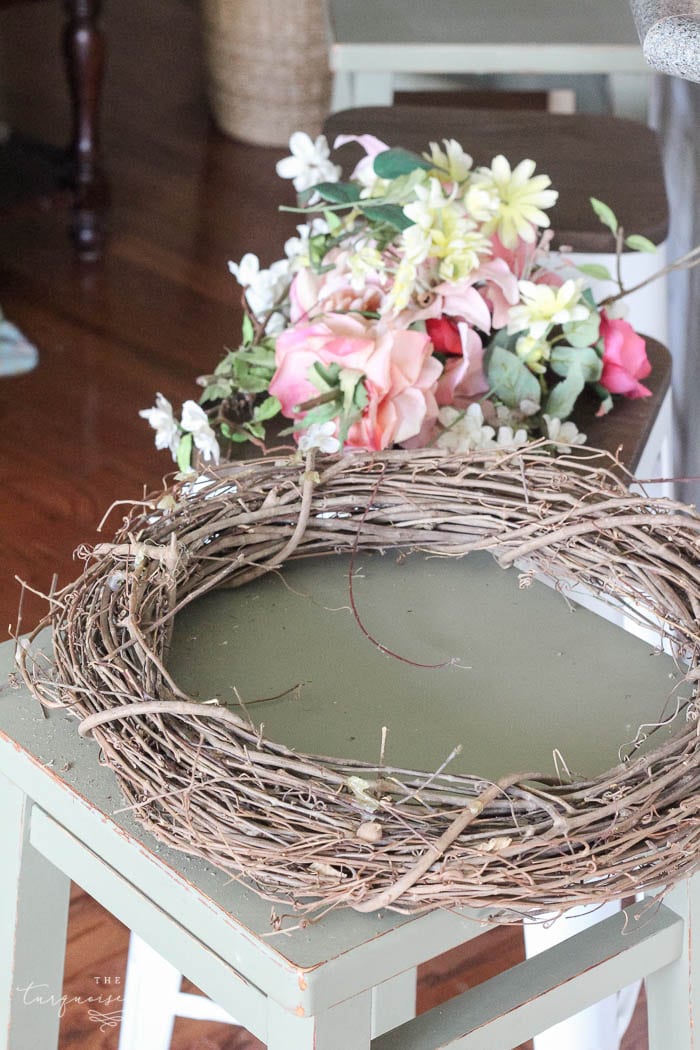
I used an old wreath that was my favorite spring wreath. My mom made two of them for my wedding to put on the doors outside of the church. I loved this thing! But over the years it’s gotten dirty and sad, so it just didn’t look good anymore. So, I up-cycled the wreath form.
Bring home your floral blooms and arrange them in a pretty place and take a picture, because they are just so cute! Well, you don’t have to, but I did. 😉
2. Prep the Stems
Take each bloom and cut the stem down with your floral wire cutters, leaving about 12 inches to work with.
3. Arrange the Floral Stems in the Wreath
Stick the stem through the wreath form, arranging them around the wreath to anchor them! Bend the stems back so that the wreath can still lay flat.
I added a few faux magnolia blooms, along the way. Fill in gaps with smaller hydrangeas, other greenery layering in the same direction.
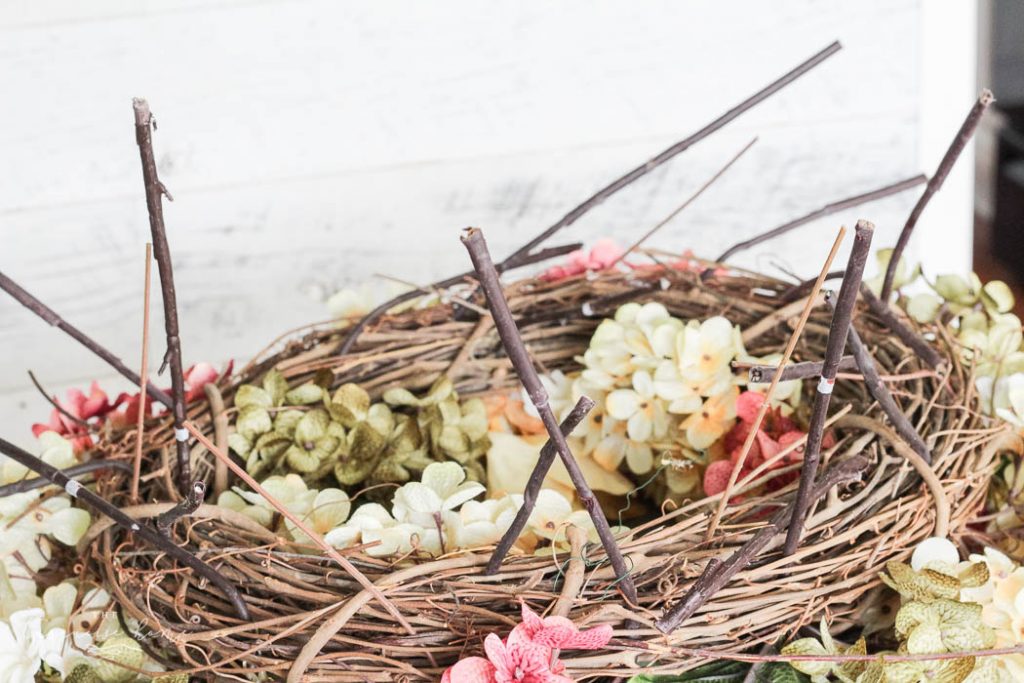
4. Secure the Stems in Place
Once you have all of the blooms stuck through the wreath, secure the ends.
Position the stems just the way you like them, flip it over and stick the ends back down into the underside of the wreath. I found it pretty easy to just tuck them under the wreath in the back.
Or you can attach them in the back with floral wire or hot glue gun. (If I were to make this wreath over again, I would cut the stems down on the back and just hot glue them in place.)
Sorry, I didn’t get a picture of them tucked under. Hopefully, it makes sense!
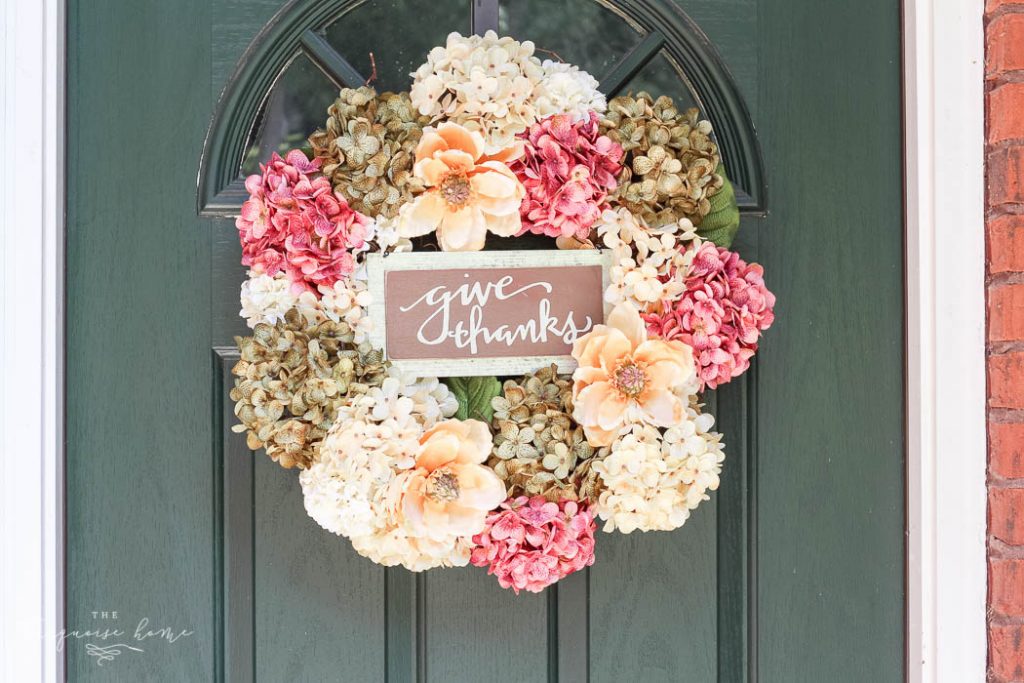
5. Optional: Add a Cute Sign
I added the cute little sign in the middle with some floral wire and hung it on the door! If you want to transition slowly into fall, you could always leave the sign off until it gets closer to Thanksgiving. (Although it’s always a great idea to give thanks!)
6. Hang and Enjoy Your Beautiful Fall Hydrangea Wreath
It maybe took me about 30 minutes to make this from start to finish. Anybody can do this! Hang and enjoy your beautiful fall hydrangea wreath. While it’s not for outdoor use, it would be fine under a covered porch or patio.

I love how this fall hydrangea wreath instantly makes my front door feel warm and welcoming — even before you step inside. It’s the little things, like a handmade wreath, that make a house feel like home. I hope it brings a little seasonal joy to your space, too.
What do you think? Would you make a beautiful wreath like this?
Tips for Styling Your Wreath
Want to give your fall hydrangea wreath a little extra flair? Tie a velvet ribbon at the bottom or layer in neutral-toned pumpkins around your entryway for that cozy autumn vibe.
If you’re loving this project, check out my DIY faux pumpkins and fall decorating ideas to carry the cozy look throughout your home!
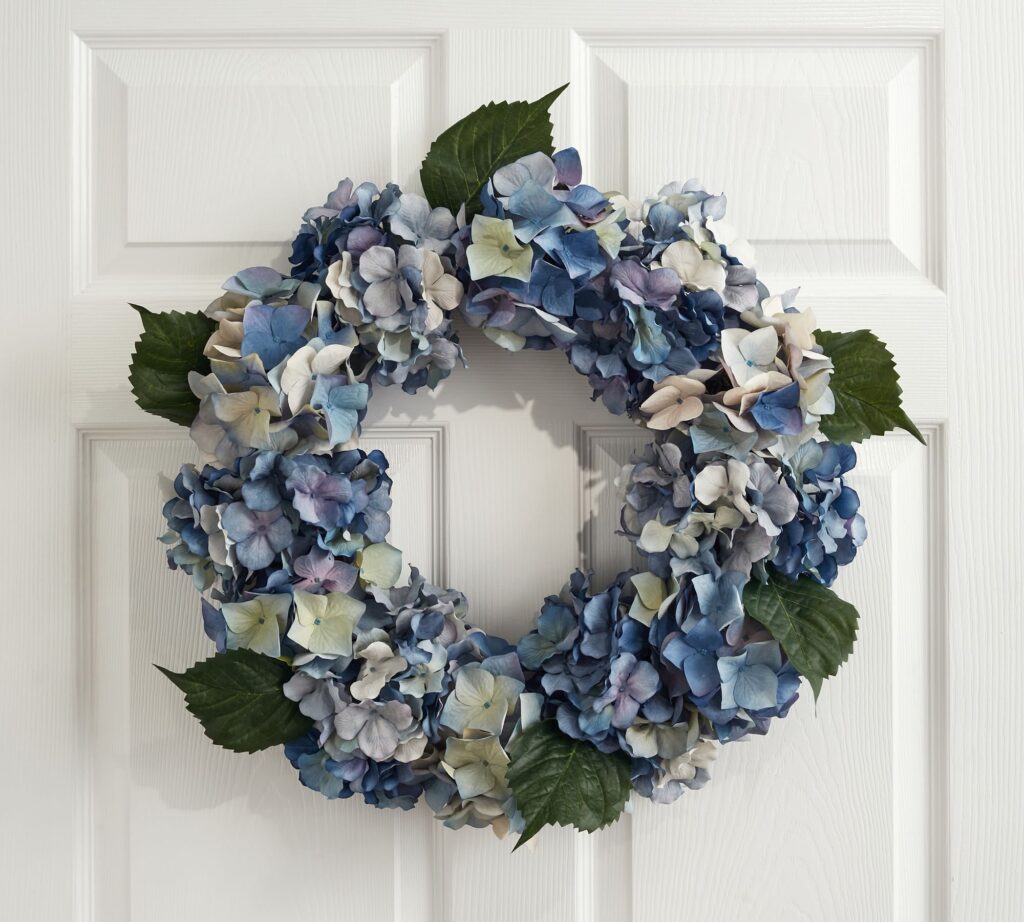
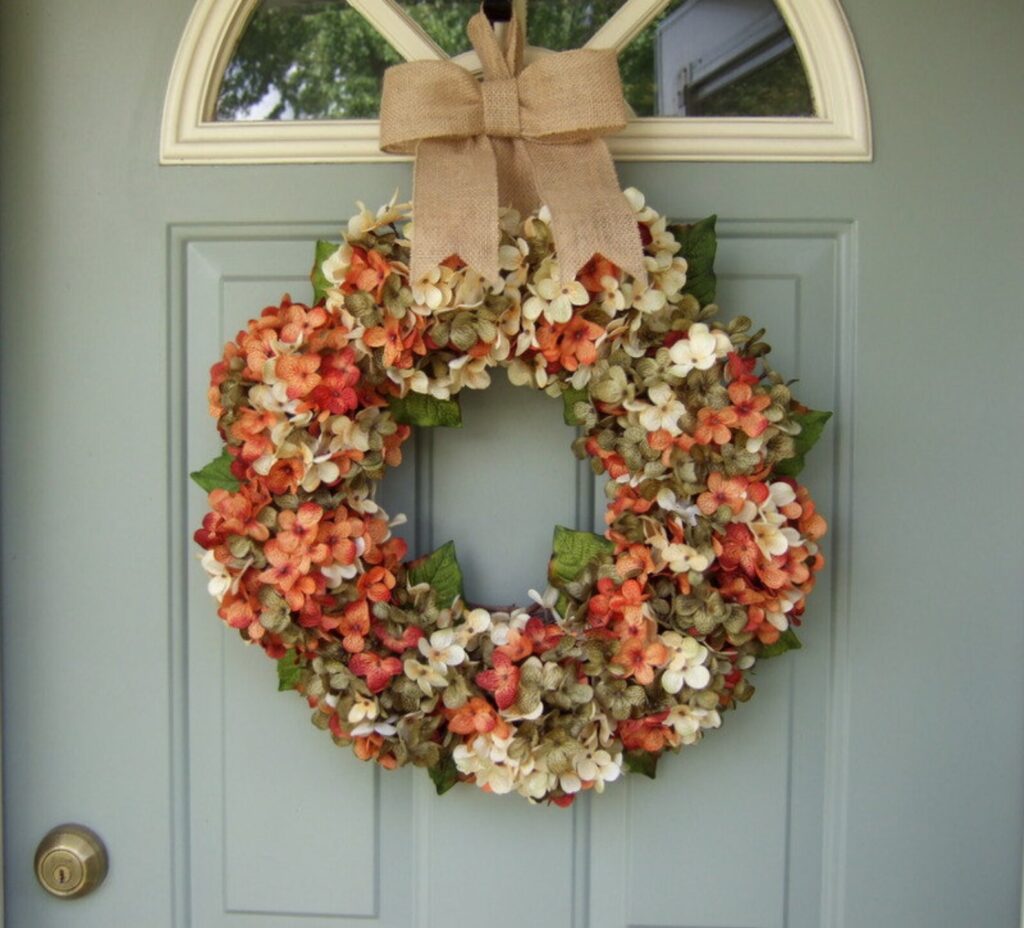
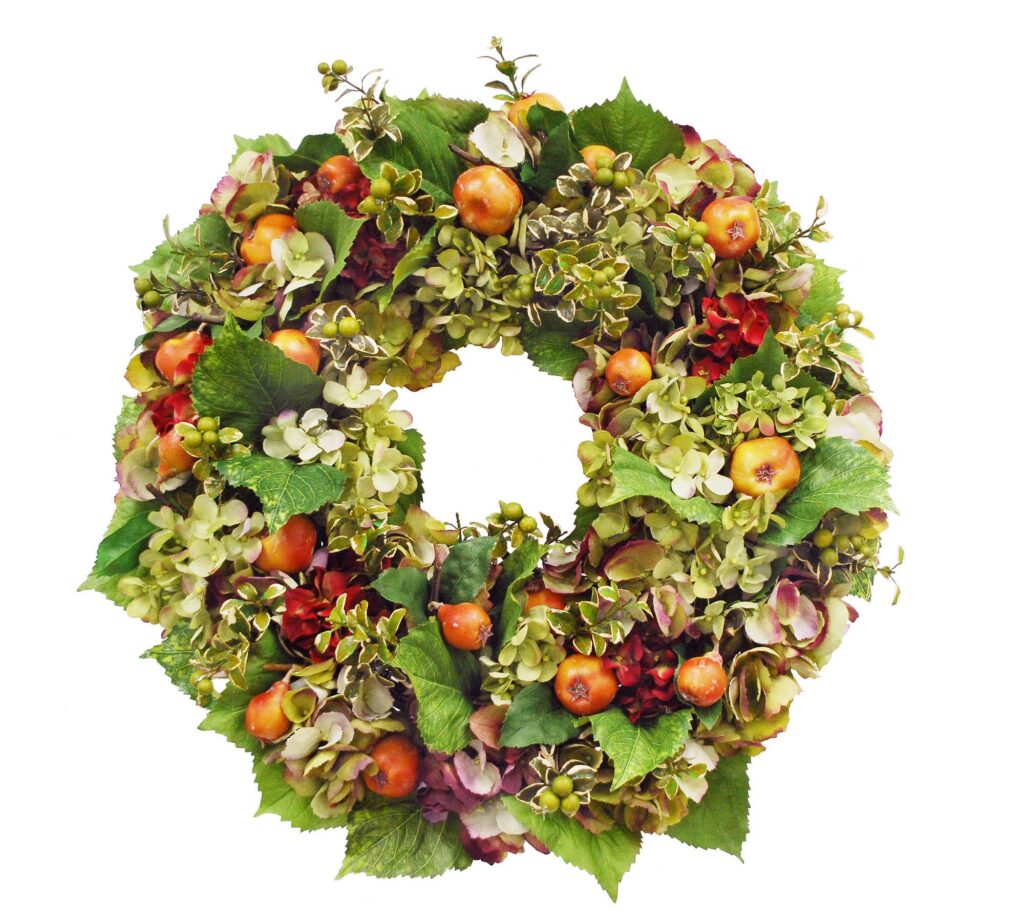
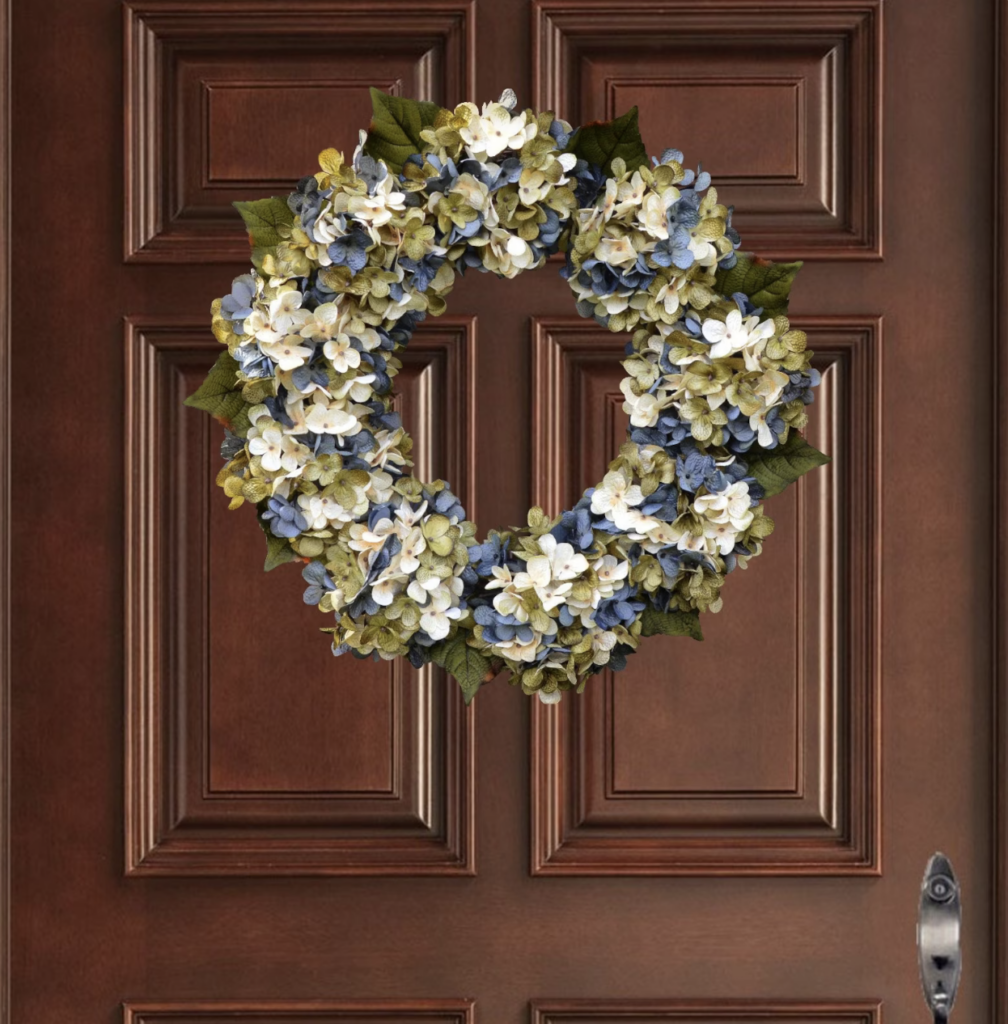
Hydrangea Wreaths to Purchase
Short on time? Select one of these beautiful hydrangea wreaths to be shipped to your door!


Ooohh so beautiful!!!
Wow! It looks amazing. Definitely going to try and make this for my front door. Great job!
Thank you so much for sharing. I love your site!
You write very nice blogs .. I am a big fan of your website
That is pretty ,and with your directions does look easy .Thank you again for another great idea
I love this wreath and your eye for colors!
BEAUTIFUL! I’m like you getting something and rearranging it.Lol Love this page!!! Very helpful! THANKS 👍🤗
Thank you, Karen! I’m so glad you’re here! xo, Laura
Thank you, Dia! xo, Laura
My Daughter has been after to make her a Hydrangea Wreath since last year. i’m give this one a try, it is do Beautiful, may have to make myself one as well! 😉
Where did you find the give thanks sign. So cute! I have never made a wreath and this will be my first one!
This is gorgeous!! Totally going to try this!
I pinned this! I love easy DIY!
Sarah, thank you soo much for pinning!!! xo, Laura
Good idea, and so easy! I need a wreath for my front door, so it may have to be this one!
Love it!! Like you, I’m just tired of my store bought wreath. So, since I seem to have everything I need for this project, I’m going to give it a try!!!! Thanks for the inspiration!!
Yay! I love it when I have everything I need already on hand! 🙂 I bet it turned out beautifully!
What a great idea! Plus…when I’m ready for a different wreath I can just pull out the flowers and add different ones. So instead of having a wreath for every season (and many to store away), I would have only one wreath but many possibilities! Thanks and Happy Fall!!
Yes! Exactly!! I do that with a burlap wreath as well – just change it out as the season change. 😀