How to Add Curtain Trim Tape for a Custom Look
Adding curtain trim tape gives a custom look that is unique to your home! Learn how to add trim tape to curtains in 6 simple steps – with NO sewing!
It’s my firm belief that a room is not done until you have window treatments. And many times that means adding window treatments in the form of curtains.
But you don’t have to simply buy a curtain panel from the store and hang it up. Give it a unique glow up with some simple trim tape.
Adding a decorative trim tape to curtains is a great way to customize simple, plain store-bought curtains. Or really a great way to jazz up ANY style fabric curtain or shade in your home. Trim looks great on roman shades as well.
And there are so many combinations of curtains and trims out there, that the options are endless!
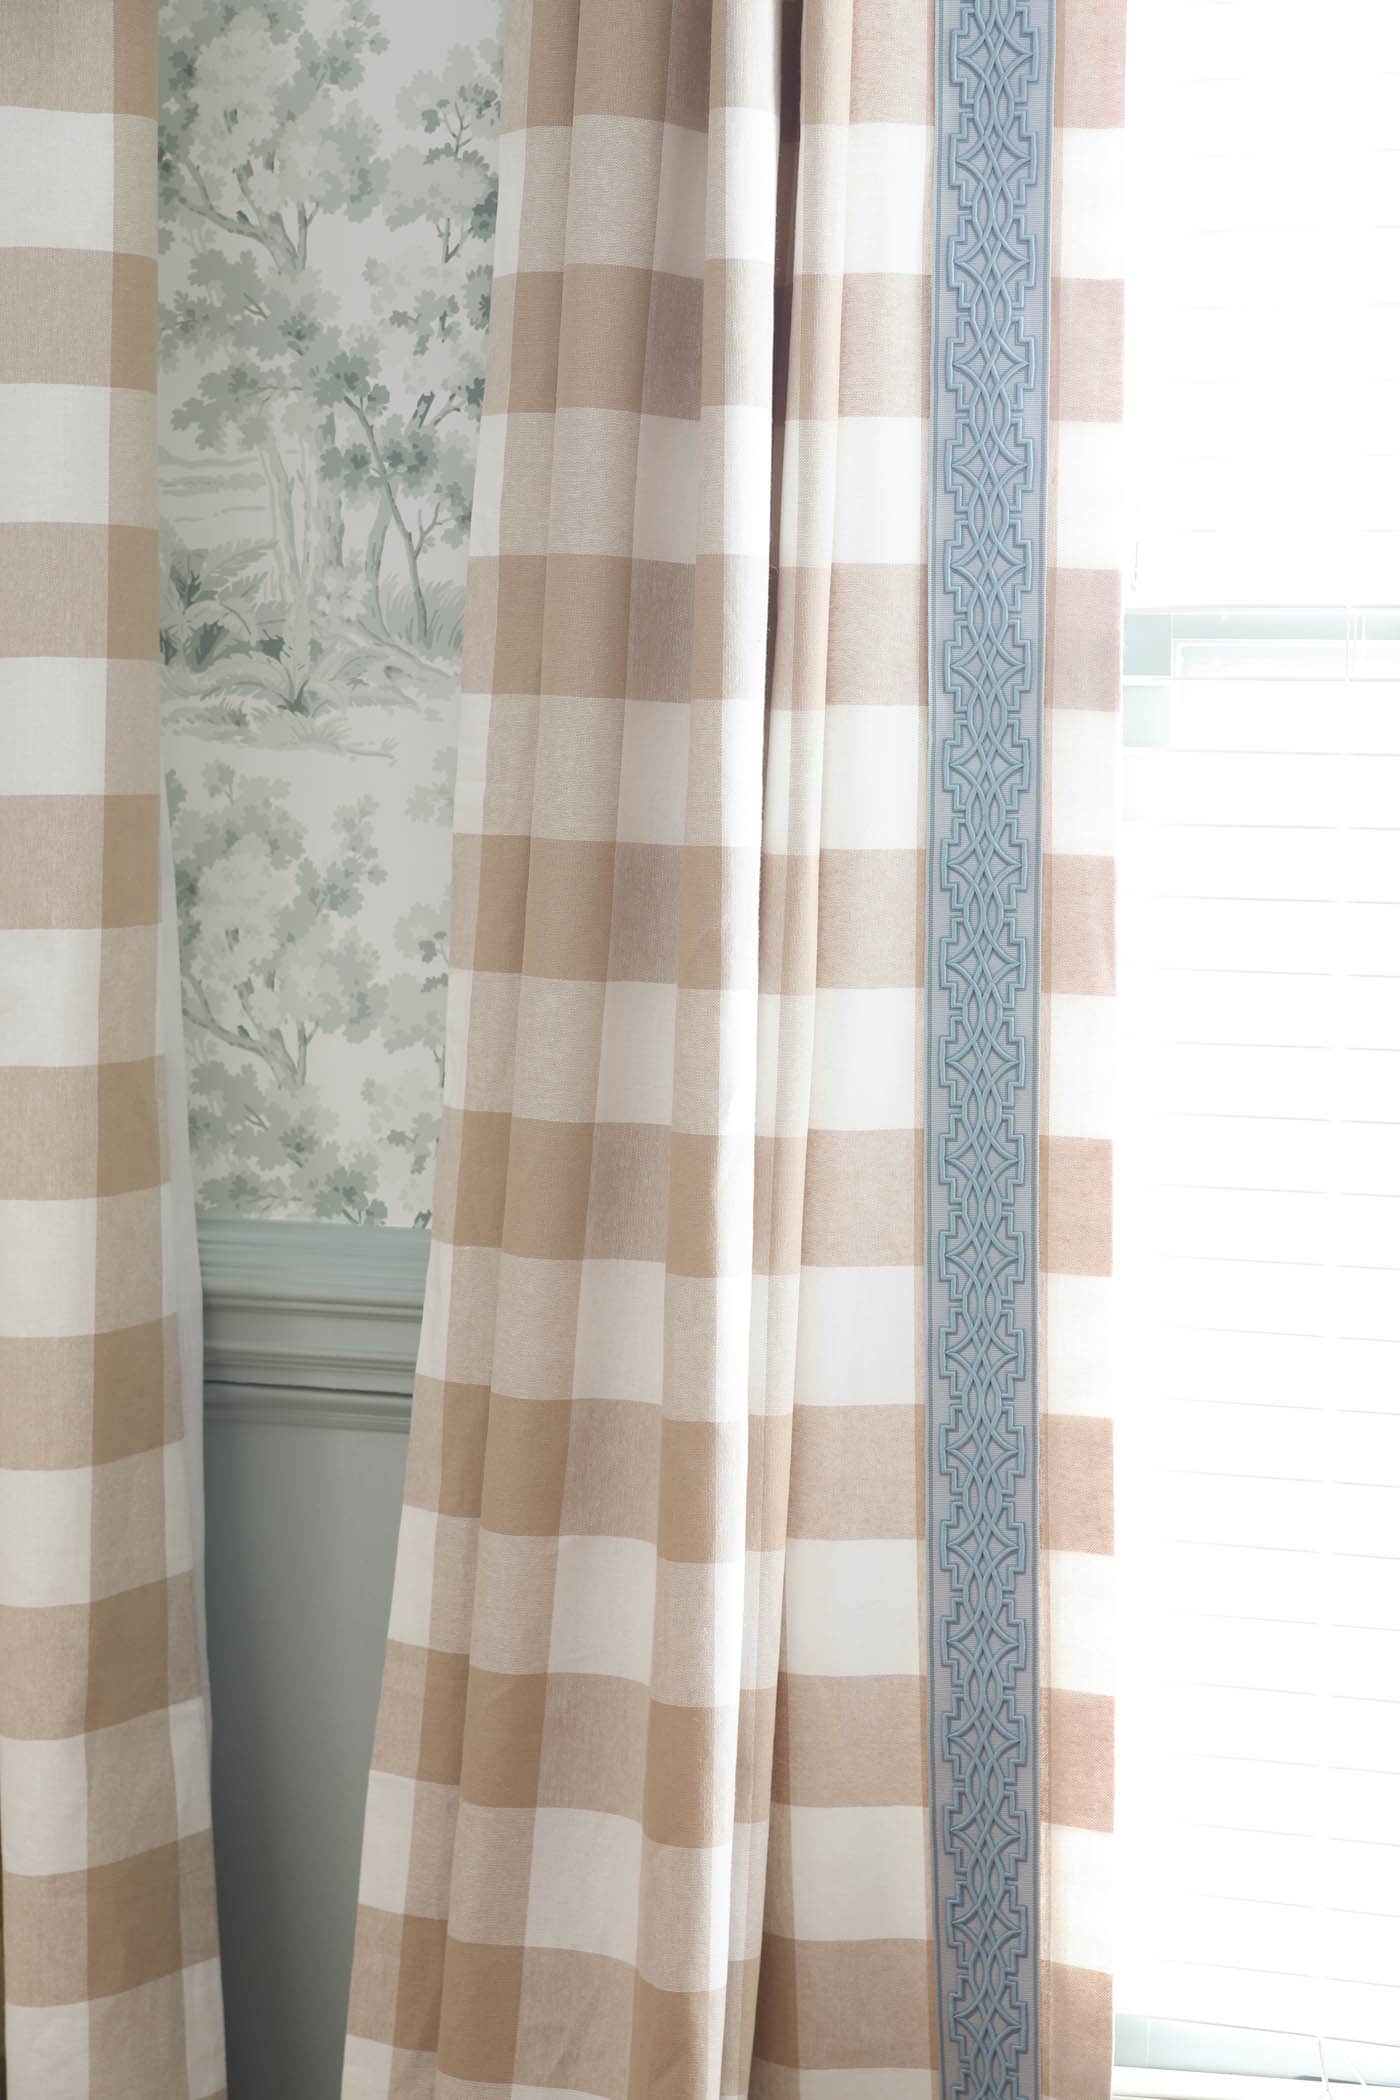
For my dining room makeover project, I wanted to bring in more of the blue into my color palette for the space. So, adding blue trim tape that coordinates with the blue chair fabric and the blue cabinets in an adjacent room is the perfect solution!
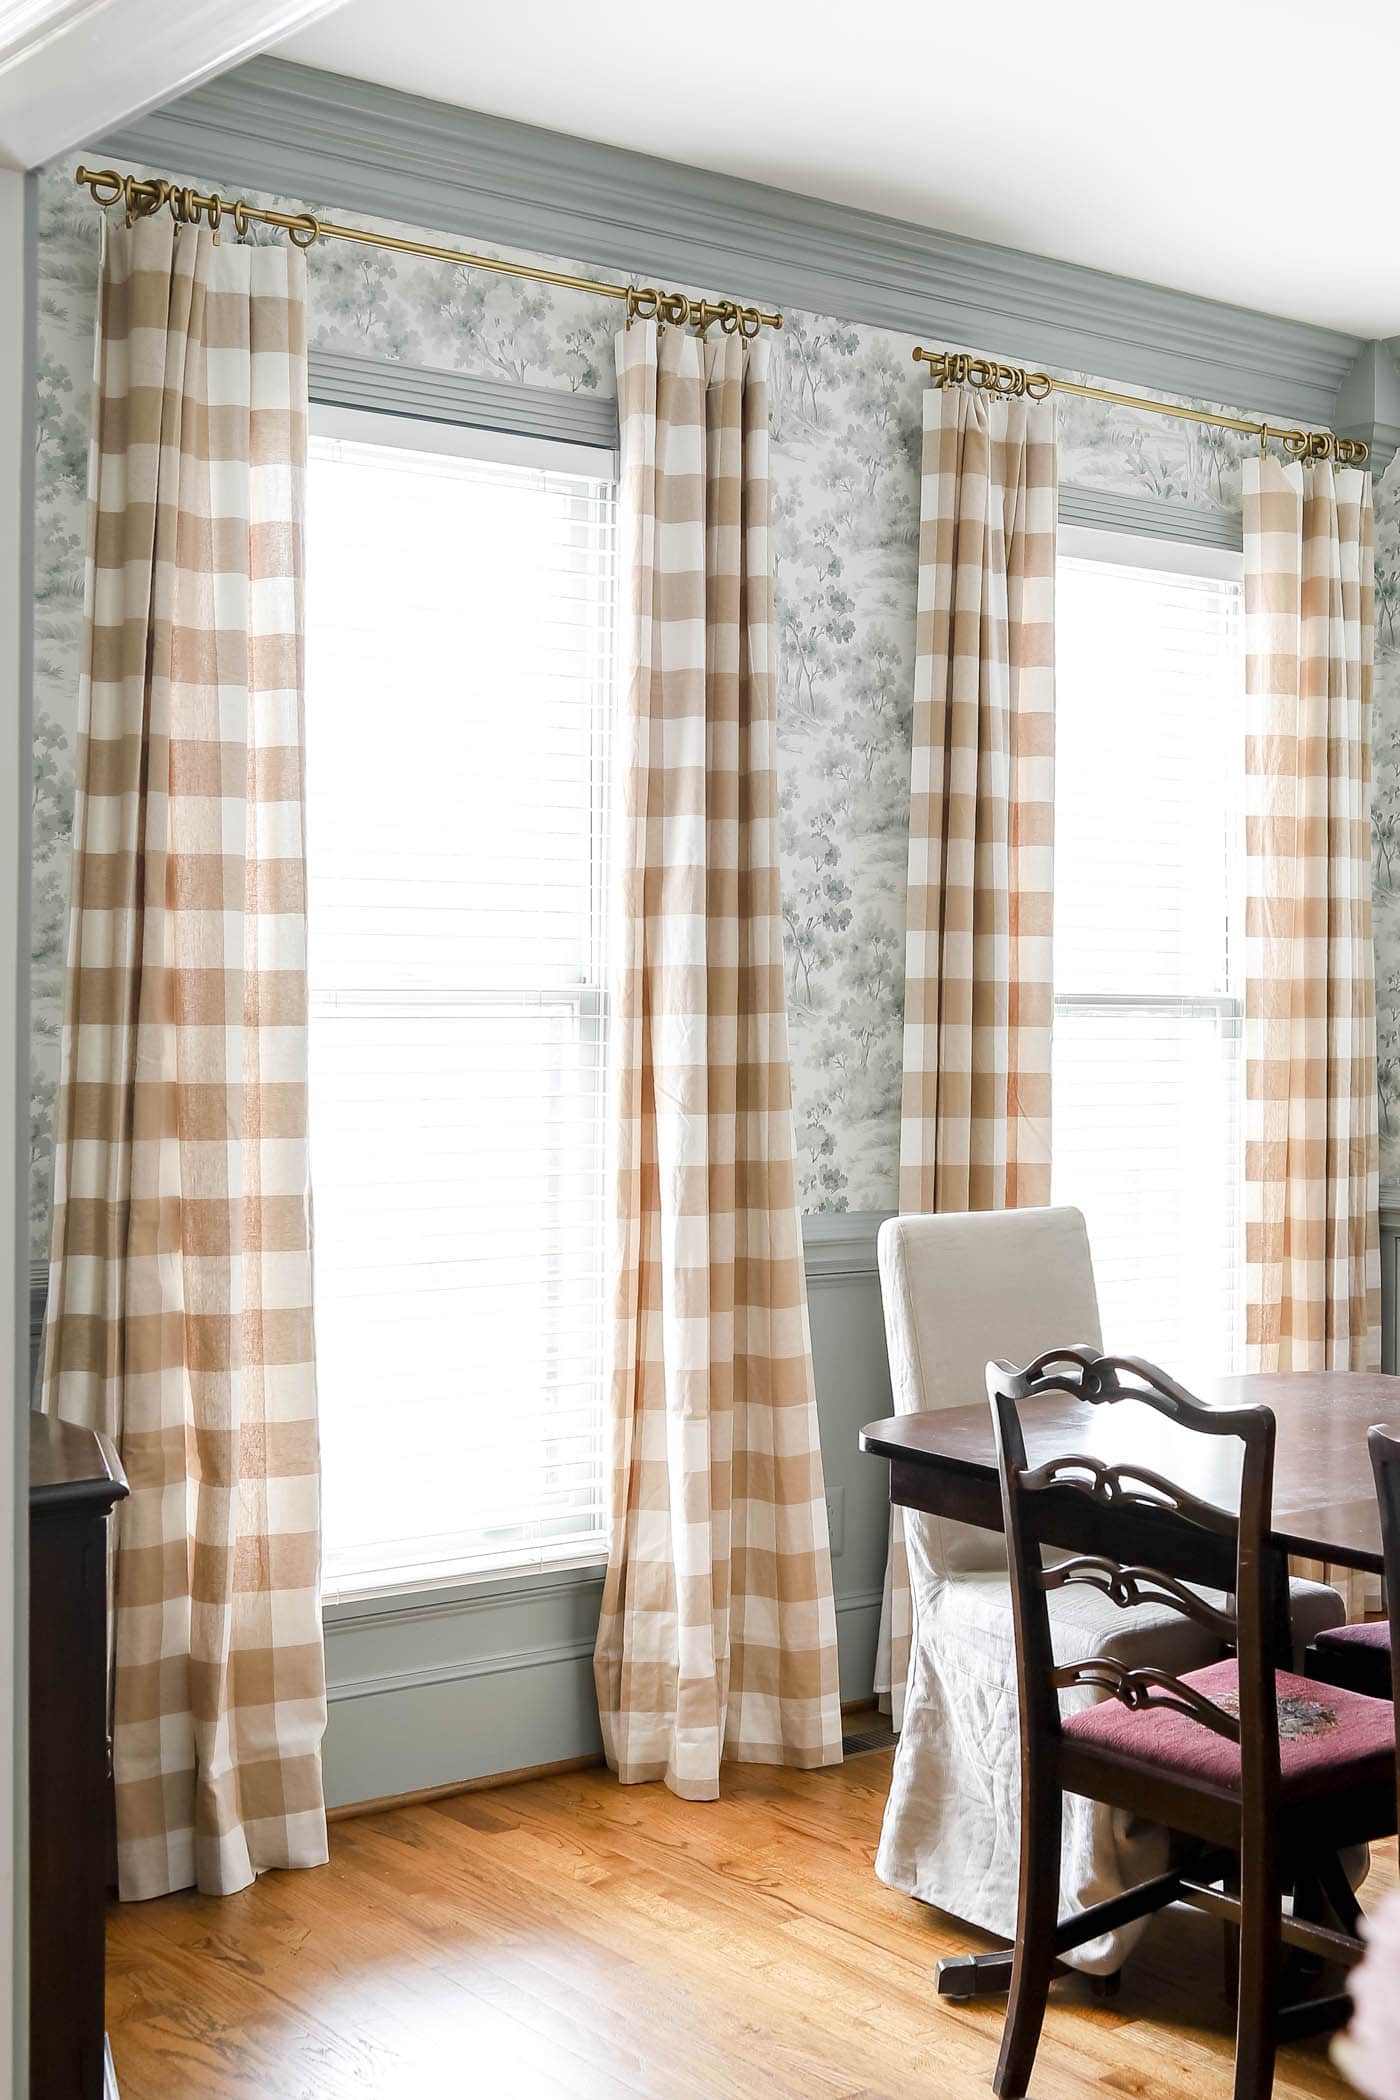
Here are the beige gingham curtains hung up straight out of the box from the store! I loved them like this, but again, wanted to bring some more blue into the space.
This post contains affiliate links for your convenience. See my full disclosure policy.
SOURCES: Buffalo Check Curtains | Brass Curtain Rods | Brass Curtain Rings | Brass Finials | Wallpaper | Trim color: Oyster Bay
Want to Save This?
Enter your email below and I’ll send it directly to your inbox!
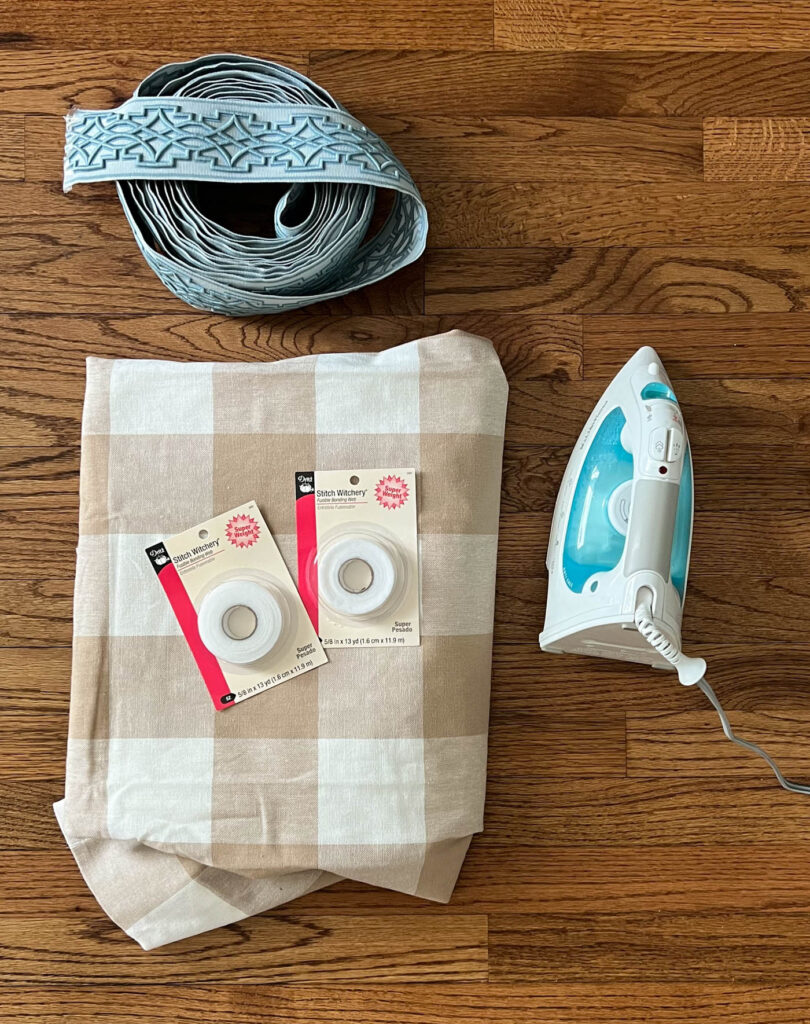
Supplies you Need for Adding Curtain Trim
- Curtains – As always hang them as close to the ceiling for maximum effect!
- 6-8 yards of Trim Tape, depending on the length of your curtains – (I got mine from designer, Sydney Collins, but I have more sources at the end.)
- Stitch Witchery fusible web – I got the super weight for my heavier trim tape
- Iron
How to Add Curtain Trim Tape
1. Iron the Curtains
You don’t want to apply trim tape to wrinkled curtains!
2. Measure 1-2 inches from the edge of the Fabric
I got lucky because the pattern on my curtains was straight and in the same place on all of them. But if I didn’t have the buffalo check pattern to guide me, I would have drawn a line down the curtains about 1.5 inches from the edge.
Or make a guide with the width you want to use and place it next to the trim tape as you iron it on.
3. Fold 2-3 inches of Trim Tape over the Top Edge
Once you have your trim placement, fold 2-3 inches of the end of the trim tape over the top of the curtain. Put a few piece of fusible web under the trim tape.
Iron over top of it with steam on for about 10-15 seconds. I followed the instructions on the back of the fusible web. It said to hold it still for 10 seconds. Sometimes mine needed a bit more.
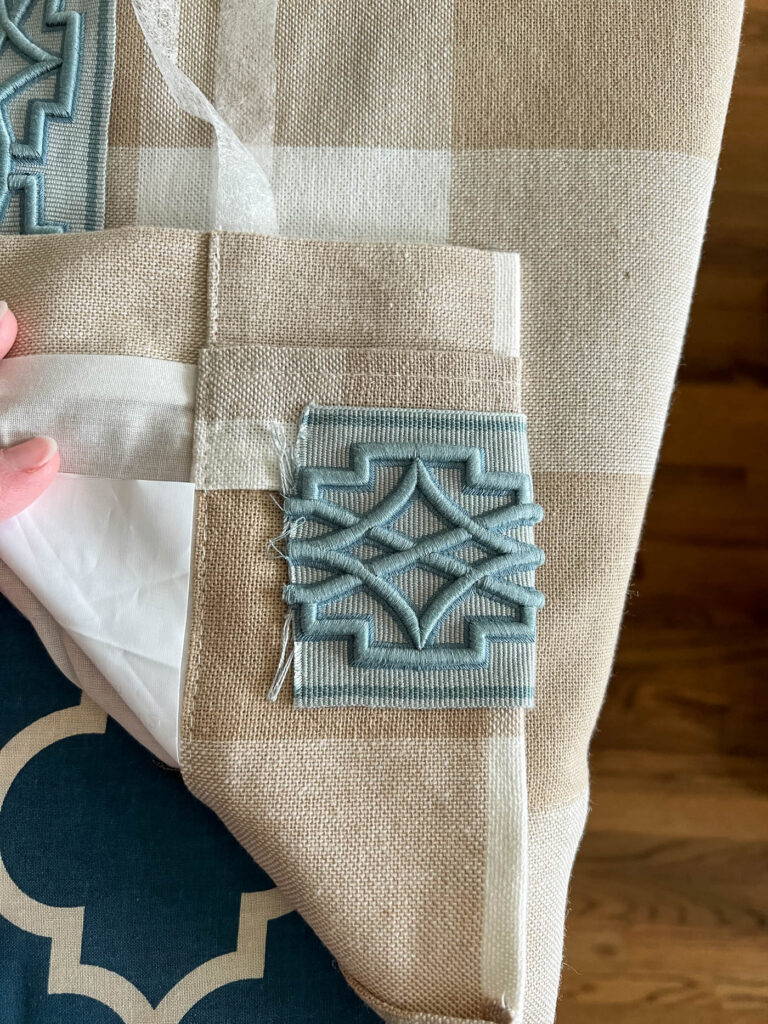
Let the trim tape cool and check to see if it adhered. If the tape didn’t stick to the fabric, iron it again for 5-7 seconds. Let it cool and check again.
4. Place 1-2 rows of Fusible Web where the Trim Tape will Go
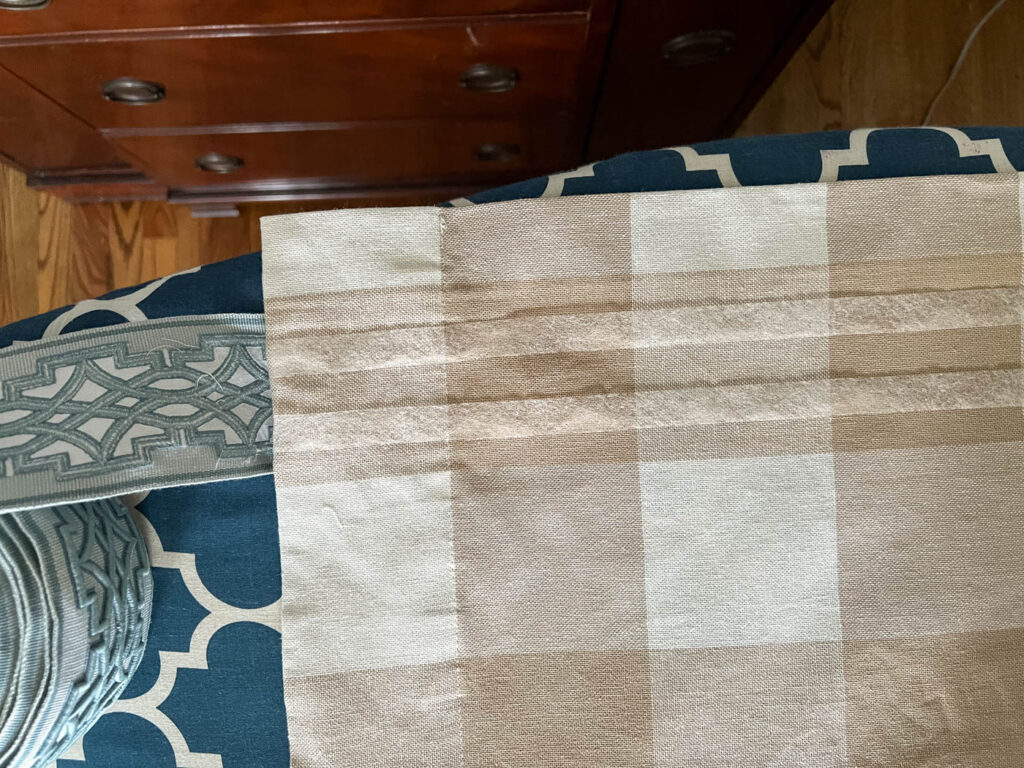
Keeping the placement in mind, add 1-2 rows of fusible web underneath the trim tape. Place the trim tape on top.
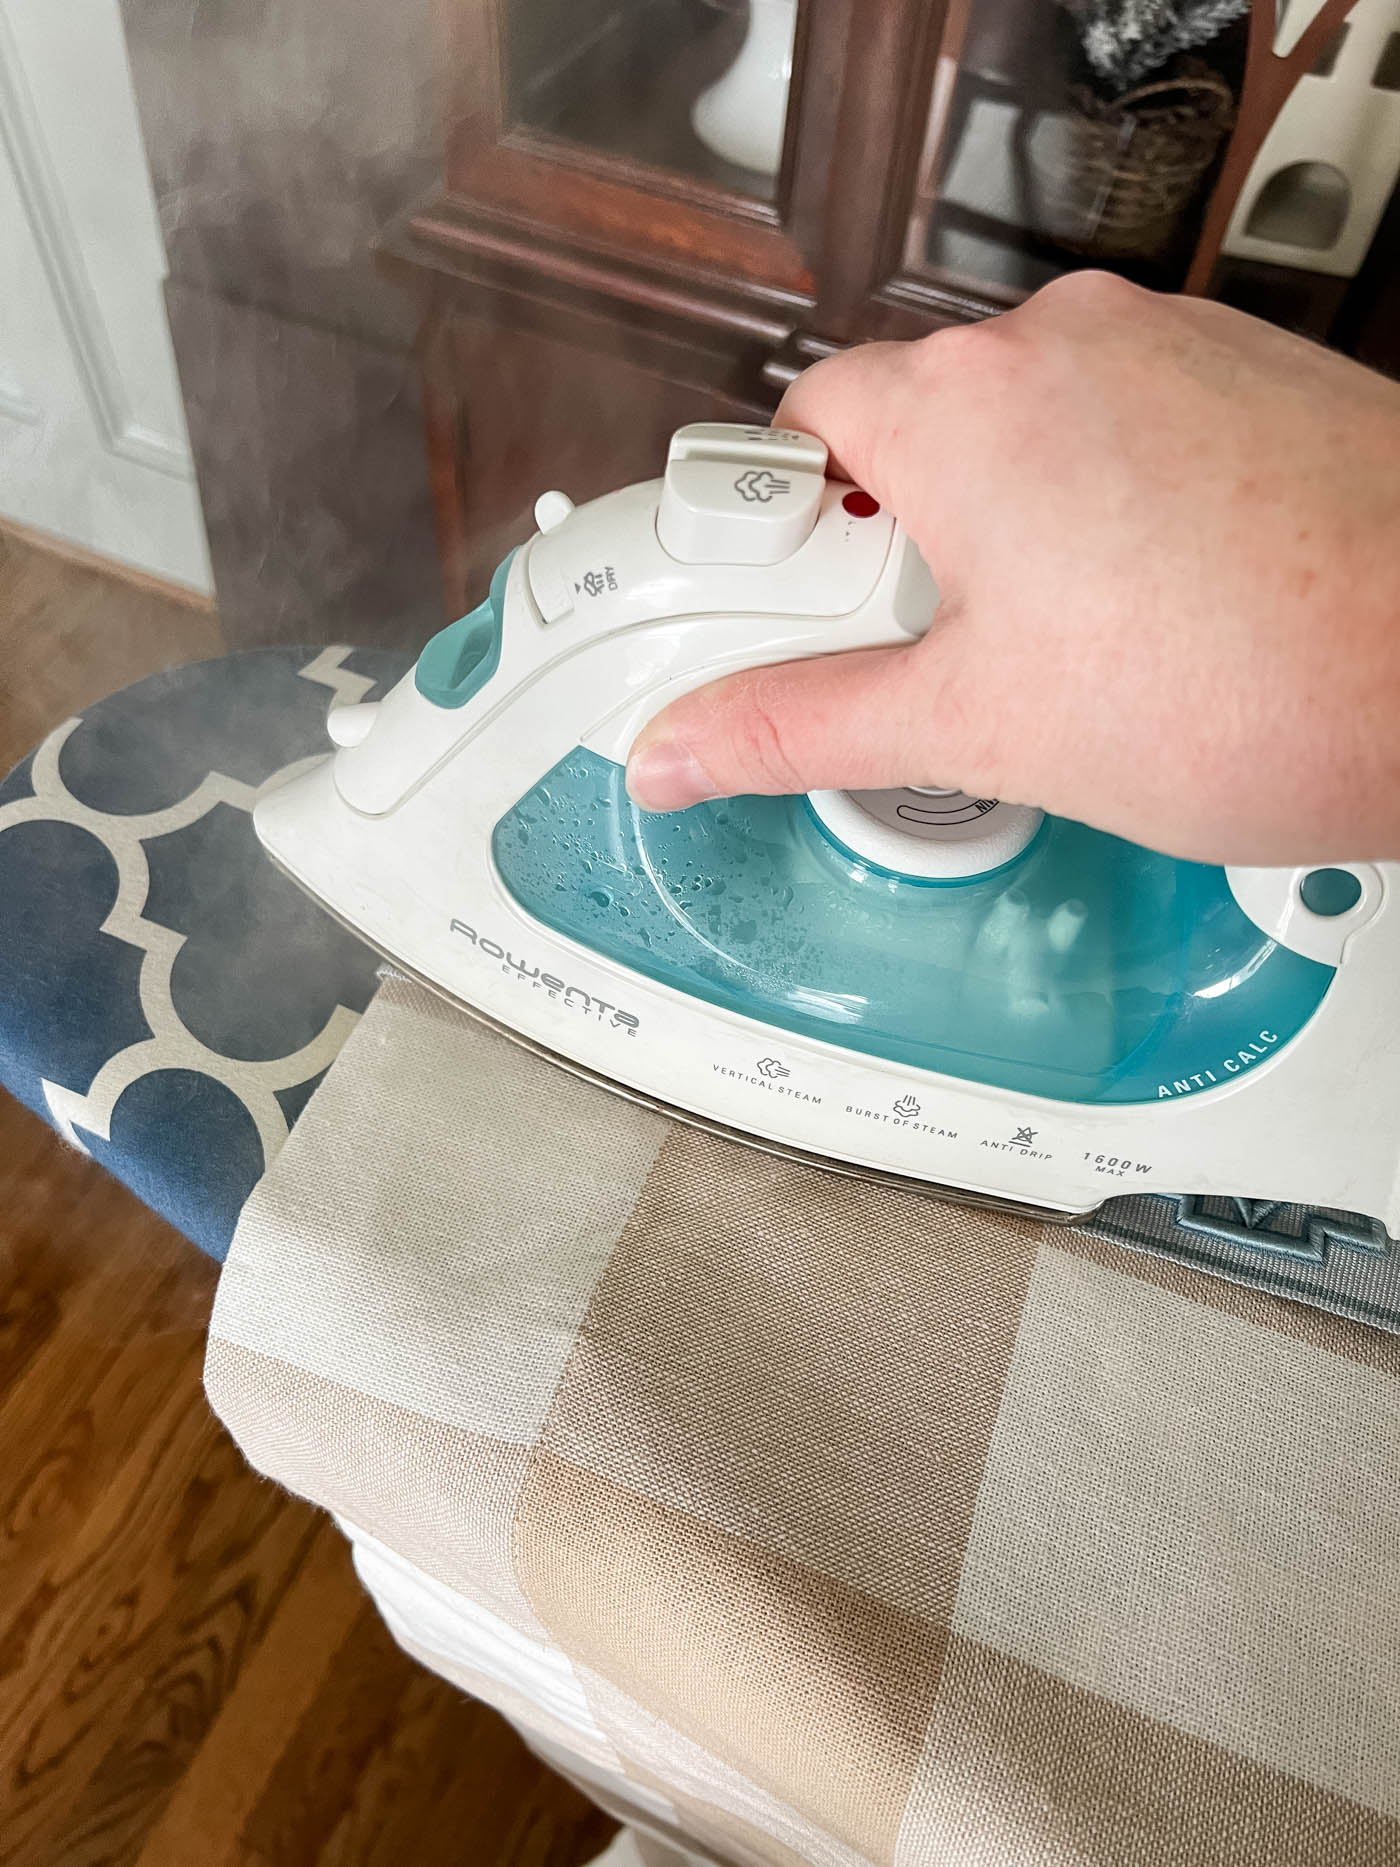
5. Iron the Trim Tape Down
I followed the directions on the back, again, but I ironed the trim tape one length of the iron at a time. I held the iron still on the tape for 10-12 seconds, then continued down the curtain until you reach the end. Repeat step 3 for finishing off the bottom.
I turned the whole thing over and ironed along the back side of the curtain where the trim tape went because the trim tape was so thick. If you have a less thick trim tape, you might not need to do that!
Final Thoughts
This was a very easy project that gives a custom look without special tools or fancy skills. I love how it makes my curtains custom for me home. And once I get the rest of the room done, it’ll make even more sense why I upgraded the curtains this way!
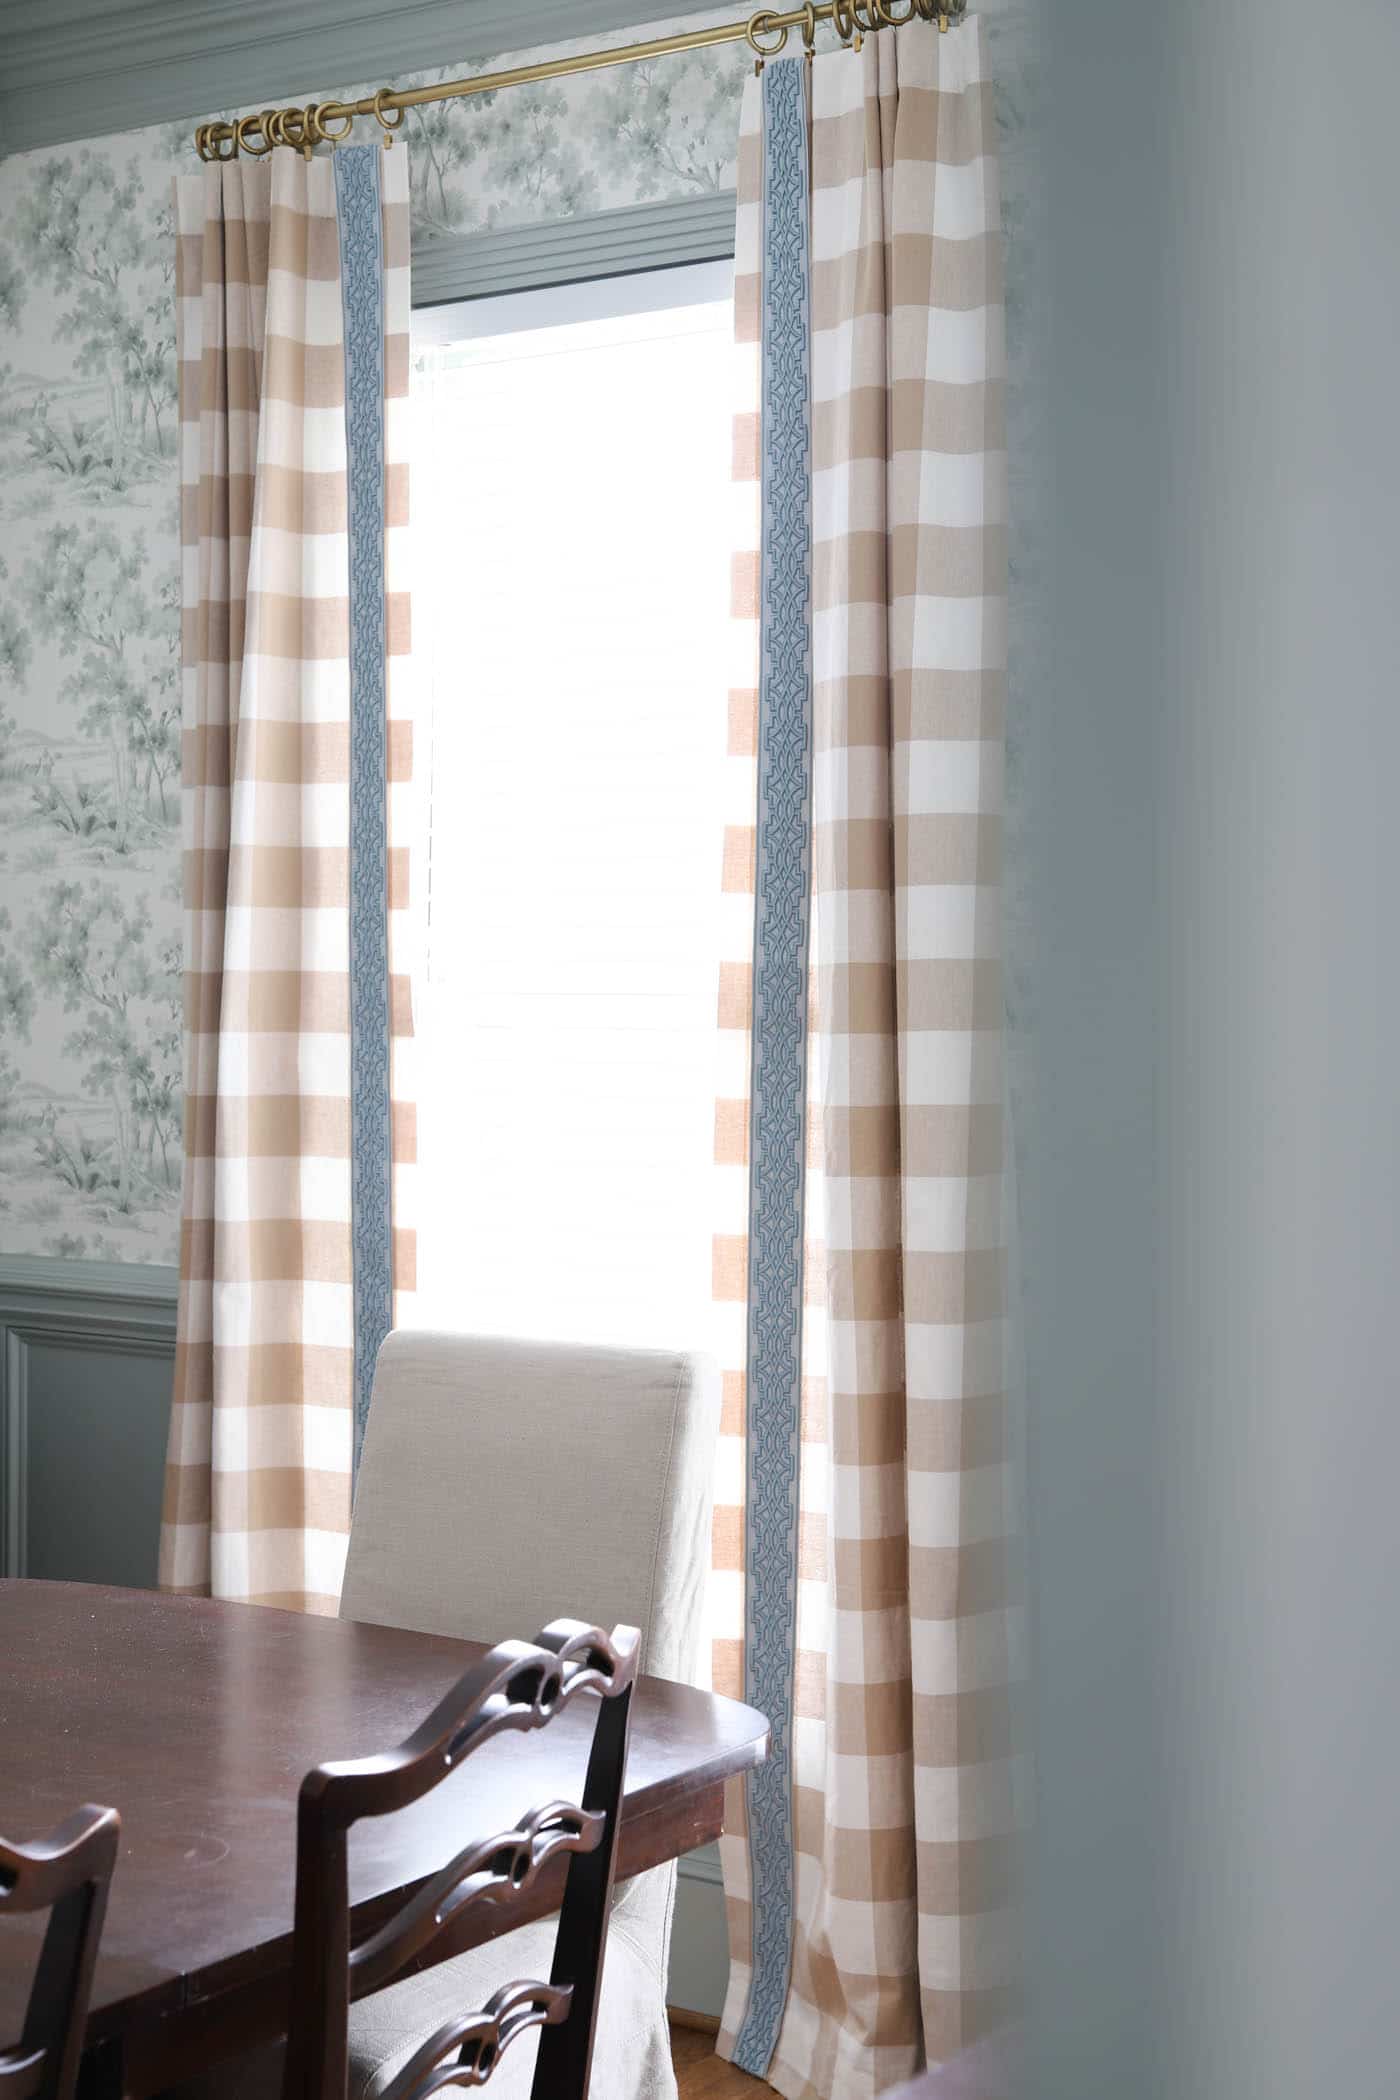
I’m only showing a sneak peek of the “finished” look since I’m still working on the full dining room makeover. I’ll be sure to come back here when the dining room is finished for the full reveal and tour!
Check out the full dining room makeover HERE!
Sources for Curtain Tapes and Trims
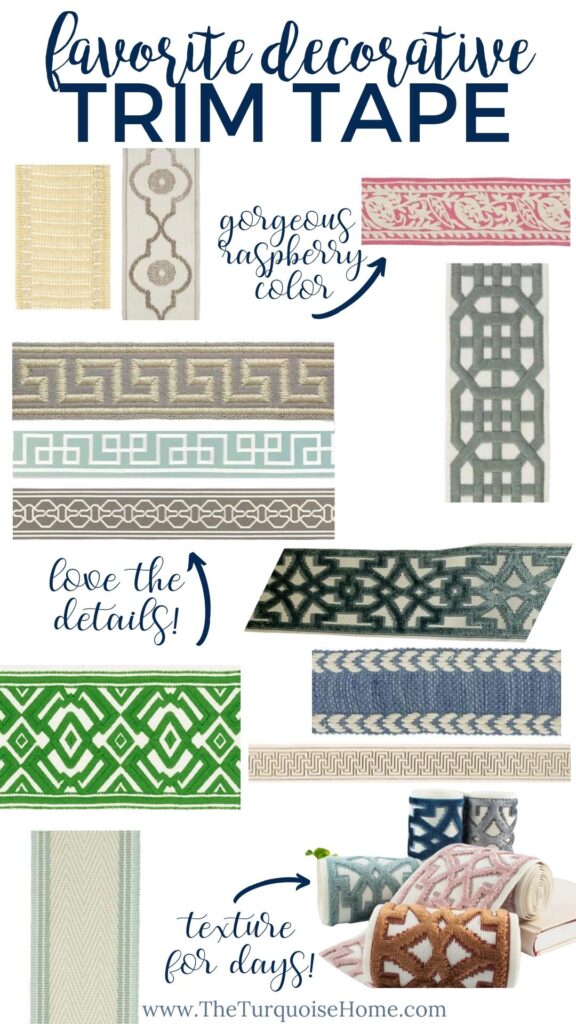
Kravet Piano Band Limestone Trim | Kravet Ogee Chain Dove Trim | Kravet Neeta Raspberry Trim | Schumacher Dominique Linen Tape Zinc Trim | Schumacher Octavius Tape Aqua Marine Trim | Schumacher Malmaison Tape Dove Trim | Lee Jofa Avignon Tape Dusk Trim | Fretwork Velvet Curtain Trim Tape | Baker Lifestyle Suraj Indigo Trim | Schumacher Labyrinth Tape Bronze Trim | Schumacher Avalon Tape Green Trim | Kravet Orient Point Jade Trim
The Way to Hang Curtains and Make Your Room Look Larger
I always take any opportunity I can to share about where to hang curtains so that your room looks the best.
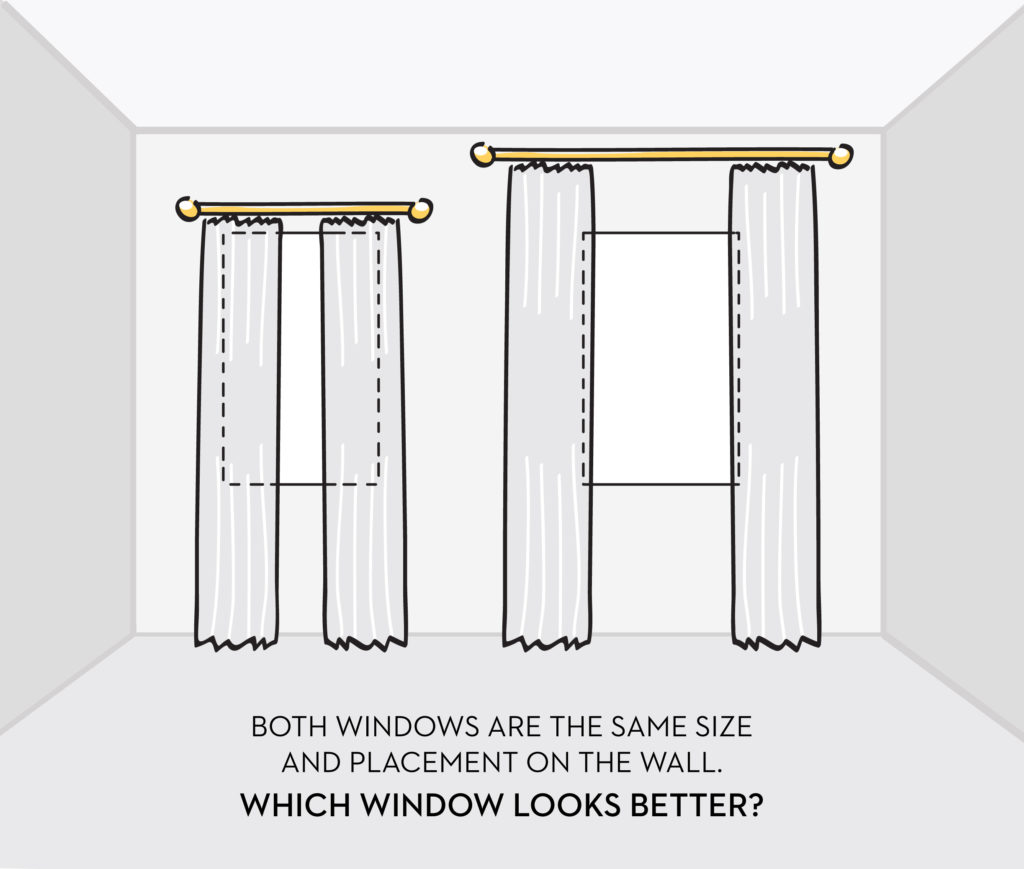
As you can see in the diagram above, the rule “high and wide” when hanging curtains makes your room and window look larger.
A good rule of thumb is to hang your curtains 4-6″ above the window frame and 3-6″ beyond the sides of the window.
And pay attention to the length of the curtains before you hang them. If you’re going to be opening and closing your curtains often, leave 1/4-1/2 inches between the bottom of the drapes and the floor. If you are leaving them in place and want to create an upscale vibe, leave up to 6-8 inched puddled on the floor.
I shared more information at the end of this: Where to Buy Cheap Curtains post (click here).
More Posts You Will Love:


Did you use the Flax or Natural color drapes? TIA!
Hi Lauren, I used the natural colored ones! I don’t think flax was available when I purchased them. 🙂 – Laura
Great idea and I love the trim you used. It looks very expensive. This is a great idea even if you intend to sew your trim. It will be so much easier to handle and feed through the machine than pinning it in place. When you cut your trim to length I noticed that it had started to unravel. Cutting on the bias helps but you can control that by carefully waving a lit match under the ends until they melt enough to self seal. It is more important to heat seal the weave if you plan to wash your trimmed item. A little fabric glue like Fray Check will also help stop the unreveling.
Thank you for all of your tips, Vicki! I’ll be sure to fix the fray before I wash it. I also thought to myself that if I ever sewed it, it would be a good first step to use the fusible web anyway. 🙂 I may end up sewing it, or having someone sew it down the line. (And yes, I had no idea how much some trim tape could cost! It’s very nice, but there’s much cheaper options out there, which I linked…) Thanks again for all of the tips! I truly appreciate it. 🙂
Laura
I love this post! Actually, I love ALL your posts. 😀 This ia so easy that I may even be able to do it, yet makes such an impact on the room. Thank you for this!
Thanks so much, Korey!! xo, Laura