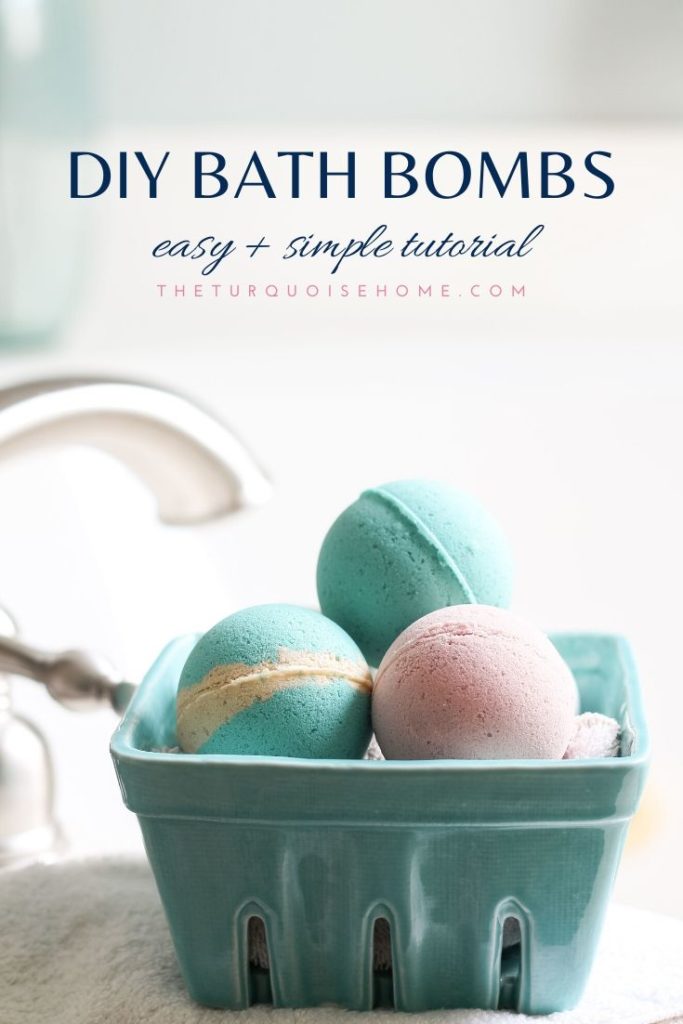
DIY Bath Bombs + Printable Gift Tag
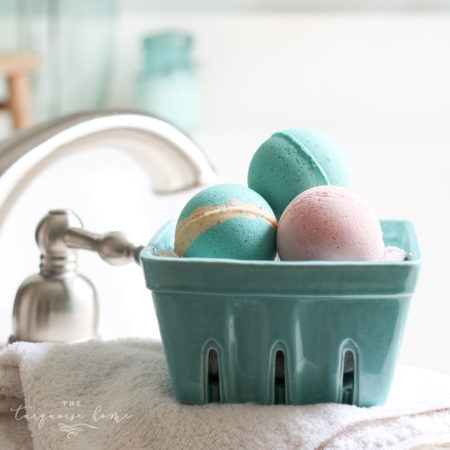
Enjoy a relaxing soak in the tub with these easy DIY bath bombs – or give them as gifts! These are simple to make, much cheaper than store-bought bath bombs and YOU get to pick the scent!
I love making our own bath bombs, especially since my girls love baths and LOVE to use them. They would use one every time they took a bath. I’ve found that the coconut oil in them helps keep their skin from drying out in the winter, so it’s an extra plus!
Hopefully when you have a big jar of these in your bathroom it will give you an excuse to relax and take some time for yourself, too!
I’ll share the recipe first, then some fun gift ideas for giving these bath bombs with free Christmas printable gift tags!
Want to Save This?
Enter your email below and I’ll send it directly to your inbox!
My days of making bath bomb recipes started a few years ago when I taught other women how to use bath and body products with essential oils. While I may not share as much about essential oils anymore, I still love them and use them daily.
If you’re looking to buy some essential oils for making these bath bombs, then I highly recommend using high quality oils. I use and love Young Living essential oils.
I know it can seem overwhelming to make something like a fancy bath bomb, but trust me when I say that you can’t mess these up (too bad). The biggest thing to be careful about is not getting the mixture too wet with the witch hazel at the end, but I’ll share an east tip to keep it from getting out of hand!
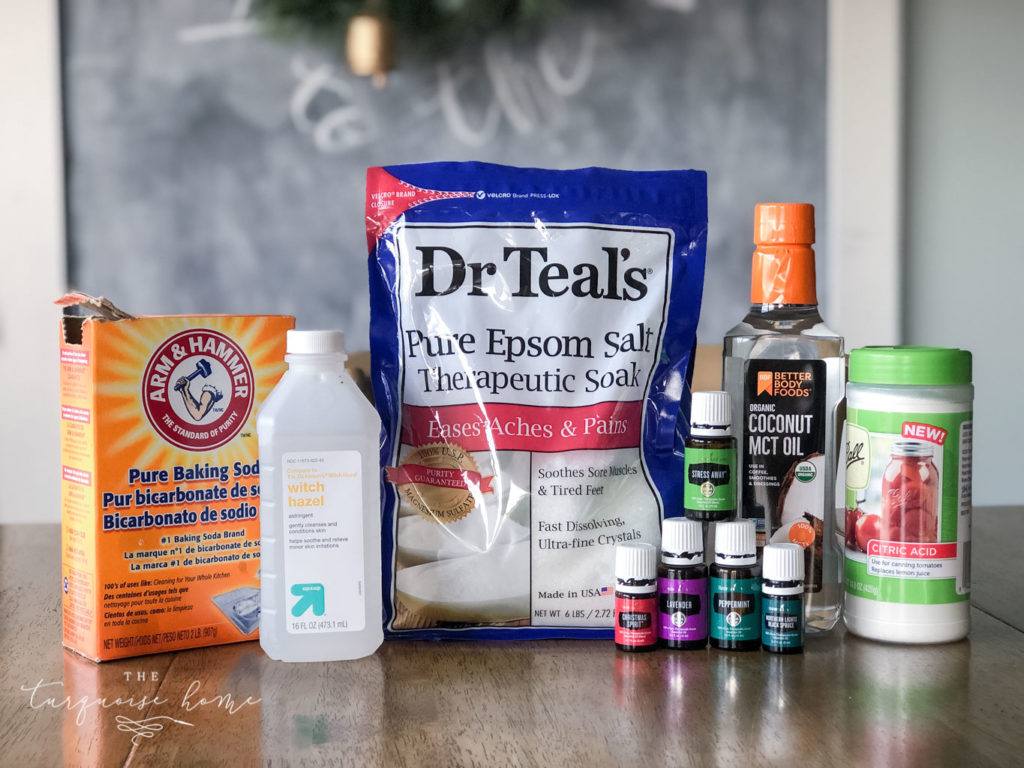
You’ll want to order your supplies ahead of time. You can find most of these ingredients in your local stores, but I’m an online shopping girl. Since I’d prefer to ship them to my home, I thought I’d share where to get everything you’ll need.
Supplies You’ll Need for Homemade Bath Bombs
- Baking Soda
- Epsom Salt
- Citric Acid
- Fractionated Coconut Oil (or Almond Oil)
- Mica Powder Pigments
- Essential Oils (I highly recommend Young Living for 100% pure essential oils. I wouldn’t use anything else, but Young Living, but I linked to some others in case you need some.)
- Witch Hazel
- 60 mm Bath Bomb Molds (Clear Ornament Molds HERE)
- Spray Bottle
How to Make the BEST Bath Bomb Recipe?
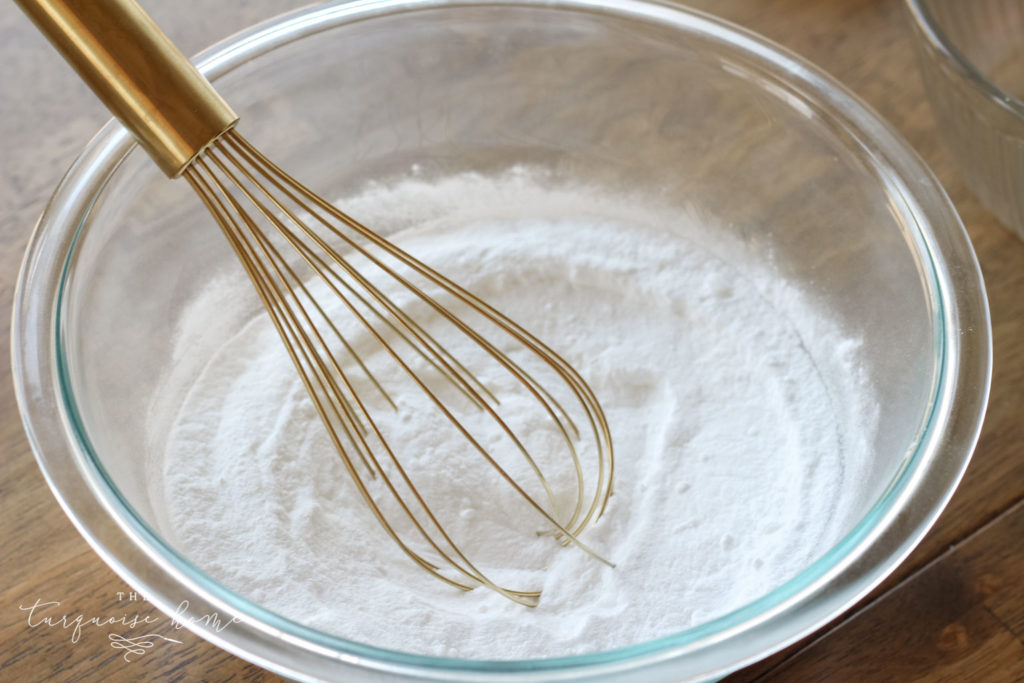
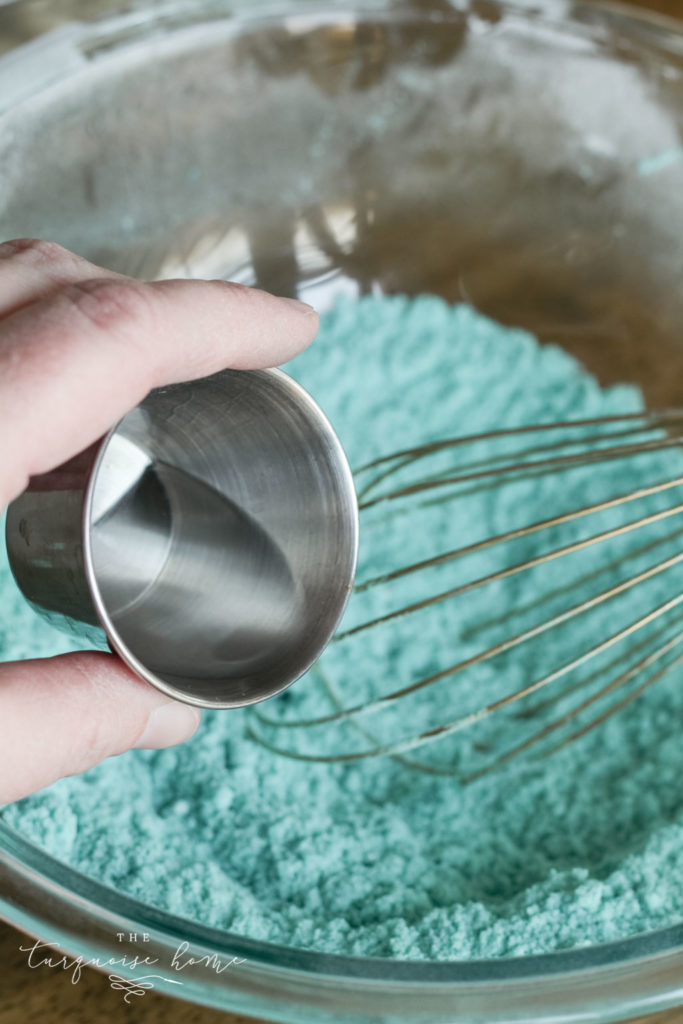
Step 1. Use a whisk to mix all three of the dry ingredients in a large bowl.
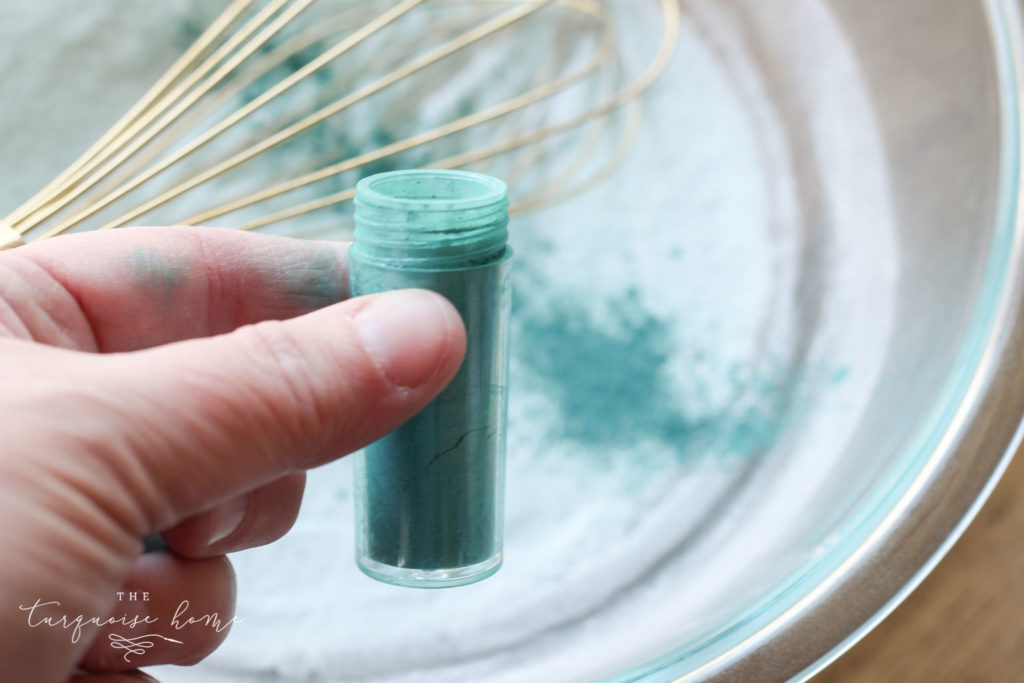
Step 2. Add your colorant.
I have used both liquid food coloring and mica powder. And by far the mica powder colorants work best!
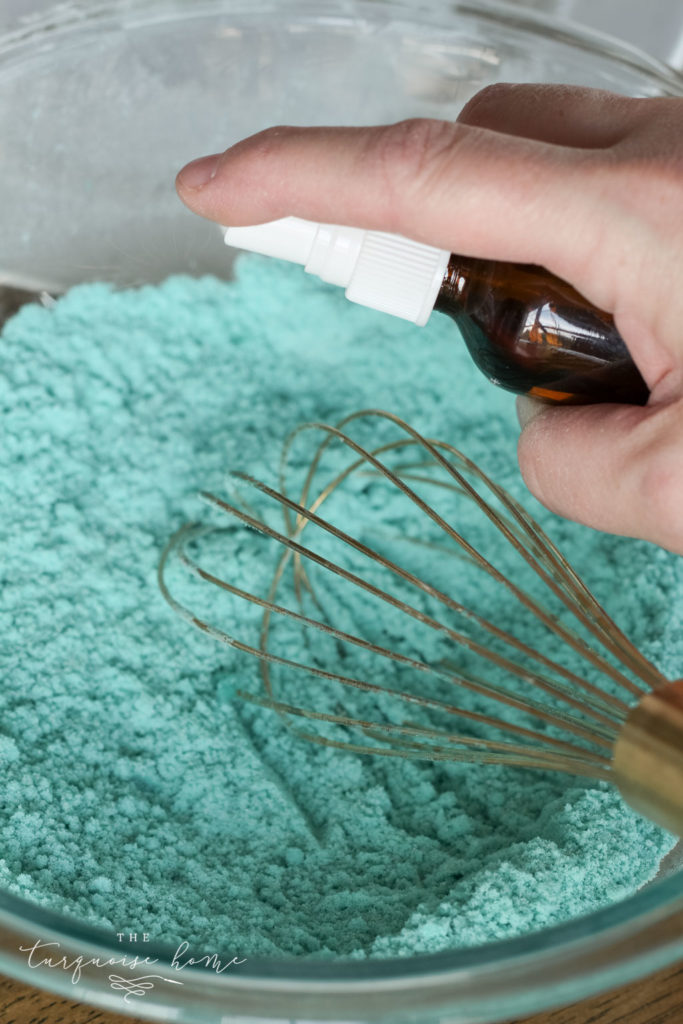
Step 3. Mix your next two wet ingredients (coconut oil and essential oils) in a small container.
Step 4. Then add the liquid ingredients to the dry ingredients–very carefully.
The coconut oil and essential oils will need to be added carefully to the dry ingredients–a little at a time–while you’re continuously stirring the mixture. The citric acid makes the bath bombs fizz, so leaving any liquid in one place too long with cause the acid to react.
Step 5. Mist the mixture with a few mists of Witch Hazel.
Put some witch hazel into a spray bottle and mist the mixture a few times until it forms a snow-like consistency. You’ll want to be able to pack it together in your hands without it falling apart. BUT be careful not to over mist it – you don’t want it to be a damp sand consistency. If you over mist it, you’ll have bath bombs that won’t stop fixing and will burst out of their molds.
If you do find that you have over-misted your mixture, just put them in muffin tins or open molds instead of circle molds. This way they can expand out the top of the muffin tips and won’t break anything. And they will still be great for the tub!
Step 6. Pack the mixture into one side of the mold. Then repeat for the other side of the mold.
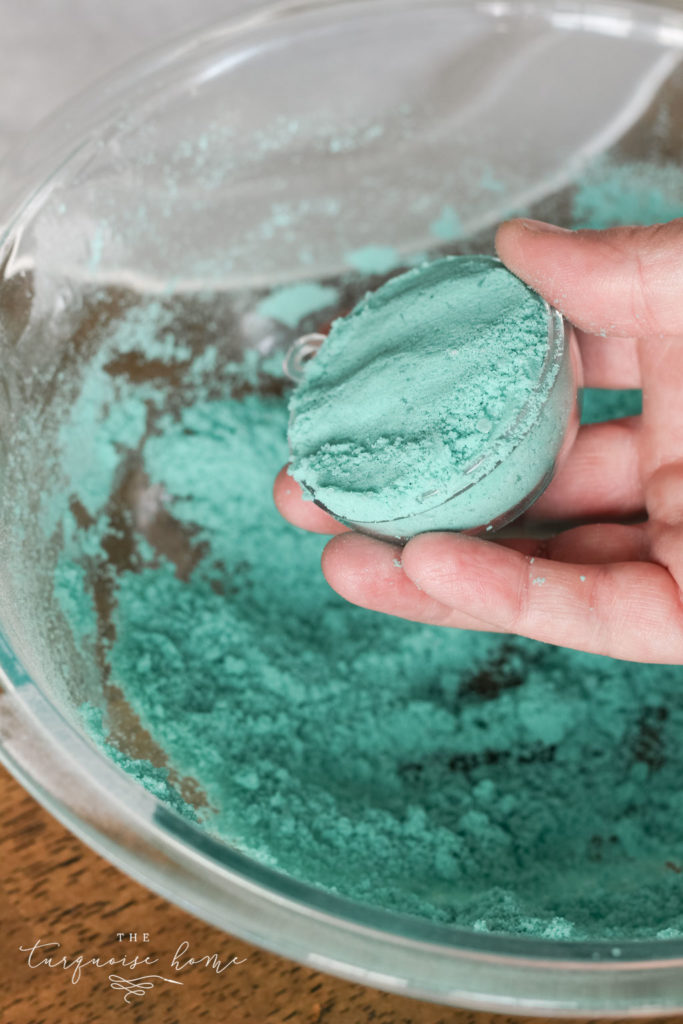
Step 7. Press each side together.
Then let it set for 30 minutes before you need to remove one side of the mold and let it dry 24 hours. Remove the mold the following day and enjoy!
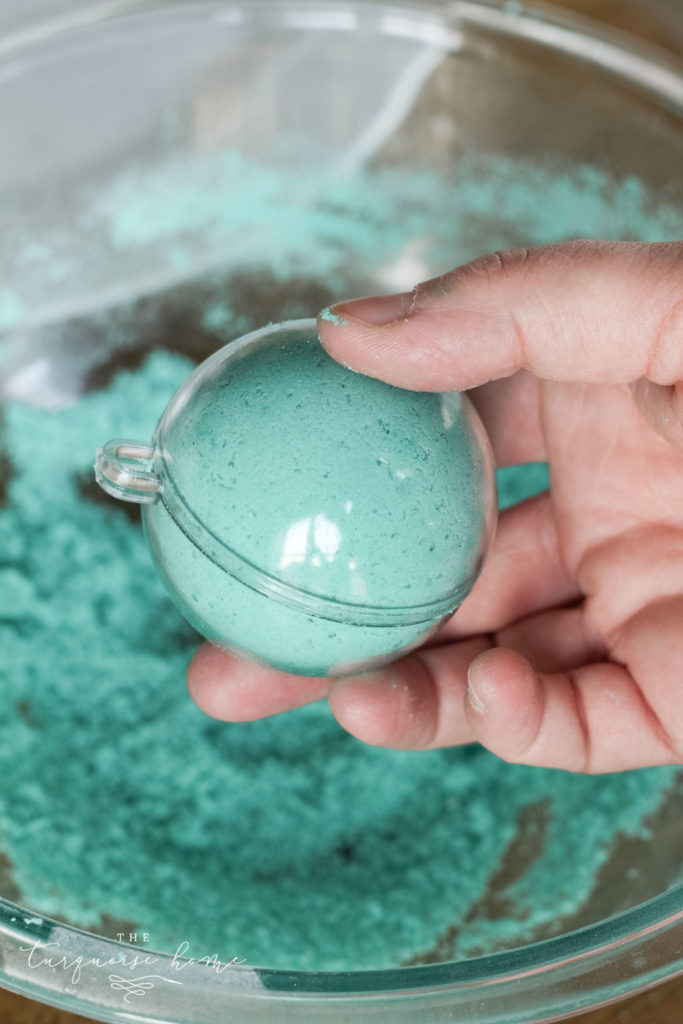
Step 8. Let it dry for at least 24 hours before use.
I store my bath bombs in an air-tight container in my bathroom.
*Tip: If you’re using the ornament molds, remove one side overnight and then put it back the next day to insure that it’s dried out completely.
NOTE: The fragrance oils I used from Young Living for my bath bombs are Stress Away, Peppermint, Christmas Spirit and Lavender. I don’t use them all-together, but in different batches.
You will want to be cautious with using citrus oils in a bath bomb because they can cause photo sensitivity. If you do use them while making a bath bomb, wait 24 hours before going into the sun. Obviously if you’re using these in the winter and your skin will be covered by clothing, it wouldn’t be an issue. ☺️
DIY Bath Bombs
Quick and Easy Bath Bomb Recipe for anyone who loves to pamper herself!
Ingredients
- 1 cup Baking Soda
- 1/2 cup Citric Acid
- 1/4 cup Epson Salt
- 20 drops Essential Oils
- 2 tsp. Fractionated Coconut Oil
- Witch Hazel in spray bottle
- 4 60 mm bath bomb moths
- Mica Colorant
Instructions
-
Combine baking soda, citric acid and epsom salt in a bowl and mix with a whisk.
-
Combine coconut oil and essential oils together, then mix into the dry ingredients a little at a time while continuing to stir the dry ingredients. Mix well.
-
Add colorant as desired.
-
Mist mixture with witch hazel until it clumbs like a snowball (or you can pack it in your hands.) Be very careful not to get it over-wet. This can cause the mixture to fix and a long time.
-
Fill two halves of mold.
-
Push together until they form a ball.
-
Keep closed for 30 minutes, then remove one side overnight to let it dry overnight.
Gift Ideas for Bath Bombs
There are so many ways you can make gifts out of these easy bath bombs, but one of my favorites is as a Christmas ornament.
Christmas Ornament with Printable Gift Tags
I crushed up some candy canes and put them in the mold first before filling my molds with the bath bomb mixture. Once they were dry, I added some ribbon, a mini pinecone and one of my free printable gift tags.
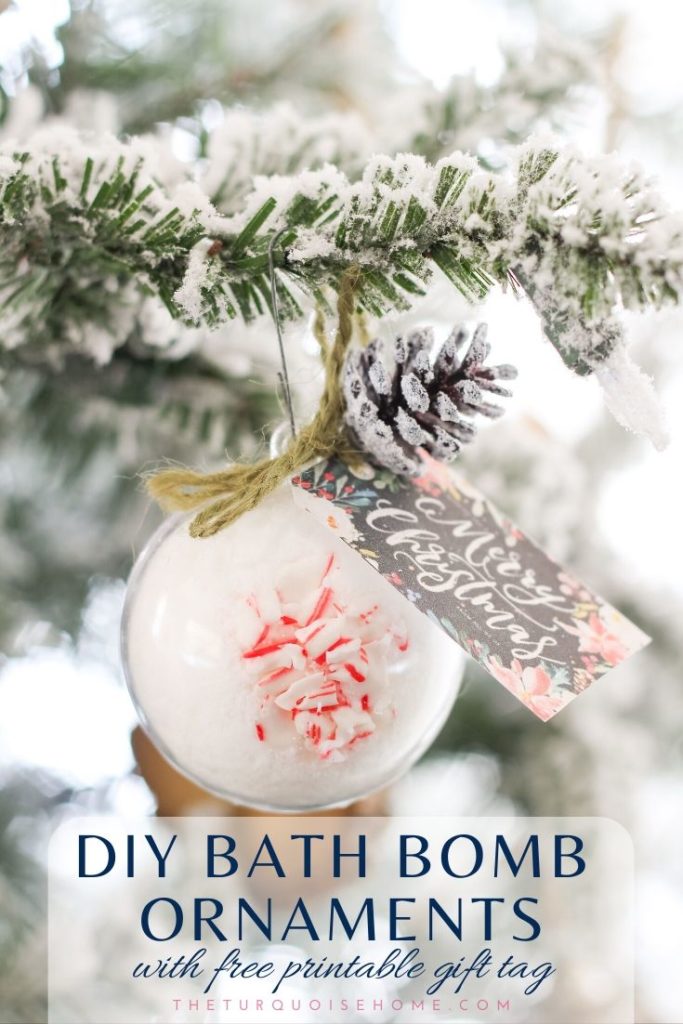
🔔 I’ve included the FREE PRINTABLE GIFT TAGS HERE for your personal use.
TAP HERE 🔔
I printed my gift tags off at 65% so that they would be smaller for the bath bomb. But you can print them as large or as small as you’d like!
Tissue Paper Candy Bombs
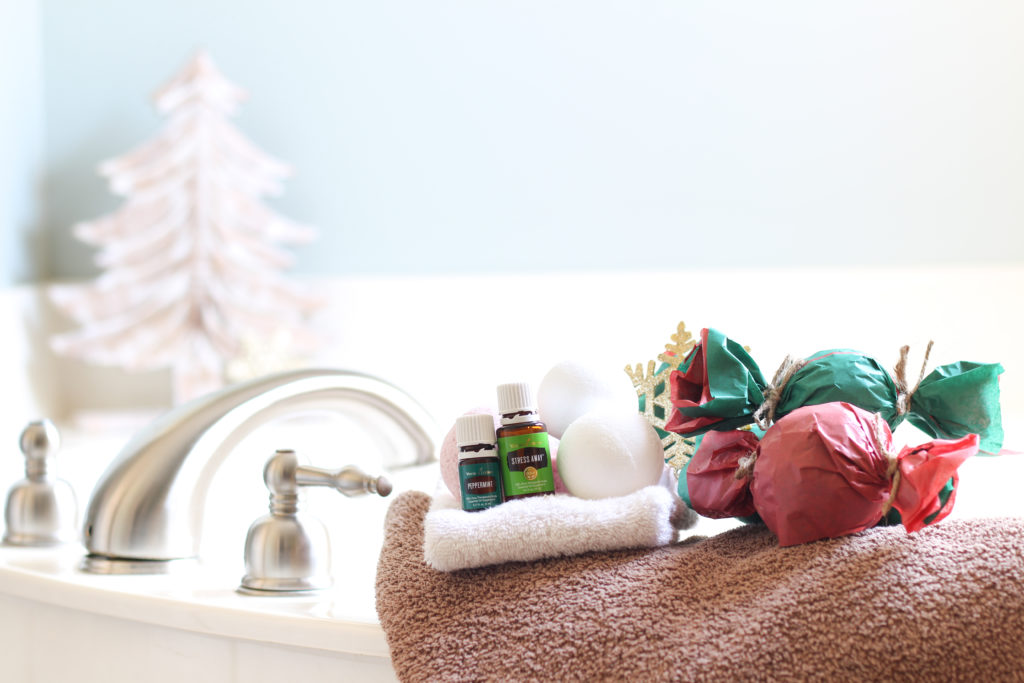
Wrap up your bath bombs in some festive tissue paper, and close the ends with pretty ribbon. Add one of the free printable gift tags above for fun!
Bath Set with a Loofah and Bath Bombs
Add a few bath bombs to a plastic drinking cup with a domed lid and top it with a mini loofah for a cute “treat” bath set!
More Homemade Bath & Body Products You Will Love:

Thank you for the wonderful ideas! I love your beautiful printables also! Enjoy the blog… Blessings! Rosita
I’ve always wanted to try making bath bombs – I love a good soak! They look so cute as little ornaments!
I love the ornament and tissue paper candy bombs! Those would make great gifts plus a few for myself! Thanks for sharing Laura.