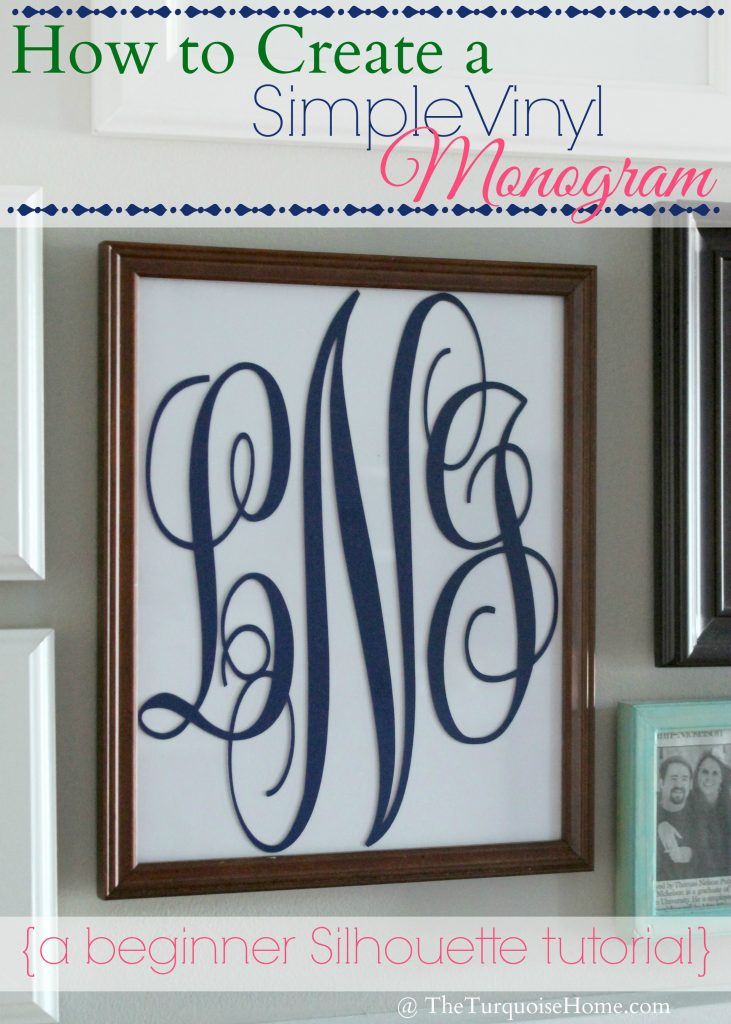
Create a Simple Vinyl Monogram {Beginner Tutorial}
I love monograms! And this simple vinyl monogram is an easy project for beginners. This tutorial will show you everything you need to know for your first monogram vinyl project.
I’ve loved using the basics of this tutorial to create a monogram printable or monogrammed wreath!
Ever since I bought my Silhouette Cameo last spring, I’ve been wanting to try out cutting vinyl. So, during their Black Friday sale, I finally purchased the vinyl starter kit and some other fun colors.
Since I’m a beginner vinyl user, I thought I’d share my first ever project. Just in case there are any other beginners out there! It wasn’t perfect, but I think the end result was worth it.
Part 1. How to Create a Monogram
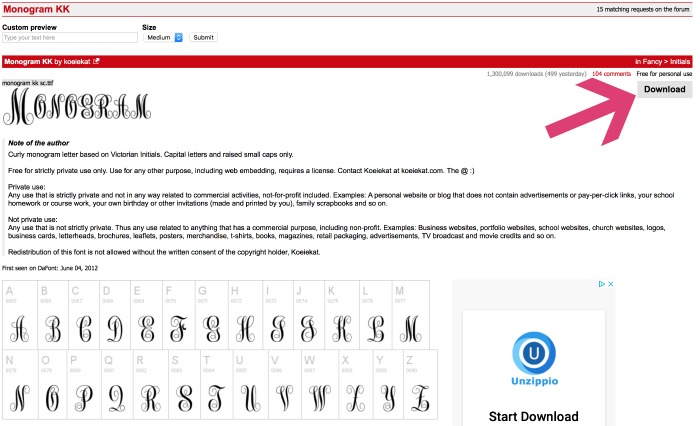
Step 1. Download the Monogram KK font from dafont.com.
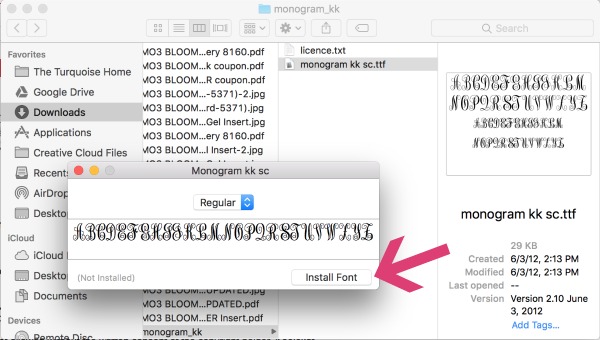
Step 2. Install the Monogram KK font to your computer.
On my Mac, I opened my downloads folder and selected the “Monogram KK” folder and selected “install font.” It automatically installed on my computer.
Click here to find out how to install a new font on a PC.
This will make it automatically pull up on your font library in Silhouette Studio. If not, shut down the Silhouette Studio and re-launch it.
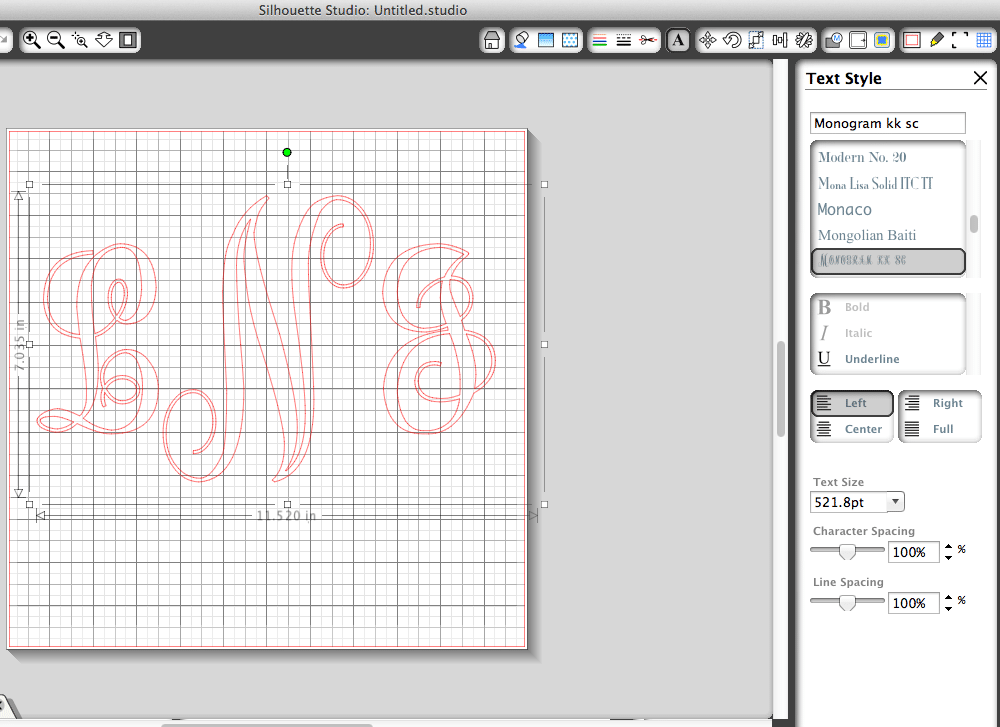
Step 3. Design your monogram in the Silhouette Studio.
{Side note: for a married couple’s monogram, which is what I’m doing here, you put the initials in this order: wife’s first name initial, married last name initial and then husband’s first name initial. So mine is LNJ.}
Monogram KK font is designed to create the perfectly sized monogram when you type the outer initials in lower case and the middle, larger initial in upper case. So, that’s what I did. Now, when you’ve typed them all out the letters won’t be overlapping, which is what we want in this project.
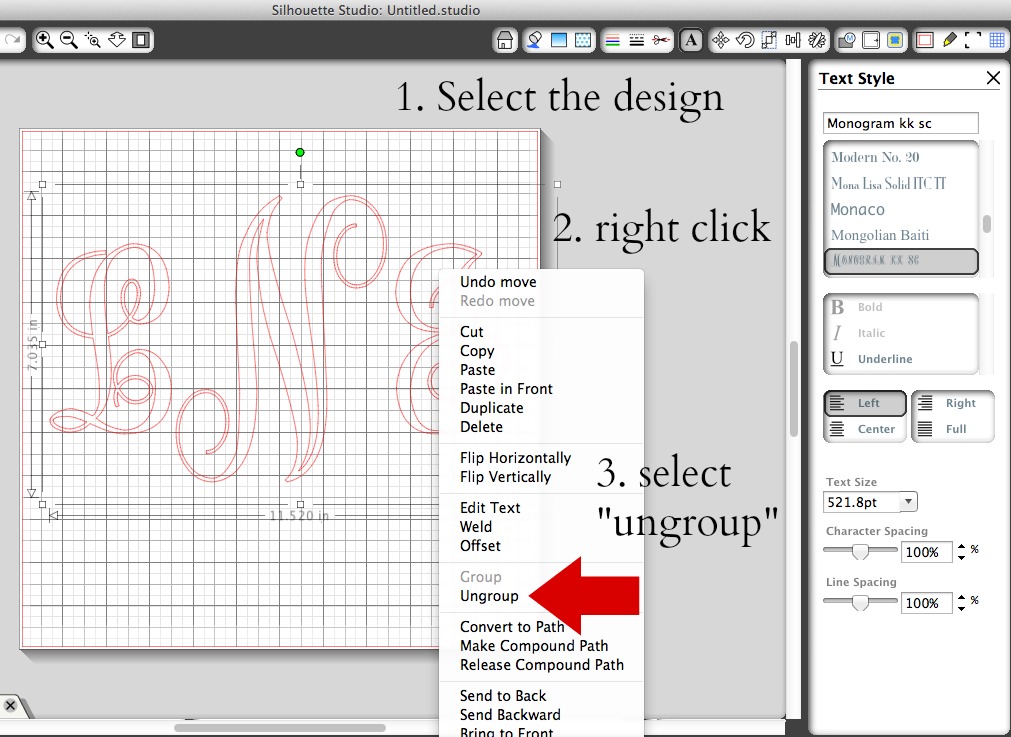
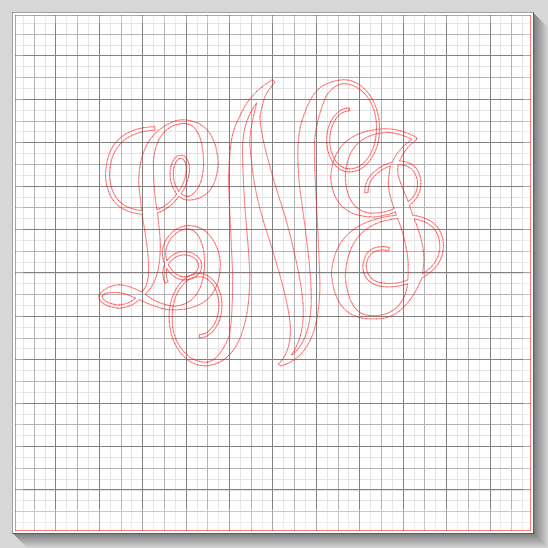
So, I ungrouped the letters and moved them around until I got them to overlap exactly how I wanted. {I know the side initials aren’t exactly even, but I thought they looked best this way.}
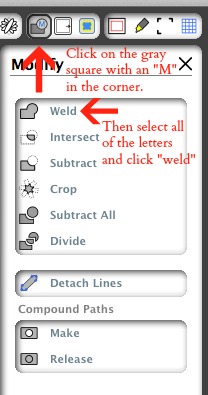
Step 4. Weld the letters together.
Once everything is overlapping perfectly, weld the letters together. This connects and re-groups the letters automatically and you have one single design.
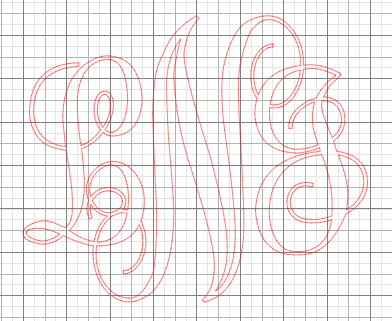
Isn’t she pretty? I was getting excited at this point!
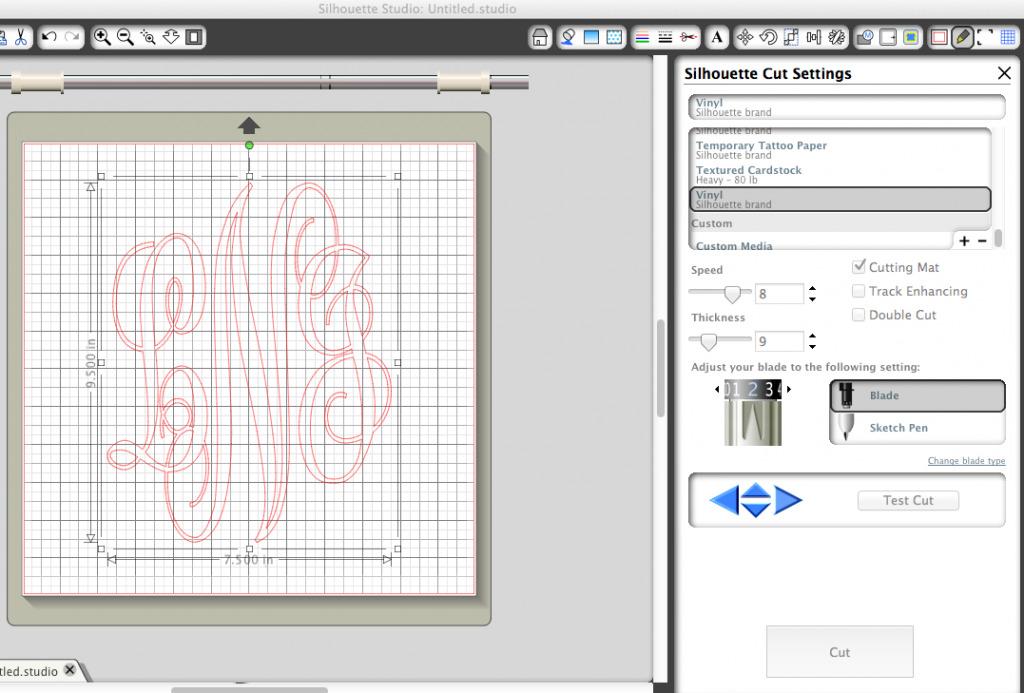
Step 5. Scale your monogram to make it fit your project.
I don’t think I’ve told you yet, but I was putting my vinyl on top of a frame. So, it would be sticking to the top of the glass. I made sure to measure the inside of the frame. Just because it’s an 8×10 frame doesn’t mean your design can be that big. 🙂 I made mine about 7.5 x 9.5 because I wanted it to fill the frame up.
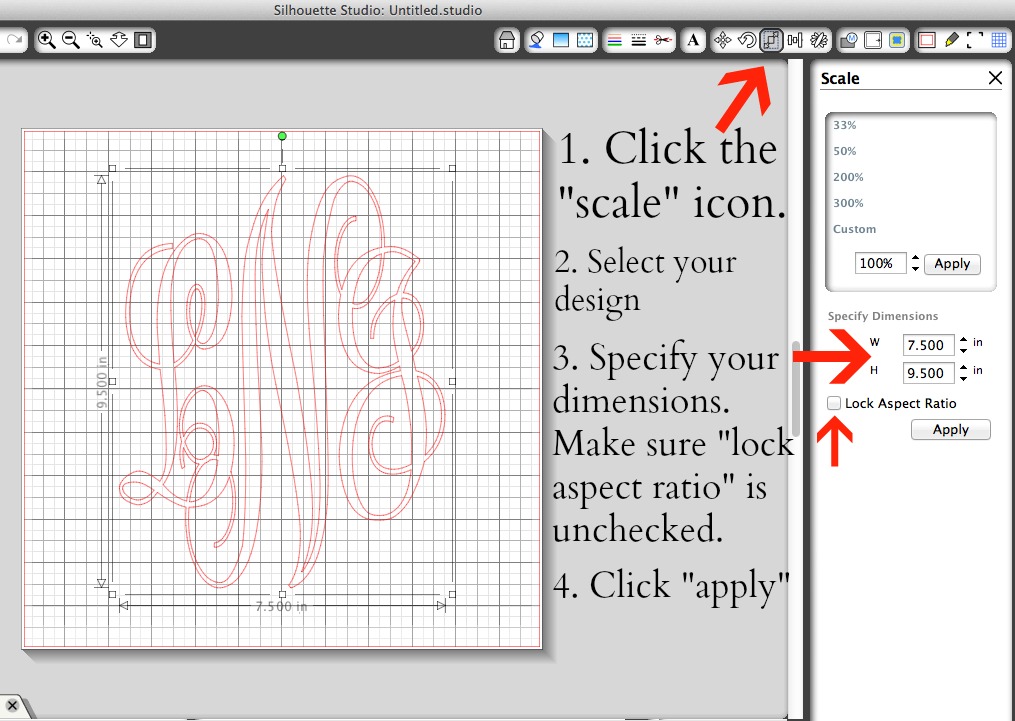
I scaled my monogram to exactly the size I needed it to be, which meant it became a little skinnier that it had been originally.
Part 2. How to Cut Vinyl to Create a Monogram
Step 6. Cut your Monogram with the Silhouette.
Now we’re ready to cut! This part is easy-peasy. I used a new cutting mat I just ordered, because my old mat isn’t very sticky and I found the vinyl wanted to roll up on it.
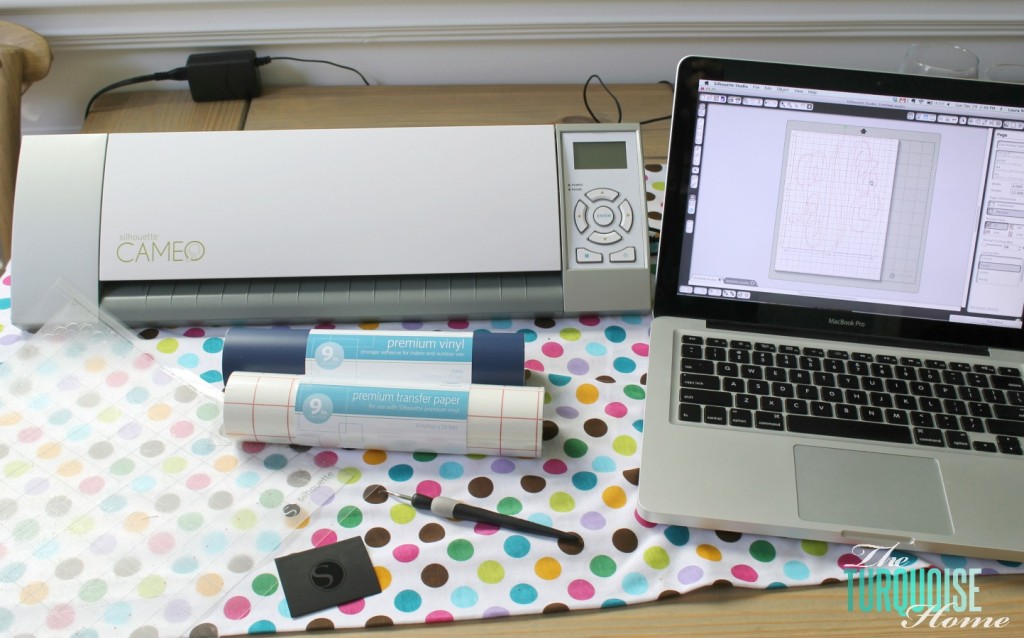
What you’ll need:
1. Vinyl <<— my favorite vinyl brand
2. Transfer Paper
3. Cutting mat
4. Hook
5. Scraper
6. Silhouette cutting machine <<— this bundle has everything you’ll need to get started!
I cut my vinyl to a little larger than my design and placed it on the cutting mat.
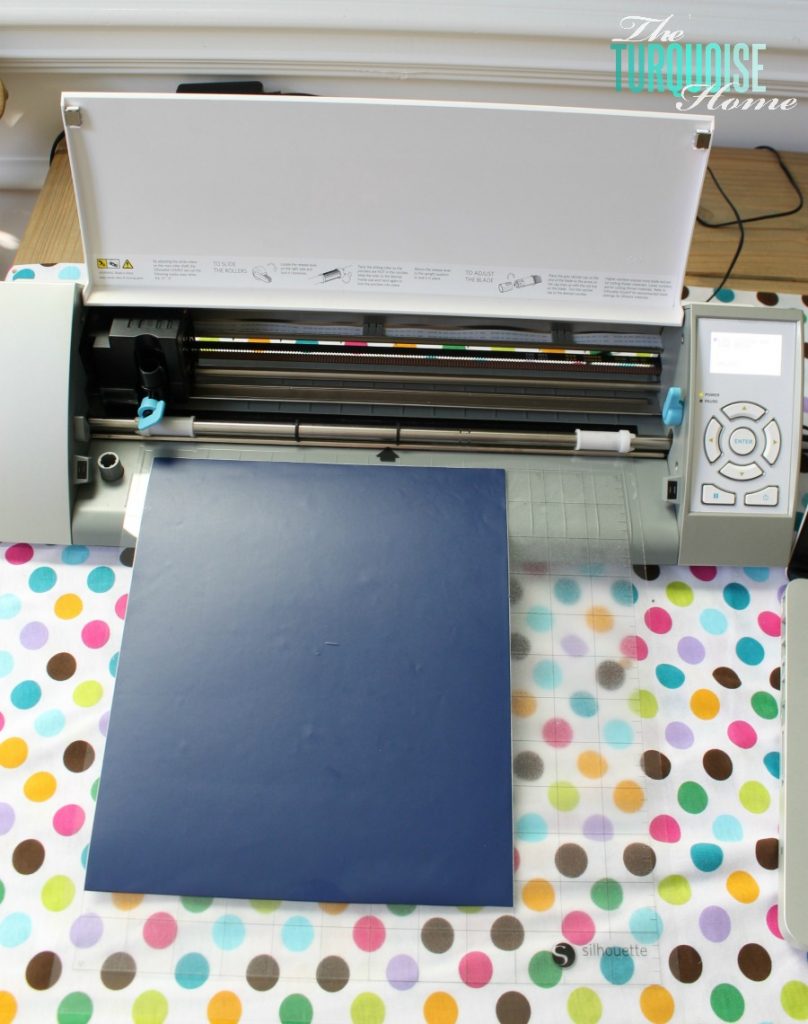
And then I just loaded the cutting mat (make sure you select “load cutting mat,” not “load media” on the Silhouette).
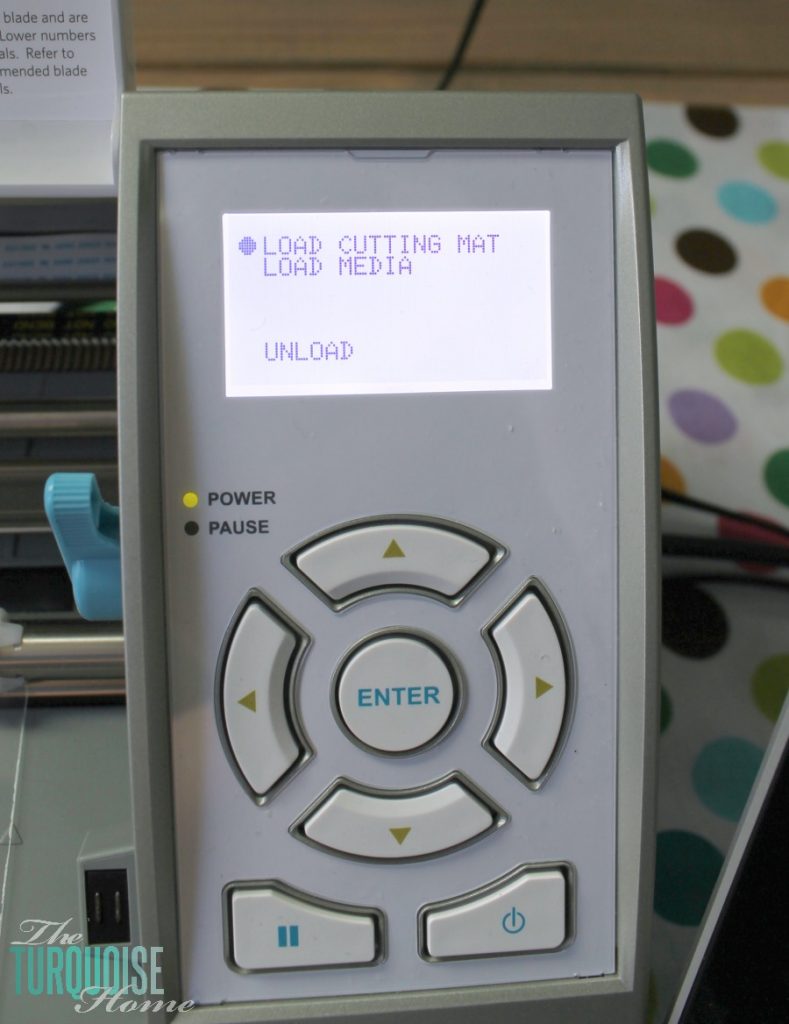
And I followed the settings in the Silhouette Studio for vinyl and clicked “cut.” Easy!
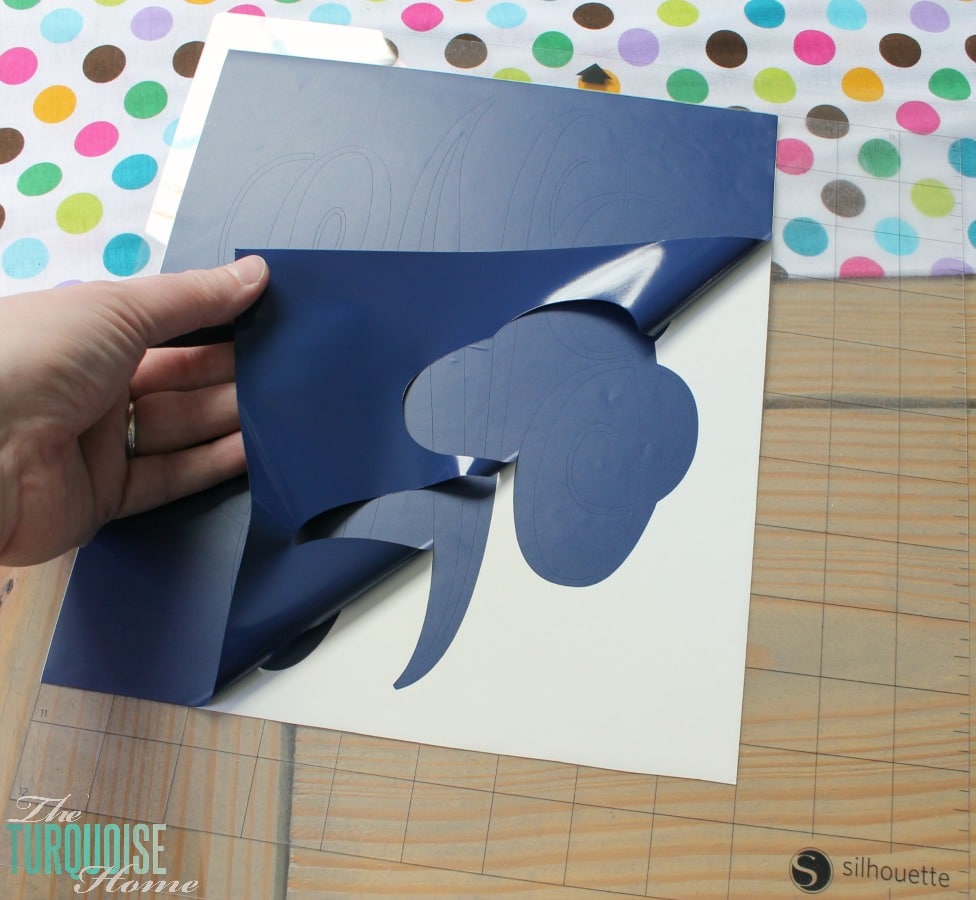
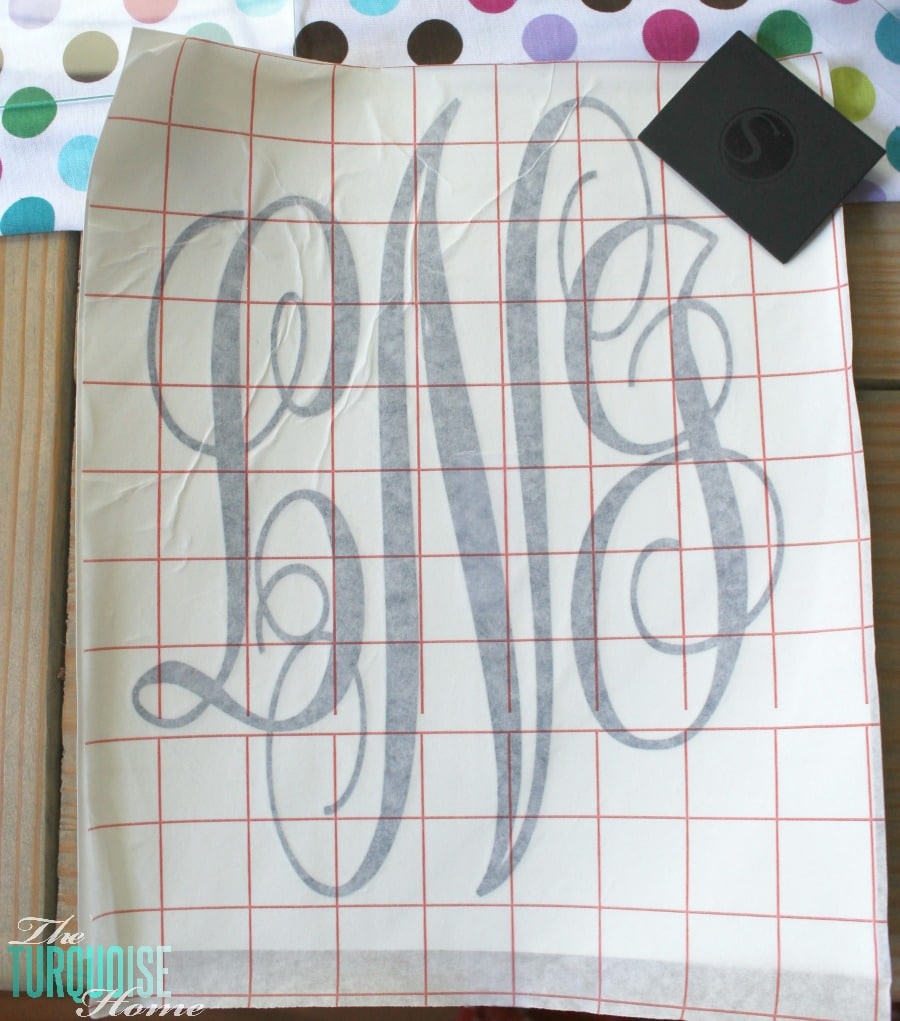
Step 7. Weed away the non-essential parts of the vinyl.
Then you just peel up the vinyl that isn’t part of your design.
I used my new hook tool to weed the smaller pieces of vinyl inside the design.
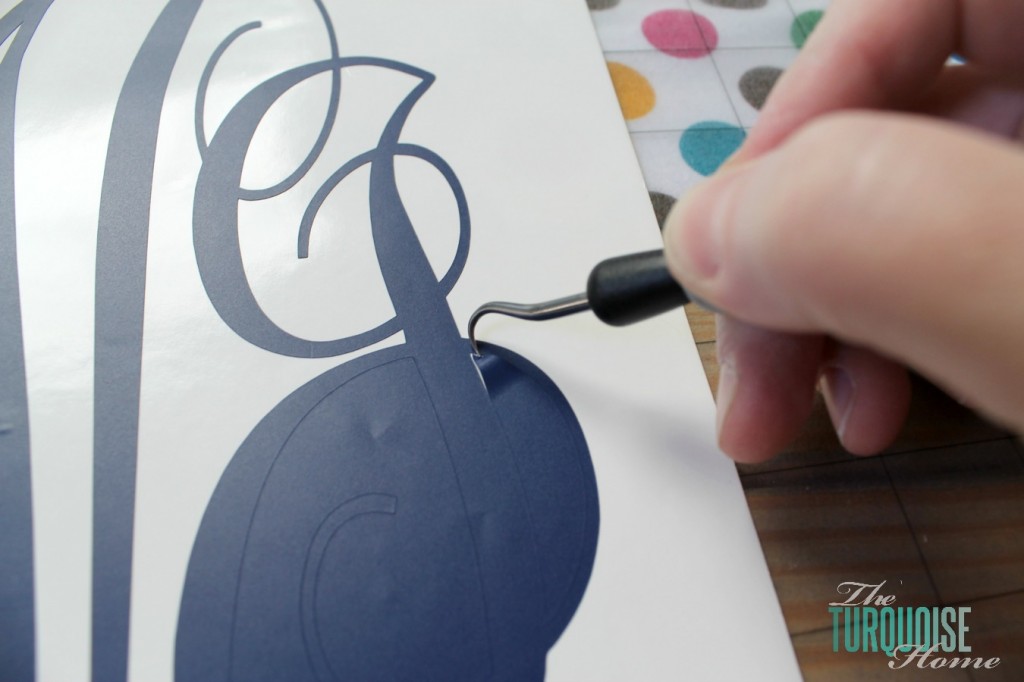
Now it’s ready to be transferred AKA here comes the tricky part!
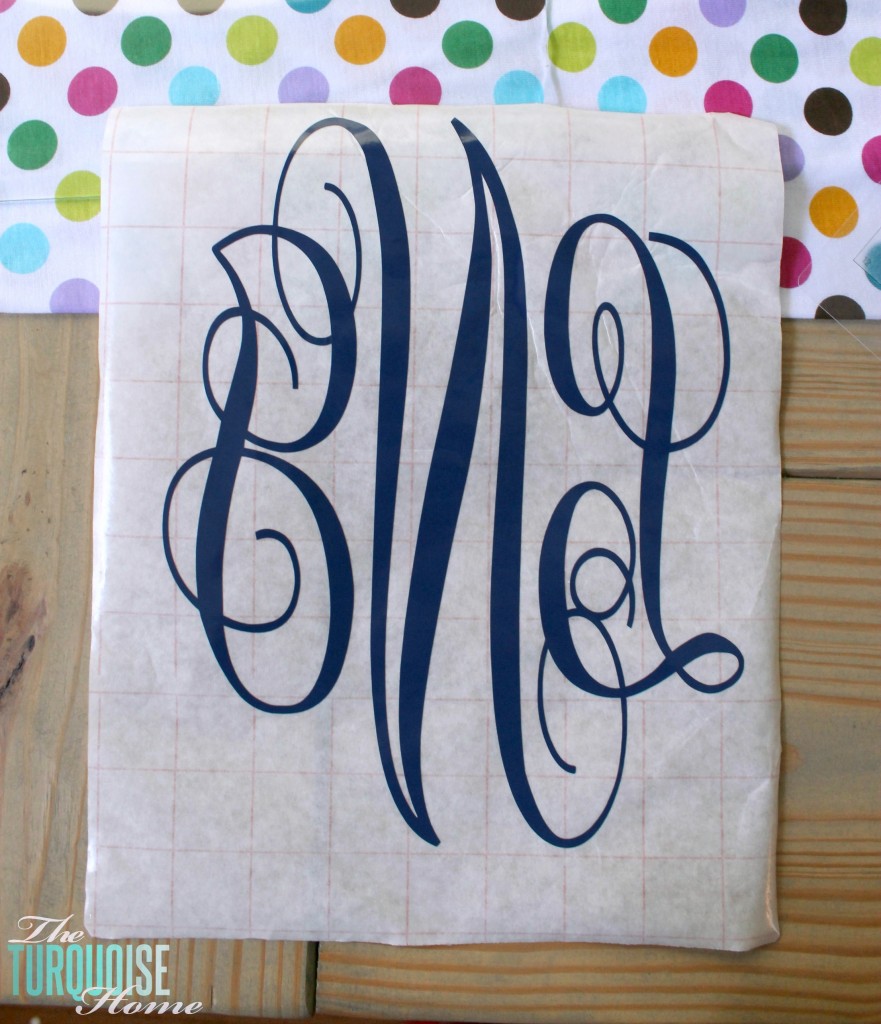
Step 8. Transfer your vinyl with transfer paper.
Cut a piece of transfer paper to the size of your design. (It comes in a roll and is pictured in my supplies picture.) Then peel off the backing from the transfer paper. You’ll have a thin, sticky piece of paper left. This is the tricky part: lay it sticky-side-down on to your design. Press the scraper tool all over the design to make sure it’s good and stuck.
You can see how I had a few wrinkles in the top of mine. It was kind of hard to get it straight on there, but I did the best I could.
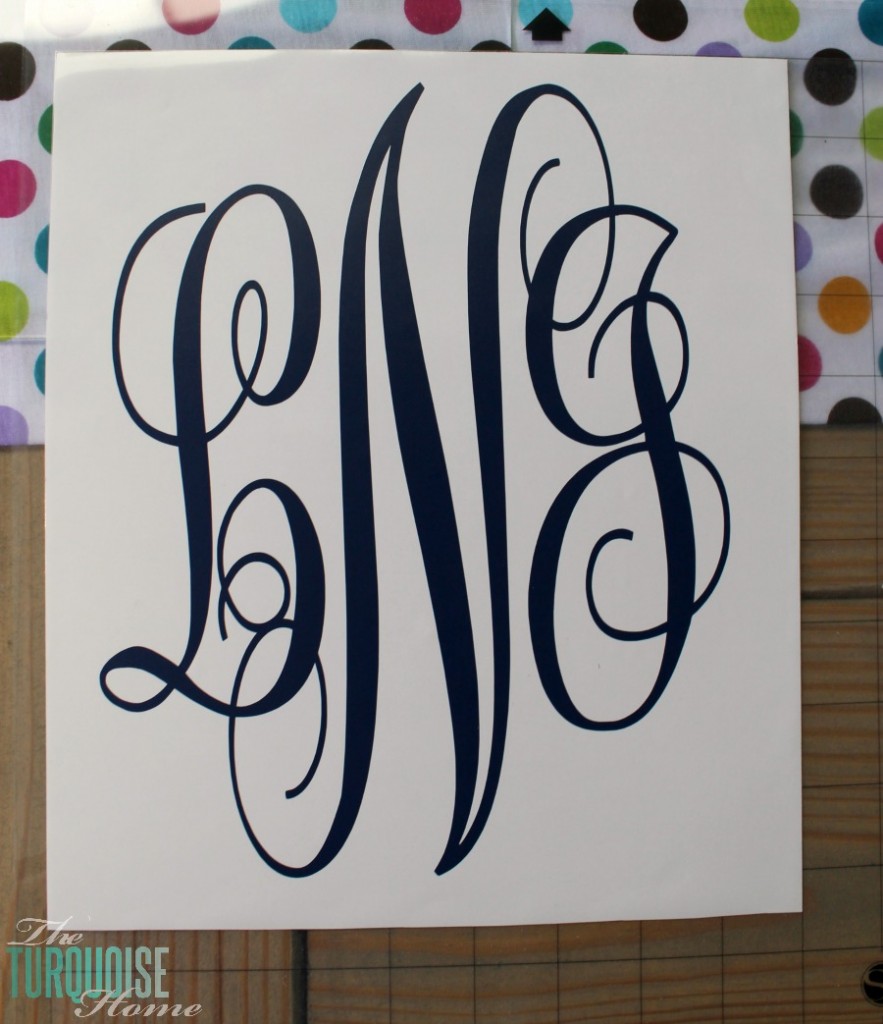
Then you’ll slowly peel away the design from its backing. You’ll now have the design {in reverse} stuck to your transfer paper. Now your monogram decal is ready to be placed wherever you want!
I attempted to place the design down on the glass from my frame, but I couldn’t really see what I was doing. So, I placed the glass on top of the design. This seemed to work much better.
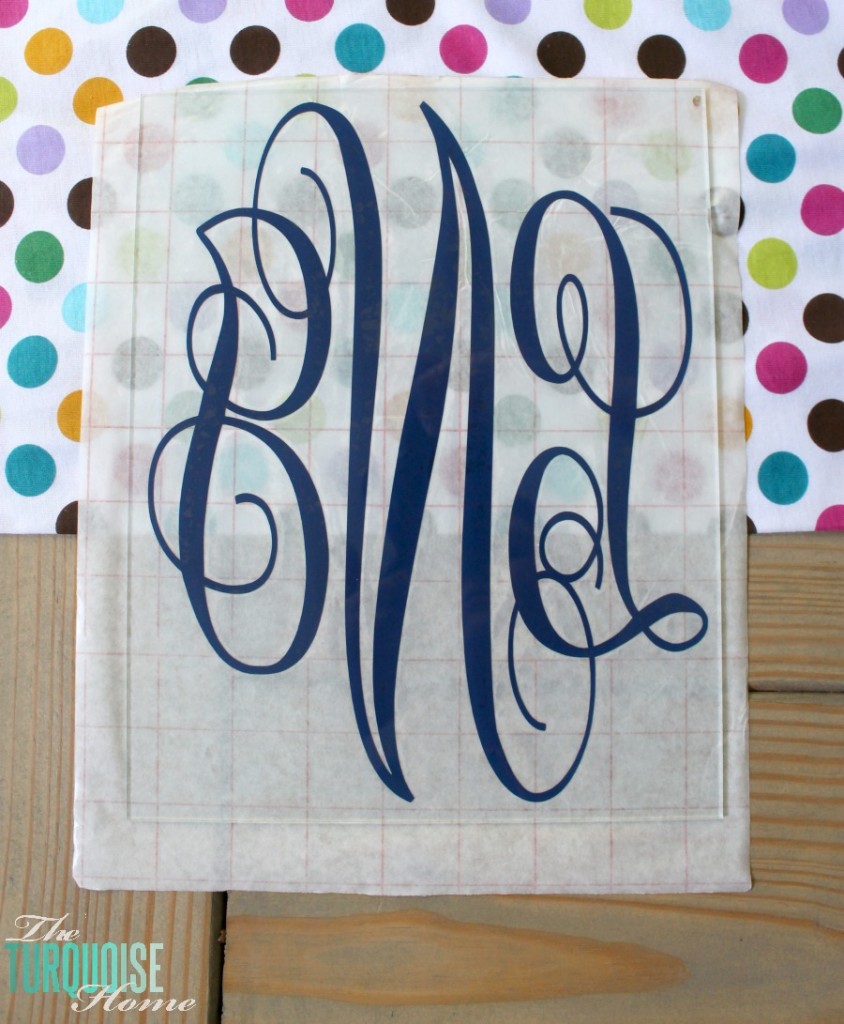
Turn your frame over and press down on the design with the scraper tool. This will make sure the design is good and stuck, and also remove any air bubbles. Then slowly peel away the transfer paper.

And voila! Just like that you have a pretty framed monogram. I placed a piece of white cardstock in the frame as a background. But I think it would look good in an empty frame with the wall color showing through, or even something fun like burlap or fabric behind it.
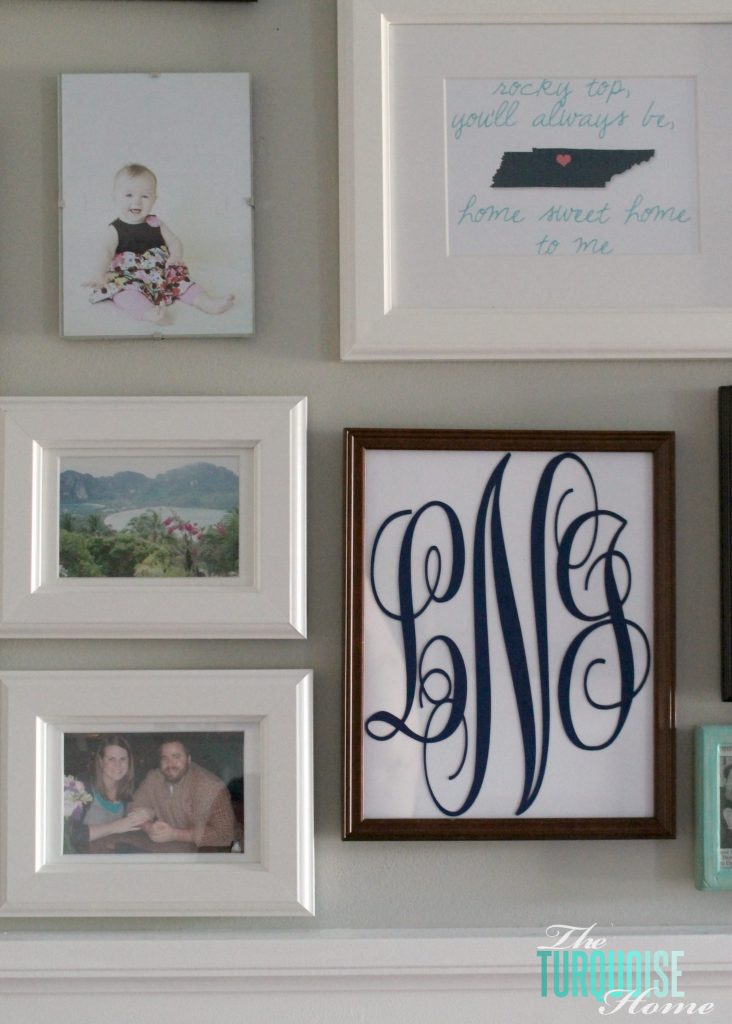
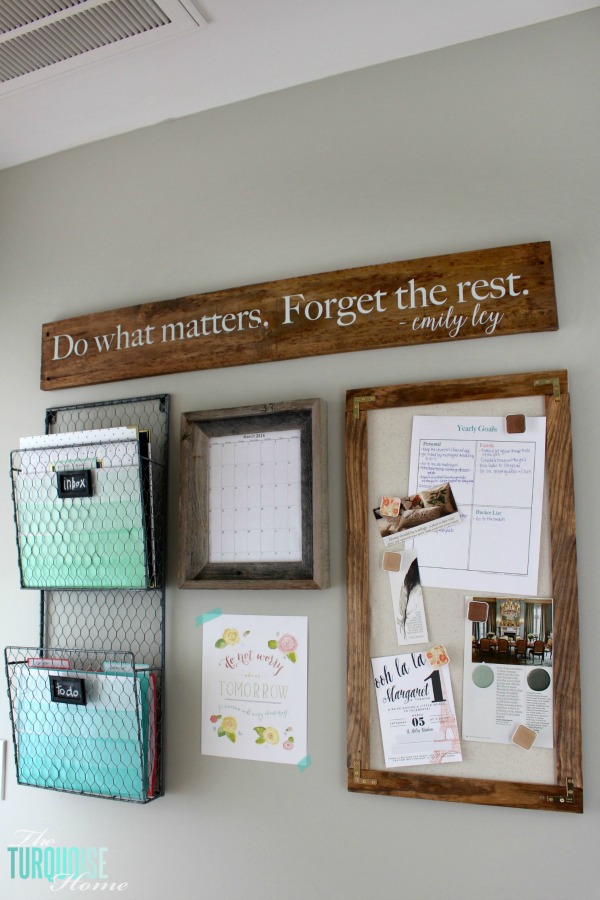
I love how it looks on my gallery wall! {Read more about my gallery wall HERE.}
Let me know if you try it or have anything to add. Like I said, this is my first vinyl project so I know I still have a lot to learn. I’m a little like the blind leading the blind. 🙂 So, any vinyl experts out there, feel free to pass on your tips and tricks!!
Tell me below in the comments which items you’re going to monogram first!
More Posts You Will Love:
- DIY Monograms for Every Room in Your House
- Cotton Wreath Free Printable {with your monogram!}
- Framed Burlap Monogram


Thank you SO much for this!! I literally just got my cameo 3 today. I had done some reading and pinning, etc before I even ordered it but was still SUPER overwhelmed after I got it set up tonight. I had so many ideas but really had no idea where to start. I ultimately found this post, found it to be EXACTLY my speed and created an adorable little monogram for my cell phone charger! It’s totally what I needed: a first, successful project. It got my feet wet using the software and the machine itself and I feel much more confident moving forward! Thank you!
Hello theturquoisehome.com
SEO Link building is a process that requires a lot of time.
If you aren’t using SEO software then you will know the amount of work load involved in creating accounts, confirming emails and submitting your contents to thousands of websites in proper time and completely automated.
With THIS SOFTWARE the link submission process will be the easiest task and completely automated, you will be able to build unlimited number of links and increase traffic to your websites which will lead to a higher number of customers and much more sales for you.
With the best user interface ever, you just need to have simple software knowledge and you will easily be able to make your own SEO link building campaigns.
The best SEO software you will ever own, and we can confidently say that there is no other software on the market that can compete with such intelligent and fully automatic features.
The friendly user interface, smart tools and the simplicity of the tasks are making THIS SOFTWARE the best tool on the market.
IF YOU’RE INTERESTED, CONTACT ME ==> [email protected]
Regards, Dian Waterman
Netherlands, GE, Zutphen, 7203 Ar, Deventerweg 199
Outstandingly fabulous
I am electronically challenged. Ive been extremely frustrated and my silhouette has just been collecting dust. I kept reading various articles and looking at tutorials and still couldn’t figure it out. I am so happy I found your tutorial. Your simplistic demonstration with notes and arrows great. This is exactly what I needed!!! Thank you, thank you, thank you!!!
Oh good!!!! That makes me so happy to hear! Have you discovered the Silhouette School Blog? I’ve found their tutorials to be very helpful! best of luck!! xo, Laura
The end result looks good.. I just got my new cameo.. Thanks for the tutorial
Your tutorial was very easy to follow. Thanks for sharing!
Thank you SO MUCH! I just got my cameo and my sister wants a monogrammed water bottle. I was struggling with creating the monogram, so your tutorial is perfect!!
I DOWNLOADED THE MONOGRAM KK AND THE SMALL “WISPS” GET TORN OFF WITH THE VINYL….ANY SUGGESTIONS?
Maybe try making them bigger?
Love this post. I recently got a vinyl cutter and I’m trying to figure out how to use the downloaded fonts in my computer program (lxi) to create a monogram. Can you help at all?
Hi Catrina, I hope you got it figured out! My fonts just show up in my Cameo software, so I’m not sure. Sorry I’m not more help!
Hello..
I was wondering where is the best place to get a cameo shiluotte?. I have been interested in getting on for vinyl crafts.
Thank you
Stephanie
Hey Stephanie, I would get it from Silhouette when they have their monthly specials. There’s usually one running at the end of every month. And you can use my discount code: TURQUOISE. Check back later in the month, because I always announce them here. Thanks!
Thank you so muchfor this helpful post! I am a technology dummy but thanks to you I can make mongram vinyls!! So excited thank you very much!
Are you using a Mac or Windows computer with your Cameo? I have the Cameo and an iMac and am trying to load fonts into the Cameo without success. Thanks for any input!
Hi Kelli,
I use a MacBook Pro with my Cameo. I am able to use any font that’s downloaded to my computer. Are you seeing some and missing others? I know that when I used an icon font, like KG Frames, that it didn’t show as KG in the Silhouette font list. I had to scroll to the K section and just look for the icons. Does that make sense? I’m wondering if that may be the issue? Let me know and I’ll try to help more!
Laura
Hello Im new and want to get into monograming. . What is the best machine for starting out like frames, wine glasses, keychains stiff likethat?? TThank you so much! I love your frame!
Stephanie
Hi Stephanie, for small items like that, I would recommend the Silhouette portrait or the Silhouette Cameo. The Portrait is just a little smaller than the Cameo. I have the Cameo and love it! I’m hosting a giveaway for the Portrait right now. Just click on my home page and it’s the post from last Thursday with my burlap spring wreath. Good luck! {And if you want to just go ahead and purchase it, there’s a great deal going on right now – all the details in the same post.}
Thank you so much! !
Does it cut vinyl letters anf designs? & do you have to buy cartridges or can u download fonts, letters and designs?
Thanks again
Stephanie
Yes, it cuts letter and designs. It can cut any font that you have on your computer. You can create your own designs or but some from their online store. Most are just $.99/each. Love it!!
To purchase a cameo from you. What does it come with? And how soon would I get it? Any warranty with it?
Stephanie
You would buy it directly from Silhouette, you’ll just use my promo code: TURQUOISE. Check out this post with all if the details: https://theturquoisehome.com/2014/03/burlap-spring-wreath-silhouette-sale-a-giveaway/
Right now the special promo deal includes a machine and several specialty media items.
I’m not sure how long the warranty lasts, but I know it comes with one. It took me a couple of weeks tops to get my machine when I ordered it.
Hope this helps!
You can make this even easier..skip the cutting may when cutting vinyl!! Works great! Love your framed monogram!
True! Although I like using the mat when it’s something that will fit on the mat. I recently had to do a long quote on a wall with vinyl and it didn’t use the mat and it worked out fine! Thanks for stopping by!
I am new to all of this. I keep trying to do a small monogram on vinyl. I used the setting in the program and it keeps getting caught in the blade. Can you give me some advice?
Thanks Courtney
Hmmm, I’m not an expert by any means, but you may want to adjust the blade setting. You’ll have to adjust it on the computer and the actual blade itself. And then do a test cut to see if it’s working better. That’s what I would try. 🙂
Hi! Thank you SO much for posting this tutorial! I really can’t thank you ENOUGH…I received a Silhouette Portrait from my husband for Christmas and finally, just figured out how to use it, thanks to you. I made my very own Monogram Wall Art, and I linked this post to use for a tutorial…Thanks again:):)
SO fun Laura! Thanks for the tutorial. I’m considered a beginner of a beginner with vinyl☺ These would be great for gifts, thanks so much for the great ideas!–♥Angie
You’re welcome, Angie! It’s a great idea to give these as gifts. 🙂
How cute! Thank you for the tutorial! I need to try this. Have a great week.
Leslie
I’m definitely going to need this tutorial soon! You’re being featured on Sunday Features {Give Me The Goods} and will be on my FB page tomorrow too 😉
Hugs,
Jamie
Thanks so much, girl! Hope you have a great week!!
Love this! I have been making monograms with my silhouette for a couple of years, using cardstock and scrapbook paper. Your idea of applying vinyl to the glass frame will be a great alternative for me! Thanks for the inspiration!
I’m a sucker for Monograms and am loving how this turned out! Thank you for linking up to the Hit Me With Your Best Shot Link Party…I’m featuring you this morning on OneKriegerChick!
Happy Weekend!
~Ariean
I love how this turned out! The blue you chose is so classy–I love it!
Cool!
Big Texas Hugs,
Susan and Bentley
This looks great! I tried my first project with my Cameo last night… didn’t turn out quite as I hoped, but I think the paper I used was too thin. I definitely want to try out a vinyl project soon.
The first project I did was with just some scrapbook paper I had on hand. It ate the paper because I had such a hard time getting it up. Now I have two mats, one that has lost a bit of the stickiness and I use it for paper. And the newer, stickier one for vinyl. I can’t wait to see some of your projects!
That is the exact same problem I had! Good idea on keeping 2 mats on hand!
You did a great job on both the project and the tutorial. And I didn’t know about that Monogram font, so thanks for the source for it.
Thanks so much, Sharon! Love that font … glad you’ve discovered it too! 🙂
I love vinyl! A floating frame would be great, too!
Can you reverse the design before cutting it so you can put it on the back of the glass.
I think you could totally do that!